User Guide Addovation Change
Last Updated: 2026-11-03
Introduction
- This document provides guidance on how to use the Addovation Change add-in to create and use Excel templates.
Addovation Change task pane
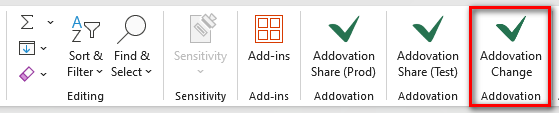
- The task pane is opened by clicking the Addovation Change button in the
Hometab of the office ribbon.
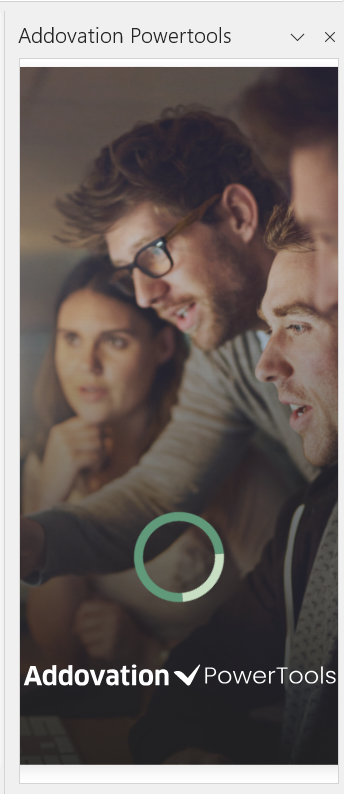
- This action will prompt a splash screen to appear on the right side of the Excel document.
Sign into the Application
- After the splash screen, the user is automatically directed to the
Sign Inpage. On this page, the user must enter theSubscription Access Keyto access the application.
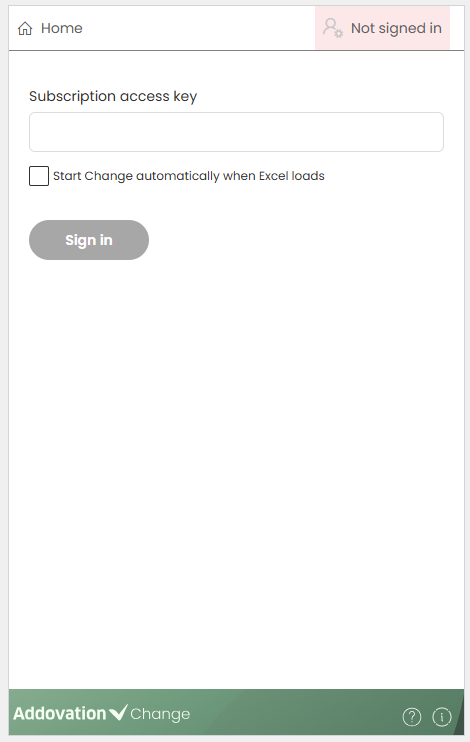
- The user can also open the Sign In screen at any time by clicking the
User Accounttab in the menu ribbon. Until the user signs in, the tab will displayNot signed in.

Subscription Access Key
The access key for the subscription is available in
Cloud Portal.Subscription access key is required to connect to the backend and determine the user’s role in the Change add-in.
There are two user roles:
Template CreatorandTemplate User.Template Creators can create, update, and delete templates using the Change add-in.
Template Users can use the templates created by Template Creators.
Optional Setting
Below the
Subscription Access Keyfield, there is a checkbox. If this checkbox is selected, the Change Task Pane will open automatically the next time a document is opened.After entering the access key (and optionally selecting the checkbox), the
IFS Authenticatorwindow appears, allowing the user to:- Enter their username and password, or
- Sign in using
Addovation SSOorSkyforce SSOby selecting an account.
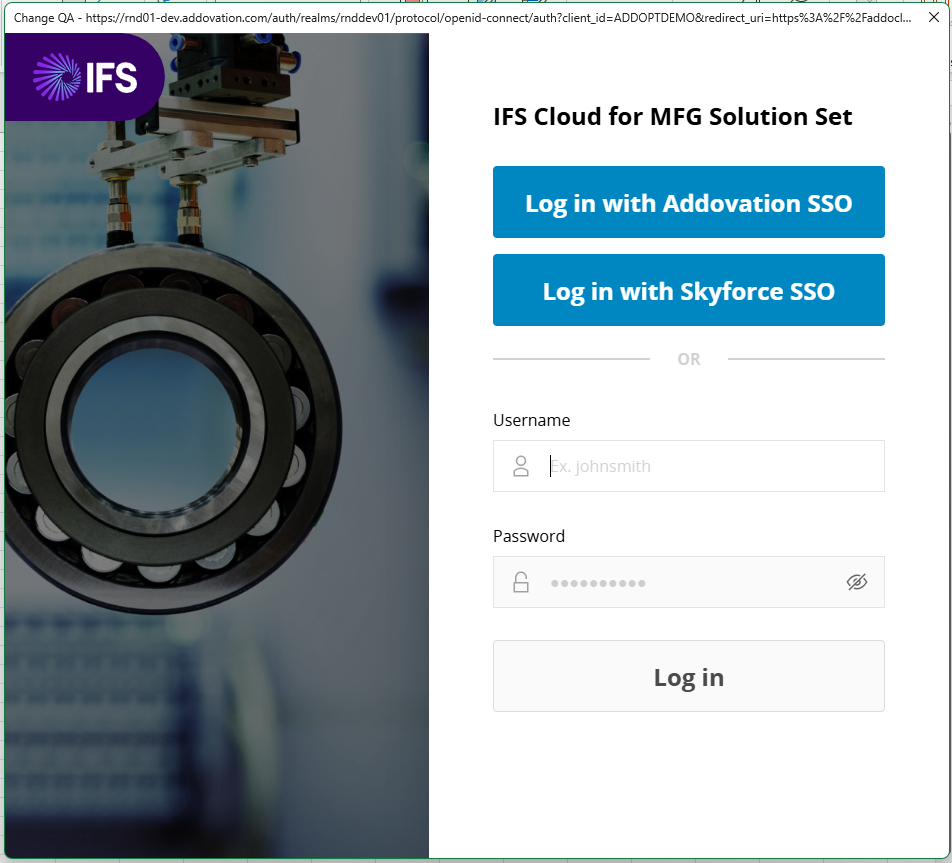
- Once signed in, the user will be directed to the
Home Page. To log out of the application, the user can click theUser Accounttab in the menu ribbon.
Menu Ribbon
Menu ribbon contains different tabs as follows.
Home Tab
The Home tab is visible to both
Template CreatorsandTemplate Users. Once a template is created and projections are added to the workbook, they are displayed in this tab.Any customized groups created (explained in later sections) are also shown on the Home page.
Data Tab
- The Data tab is available only to
Template Creators. It allows users to search for projections and configure operations for the selected projections.
Configurations Tab
- The Configurations tab is also available only to
Template Creators. It provides various configuration options.
Notification Tab
- The Notifications tab displays system notifications and is available to both
Template CreatorsandTemplate Users.
User Account Tab
- The User Account tab allows users to sign in to or sign out of the application. It is available to both
Template CreatorsandTemplate Users.

Bottom Bar
The bottom bar displays the
Application logo, aHelp icon, and anInformation icon.- When the user hovers the cursor over the bottom bar, it expands to show the
application version. - Clicking the Help icon opens the
documentation site. - Clicking the Information icon opens the
connected IFS environment.
- When the user hovers the cursor over the bottom bar, it expands to show the

Home Tab
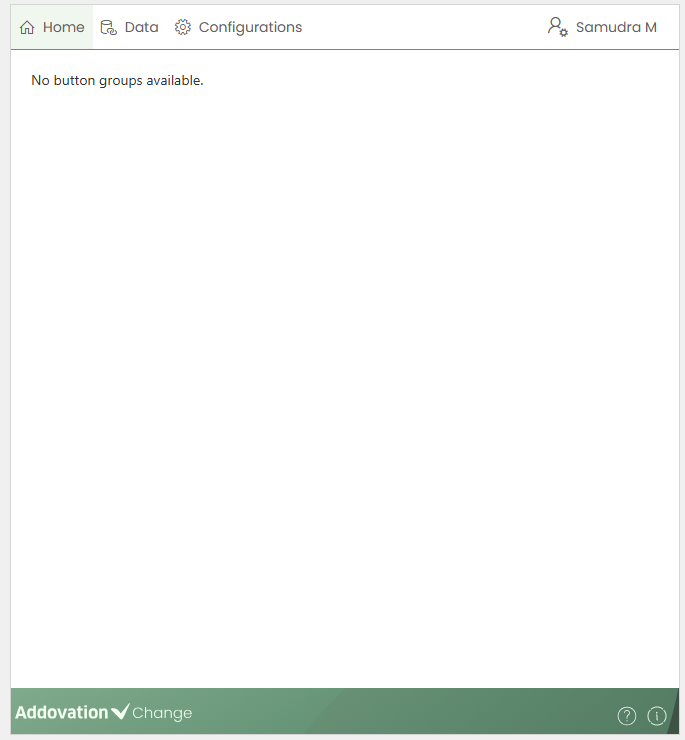
- Once signed in, the user is directed to the Home tab. When no projections have been added to the workbook, a message is displayed on the Home page, as shown below.
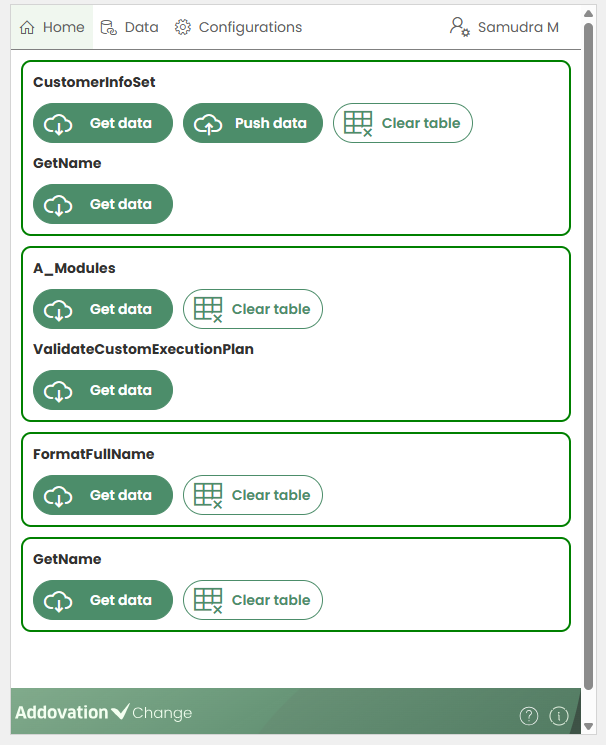
When projections are added,
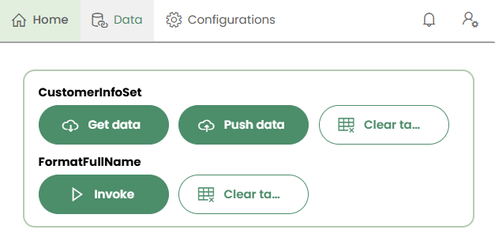
entity setsandquick reports are grouped together with anyactionsorfunctionslinked to the same Excel table and displayed in the home tab.Actions and functions that are connected to
custom tablesor added in the header without linking to a table created by the template creator are listed separately.If any
customized button groupshave been created, they are displayed on the Home page accordingly.
Data Tab
The Data tab is available only to Template Creators. In the data tab, there are two available tabs:
SearchandSelected.Searchtab allows creators to search for projections.Selectedtab displays a list of selected items categorized underEntity Sets,Actions,FunctionsandQuick Reports.A
progress barat the top of the pane indicates the status and progress of the steps.
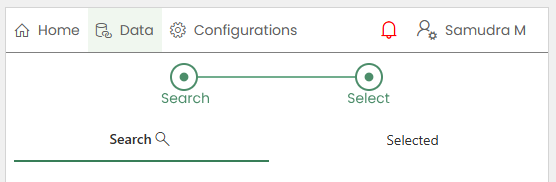
The Search and Selected tabs can be navigated while keeping an item selected, and the search results will remain unchanged.
Search for a Projection/Quick Report
Creators can search for projections by entering a search criterion. The results are automatically filtered as the user types.
The entered criterion can be cleared by clicking the
xicon.Matching projections are displayed grouped by Component, while Quick Reports are displayed grouped by Category.
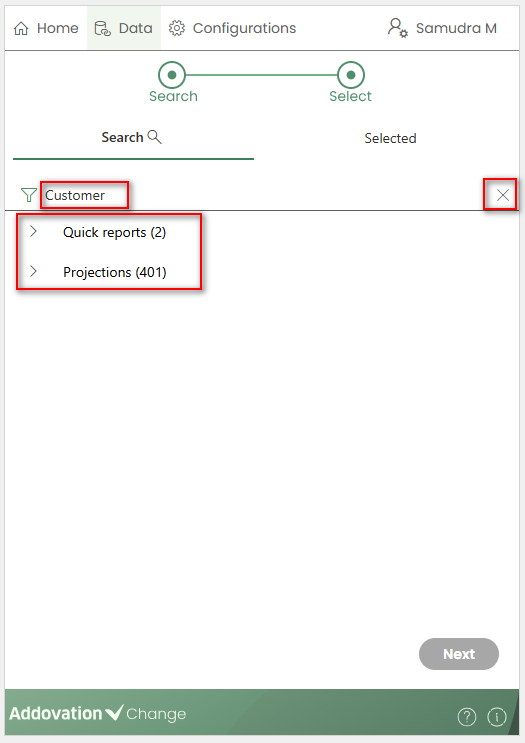
When no search criterion is entered, all available Projections and Quick Reports are listed, grouped by Category by default.
Selecting a Projection
A projection can be selected in either of the following ways:
Double-clickon the recordSingle-clickon the record, then click theNextbutton
The
Nextbutton remains disabled until a projection or quick report is selected.
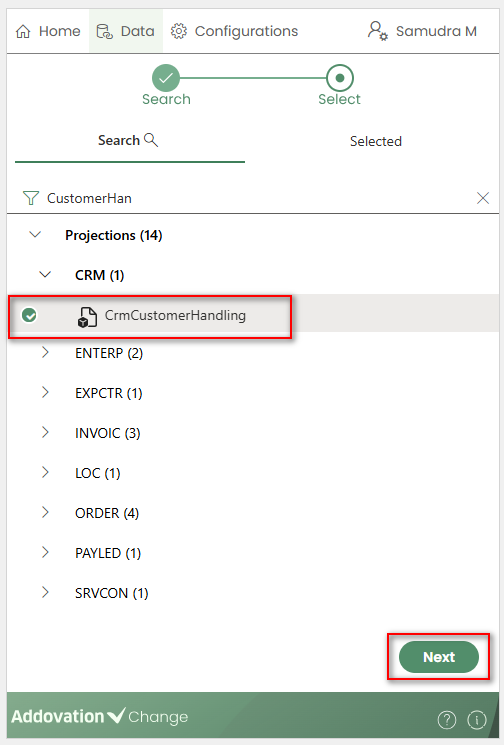
At this stage,
Searchis selected in the progress bar.In the next step, expanding the selected projection will display its
Entity Sets,Actions, andFunctions.You can navigate back to the projection search results at any time by clicking the
Previousbutton.The list can be filtered by typing in the search field.
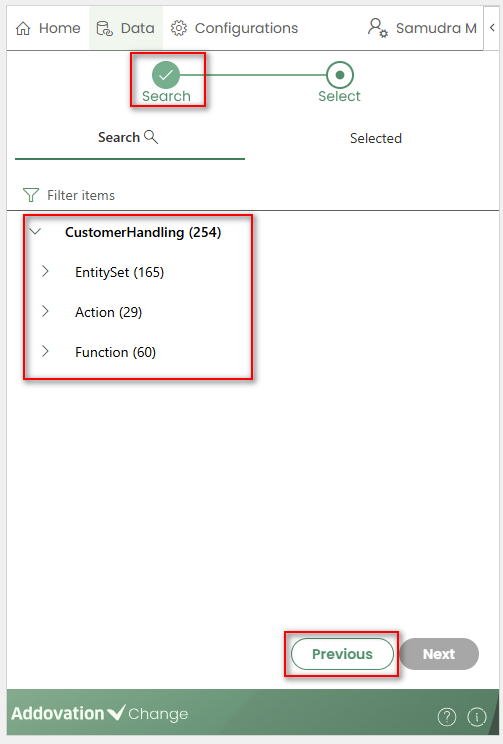
The required projection type (Entity, Action, or Function) can be selected in either of the following ways:
Double-clickon the itemSingle-clickon the item, then click theNextbutton
Once selected, the
Selectstep in the progress bar will be marked as complete, and users will be taken to theSelectedtab immediately after double-clicking or clickingNext.
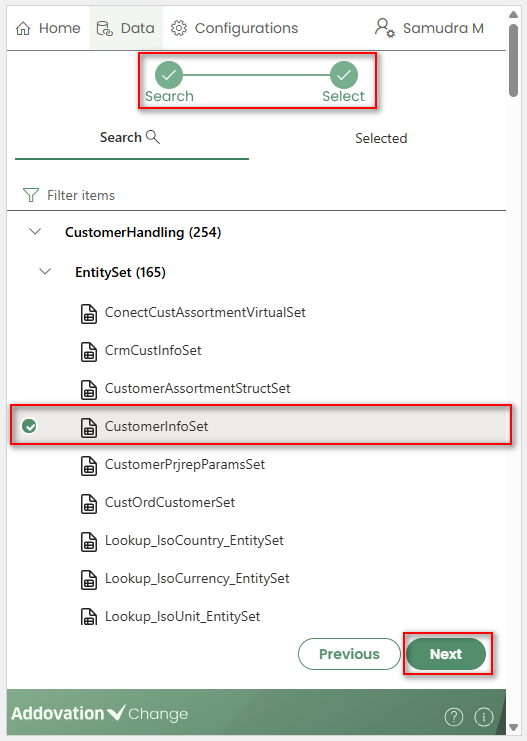
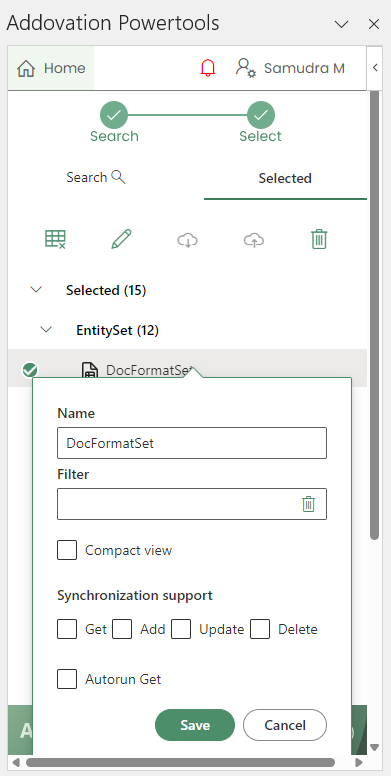
The newly added projection will appear at the top of the Selected list, and the configuration window will automatically open, focusing on the relevant record.
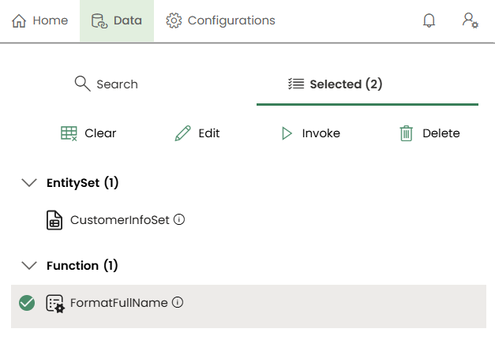
In the Selected section, projections are listed grouped by Entity Set, Action, and Function.
The number of items selected in each category is shown in brackets next to the category label.
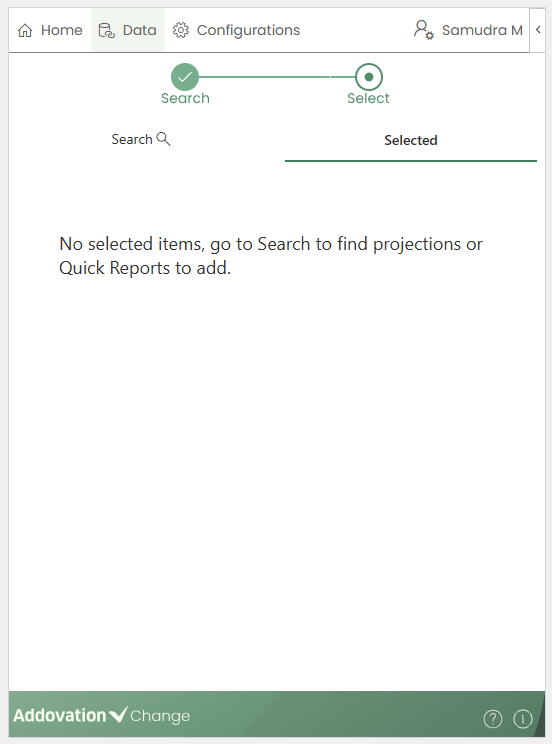
- In the Selected tab, if no projections have been selected, the following message will be displayed.
Entity Sets
An Entity Set is represented as a table on the worksheet. Before inserting it, you must first select a cell in the Excel sheet where the table will be placed.
The selected Entity Set will be inserted at the chosen position.
If the sheet contains multiple tables, they should be placed side by side, not on top of each other.
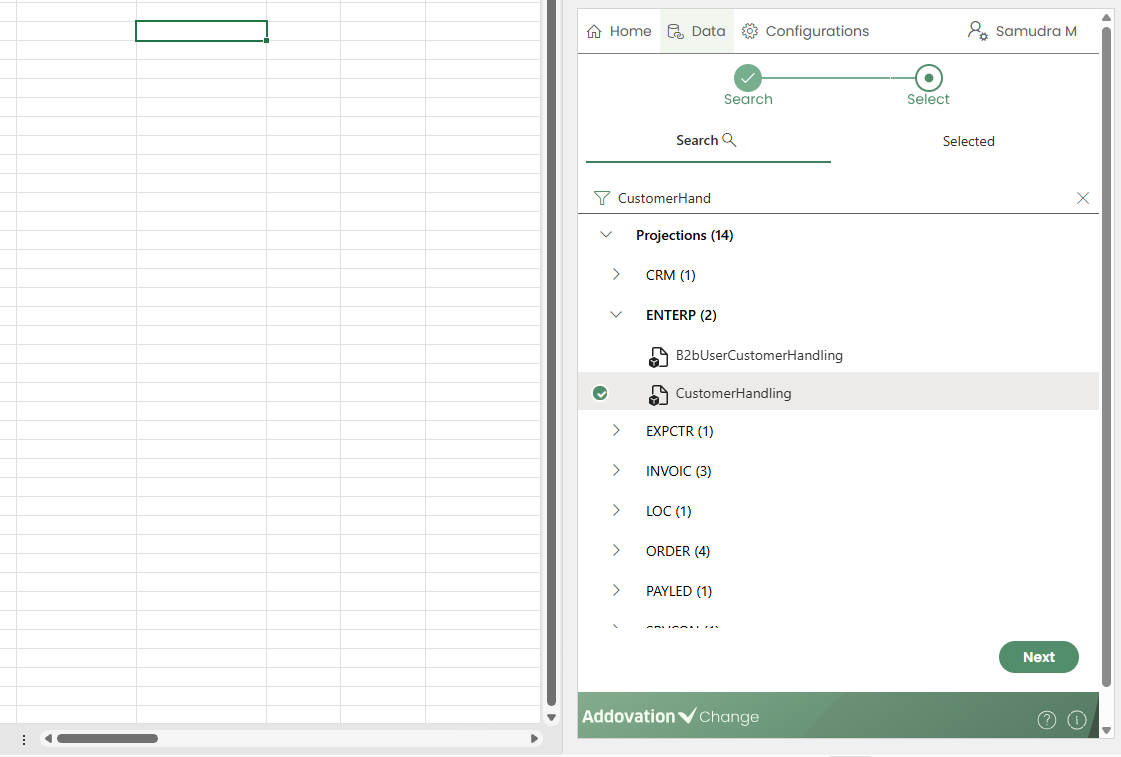
The inserted table will have a
Statuscolumn automatically added as the leftmost column, which will display the status from saved operations.Key columns will be colored with a different color. The user can add more columns to the table if necessary.

Entity Set Properties
As explained earlier, the entity set properties dialog is automatically opened when the table is inserted.
It can also be opened using the
Editicon.
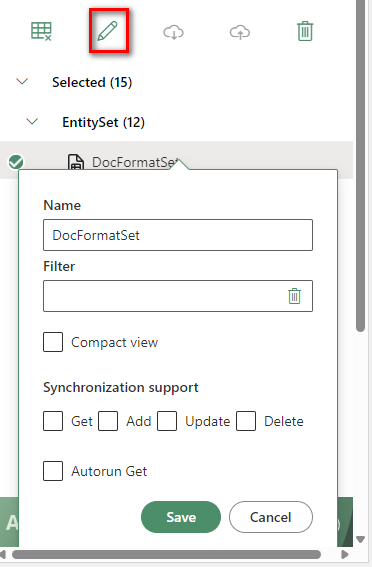
Name
- This field appears first in the Entity Set Properties dialog. It defines how the projection will be displayed in the list and can be edited by the user.
Operations
The Operations section is expandable and is open by default.
Hovering over the
information iconnext to the Operations label displays a tooltip:Allowed operations.The section contains five checkboxes, each representing a different operation that can be enabled for the selected entity set:
Get: Populates the table by retrieving data.Add: Adds new items by inserting rows into the table.Update: Modifies existing items in the table.Delete: Removes items from the table.Autorun Get: Will run the entity set automatically, i.e. clear the table and fetch the data again, when the user signs in to the application.
Note
Not all operations are supported for every entity set. To see which operations are available, refer to the Projection API.
Important
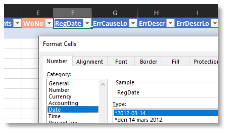
Columns can be deleted from the table, but key columns cannot be removed if the table is to be updated. In addition to key columns, the Add operation may require other mandatory columns. The mandatory columns for each entity set can be found in the Projection API.
Filter
- The Filter section is expandable and allows users to apply filters to the OData query used for fetching data.
Text Filter
- In the Text filter, the filter can be either hard-coded or reference a cell in the workbook. The following are sample OData filter scenarios supported by the Text filter for reference.
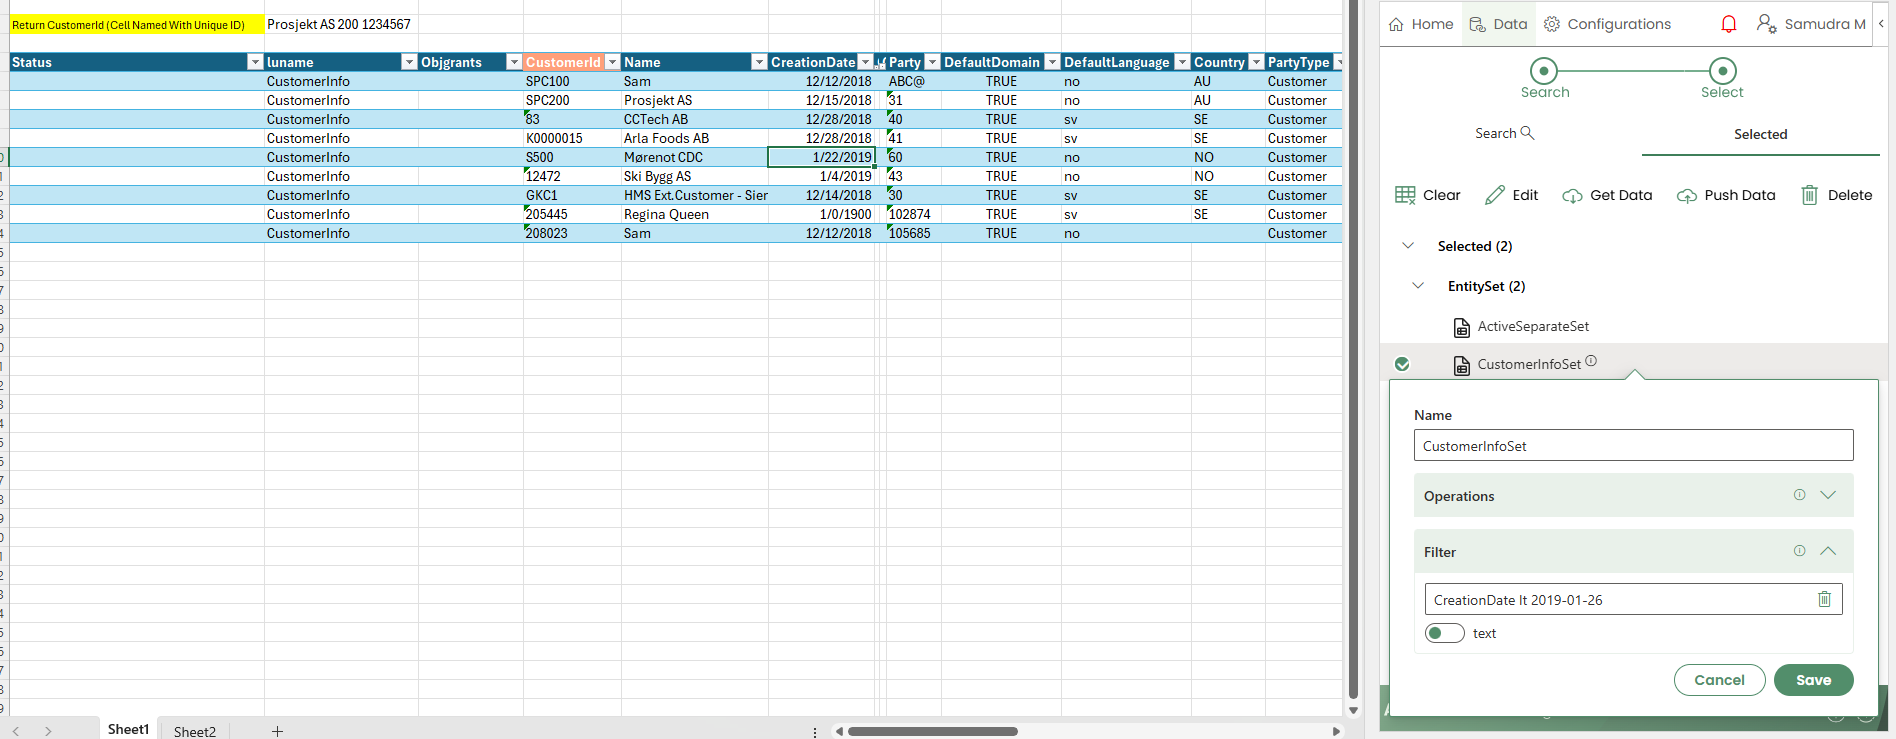
- Less Than: lt
Example 01: WoNo lt 1000
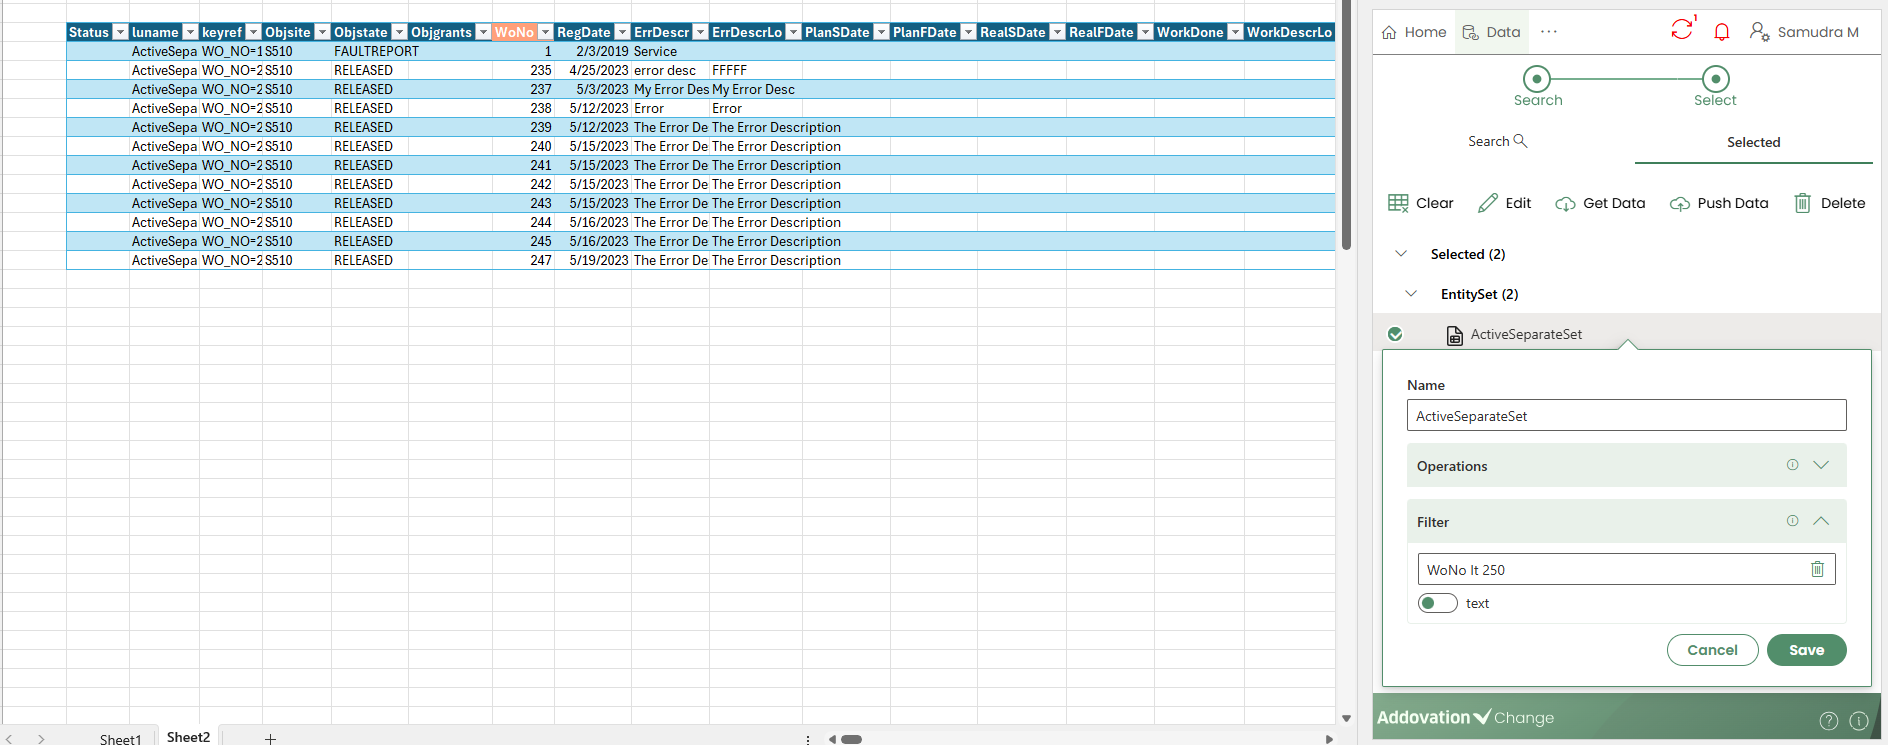
Example 02: CreationDate lt 2019-01-26
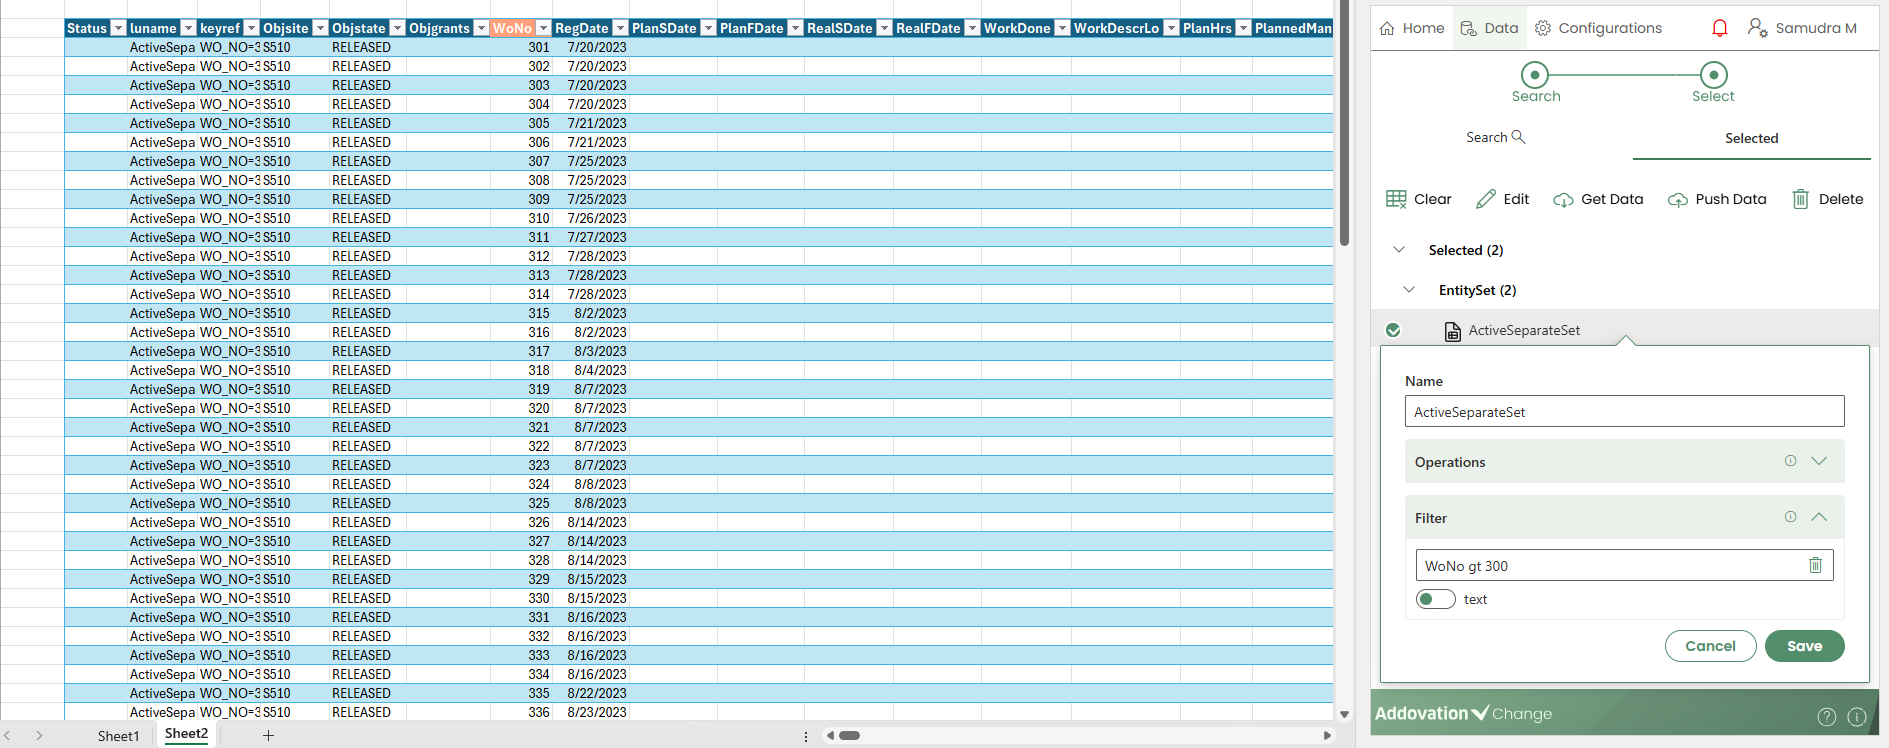
- Greater Than : gt
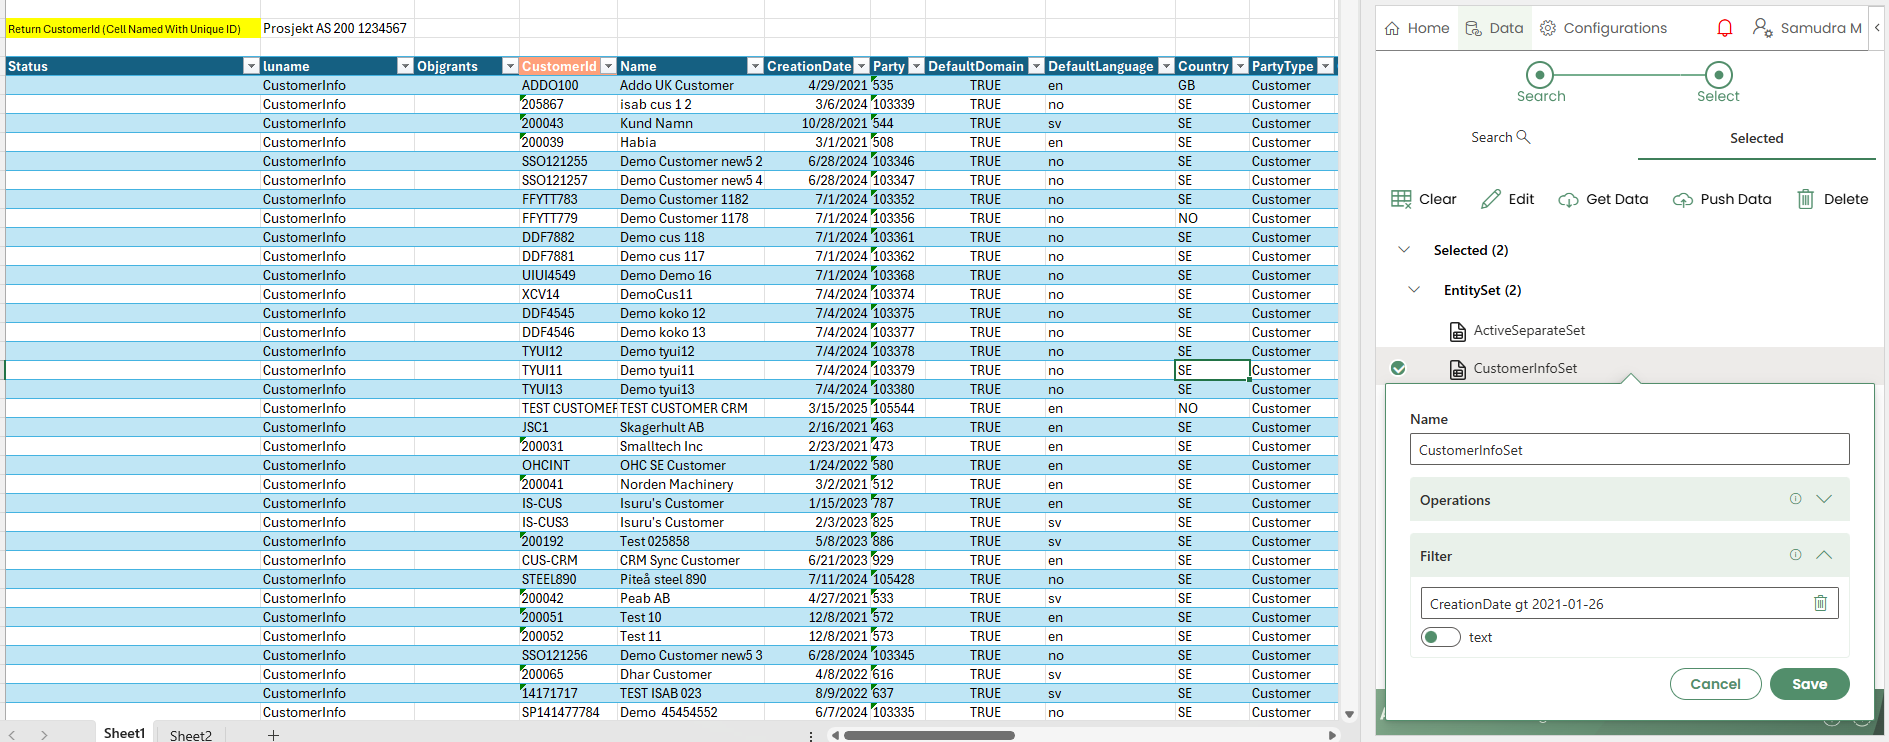
Example 01: WoNo gt 900
Example 02: CreationDate gt 2021-01-26
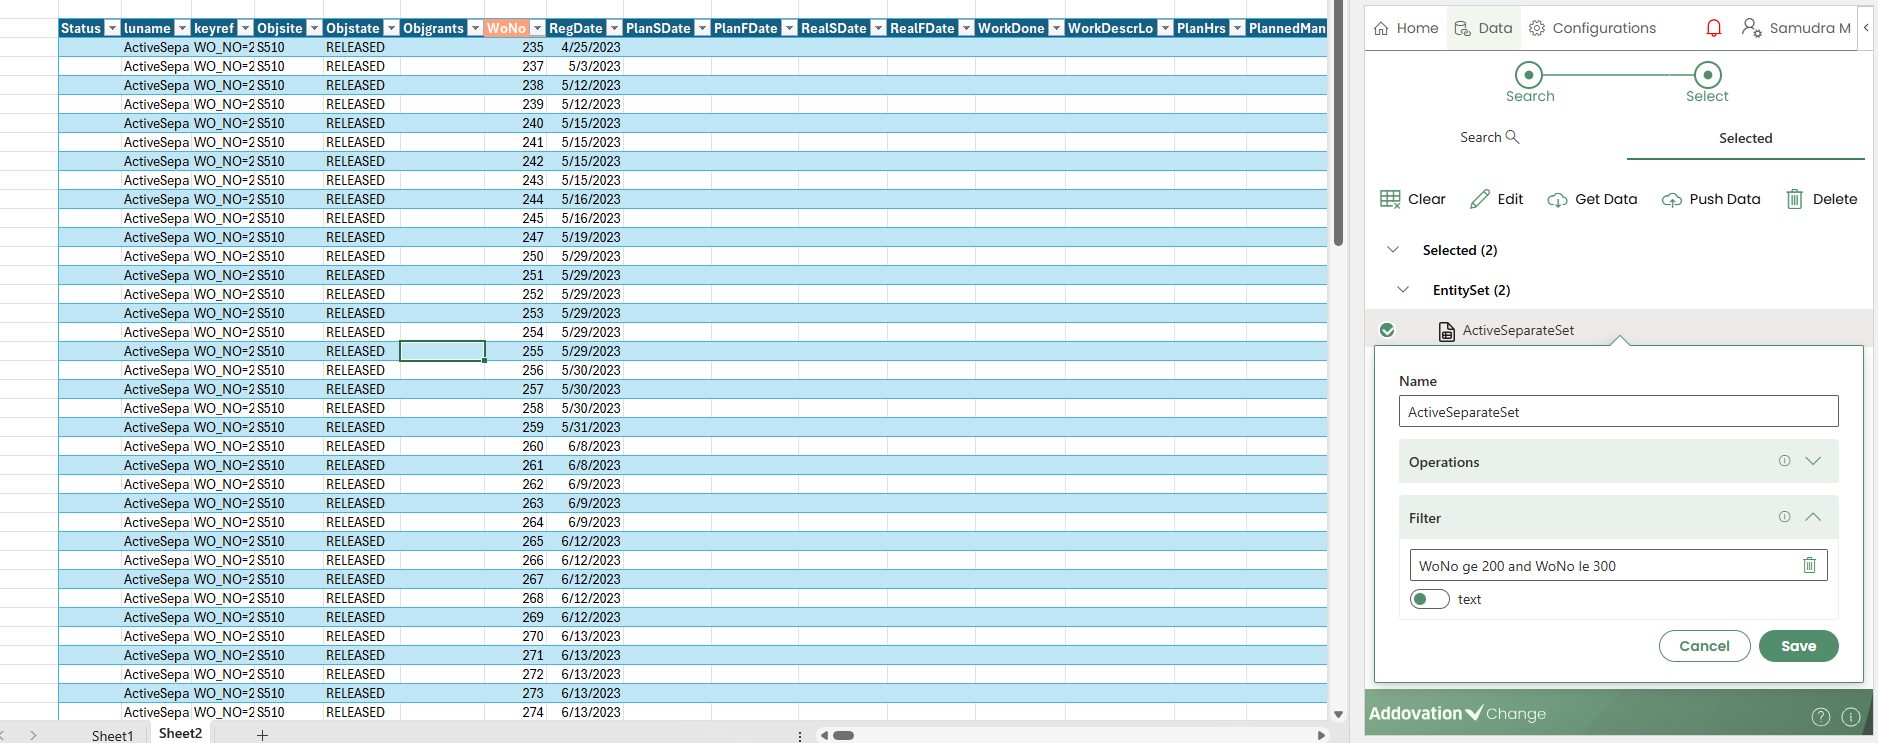
- Between two values
Example 01: WoNo ge 200 and WoNo le 404
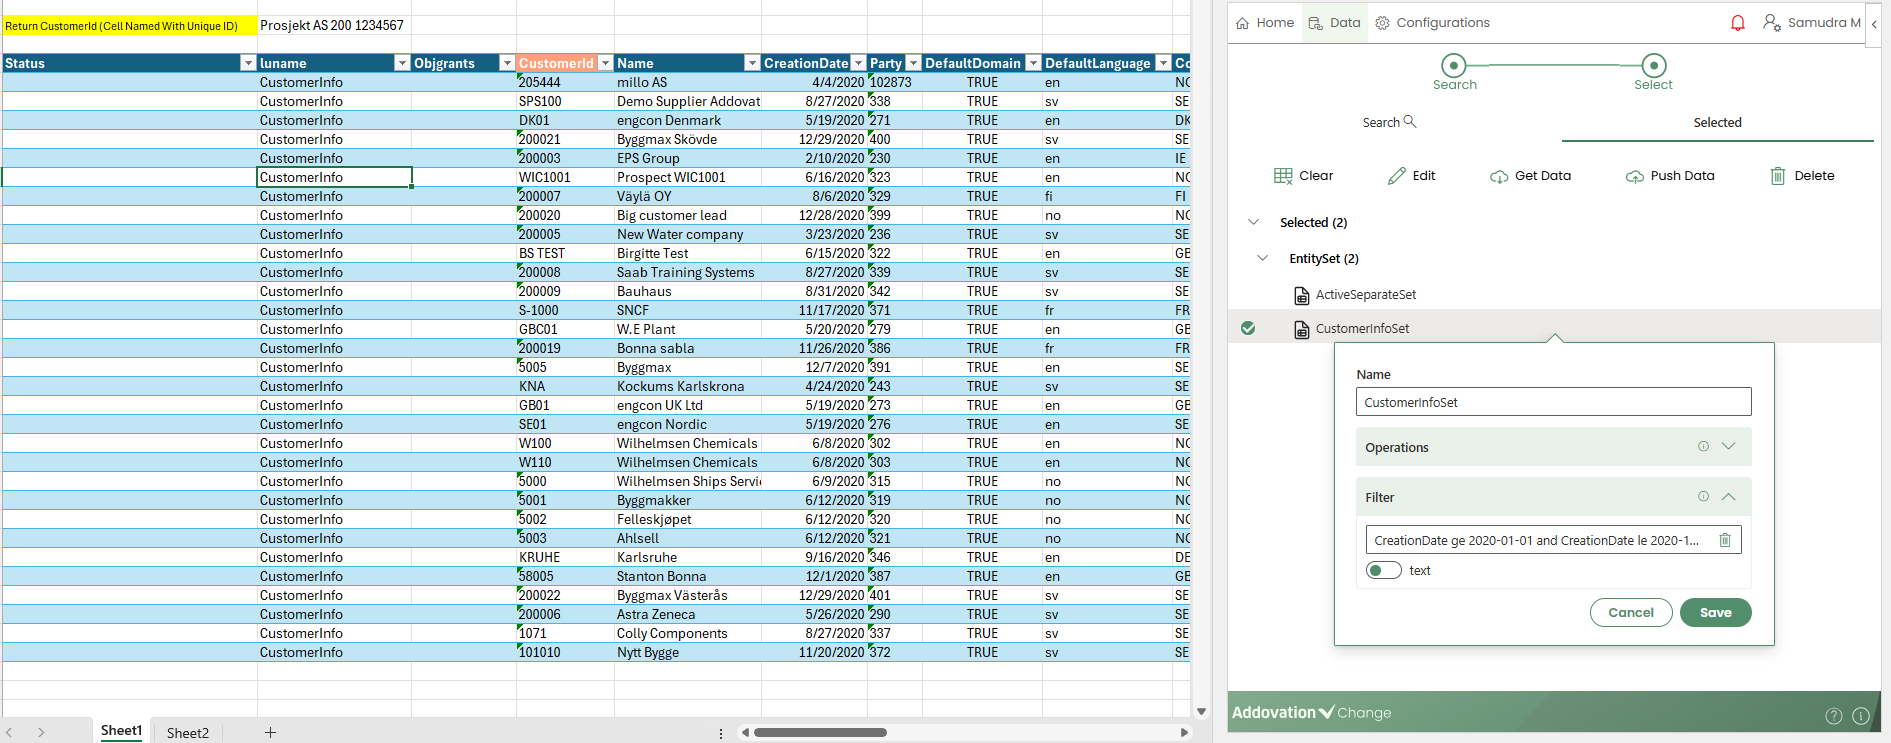
Example 02: CreationDate ge 2020-01-01 and CreationDate le 2020-12-31
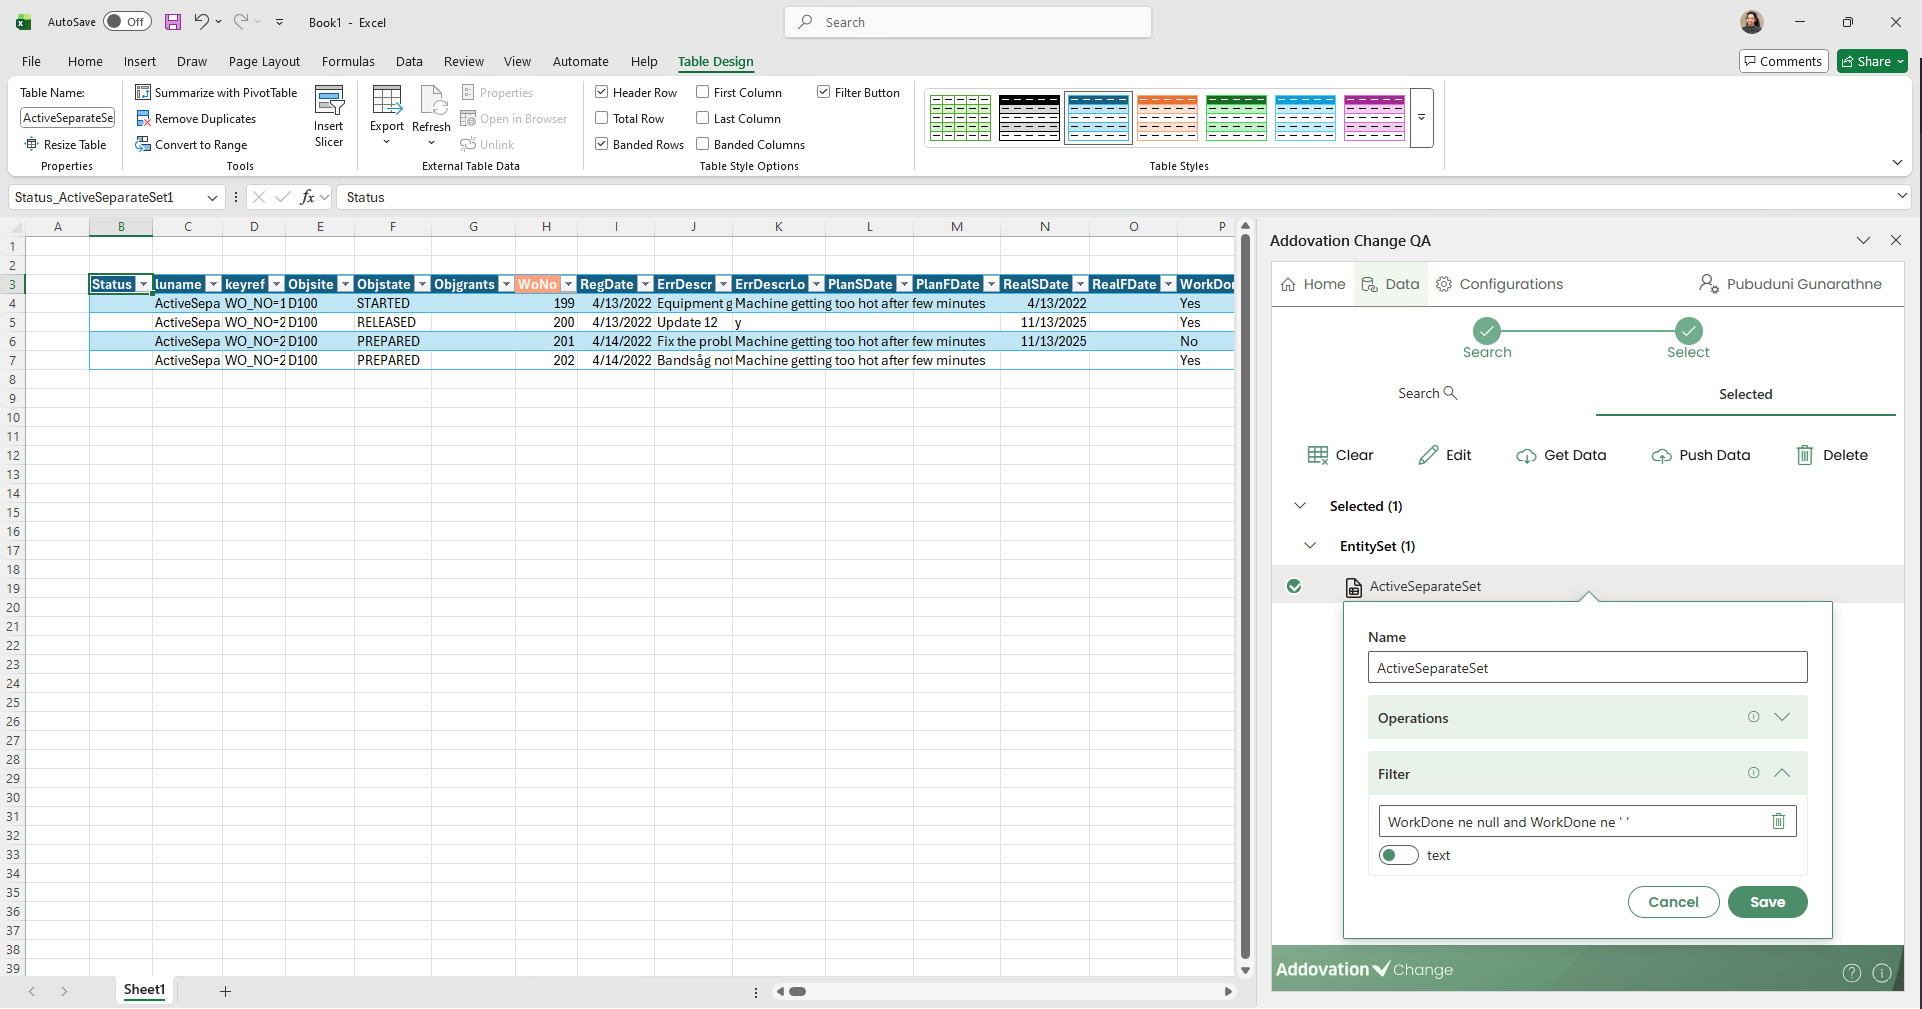
- Any value but not blank ones
Example 01: WorkDone ne null and WorkDone ne ' '
Example 02: RequiredStartDate ne null
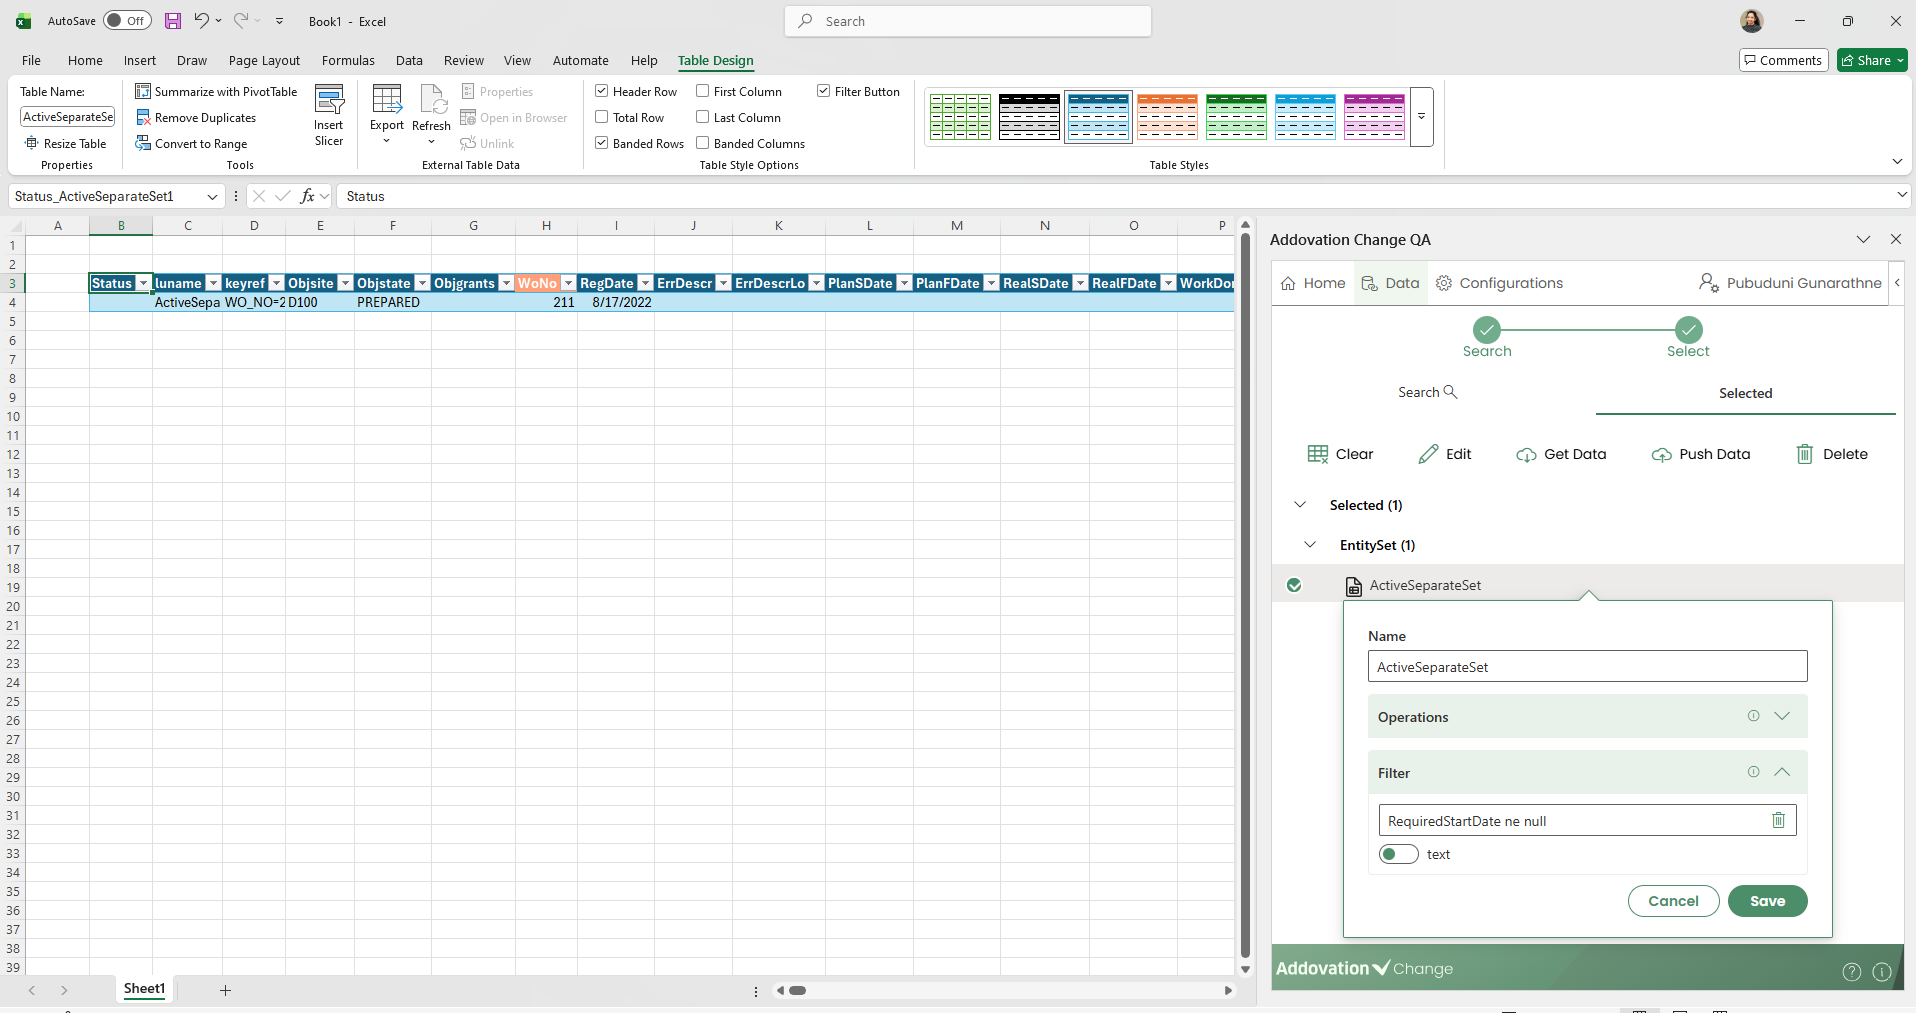
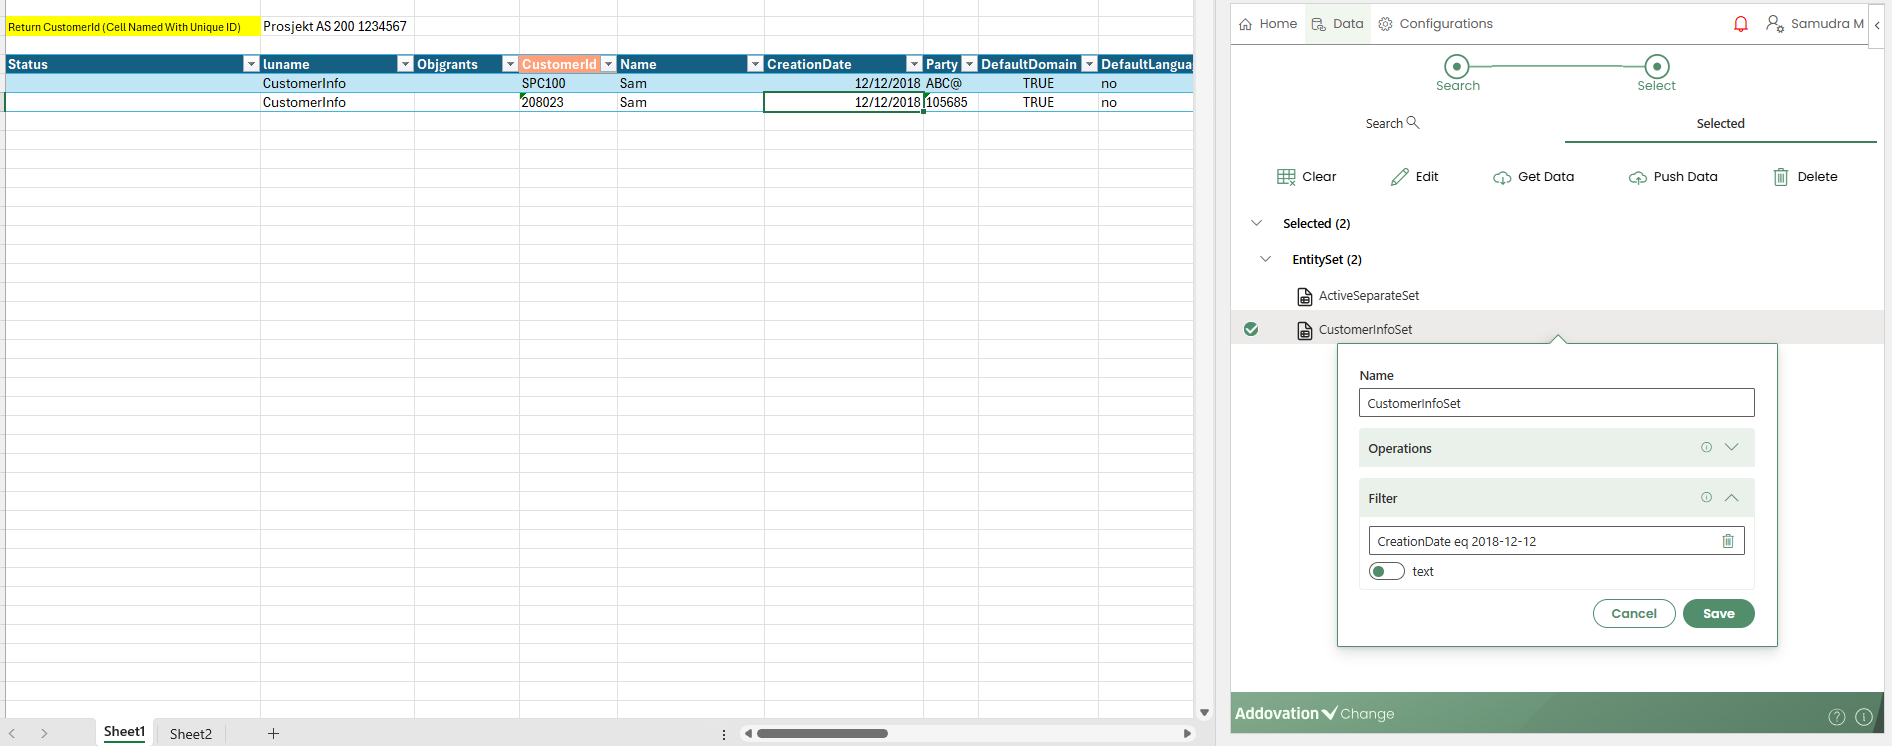
- Date Filter
Example: CreationDate eq 2018-12-12
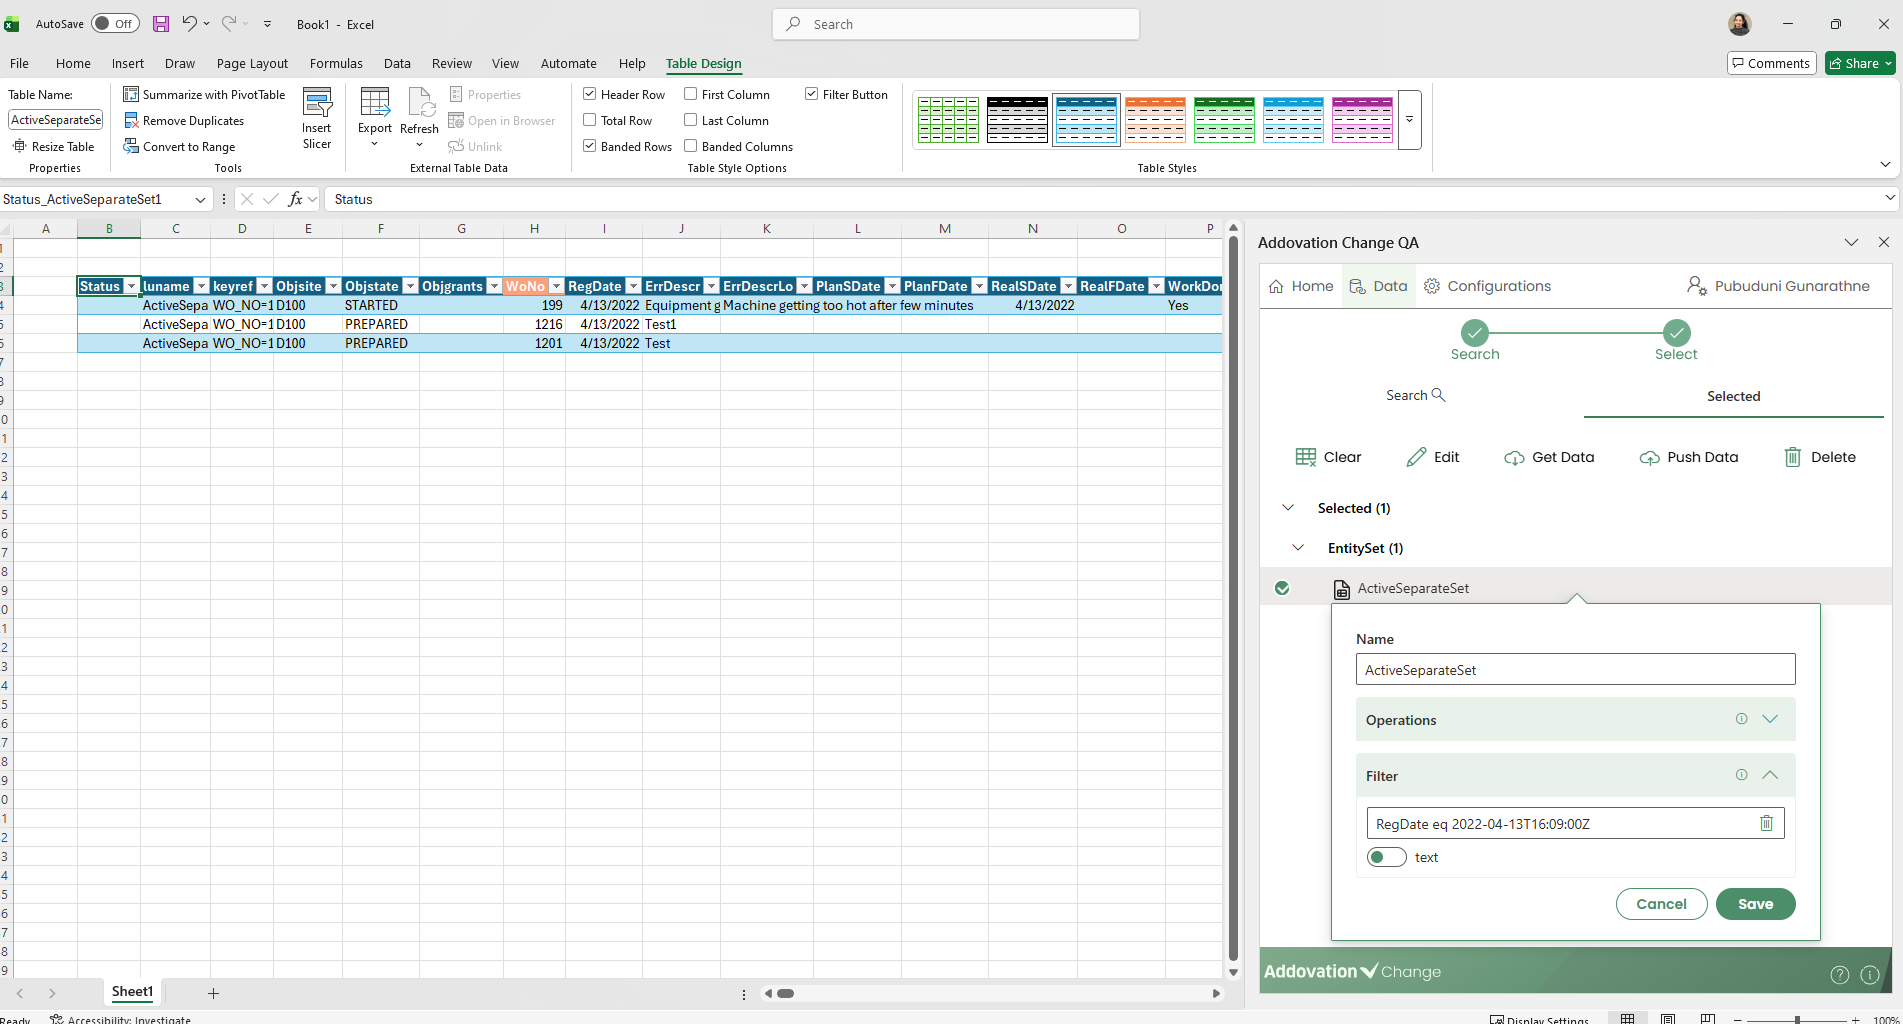
- Date and Time Filter
Example: RegDate eq 2022-04-13T16:09:00Z
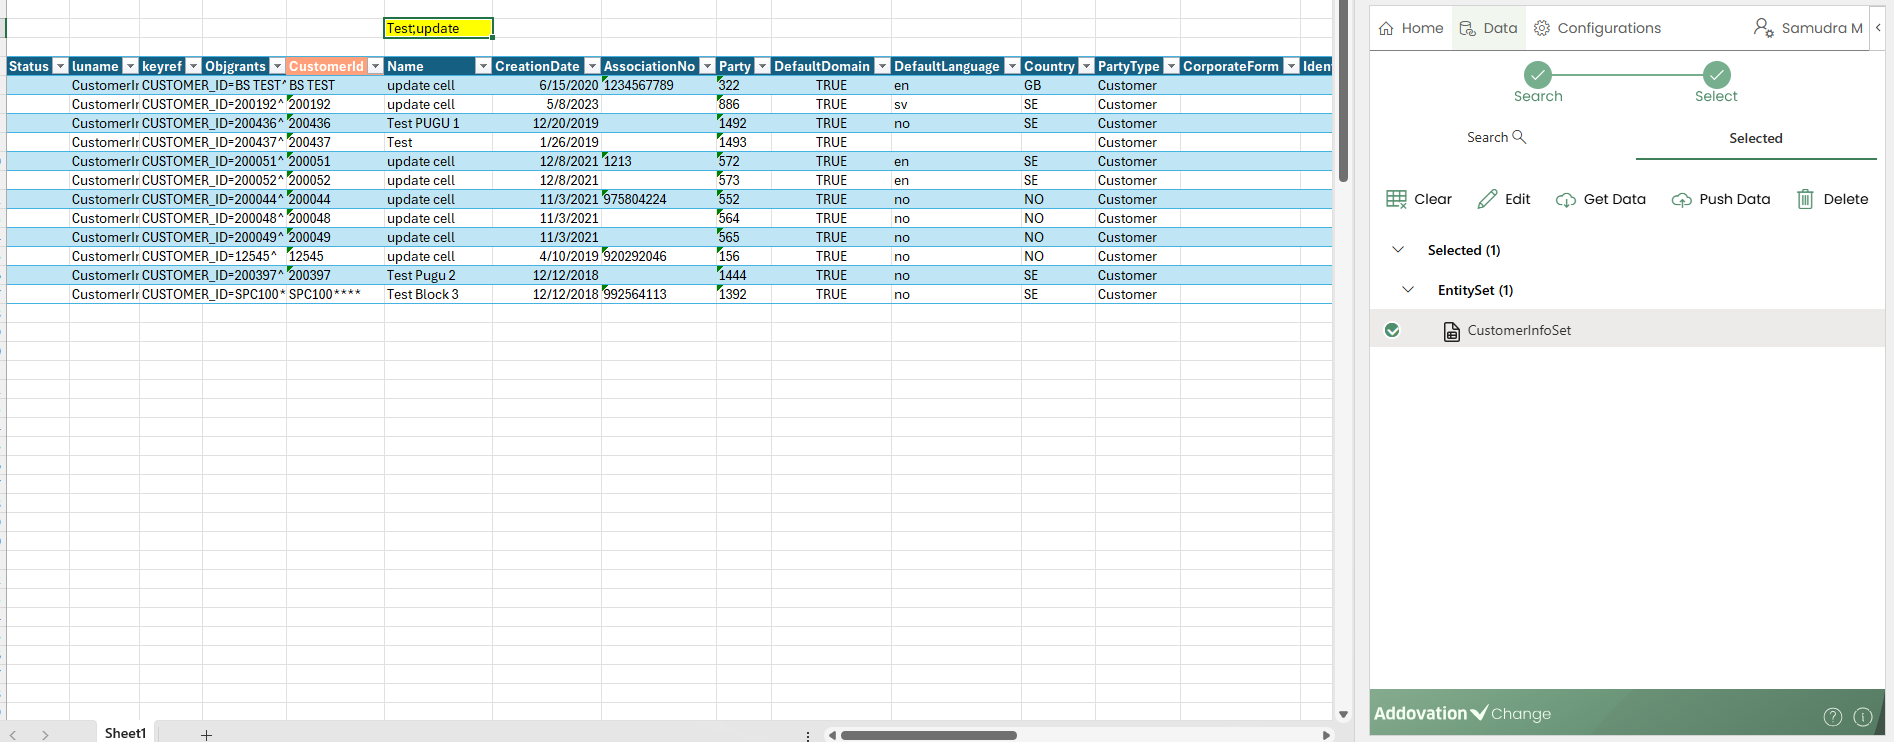
- The text filter also supports multiple filters separated by semicolons. Below are some sample scenarios that demonstrate how the semicolon feature works within the text filter.
- Semi colon support for cell values (one or more terms)
- Semi colon support for cell values with spaces around
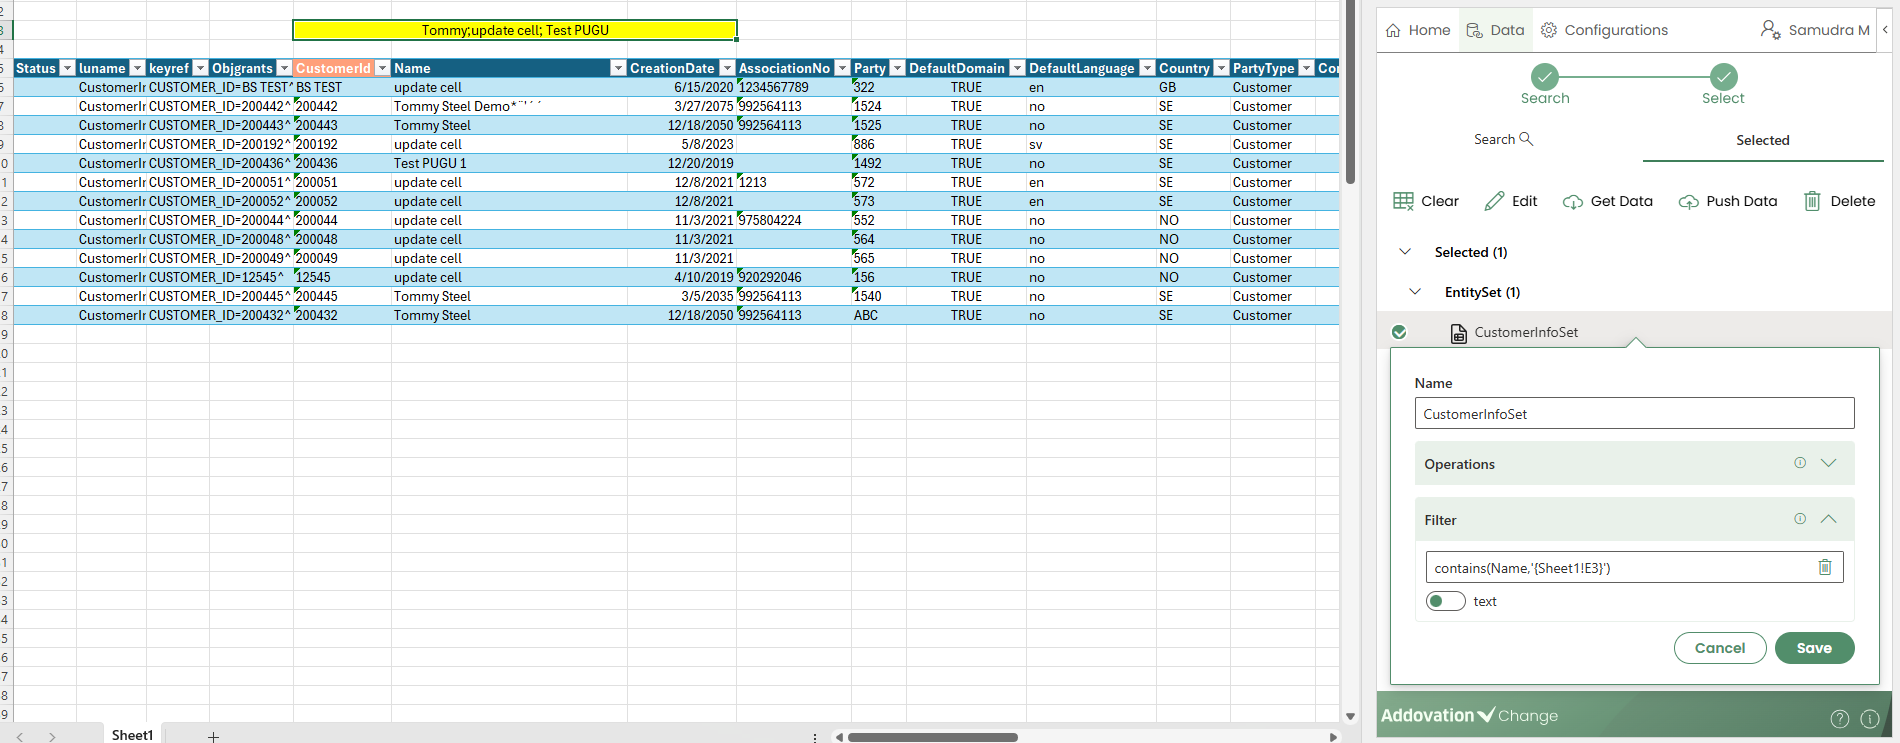
- Reference to multiple cell values with or without semi colons
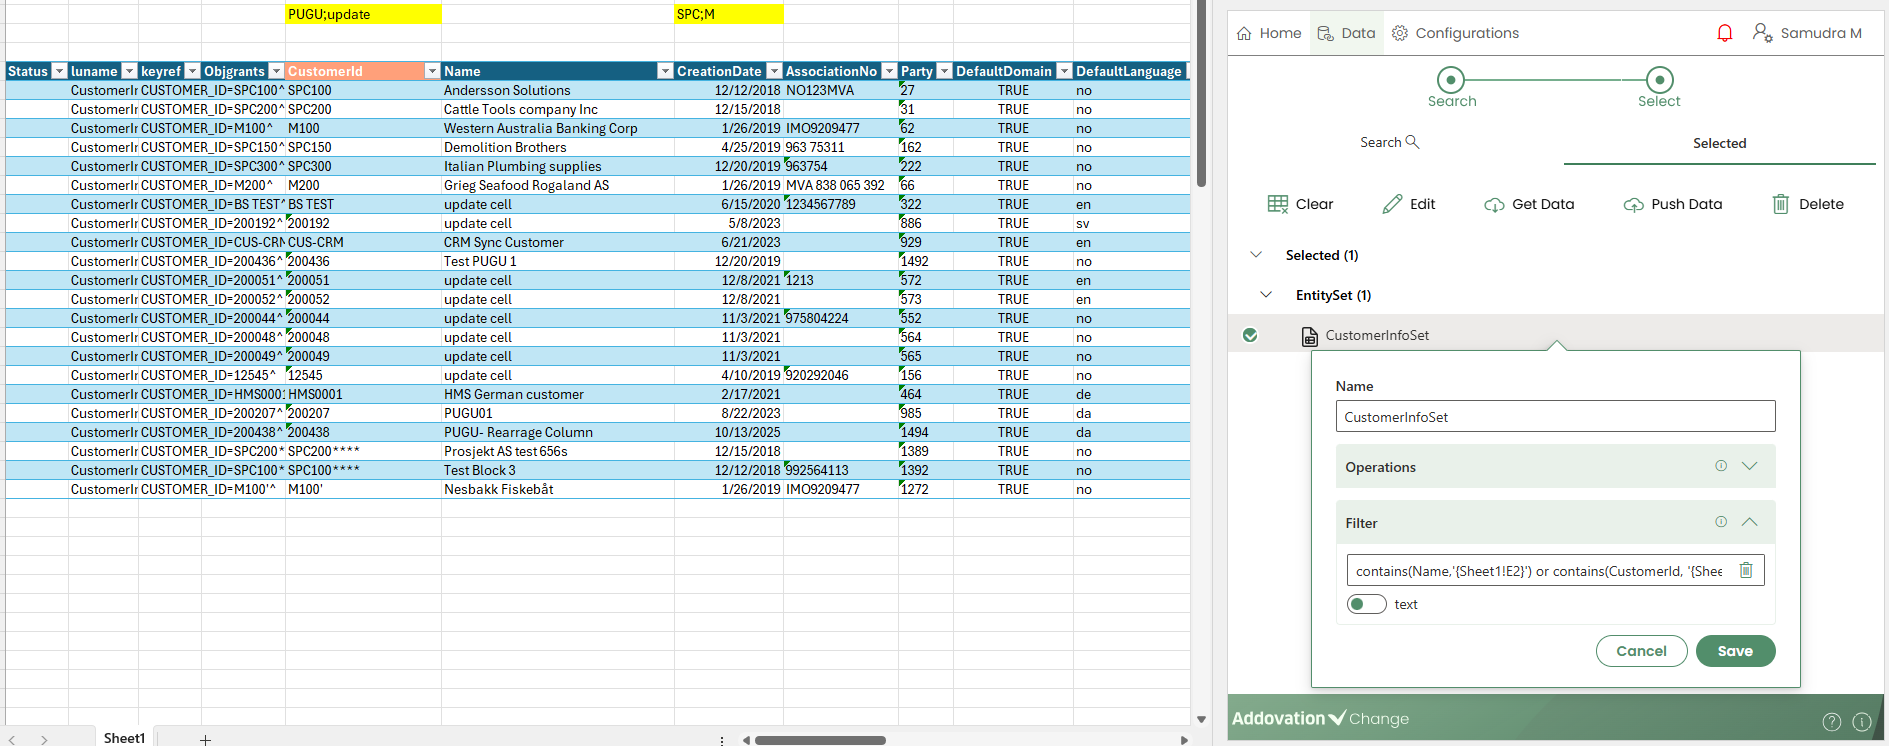
Entity Set Commands
- A set of commands is available when working with an entity set table. These commands are described below in the order they are displayed, from left to right.

Clear table: Clears data from a table
Edit: Opens Entity set properties dialog
Get data: Populates the table with fetched data
Push data (save): Changes to the table is pushed to the server (add/update/delete)
Delete item: Deletes the selected entity set and the table from the sheet.
Actions
Actions can be added to the workbook either to a table or to a cell outside a table.
Similar to selecting an entity set, the user starts by selecting the projection and then selects the required action.
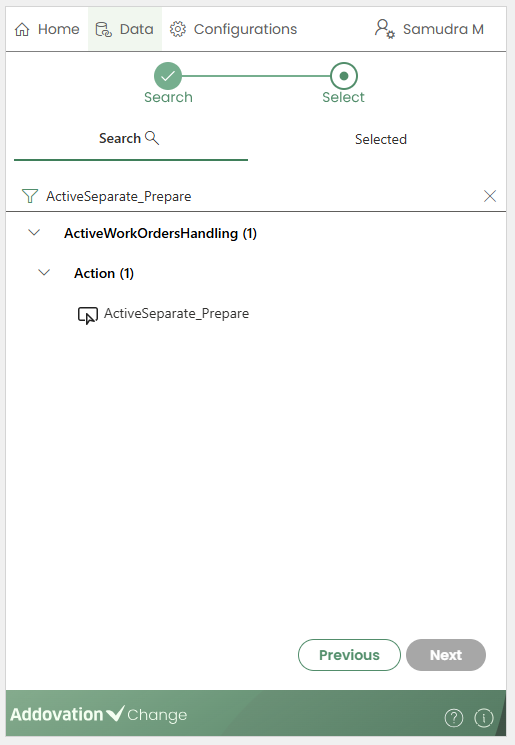
You can add an action by either double-clicking it or by single-clicking and then selecting Next.
This will take you to the Selected tab and open the action settings.
Action Settings
- The action settings dialog is where the table columns/cells and action parameters are connected.
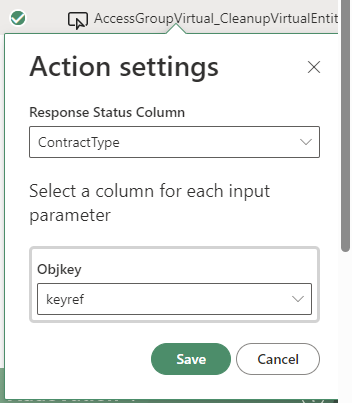
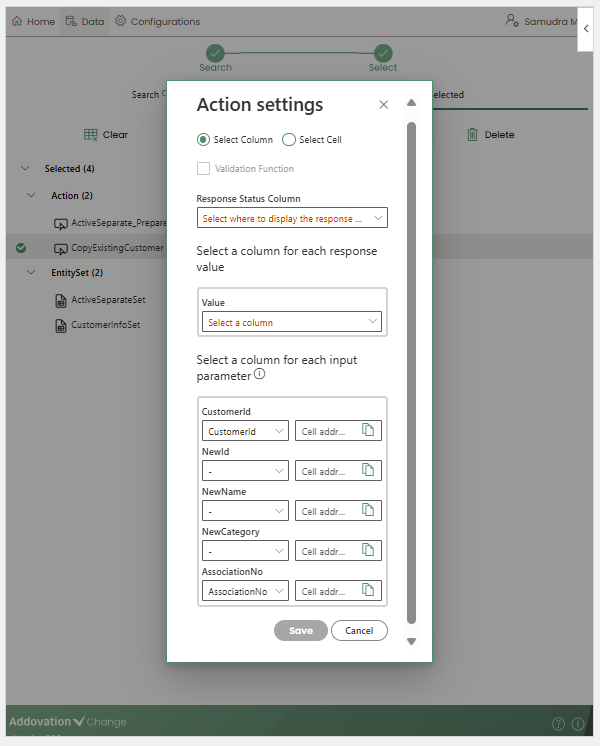
In the
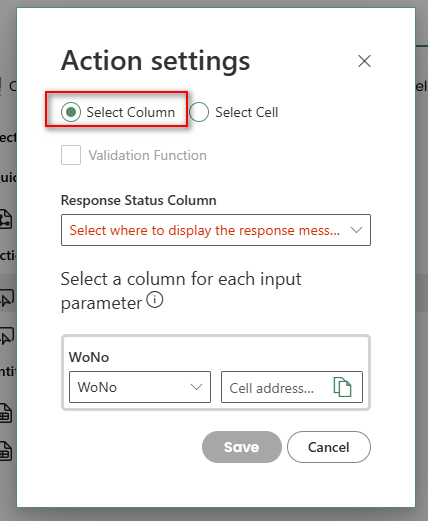
Action Settingswindow, the first step is to choose whether the selected action is connected to atable columnor to acell outside the table.There’s a dropdown menu for each action parameter (Response Status, Response Value and Input Parameter), where the user can pick which column or cell should be connected to the parameter.
If the
Select Columnradio button is chosen in actions settings window, the action parameter fields allow the user to select columns from the table currently selected in the workbook.
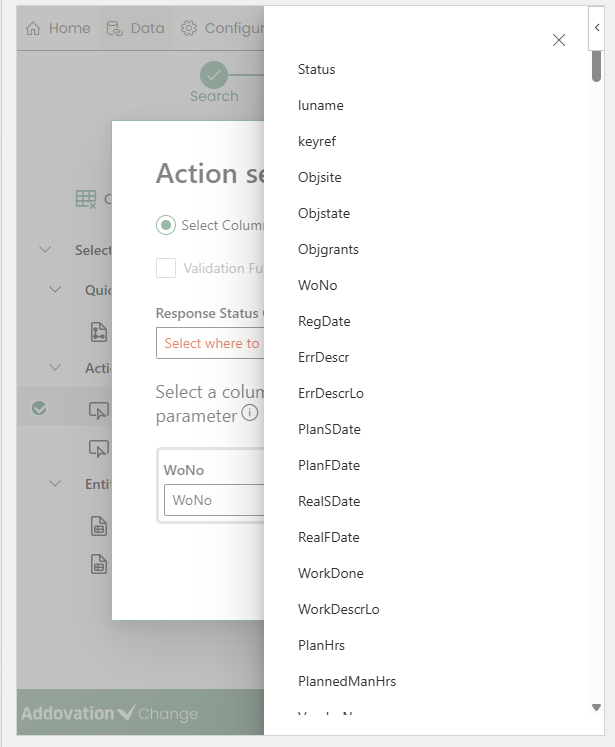
- If multiple tables exist and no cell within the required table is selected, the add-in displays the message
No table selected.
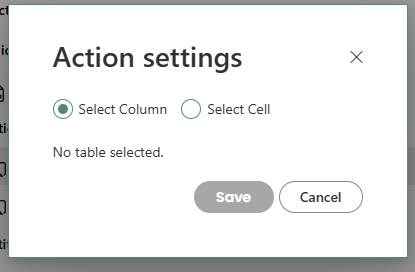
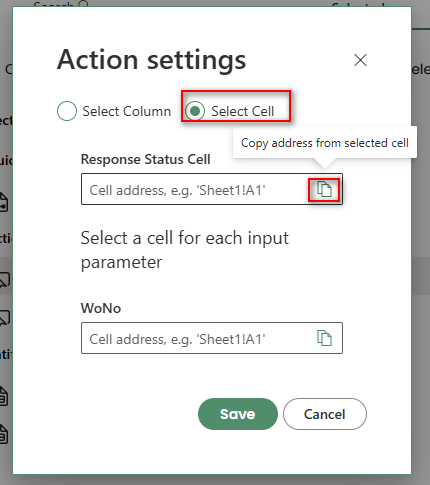
If the Select Cell radio button is chosen, the user must provide a cell address for each action parameter field.
- The user can select a cell directly in the workbook and copy its address using the copy icon.
Response Status
The first dropdown in the action parameter selection is for the
Response Status Column/Cell.Entity set tables always include a
Statuscolumn. However, if the table allows Add, Update, or Delete operations, or if another action uses the same status column, it is recommended to add a new column for the action’s status to avoid confusion.
Response Value
The next dropdown is for the
Response Value Column/Cell.This dropdown may be available for some actions and not for others, depending on their configuration.
Once the action is successfully triggered, its output value will be passed to the selected column or cell.
If an action returns multiple values, each response value can be assigned to a separate column. Additional columns can be added to the table and will appear in the dropdown list. There is also an option to skip displaying the response value by selecting the
–option in the dropdown.
Input Parameter(s)
The last set of dropdowns are for providing
input parameters.The values in the selected column(s) or cell(s) will be used as input for the action.
The add-in also allows combining table columns and cell addresses for action input parameters when Select Column is chosen.
If no table column is selected, the add-in will use the value provided in the cell address.
Action Commands
- A set of commands is available when working with actions. These commands are described below in the order they are displayed, from left to right.

Clear table: Clears data from a table
Edit: Opens the action properties dialog to change the display name of the action.
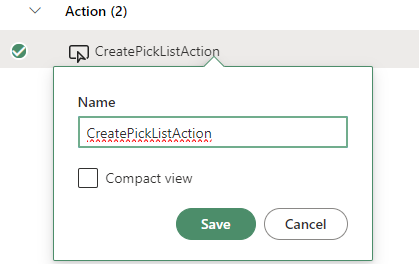
Invoke Action: Invoke the action using parameters from the table/cells.
Delete item: Deletes the selected entity set and the table from the sheet.
Functions
Functions, just like actions can be added to the workbook either to a table or to a cell outside a table.
Similar to selecting an entity set, the user starts by selecting the projection and then selects the required function.
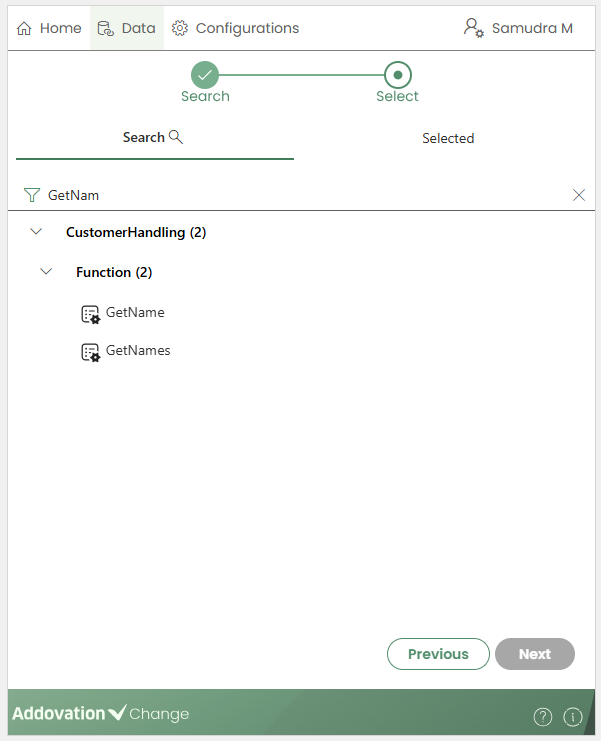
- Double clicking the function item will direct user to the
Selectedtab and open the function settings.
Function Settings
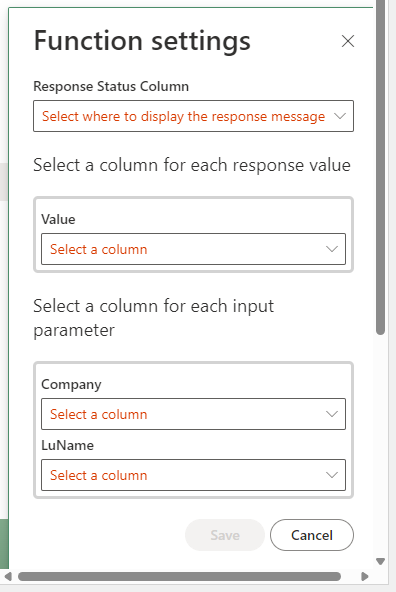
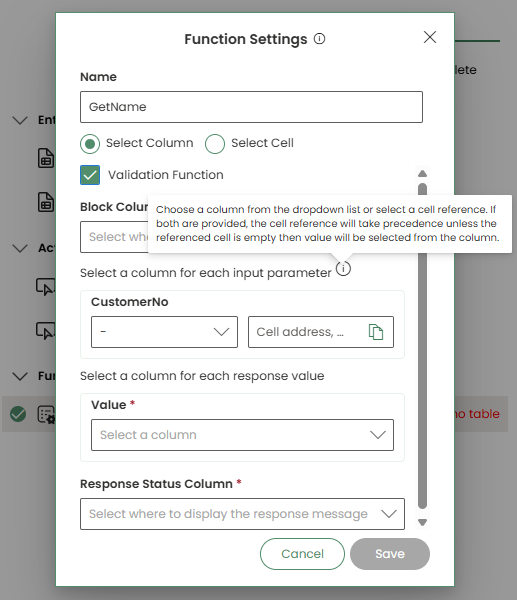
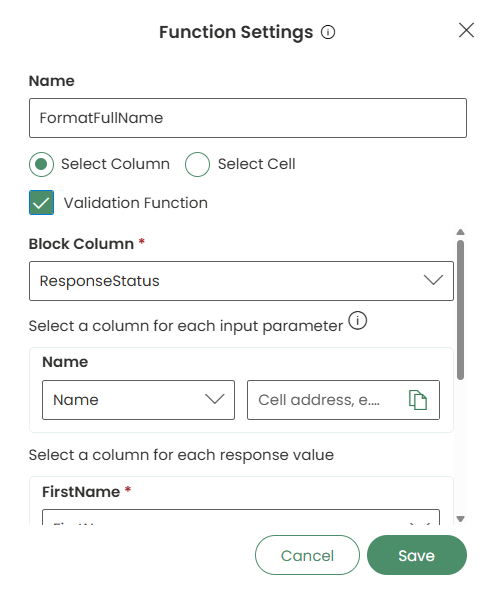
The function settings dialog is where the table columns/cells and function parameters are connected.
As with Actions, the first step in the Function Settings window is to select whether the function is connected to a table column or to a cell outside the table.
Validation Functions
- For functions, an additional checkbox is available in the Function Settings window that allows users to specify whether the function should act as a validation function.
Important
A function can be selected as a validation function only when the function parameters use table columns.
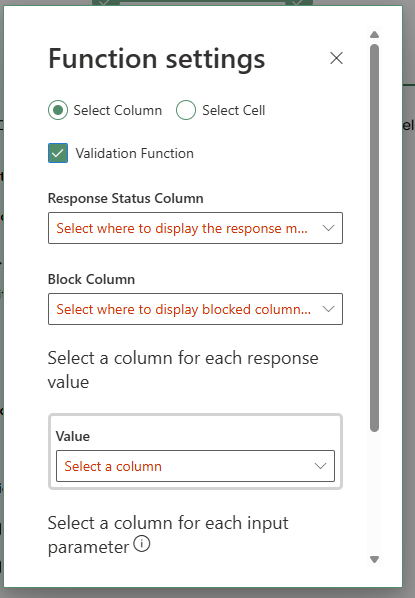
How it works is as follows:
A Validation Function is a special type of function used to validate records before they are pushed to a projection. It allows you to control whether individual rows should be included or blocked based on a specific column value.
In this mode:
Only rows where the selected Block Column has the value “OK” will be pushed to the projection.
Rows with any other value in the Block Column (for example, “Not OK”) will be blocked and excluded from the projection.
Block Column Selection
- When a function is marked as a validation function, an additional configuration option becomes available.
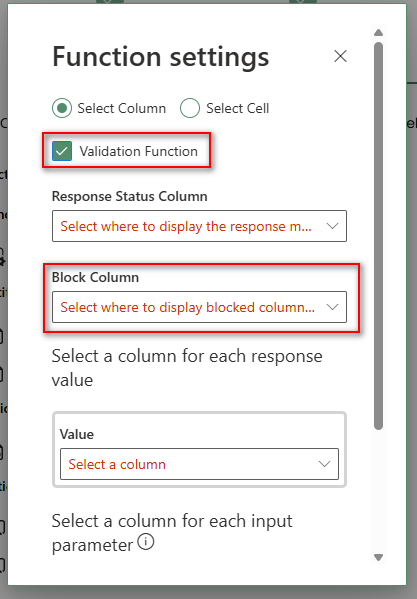
Users can select a
Block Columnfrom a list of columns in the entity set.In most cases, this column is one of the outputs produced by the validation function.
The system evaluates the value of the selected Block Column for each row to determine whether the record should be allowed or blocked.
This mechanism ensures that only records that meet the defined validation criteria are processed further, helping maintain data accuracy and consistency.
Response Status
The first dropdown in the function parameter selection is for the
Response Status Column/Cell.Entity set tables always include a Status column. However, if the table allows Add, Update, or Delete operations, or if another function uses the same status column, it is recommended to add a new column for the function’s status to avoid confusion.
Response Value
The next dropdown is for the
Response Value Column/Cell.This dropdown may be available for some functions and not for others, depending on their configuration.
Once the function is successfully triggered, its output value will be passed to the selected column or cell.
If a function returns multiple values, each response value can be assigned to a separate column/cell.
Additional columns can be added to the table and will appear in the dropdown list.
There is also an option to skip displaying the response value by selecting the
–option in the dropdown.
Input Parameter(s)
The last set of dropdowns are for providing
input parameters.The values in the selected column(s) or cell(s) will be used as input for the function.
The add-in also allows combining table columns and cell addresses for action input parameters when
Select Columnis chosen.If both values are provided, the cell reference is used first. However, if the referenced cell is empty, the value is retrieved from the selected column.
Function Commands
- A set of commands is available when working with functions. These commands are described below in the order they are displayed, from left to right.
Clear table: Clears data from a table
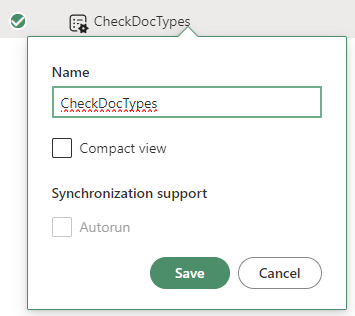
Edit: Opens the Function Properties dialog, allowing you to change the display name of the function. The dialog also includes a checkbox to enable auto-run, which makes the function run automatically whenever the entity is triggered.
Invoke Action: Invoke the function using parameters from the table/cells.
Delete item: Deletes the selected function from the sheet. A confirmation message will appear to get user’s confirmation.
Quick Reports
To add a Quick Report to a worksheet, first select the cell where you want the table to be placed.
Then, double-click the required Quick Report to insert it into the sheet.
Quick Reports are available in the Quick Reports section, where they are grouped by category.
You can also use the search bar to quickly find a report by typing its name.
If a worksheet contains multiple tables, ensure they are placed side by side. Tables must not overlap or be placed on top of one another.
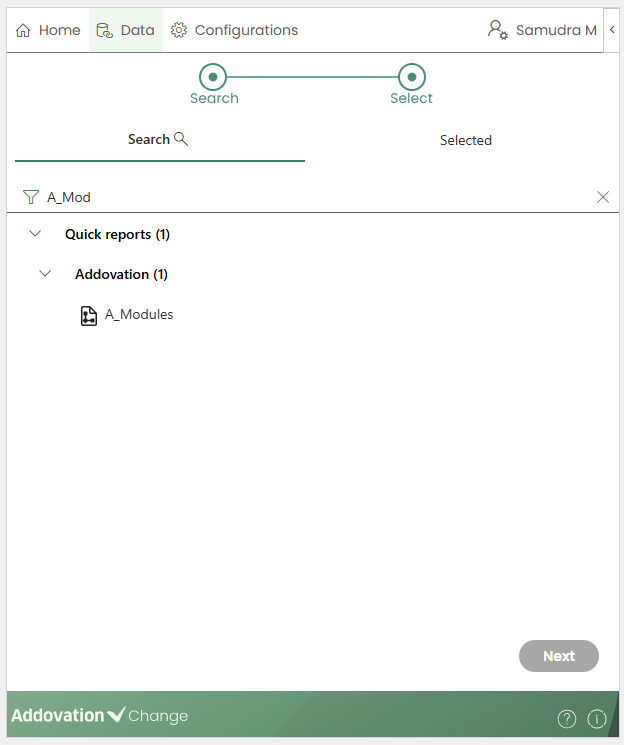
The creator will be directed to the Selected tab and quick report settings dialog will open automatically.
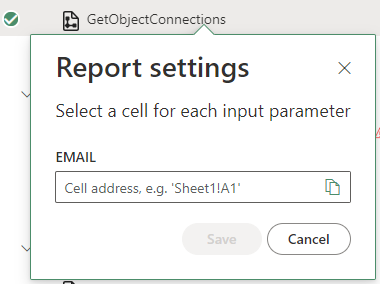
Quick Report Settings
The settings dialog for the quick report is where
input parametersare configured.For each input parameter, an address (cell) from which the parameter value is to be fetched should be entered.
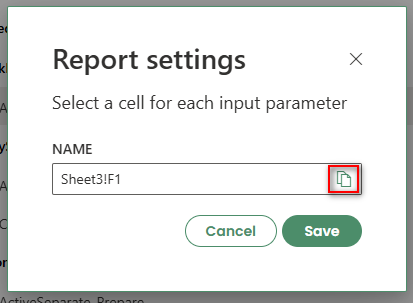
It's also possible to copy the address for the selected cell by clicking the
copybutton in the text field.
Quick Report Properties
- For quick reports, the below properties can be updated.
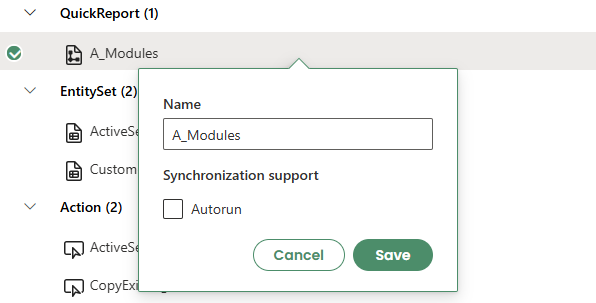
Name
- How the item will appear in the list.
Autorun
Will run the quick report automatically, i.e. clear the table and fetch the data again, when the user signs in to the application.
Synchronization Status, Notifications & Sync
Synchronization Status
After performing Create, Read, Update, or Delete (CRUD) operations, the result is shown in the
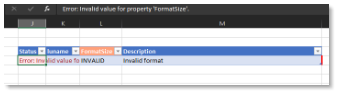
Statuscolumn of the worksheet.A successful operation is indicated by a success status.

- If an operation fails, an error status is displayed.
Notifications
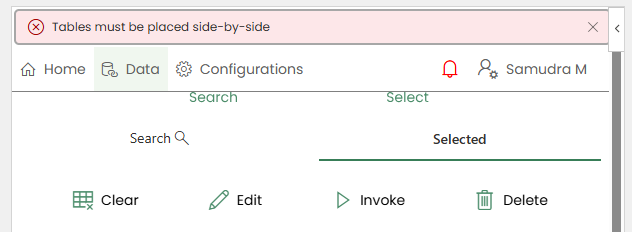
- General errors are shown as notifications at the top of the task pane.
When a new notification is received, the bell icon in the menu ribbon is highlighted in red.
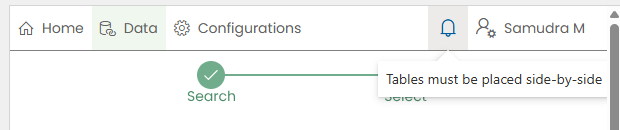
Clicking the bell icon displays all notifications received during the current login session.
Sync Option
- A
Sync iconappears on the menu ribbon with a notification count when changes are detected from the IFS side for entity sets or quick reports added to the current workbook.
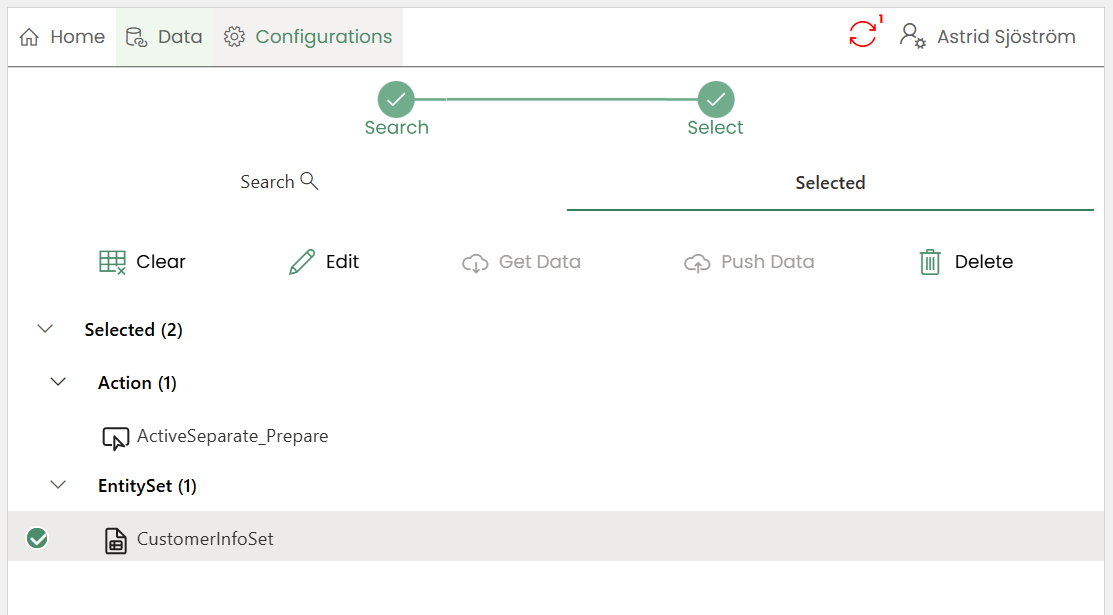
These changes may include adding or removing columns.
The notification count appears as 1 if one or more changes are made to the same entity set or quick report.
The count increases based on the number of affected entity sets or quick reports.
When the user clicks the Sync icon, the workbook table is synchronized with IFS, and the latest updates are applied to the workbook.
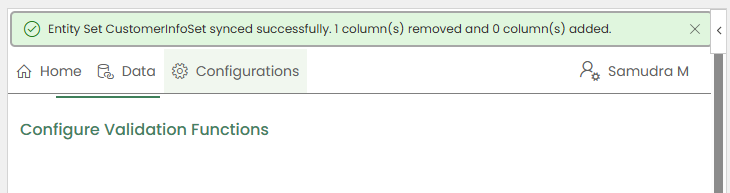
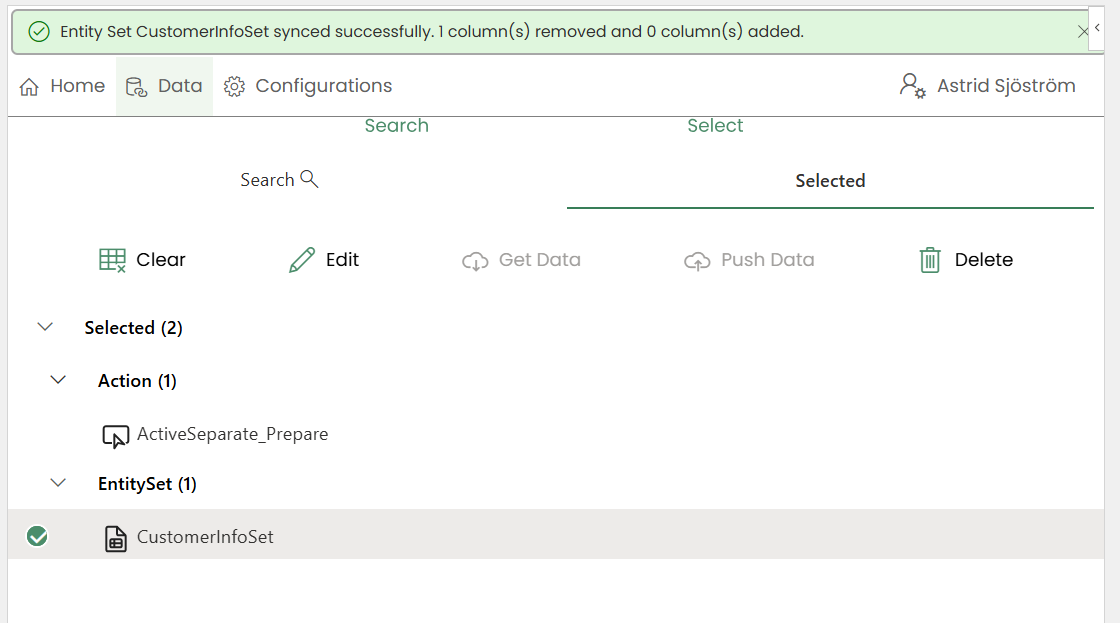
After a successful sync, a confirmation message is displayed, indicating the number of columns that were added and removed.
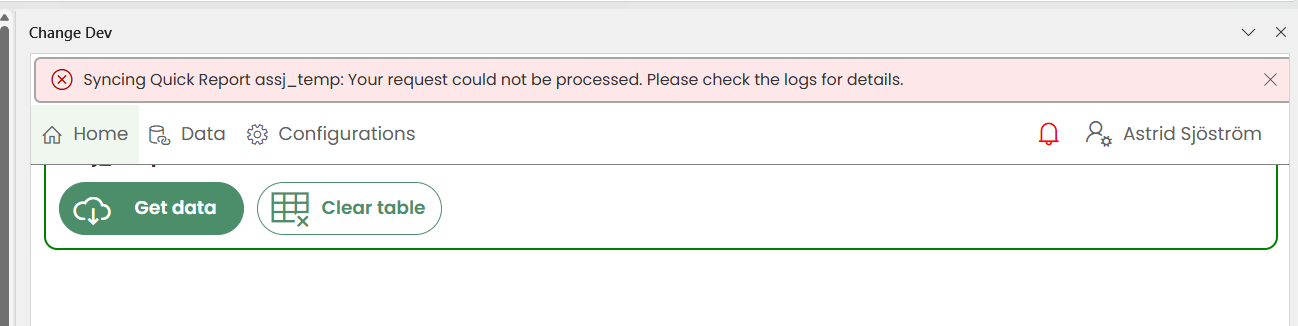
- If a quick report has been completely removed from the IFS side, clicking the Sync icon will not remove the corresponding table from the workbook. Instead, an error message will be displayed to inform the user of the issue.
Configurations Section
Note: This tab is only available for template creators.
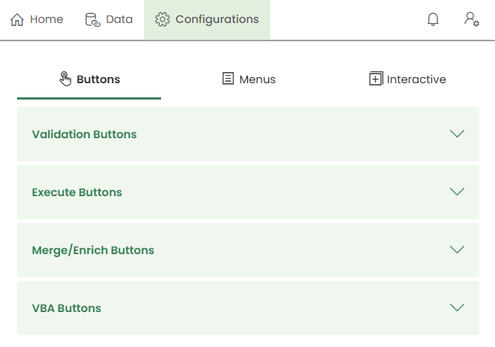
This guide describes the Configurations area of the Addovation Change add-in for Excel, covering how to set up Buttons, Menus, and Interactive features that drive data validation, execution, enrichment, and drilldown navigation within your workbook.
The Configurations area is organized into three tabs, shown at the top of the screen:
- Buttons
- Validation
- Execute
- Merge/Enrich
- VBA
- Menus
- Available Buttons
- Groups
- Interactive
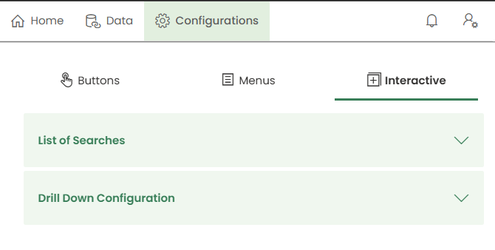
- List of Searches
- Drilldown Configuration
- Drilldown Configuration — with Documents
1. Buttons
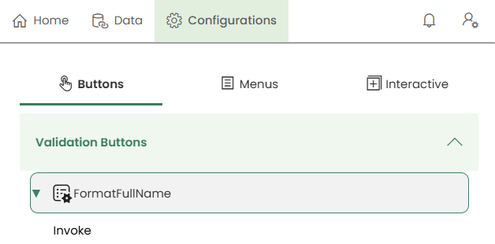
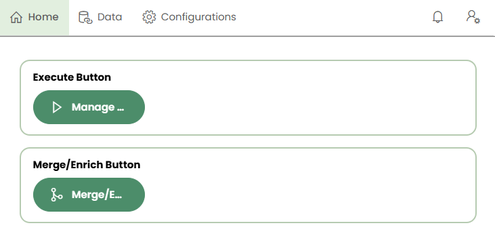
Buttons let you attach custom actions to your workbook that appear in the Home tab, giving end users a simple, repeatable way to run validations, execute multi-step operations, merge data, or trigger VBA logic.
1.1 Validation
Validation buttons let you run a custom function against your data before any changes are pushed, so that only rows passing your business rules are sent through.
How it works:
- Add a function and mark it as a validation function.
- Select the block column where the result will be written. This can be the same as the response column.
- When the button is clicked, the validation function runs before any insert, update, or delete operation.
- The function writes a result of OK or FAIL to the response/block column for each row.
- On push:
- Rows marked OK are included and processed.
- Rows without an OK result (including FAIL or blank) are ignored and excluded from the push.
This ensures that only data meeting your validation criteria is ever inserted, updated, or deleted.
1.2 Execute
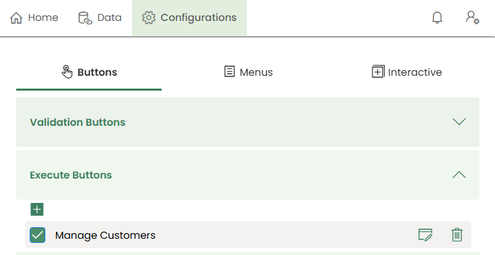
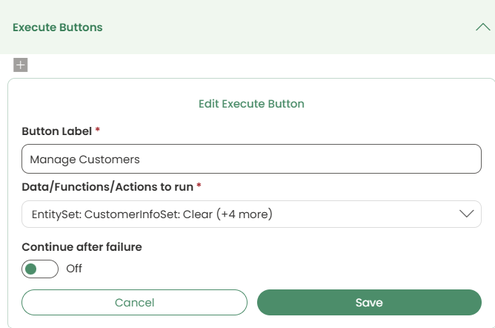
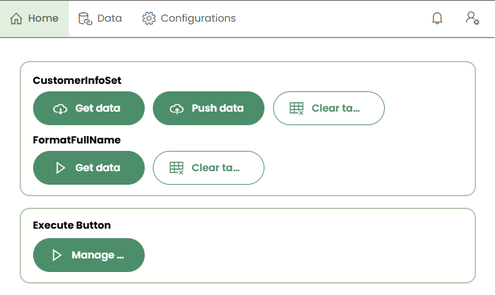
Execute buttons group multiple operations into a single, one-click action.
How it works:
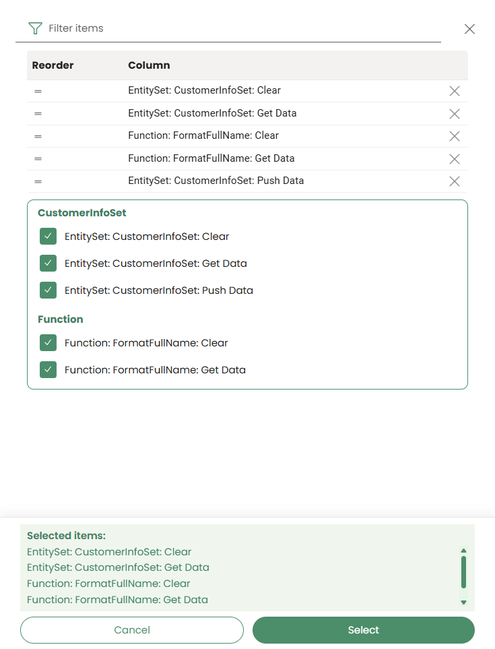
- Combine operations such as Clear, Get, Push, and Invoke into one Execute button.
- This allows users to perform a complex, multi-step operation without running each step manually.
- When configuring the button, you can:
- Select which operations apply to the current workbook.
- Arrange the selected operations in the order they should run (execution order).
This is useful for standardizing repeated workflows so users always run steps in the correct sequence.
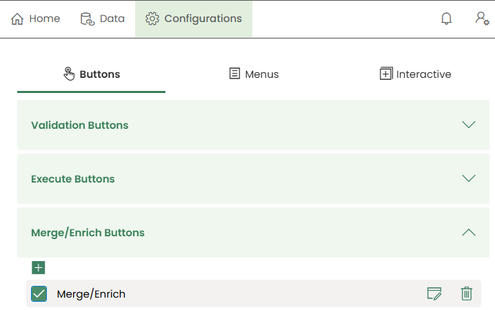
1.3 Merge/Enrich
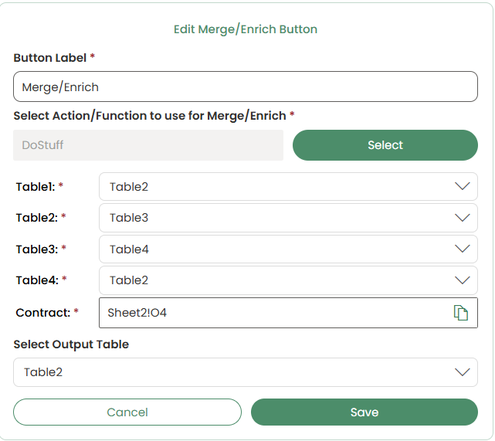
Merge/Enrich buttons let you combine or modify table data using configured actions or functions.
How it works:
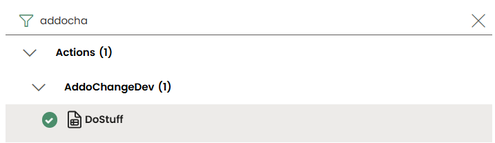
- Select the actions or functions that support merge/enrich operations.
- Multiple input types and any number of inputs are supported.
- Define an output table — the destination for the merged or enriched data.
- The output can target any available table or input in the workbook.
This feature is useful when data from multiple sources or functions needs to be consolidated into a single working table.
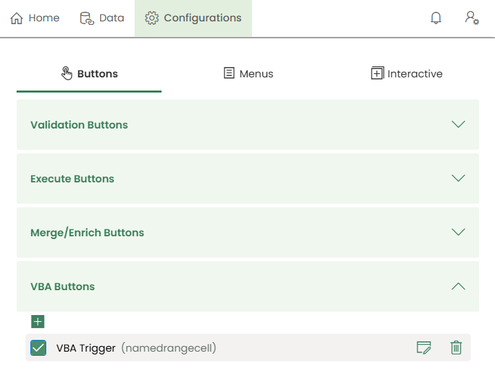
1.4 VBA
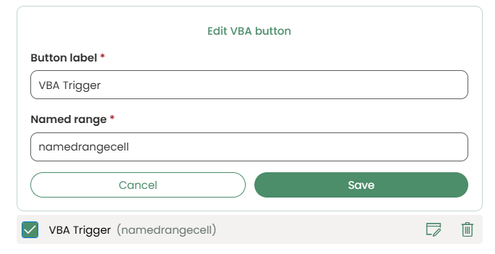
VBA buttons connect a button to a named range in the workbook, allowing VBA scripts to react to button clicks.
How it works:
- Create a VBA button with a reference to a named range.
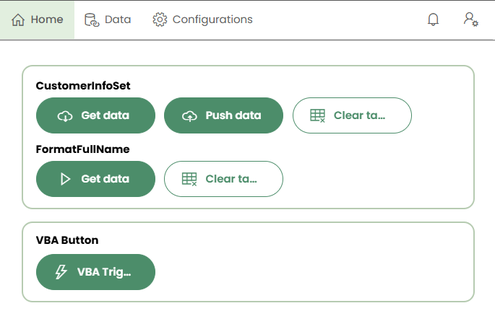
- The VBA button appears in the Home tab.
- When clicked, the add-in updates the named range's value based on its current type:
- Number → the value is incremented.
- Date → the date is incremented.
- Boolean → the value is set to
TRUE.
- Any VBA scripts in the workbook can read and respond to changes in this named range, allowing custom logic to be triggered from the button click.
2. Menus
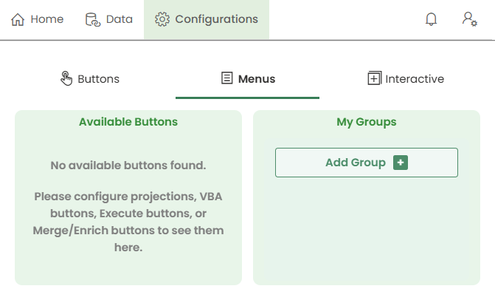
Menus control how configured buttons are organized and surfaced to users in the Home tab.
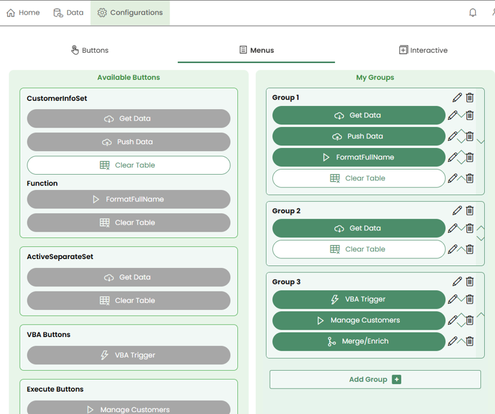
2.1 Available Buttons
This view lists all actions currently available in the workbook — i.e., every button that has been configured and can be used.
2.2 Groups
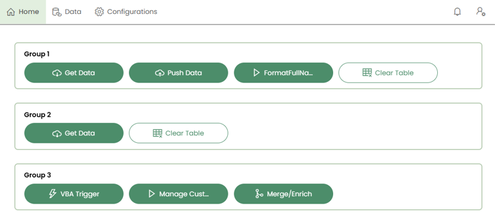
Groups let you categorize the available actions in a workbook for easier navigation.
- Configured groups appear in the Home tab.
- Grouping helps organize buttons logically (e.g., by function, process stage, or data type) so users can find the right action quickly.
3. Interactive
Interactive features add dynamic, in-worksheet lookups and navigation between related datasets.
3.1 List of Values (LOV)
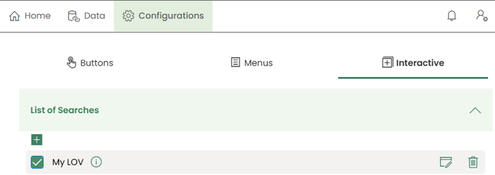
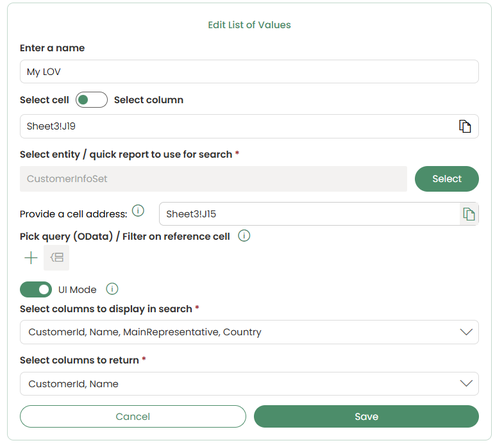
A List of Values (LOV) creates a searchable list directly in the worksheet, allowing users to find and select data without leaving Excel.
How it works:
- Create a List of Values (LOV) based on either a Quick Report or an Entity Set.
- Select the LOV field — the cell or column the LOV is attached to.
- Select a filter cell, and optionally define an additional OData filter for more precise queries.
- Select which columns to display in the LOV results.
- Select the output columns to return once a value is selected.
- Map output columns to specific cells on the worksheet using named ranges.
Behavior:
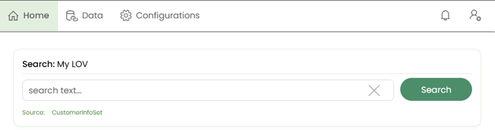
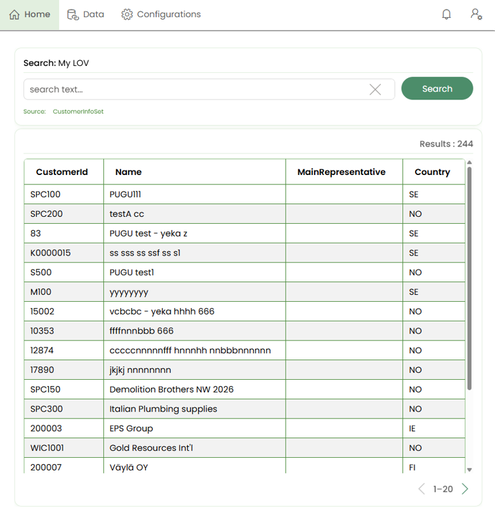
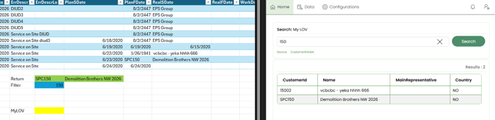
- When a user's focus is on the LOV field while in the Home tab, matching data is populated in the Home tab automatically.
- If the filter field contains a value, the LOV results are filtered accordingly.
- When the user selects a row from the LOV results, the corresponding output column values are written into the mapped cells.
3.2 Drilldown Configuration
Drilldown configuration establishes a parent-child relationship between two datasets, allowing users to navigate from a selected item into related, more detailed data (for example, from a Customer record into its Customer Contacts).
Supported sources: Both Quick Reports and Entity Sets.
How it works:
- Add the relevant tables to Change as usual.
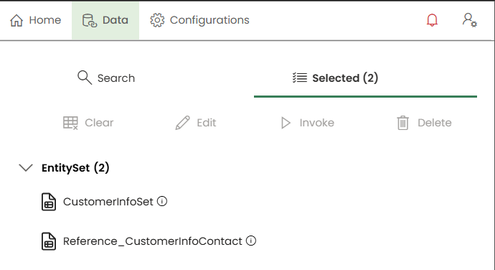
- Create a drilldown from the Configurations menu.
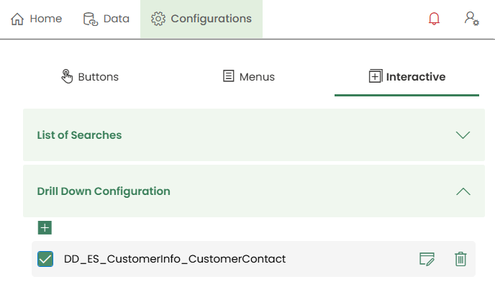
- Select the source (parent) table.
- Set the trigger column(s) on the source table — the column(s) that, when selected, initiate the drilldown.
- Select the target (child) table.
- Define the column mapping between the source and target tables.
- A cell (rather than a source column) can also be mapped to a target column, where needed.
- Configure Auto Focus:
- ON — the user is automatically navigated to the sheet/table containing the target dataset.
- OFF — the target data is populated, but the user's view/focus does not change automatically.
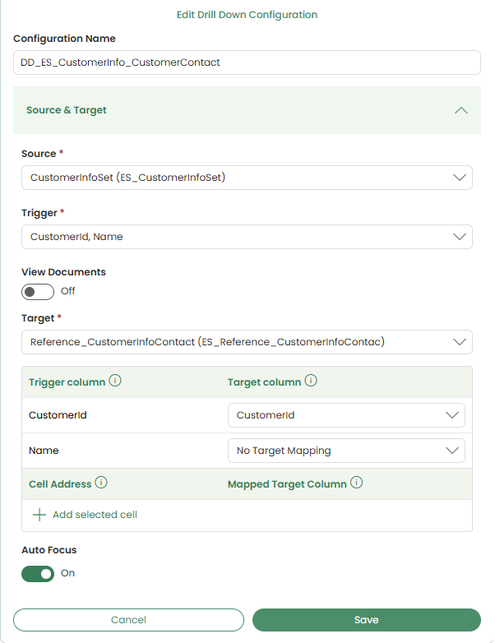
Behavior: When a user selects a cell in a trigger column on the source dataset, the target dataset is populated based on that selection, following the configured mapping and focus behavior.
3.3 Drilldown Configuration — with Documents
This extends standard drilldown configuration to support viewing documents attached to a selected entity, instead of (or in addition to) drilling into a related table.
How it works:
- Set up the source dataset as described in Drilldown Configuration.
- Enable or disable View Documents:
- OFF — the drilldown behaves normally, navigating to the configured target table/columns.
- ON — the drilldown switches to Document View mode, allowing the user to select a row or cell and view documents attached to that entity (for example, viewing documents connected to a Project).
- Optionally configure the document window title and button label.
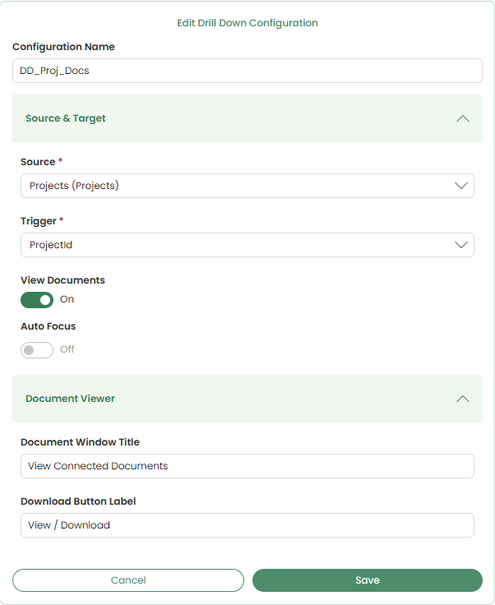
Behavior:
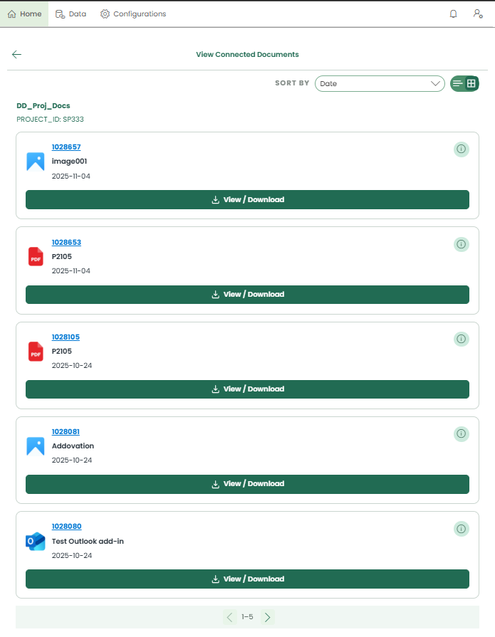
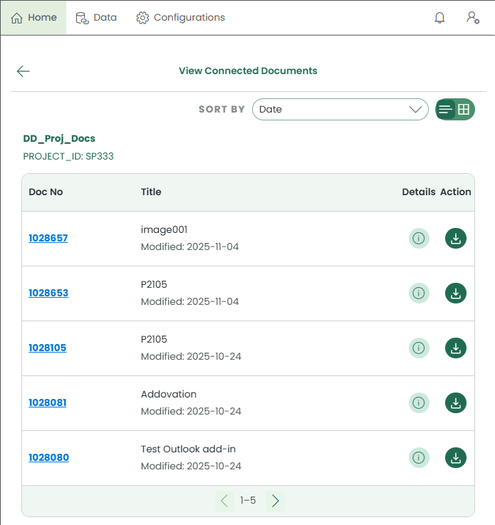
- Once a trigger cell is selected, the Home tab updates to show the documents attached to that entity.
- Documents can be displayed in list view or card view.
- Documents can be ordered by:
- Name
- Modified date
- Document number
- File type
- Documents can be filtered using a search field.
- Results support paging for larger sets of documents.
- Users can view document details and:
- Open in IFS
- View or Download the document
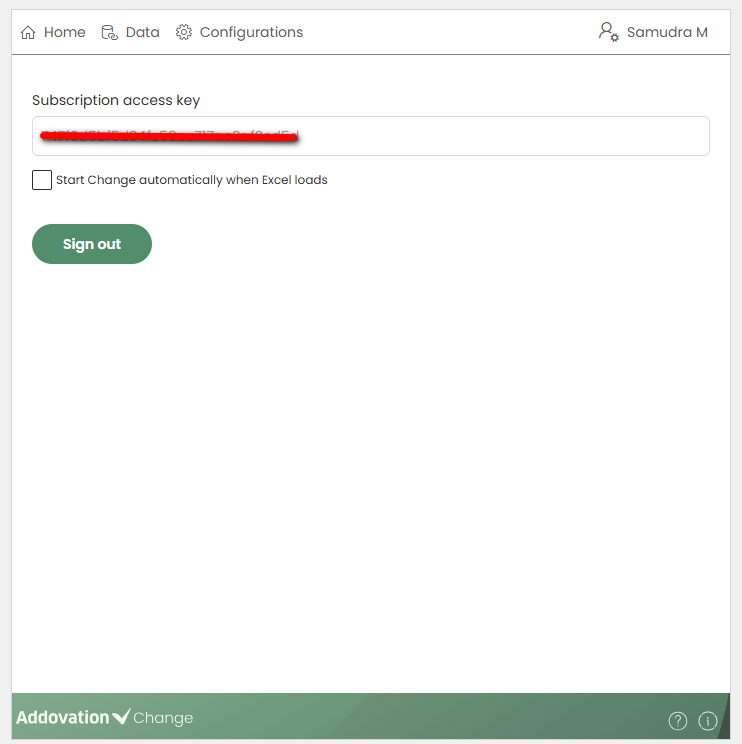
User Account Tab
- Clicking the User Account tab allows users and creators to sign out of the application when they are signed in.