Addovation Share for Teams - Setup Guide
Last Updated: 2025-12-26
IFS Configuration
Deploy Projection using Build Place
Refer Technical Documentation For IFS Cloud - docs.ifs.com
Configure IFS Values
There are few configurations required in IFS to support OAS 365 Teams Integration.
Prerequisites
- A service user with granted permission to Teams Integration projections.
Setup a Client
A Client Id along with Secret is required to authenticate end users.
- Sign in to IFS environment
- Go to
Solution Manager>User and Permissions>Identity and Access Manager> Select IAM Client - Select
+(Add New) button - Enter unique
Client ID - Enter a
Description - Enable
Service Accounts - Select service user from the
Username - Click
Okbutton

- Search and select newly created
Client Idfrom IAM Client list.
Note
Client Id is required to configure OAS 365 Teams Integration in Addovation Cloud Portal.
Note
Client Secret is required to configure OAS 365 Teams Integration in Addovation Cloud Portal.
Client Id and Client Secret is available in IAM Client Details
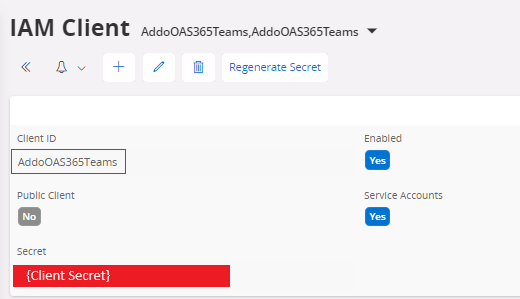
Note
RealmId is required to configure OAS 365 Teams Integration in Addovation Cloud Portal. Realm Id is available in IFS Login URL

Azure Configuration
Resource group
A resource group is a container that holds related resources for an Azure solution. The resource group can include all the resources for the solution, or only those resources that you want to manage as a group.
Note
If you already have a resource group, you could use the existing group.
- Sign into the Azure portal with your Azure account.
- Select
Resource groupsand then selectCreate.
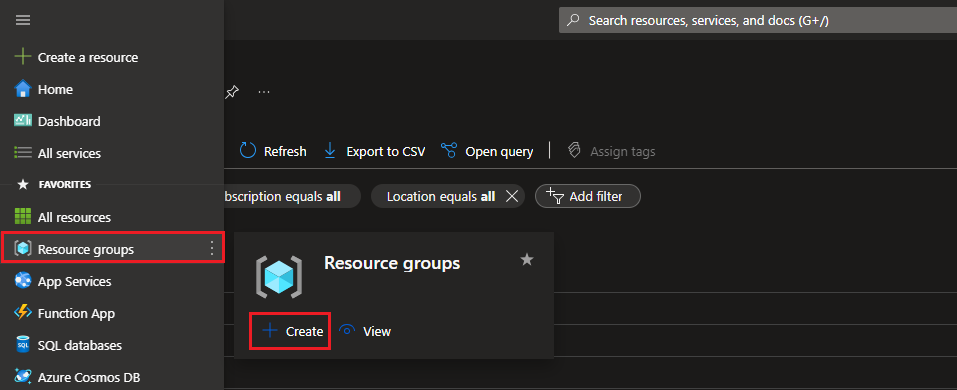
Enter the following values:
Subscription: Select your Azure subscription.Resource group: Enter a new resource group name.Region: Select an Azure location, such as Norway East.
Select
Review+CreateSelect
Create. It takes a few seconds to create a resource group.Select
Refreshfrom the top menu to refresh the resource group list, and then click the newly created resource group to open or select Notification (the bell icon) from the top and selectGo to resource groupto see the newly created resource group.
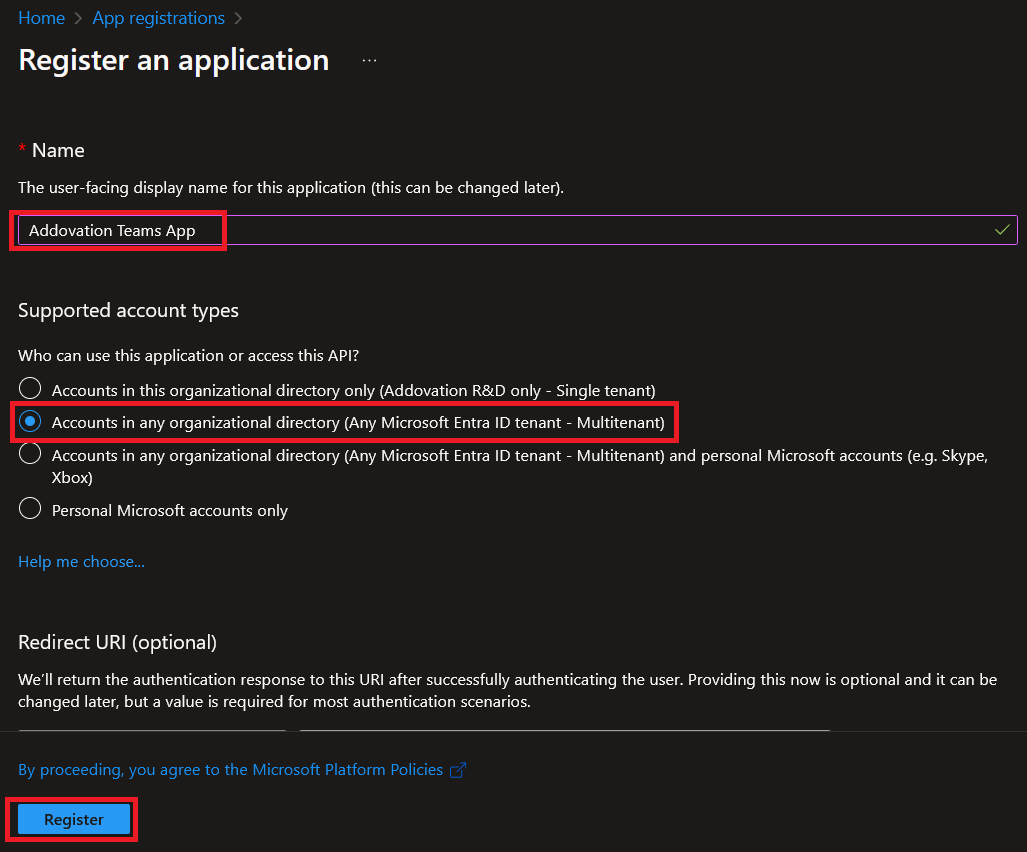
Register New Application in Azure
The Microsoft identity platform performs identity and access management (IAM) only for registered applications. Whether it's a client application like a web or mobile app, or it's a web API that backs a client app, registering it establishes a trust relationship between your application and the identity provider, the Microsoft identity platform.
To register an application
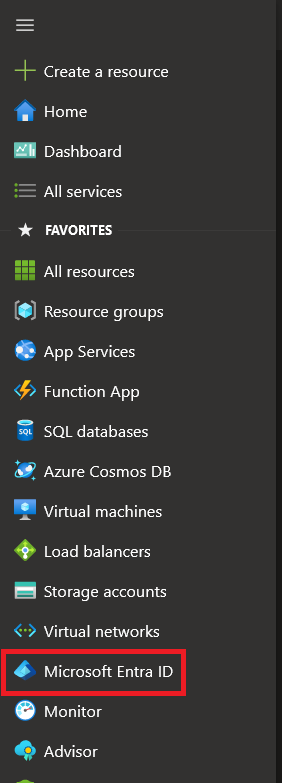
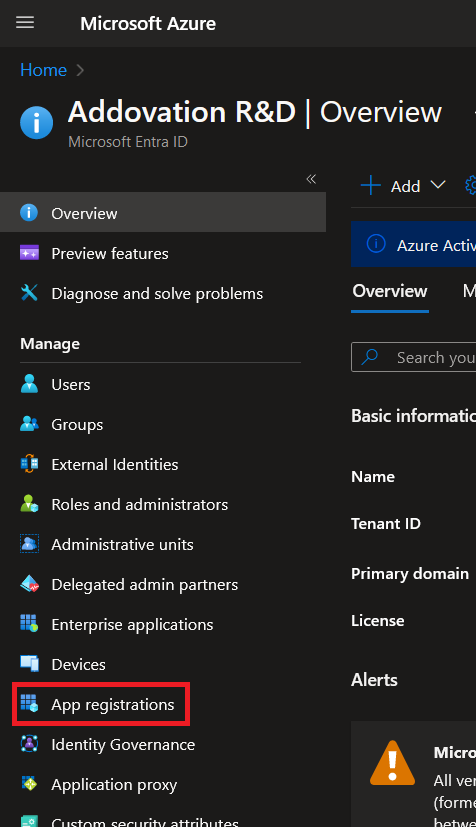
- Select
Microsoft Entra IDand selectApp registrations
- Select
New registrationto add new application

- Provide a unique name to the application.
- Select
Authentication->Add a platform->Web
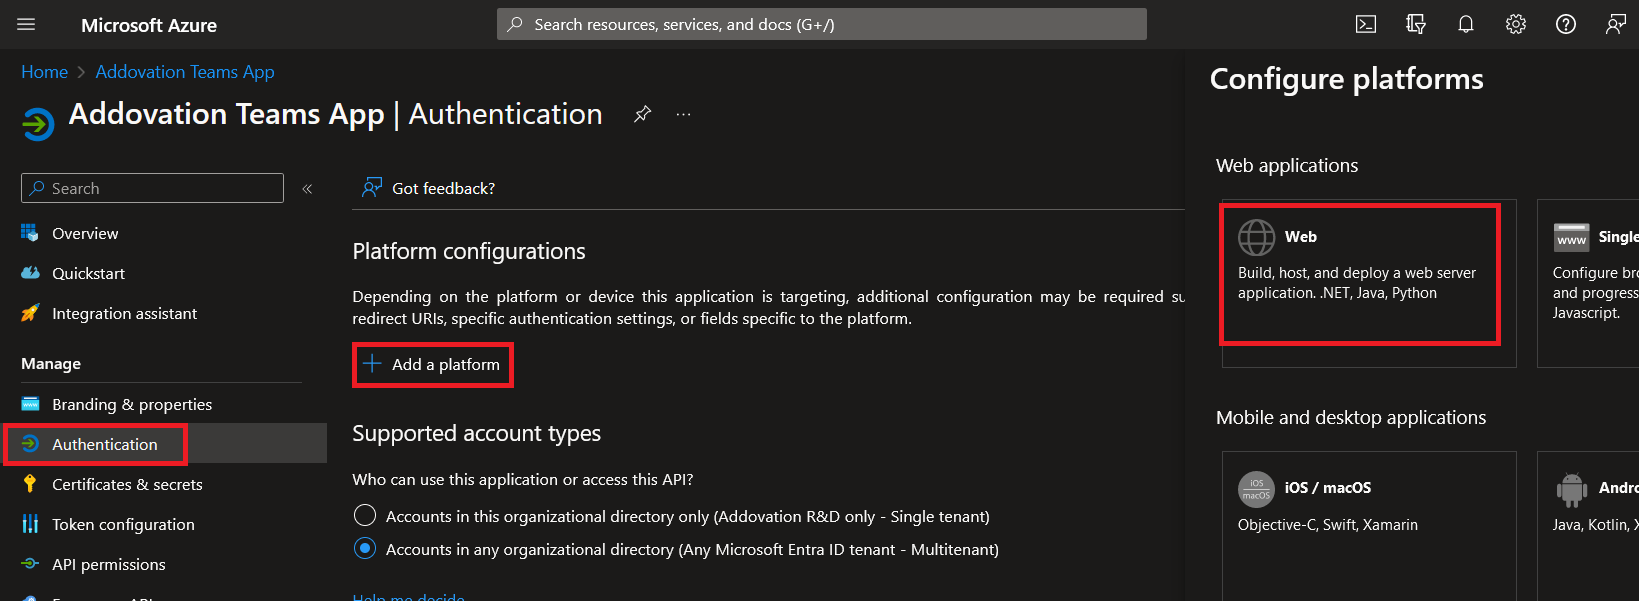
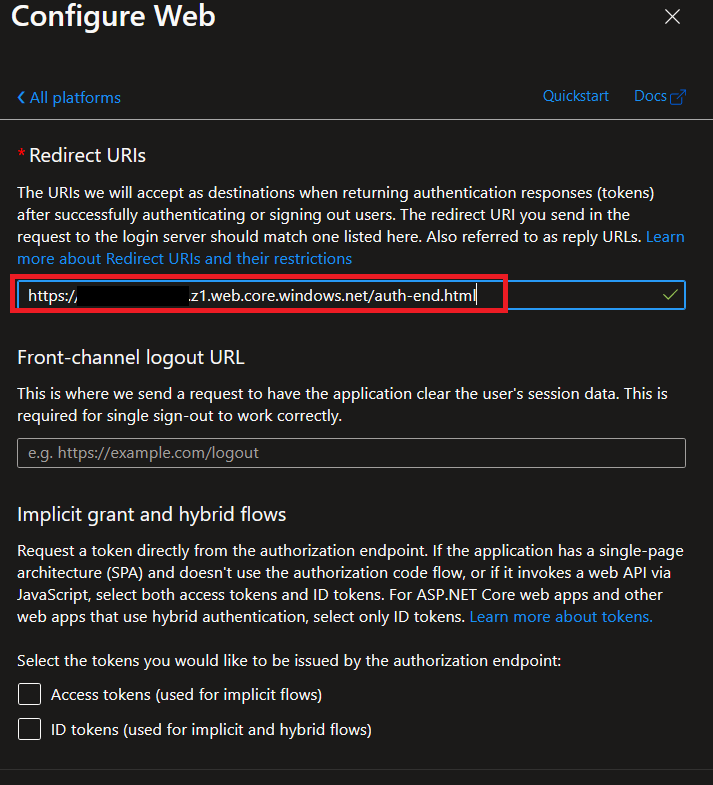
- Configure the redirect URL provided by Addovation and click
Configurebutton.
Once the web app is registered, the next step is to register the single-page application.
- Select
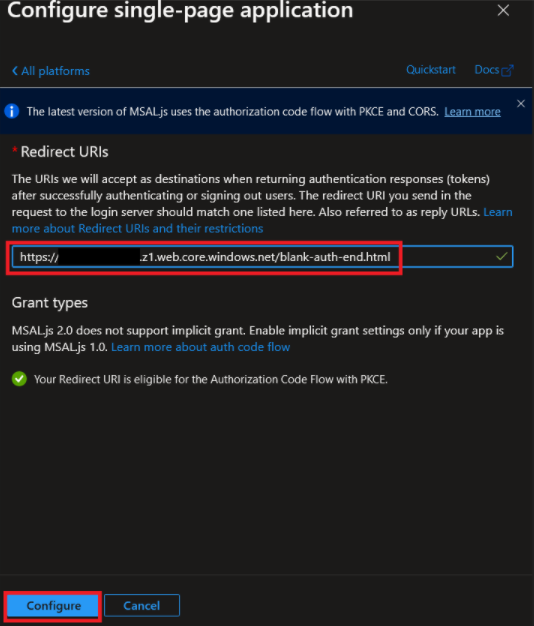
Authentication->Add a platform->Single-page application
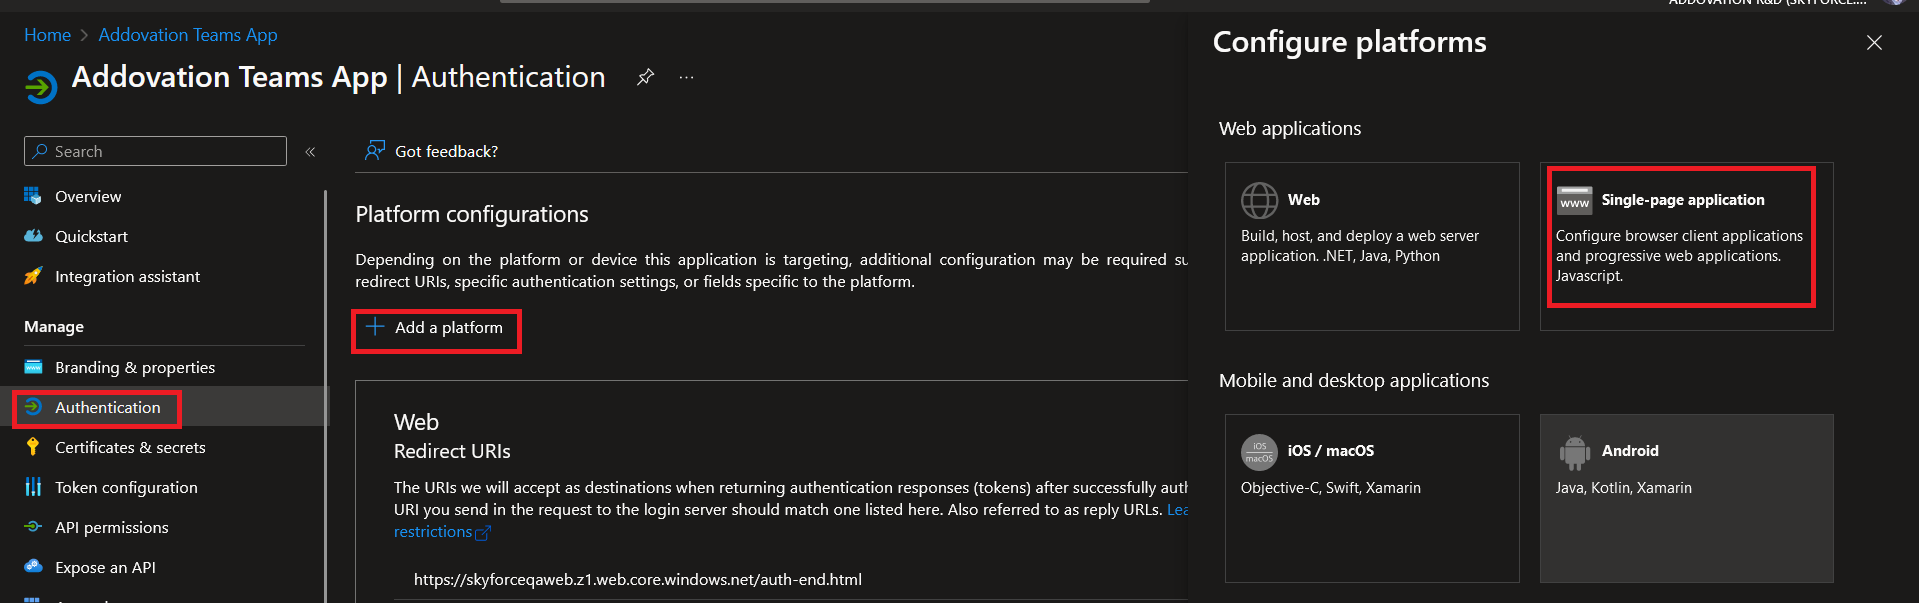
- Configure the redirect URL provided by Addovation and click
Configurebutton.
Add Client Secret
- Go to
Certification & Secret--> SelectClient secretstab --> ClickNew client secret
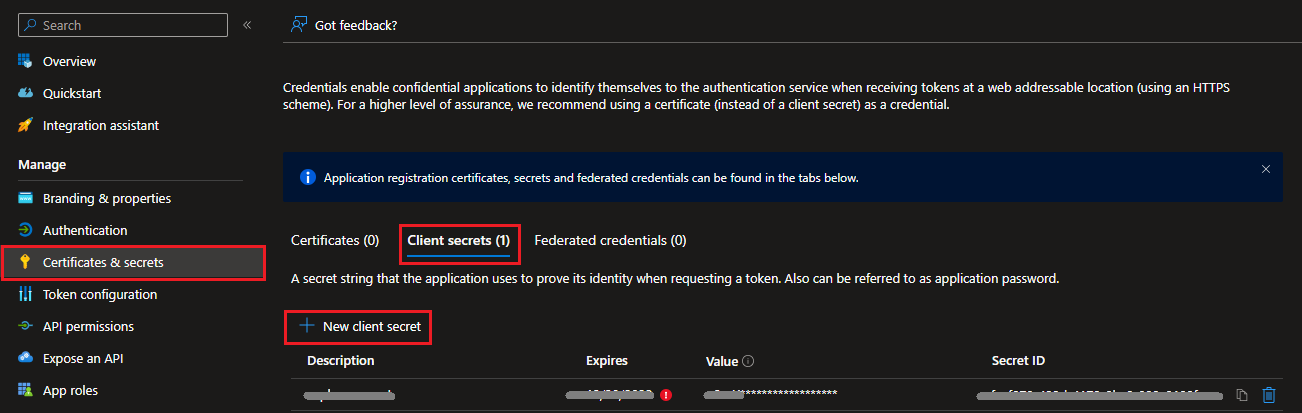
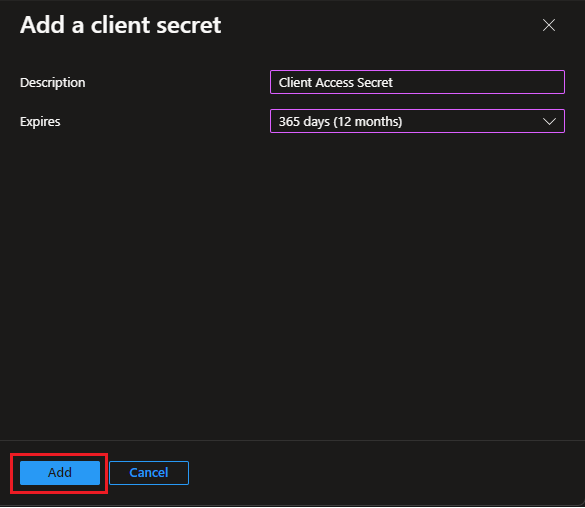
- Provide a secret name
- Set expires in
- Click on
Savebutton
Note
Client Secret is required configure the Teams Integration in Addovation Cloud Portal.
Important
Once you created client secret save it for future use. The secret has one time access

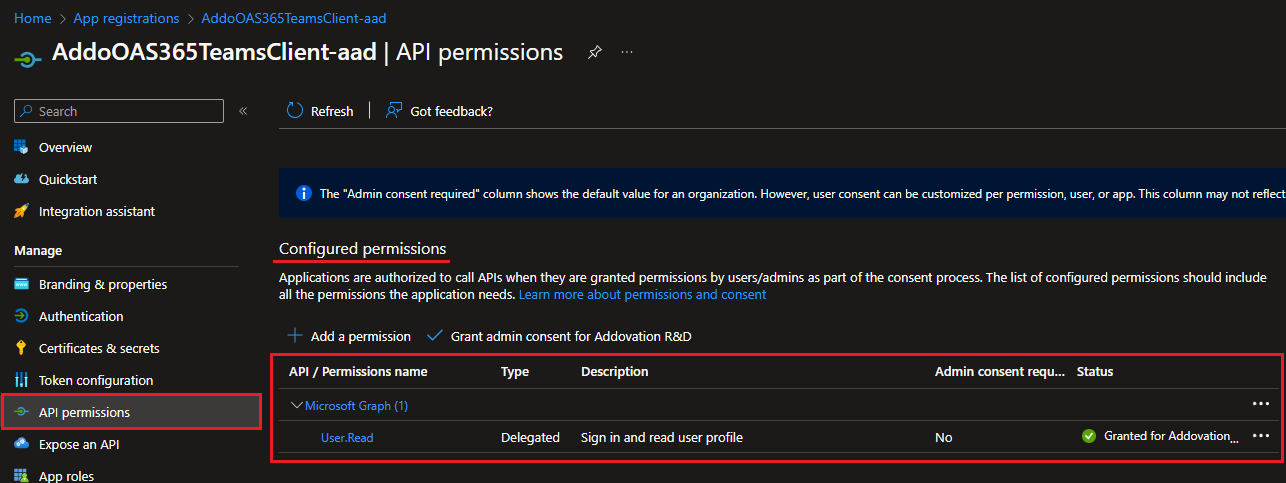
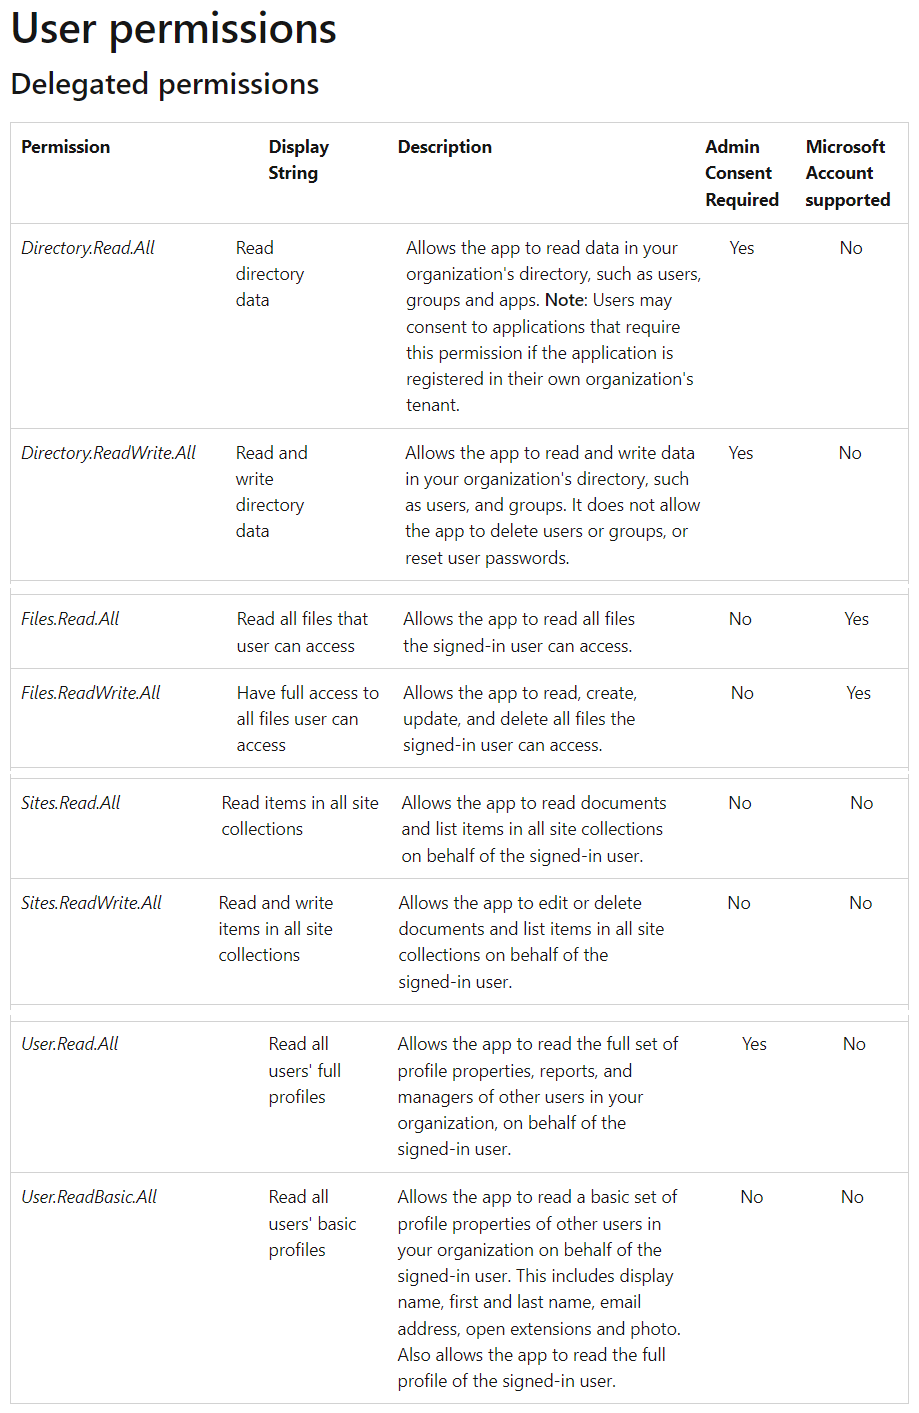
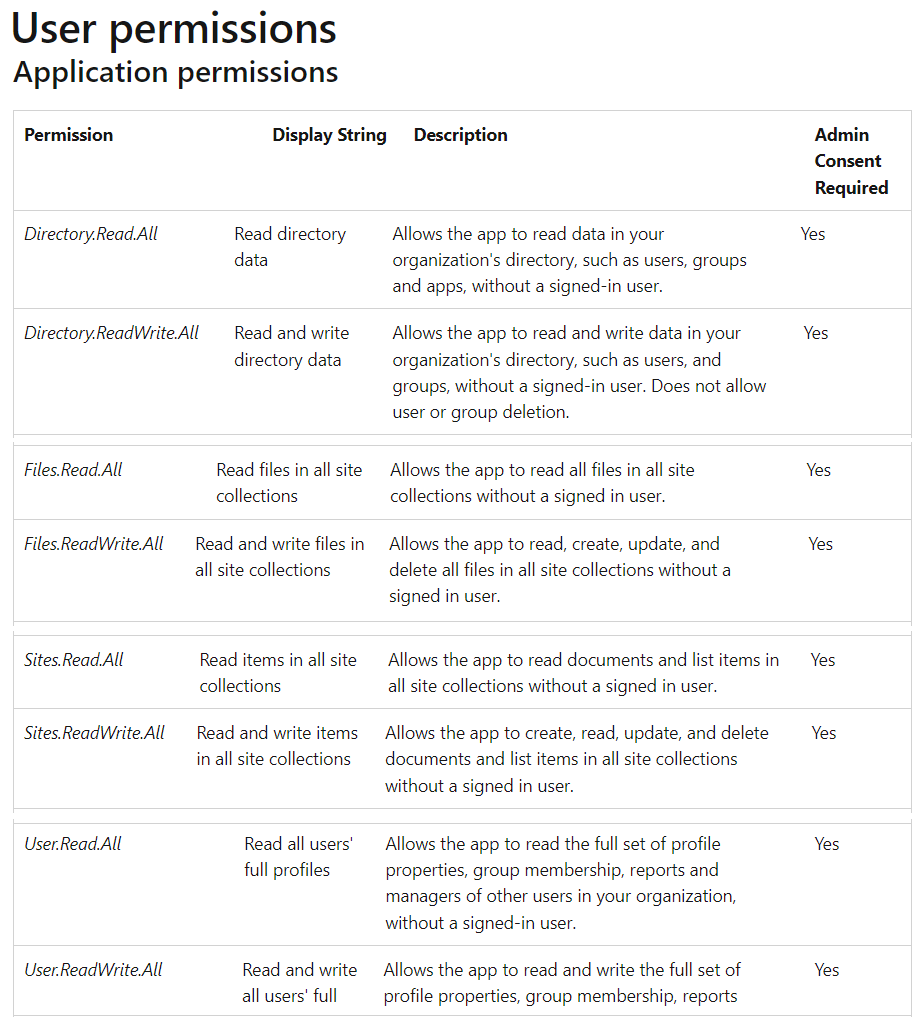
Add API Permissions
API Permissions are required to define level of access to the user provided through registered App in Azure AD.
- Go to
API Permission-> Add a permission
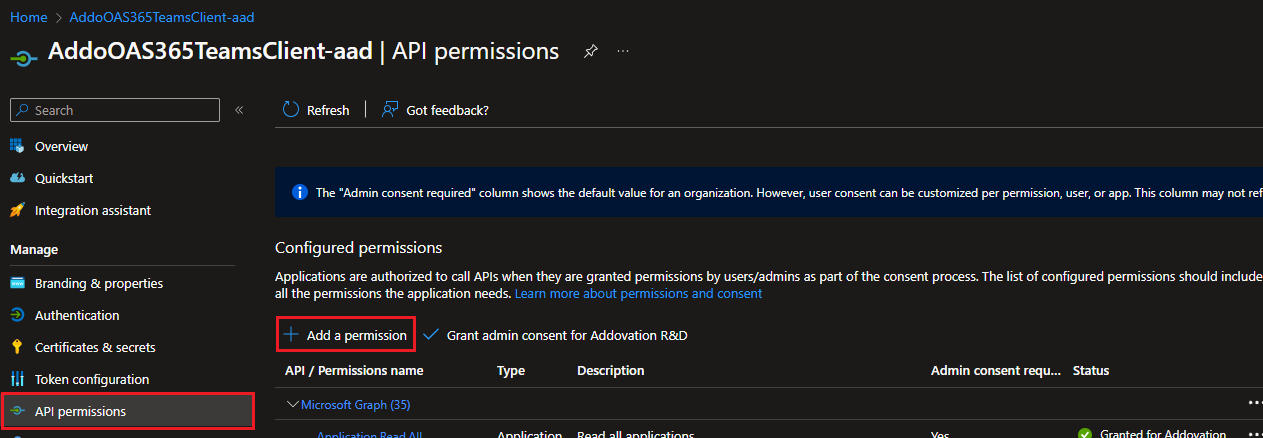
- Select
Microsoft Graph

- Select type between Delegated permissions and Application permissions
- Search required permission name
- Select the permission name(s)
- Click Add permissions
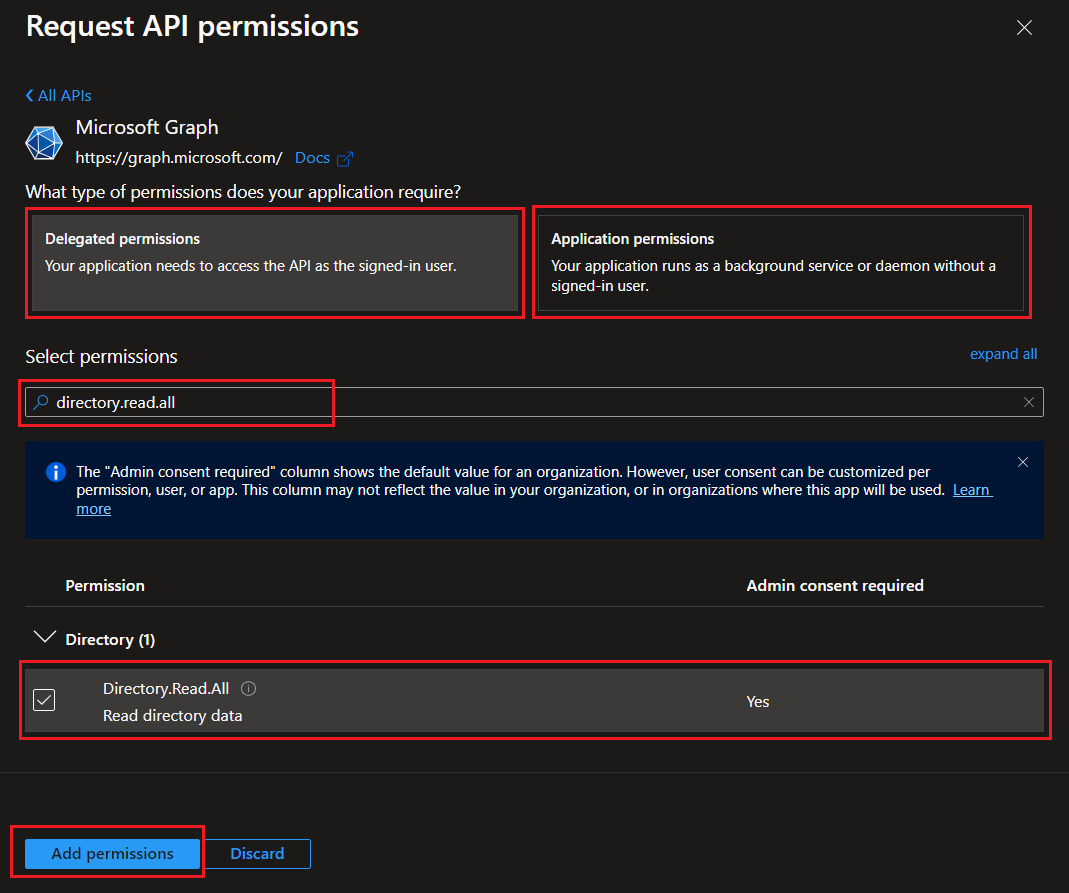
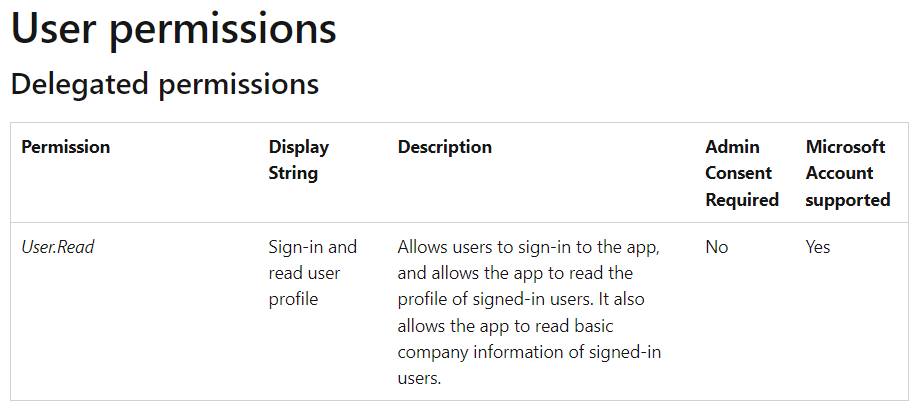
For an app to access data in Microsoft Graph, the user or administrator must grant it the permissions it needs. This topic lists the delegated and application permissions exposed by Microsoft Graph.
Refer Microsoft Graph permissions for more details.
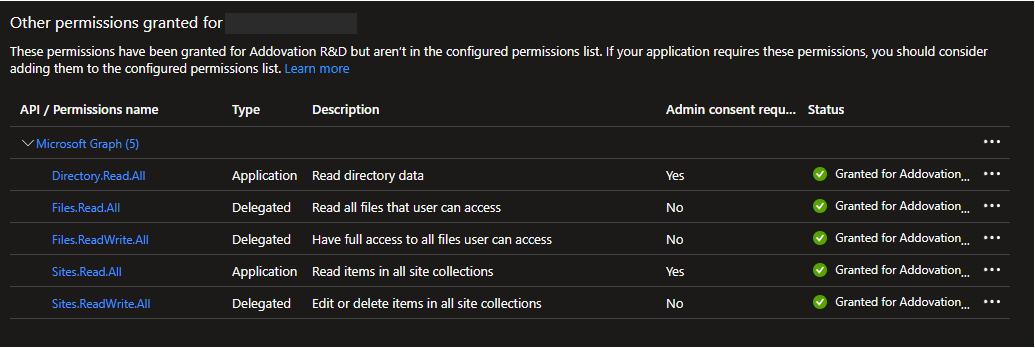
- Add following API permissions to the Application and grant admin consent for tenant.
Deploy Teams Integration App
To integrate the Teams Integration App with MS Teams, you need to upload it to the MS Teams Admin portal to make it available as an app in MS Teams.
- Login to MS Teams admin dashboard
- Select
Teams apps->Manage apps->Upload new app
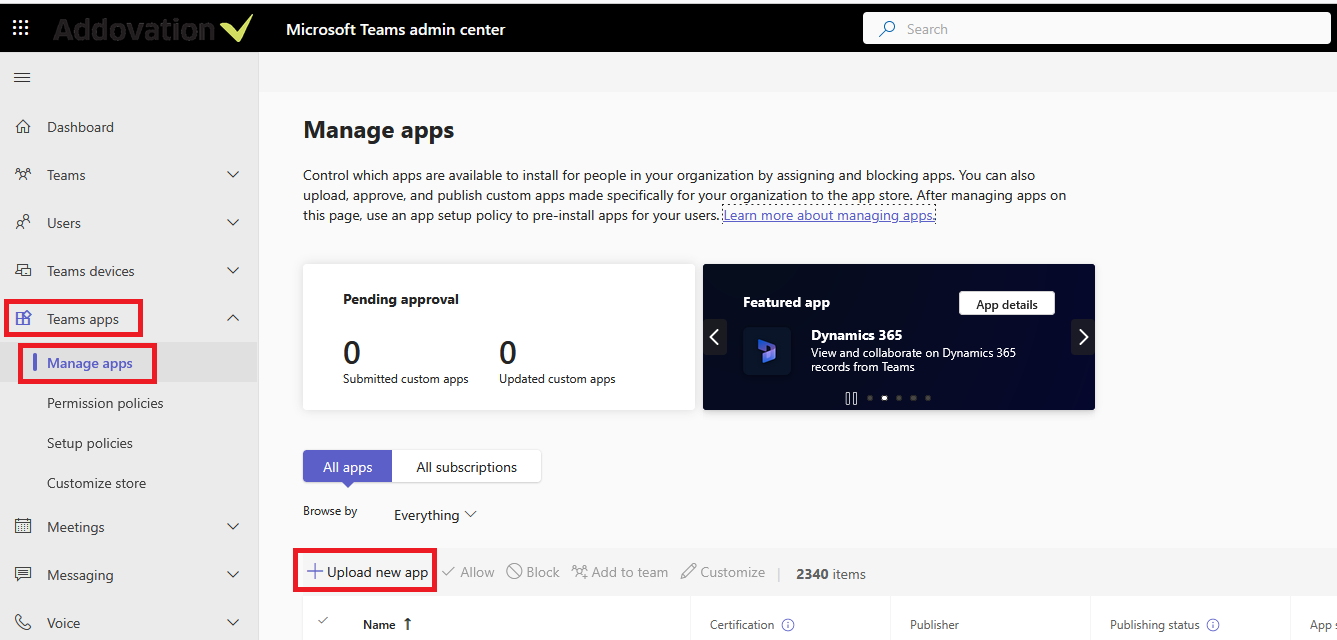
- Upload the app package file provided by Addovation.
App Installation
Teams Apps store
- Open
Microsoft Teamsand log in to your account.
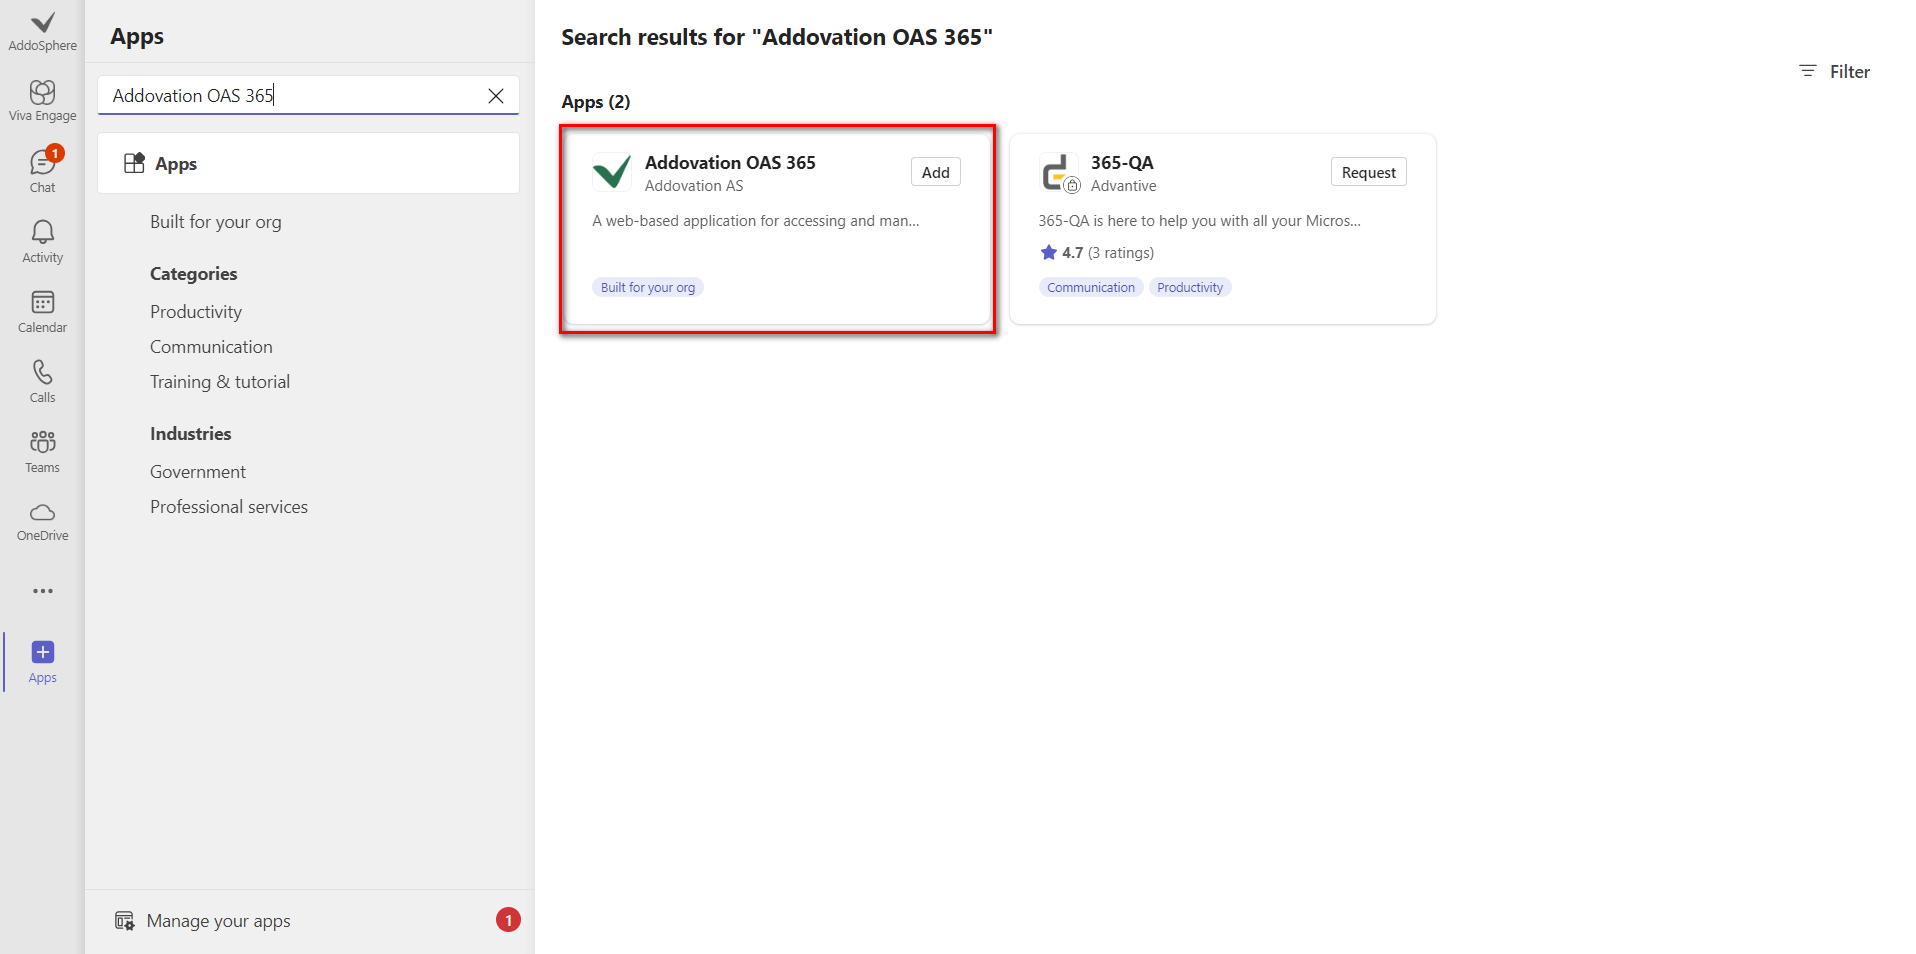
In the left sidebar, click on the
Appsicon. It may appear as a plus sign inside a square and be labeled asApps.In the Apps section, you can browse through the featured apps, or you can use the search bar to find the
Teams Channel App.

- Click on Addovation OAS 365 button
Now It will Open Addovation OAS 365 window as below.
Click on Add to a team button
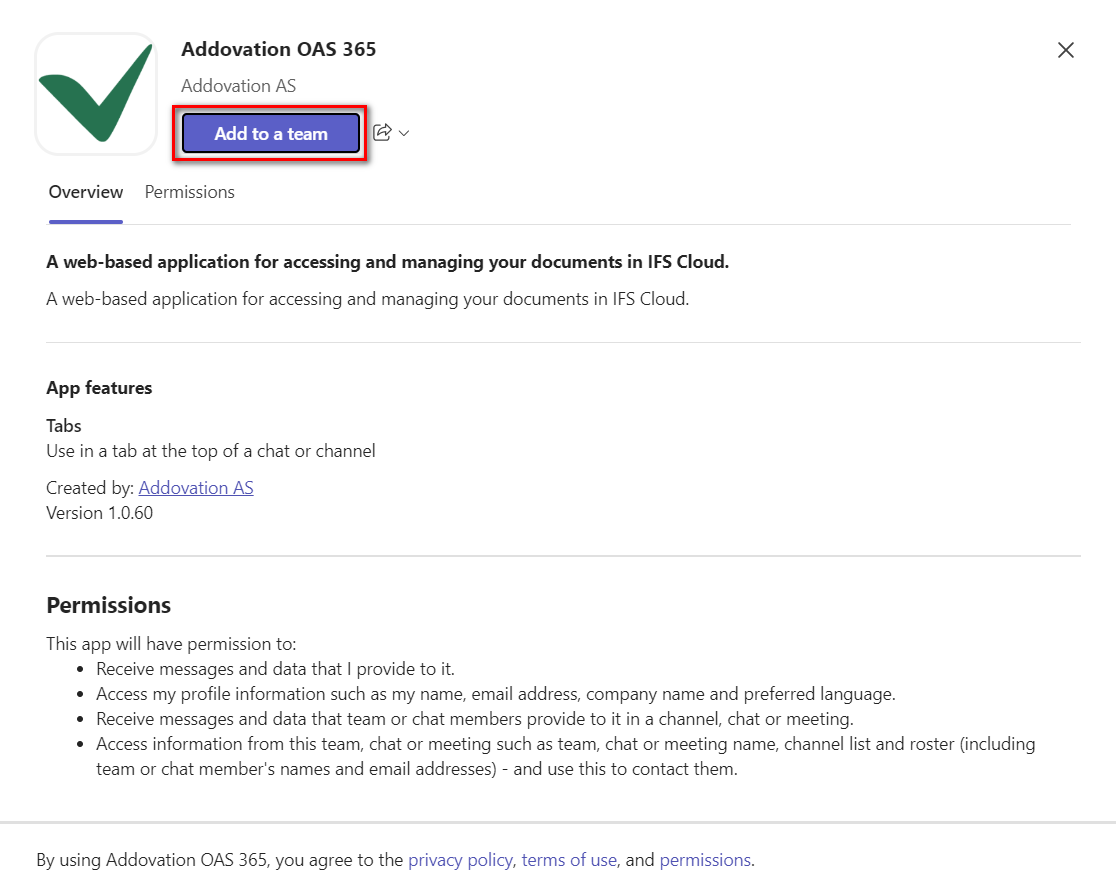
- Select your
channelfrom the dropdown.
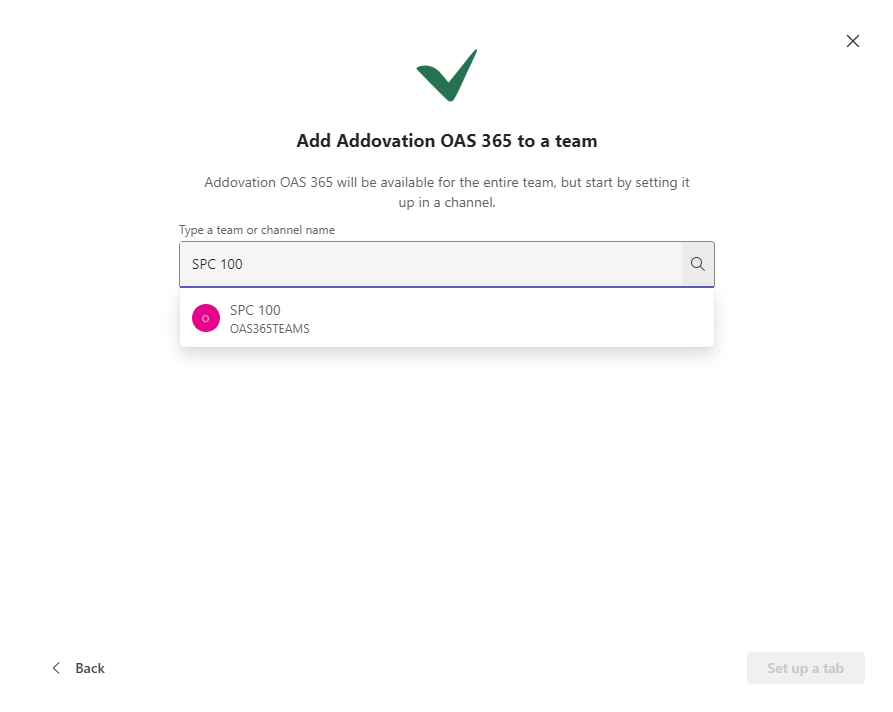
- Click Set up a tab button.
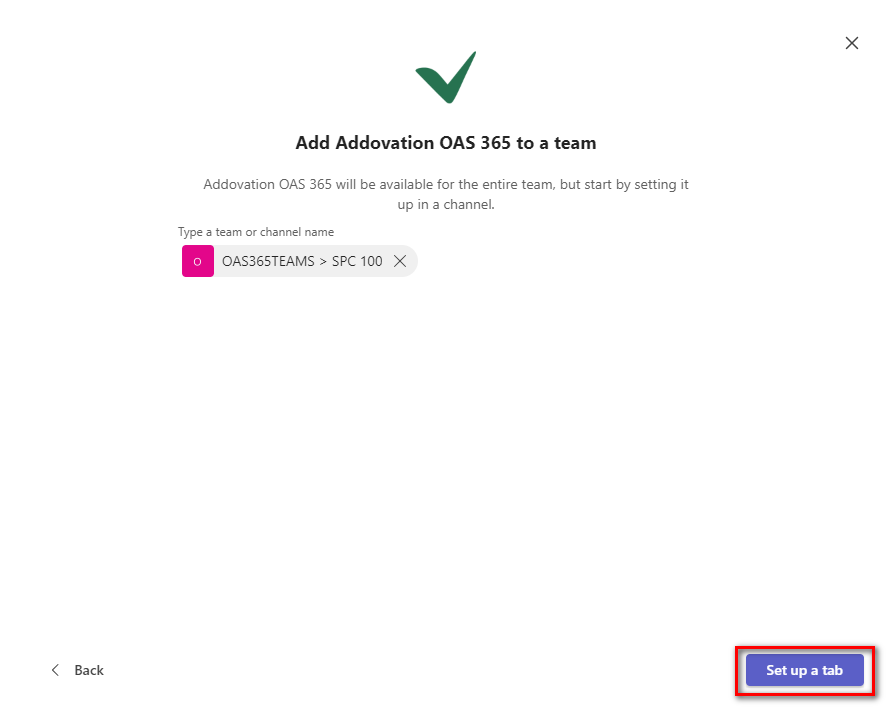
A tab for OAS 365 will appear in the channel's menu.
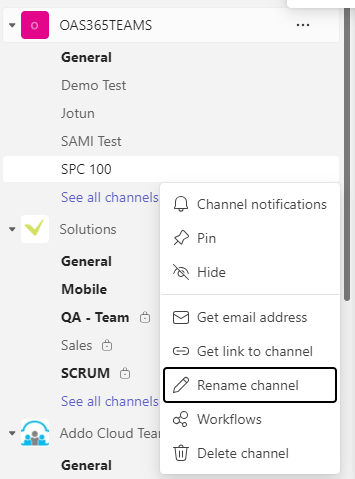
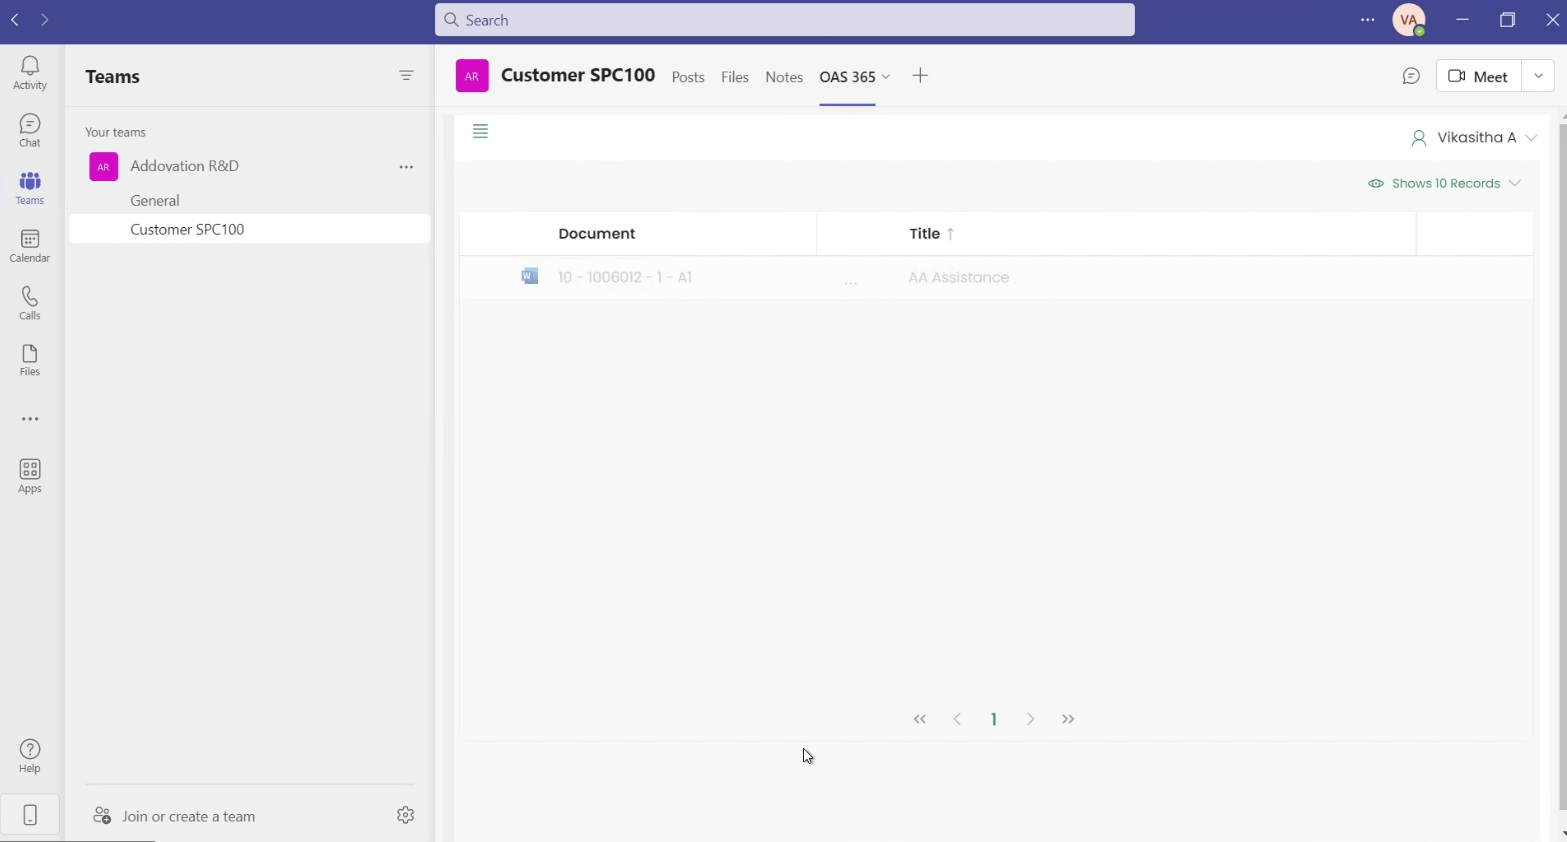
Configure the Share tab (channel)
Each channel can have its own separate Share tab app and configuration. For example, one channel may be just customer focused, while another may be project and customer focused. The channel configuration determines what the end-user sees.
- Go to the Teams channel's configuration menu (the "..." button to the right of the channel name) and select 'Rename channel' from the context menu to update the channel description.
In the channel's description field put your preferred filter (based on one or more logical units in IFS Cloud).
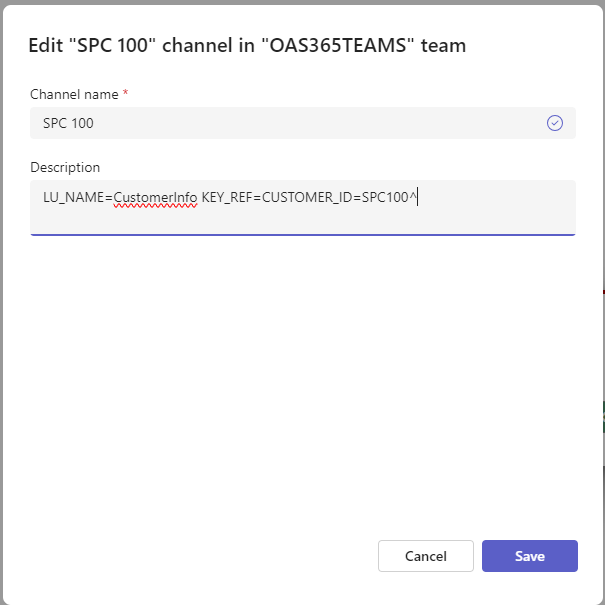
For example, documents connected to the customer ID SPC100:
LU_NAME=CustomerInfo KEY_REF=CUSTOMER_ID=SPC100^
For example, documents connected to the customer SPC100, and work order #76, and Part Revision #38134090:
LU_NAME=ActiveWorkOrder KEY_REF=WO_NO=76^,
LU_NAME=CustomerInfo KEY_REF=CUSTOMER_ID=SPC100^,
LU_NAME=EngPartRevision KEY_REF=PART_NO=38134090^PART_REV=R01^
- After having configured the channel you can open the
Teams Channel Appand see the documents connected to your logical units.
Network Configurations
Click here to read details about network configurations.