Addovation Share - Setup Guide
Last Updated: 2024-11-15
IFS Configuration
Deploy Projection using Build Place
Refer Technical Documentation For IFS Cloud - Build Place Deliveries
Configure IFS Values
There are few configurations required in IFS to support Addovation Share.
Prerequisites
- A service user with granted permission to Teams Integration projections.
Setup a Client
A Client Id along with Secret is required to authenticate end users.
- Sign in to IFS environment
- Go to
Solution Manager>User and Permissions>Identity and Access Manager> Select IAM Client - Select
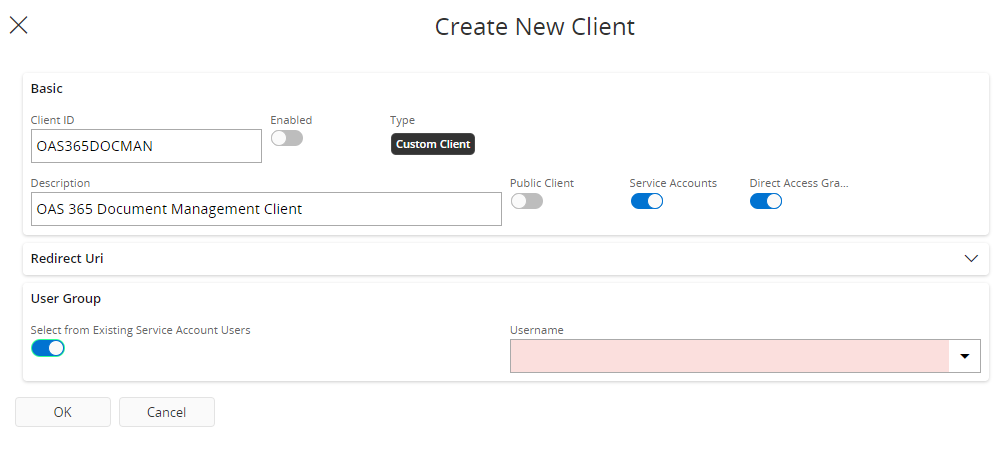
+(Add New) button - Enter unique
Client ID - Enter a
Description - Enable
Service Accounts - Select service user from the
Username - Click
Okbutton
- Search and select newly created
Client Idfrom IAM Client list. - Select edit button from top menu

- Select
+(Add) button inRedirect Urisection. - Enter your client Uri with
redirectat the end.
{your uri}/redirectEx: https://share.addovation.com/redirect
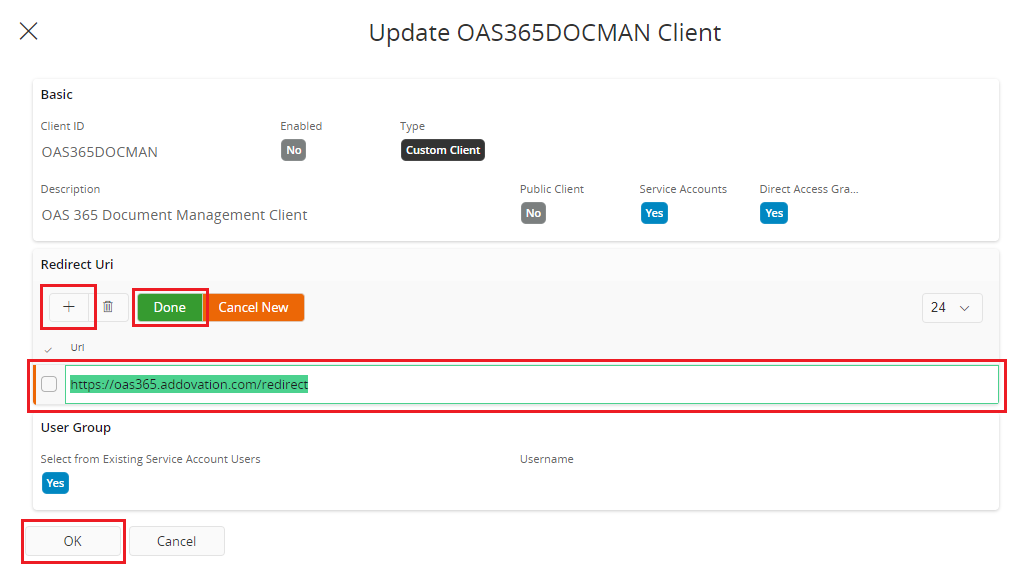
- Select
Donebutton and thenOkbutton
Note
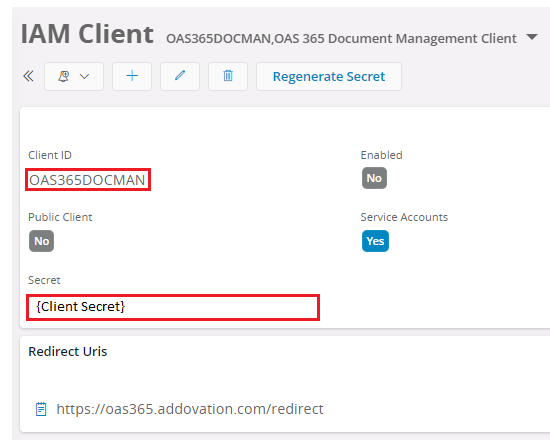
Client Id is required to configure Addovation Share in Addovation Cloud Portal.
Note
Client Secret is required to configure Addovation Share in Addovation Cloud Portal.
Client Id and Client Secret is available in IAM Client Details
Note
RealmId is required to configure Addovation Share in Addovation Cloud Portal. Realm Id is available in IFS Login URL

Azure Configuration
Resource group
A resource group is a container that holds related resources for an Azure solution. The resource group can include all the resources for the solution, or only those resources that you want to manage as a group.
Note
If you already have a resource group, you could use the existing group.
- Sign into the Azure portal with your Azure account.
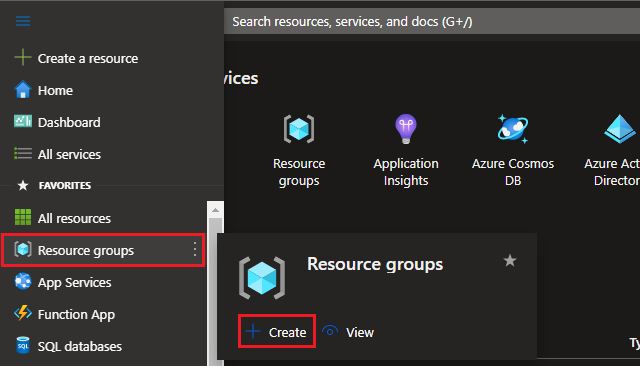
- Select
Resource groupsand then selectCreate.
Enter the following values:
Subscription: Select your Azure subscription.Resource group: Enter a new resource group name.Region: Select an Azure location, such as Norway East.
Select
Review+CreateSelect
Create. It takes a few seconds to create a resource group.Select
Refreshfrom the top menu to refresh the resource group list, and then click the newly created resource group to open or select Notification (the bell icon) from the top and selectGo to resource groupto see the newly created resource group.
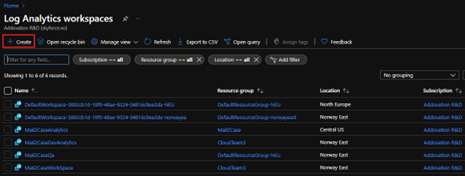
Create Log Analytics Workspace
A Log Analytics workspace is a unique environment for log data from Azure Monitor and other Azure services. To create Log Analytics Workspace please follow steps below.
- Click
Log Analytics Workspaces
(Search if Log Analytics is not listed in Azure Services)

- Click
Create.
- Add your details to required fields and click
Review+Create.
![]()

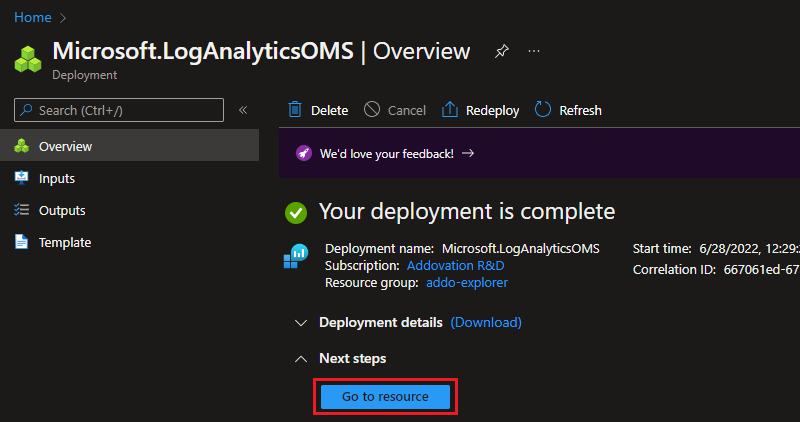
- Click
Go to resourceand theLog Analytics Workspaceis ready to use.
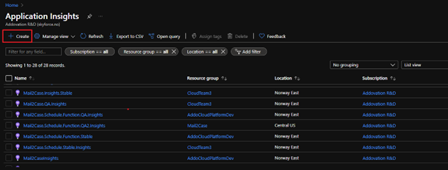
Create Application Insights
Application Insights is a feature of Azure Monitor that provides extensible application performance management (APM) and monitoring for live web apps.
- Go to Azure Portal main page and click
Application Insights.
(Search if Application Insights is not listed in Azure Services)

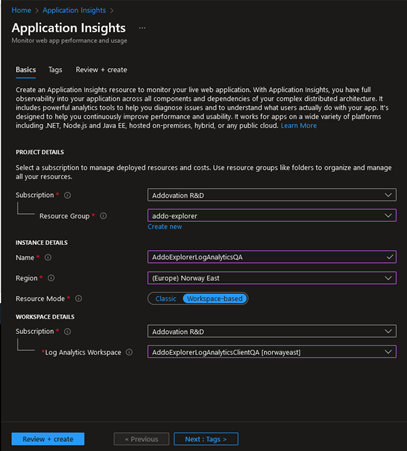
- Click Create.
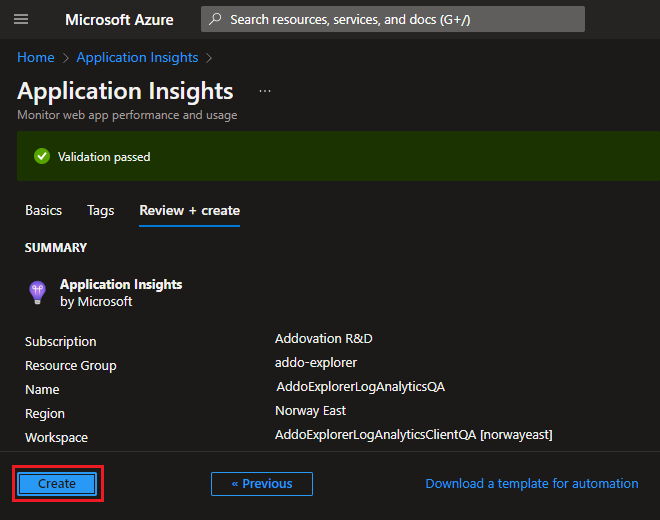
- Fill required fields and select previously created log analytics workspace as below. Now click
Review + Create.
- Click
Create.
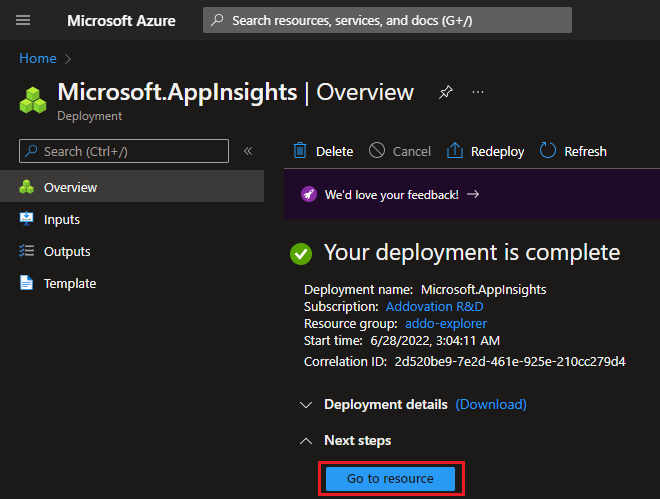
- Click
Go to resource.
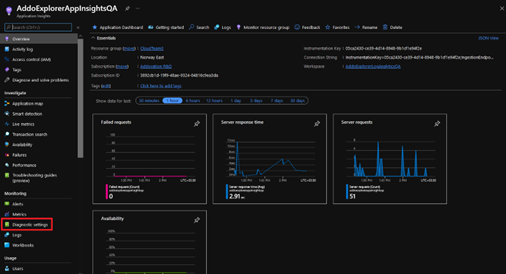
- Click
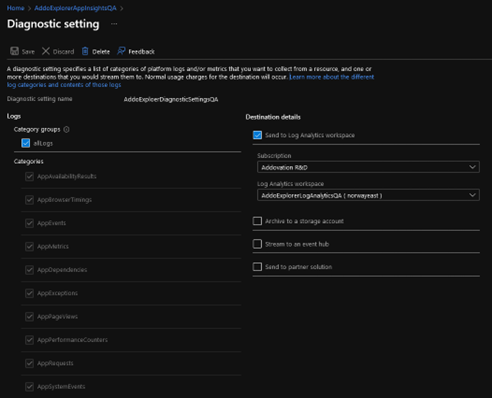
Diagnostic Settingsand Add diagnostic setting.
- Click
Add diagnostic setting.
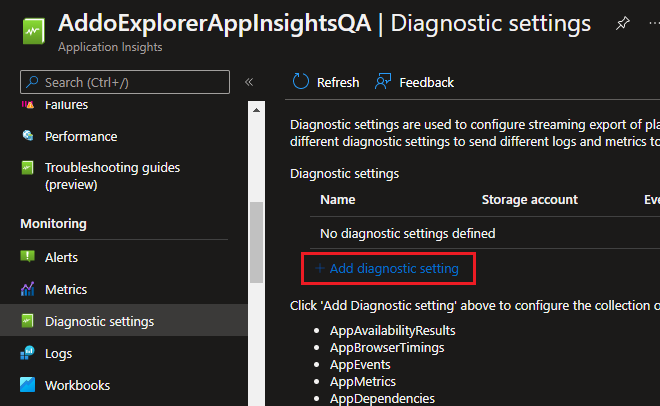
- Now add below settings and select your
Log Analytics Workspacefrom the drop down and save it.
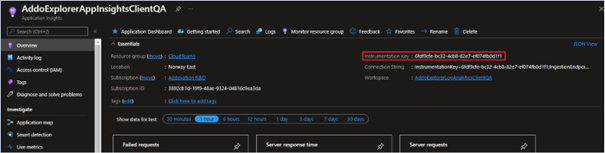
Note
Instrumentation Key is important in configuring Addovation Share in Addovation Cloud Platform, which is available in Application Insights Overview.
Setup for OneDrive Support
OneDrive access requires to operate functions such as Edit in Browser, View Copy and Share OneDrive Links.
External sharing setting for a user's OneDrive
Addovation Share requires to Allow sharing with anonymous guest links and authenticated users for OneDrive in order to upload IFS documents to OneDrive, which will be used to Edit, View and share OneDrive links.
- Sign in to https://admin.microsoft.com as a global or SharePoint admin. (If you see a message that you don't have permission to access the page, you don't have Microsoft 365 admin permissions in your organization.)
- In the left pane, select
Users>Active users - Select the user.
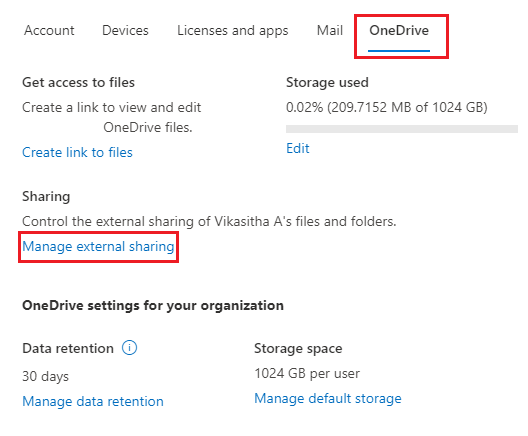
- Select the
OneDrivetab, and under Sharing, selectManage external sharing.
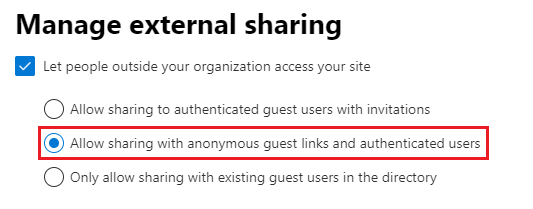
- Select
Allow sharing with anonymous guest links and authenticated users, and then selectSave.
Register New Application in Azure Active Directory
Azure Active Directory (Azure AD), part of Microsoft Entra, is an enterprise identity service that provides single sign-on, multi-factor authentication, and conditional access to guard against 99.9% of cybersecurity attacks.
- Log in to Azure portal
- Go to Azure Active Directory
(Search if Azure Active Directory is not listed in Azure Services)

- Go to App registration --> New registration
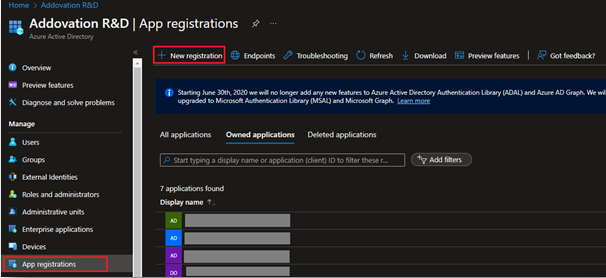
- Create an application using App registrations with a unique name (leave Redirect URI empty).
- Select the
Accounts in any organizational directory (Any azure AD directory - Multitenant)forWho can use this application or access this API?.
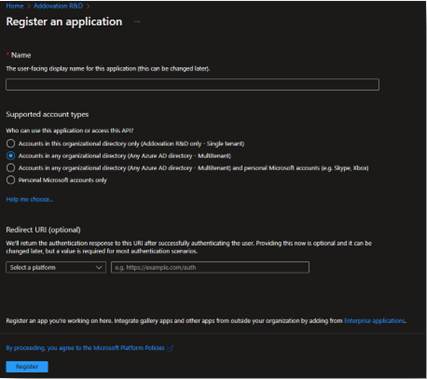
- Click Register button
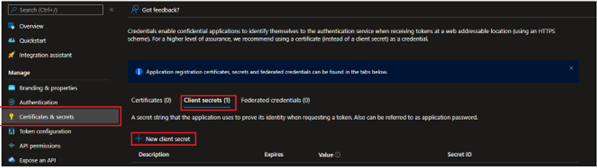
Add Client Secret
- Go to
Certification & Secret--> SelectClient secretstab --> ClickNew client secret
- Provide a secret name
- Set expires in
- Click on
Savebutton

Note
Client Secret is required configure Addovation Share in Addovation Cloud Portal.
Important
Once you created client secret save it for future use. The secret has one time access

Note
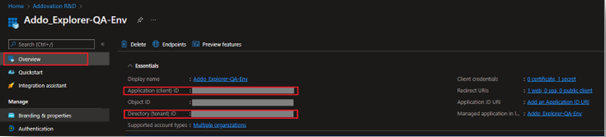
Client Id and Tenant Id from application overview is required to configure Addovation Share in Addovation Cloud Portal.
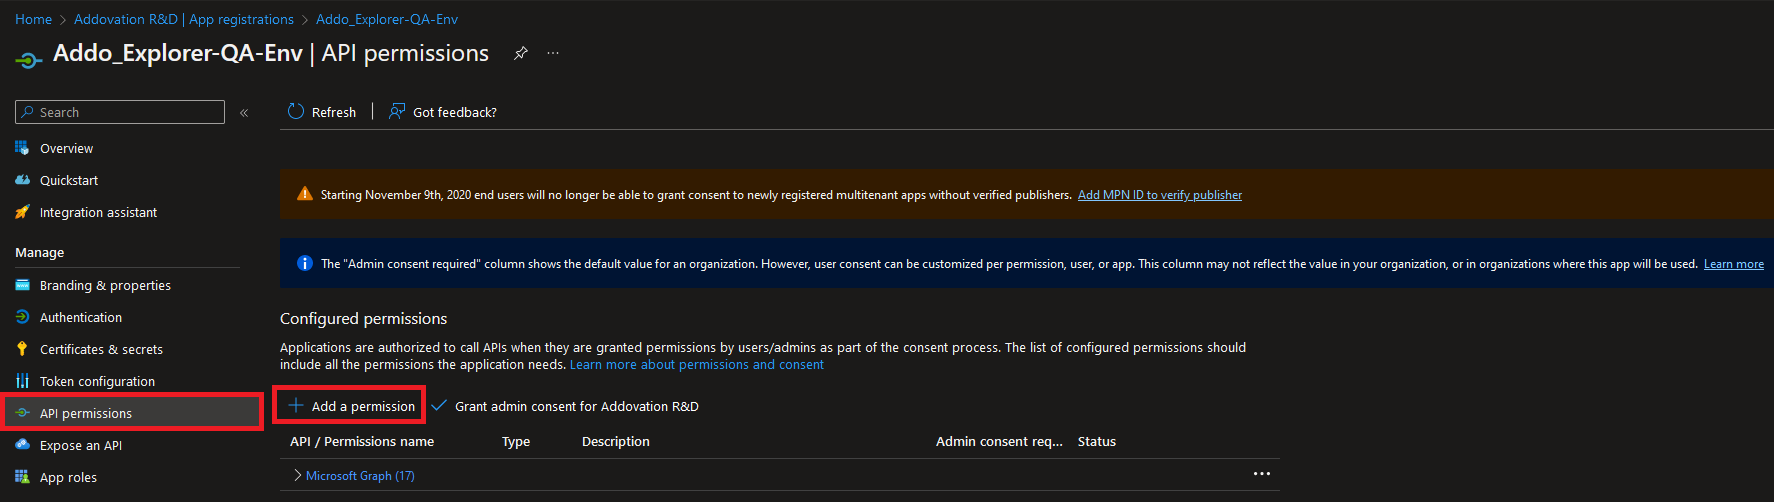
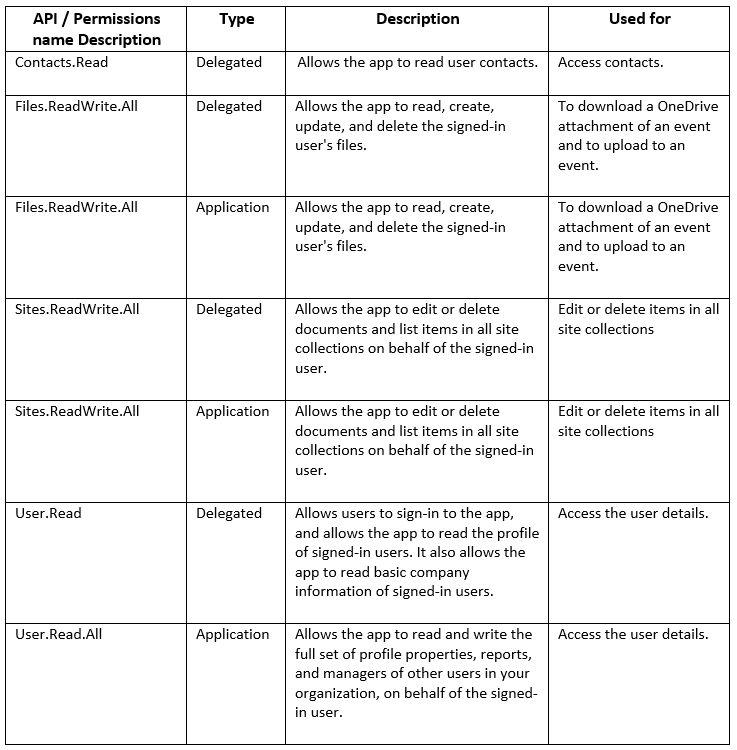
Add API Permissions
API Permissions are required to define level of access to the user provided through registered App in Azure AD.
- Go to
API Permission-> Add a permission
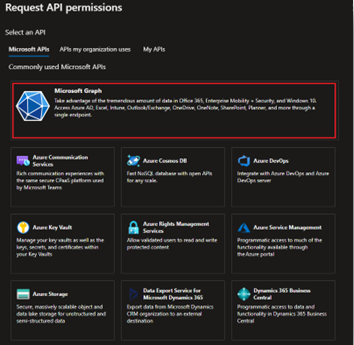
- Select
Microsoft Graph
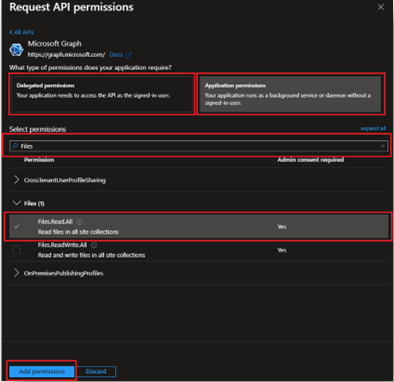
- Select type between Delegated permissions and Application permissions
- Search required permission name
- Select the permission name(s)
- Click Add permissions
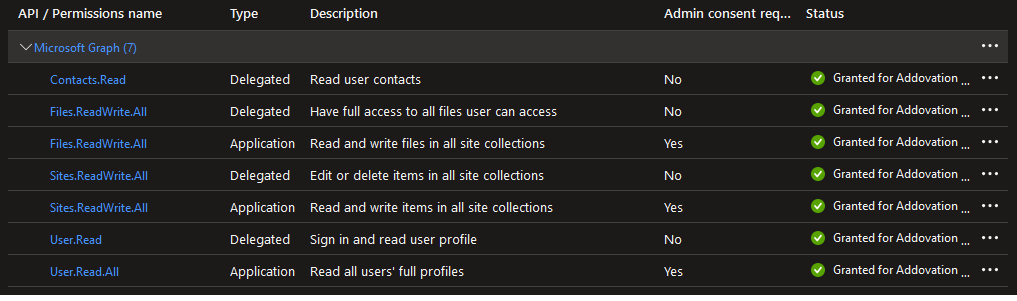
- Add following API permissions to the Application and grant admin consent for tenant.
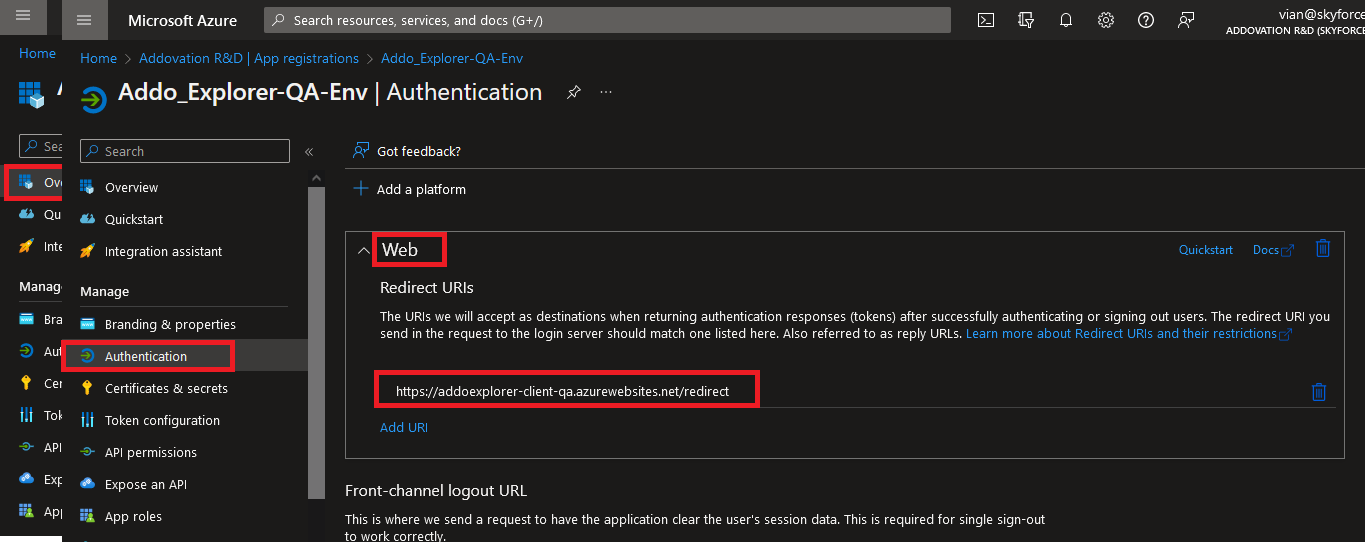
Setup Redirect URI
Important
Redirect URL needs only when the user needs to access a different tenant for OneDrive operations except for the tenant in which IFS environment configured .
- Go to Authentication --> Add a platform --> Web
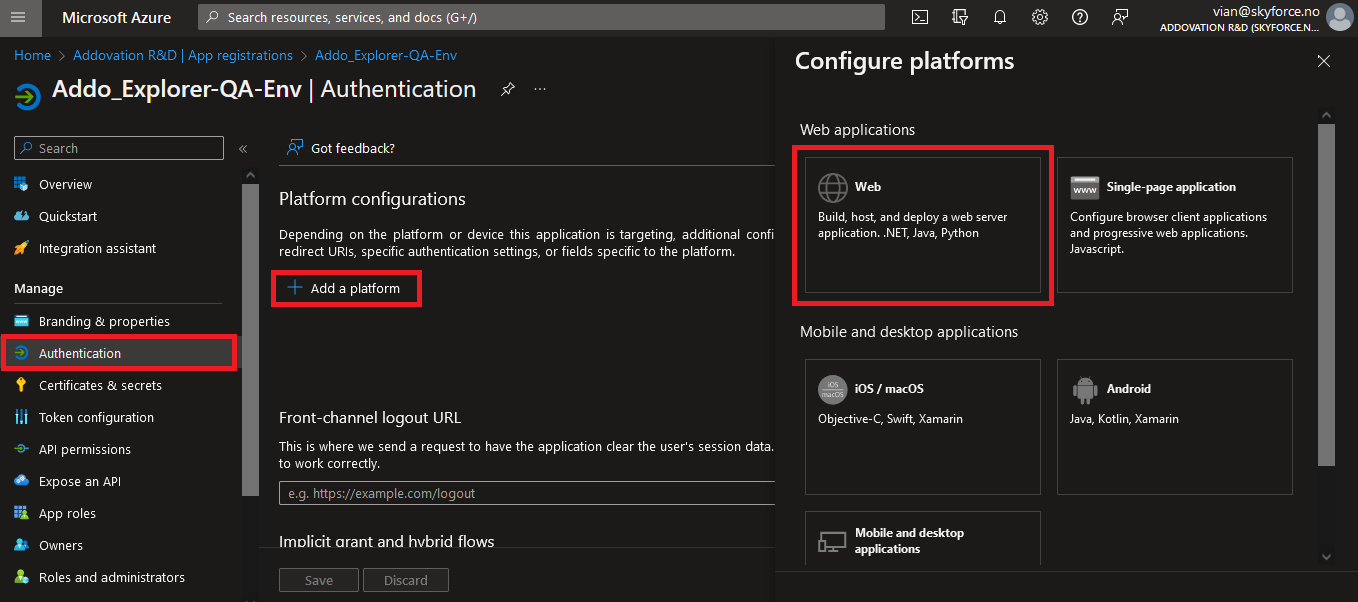
- Enter Redirect URL and click Configure button
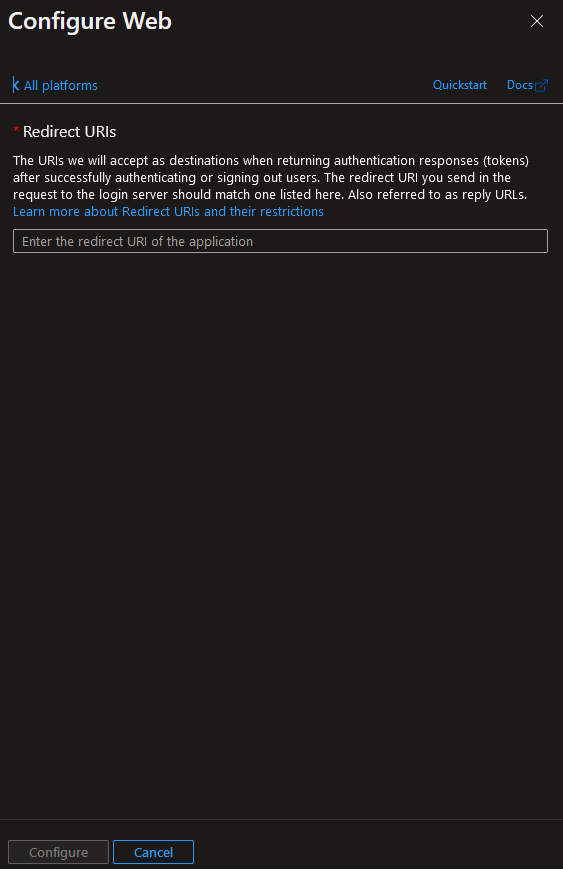
Redirect {Addovation Share Client URL Name}/redirect
Ex: https://your-client-url.com/onedriveSelect
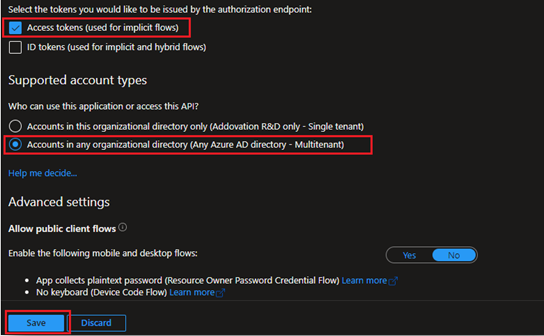
Access token (used for implicit flows)Select the
Accounts in any organizational directory (Any azure AD directory - Multitenant)as ‘Who can use this application or access this API?’Click Save button
Note
Redirect URL is required to configure in Addovation Cloud Portal. You can get redirect URL from
Authentication --> Web --> Redirect URL.
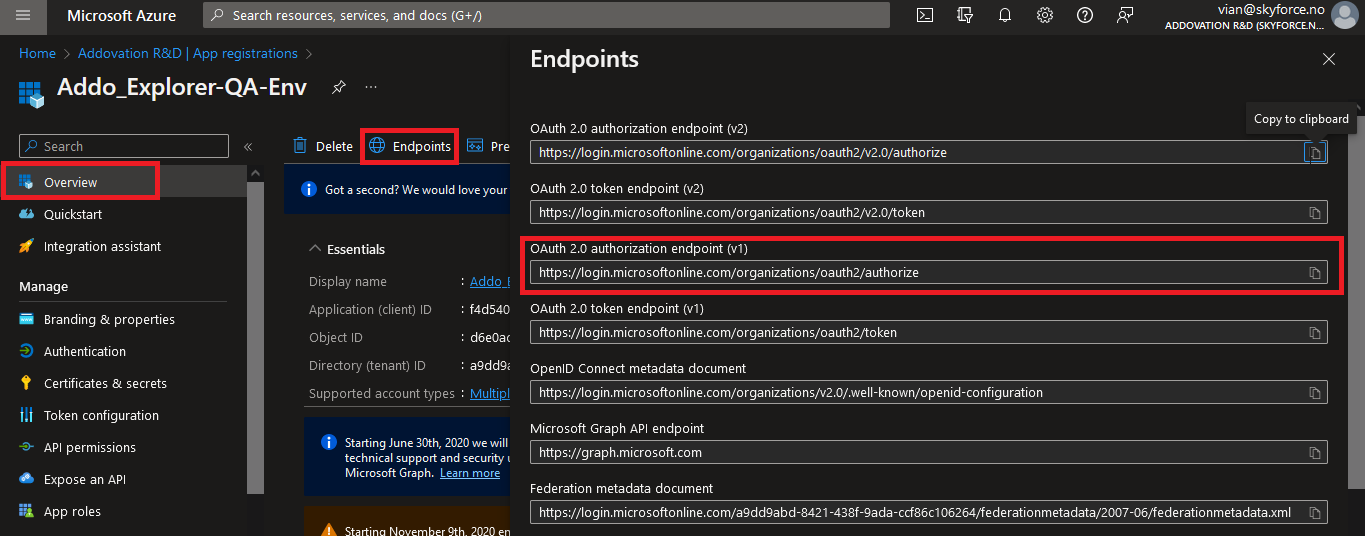
Note
Authentication Endpoint is required to configure in Addovation Cloud Portal.
Go to Overview --> Endpoint --> Copy OAuth 2.0 authorization endpoint (v1).
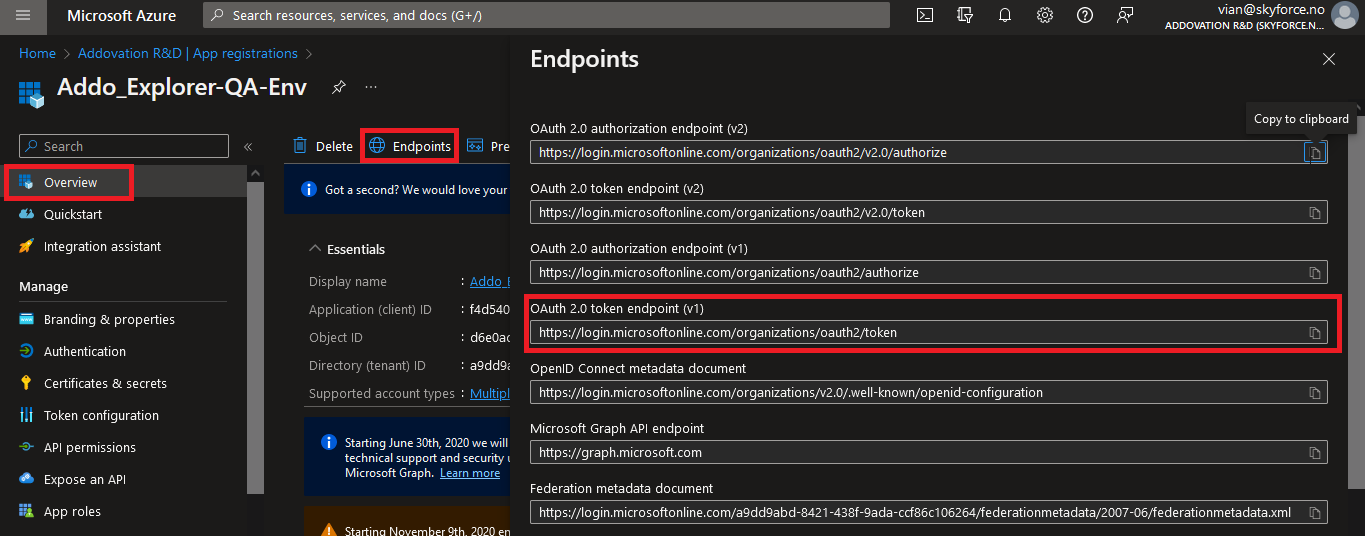
Note
Token Endpoint is required to configure in Addovation Cloud Portal.
Go to Overview --> Endpoint --> Copy OAuth 2.0 token endpoint (v1).
Token Endpoint
- Token Endpoint is required to configure in Addovation Cloud Portal.
- Go to Overview --> Endpoint --> Copy OAuth 2.0 token endpoint (v1)
Log Analysis
Addovation Share has enabled the option to analyze logs using Azure Application Insights.
- Open Application Insights
- Select desired Application Insight
- Click on
Logs
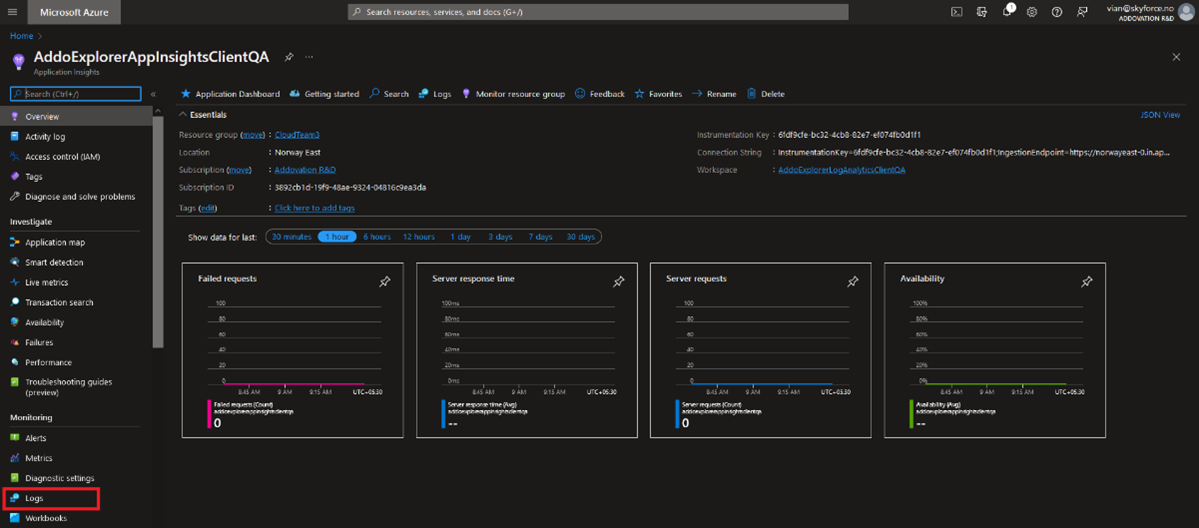
In query window you can add queries to view data.
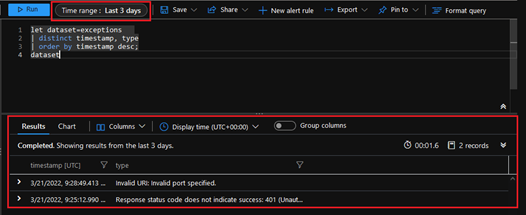
Filter errors list
 let dataset=exceptions
 | where client_Type == "Browser"
 | distinct timestamp, type, assembly, itemType, client_Type
 | order by timestamp desc;
 dataset
You can select time range according to your requirement
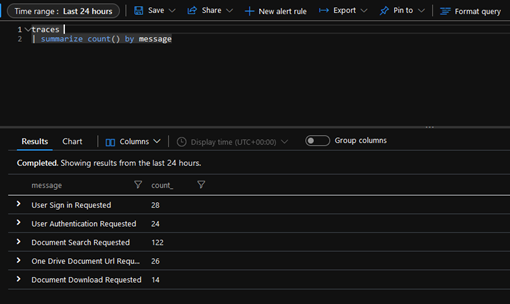
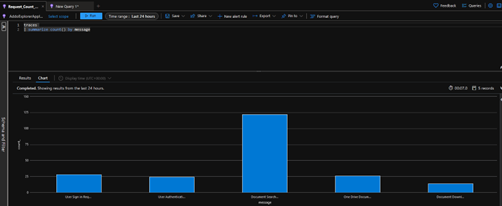
Request count list
  traces
  | summarize count() by message
Network Configurations
Click here to read details about network configurations.