Addovation Share - User Guide
Last Updated: 2024-11-15
Introduction
Addovation Share allows users to search documents/files instantly on content, metadata and retrieve them from IFS and ability to check-in and check-out files from IFS Application.
The solution includes:
- Search document content
- Search document(s)
- Download document(s)
- Open document(s) in SharePoint
- Open in IFS Aurena
- Edit Document(s)
- Copy and Share link(s) with or without access limitation for later access from IFS Aurena, OneDrive and Addovation Share Web App itself
- Convert word document(s) to PDF
- Convert multiple word documents to PDF and merge them into one PDF document
- Merge multiple PDFs to a single PDF
- Check-in document(s)
- Check-in document(s) as new revision(s)
- Check-out document(s)
- Undo check-out
- Search and list checked out documents
- Get Template
The User Guide is envisioned to assist individuals utilizing the Addovation Share solution.
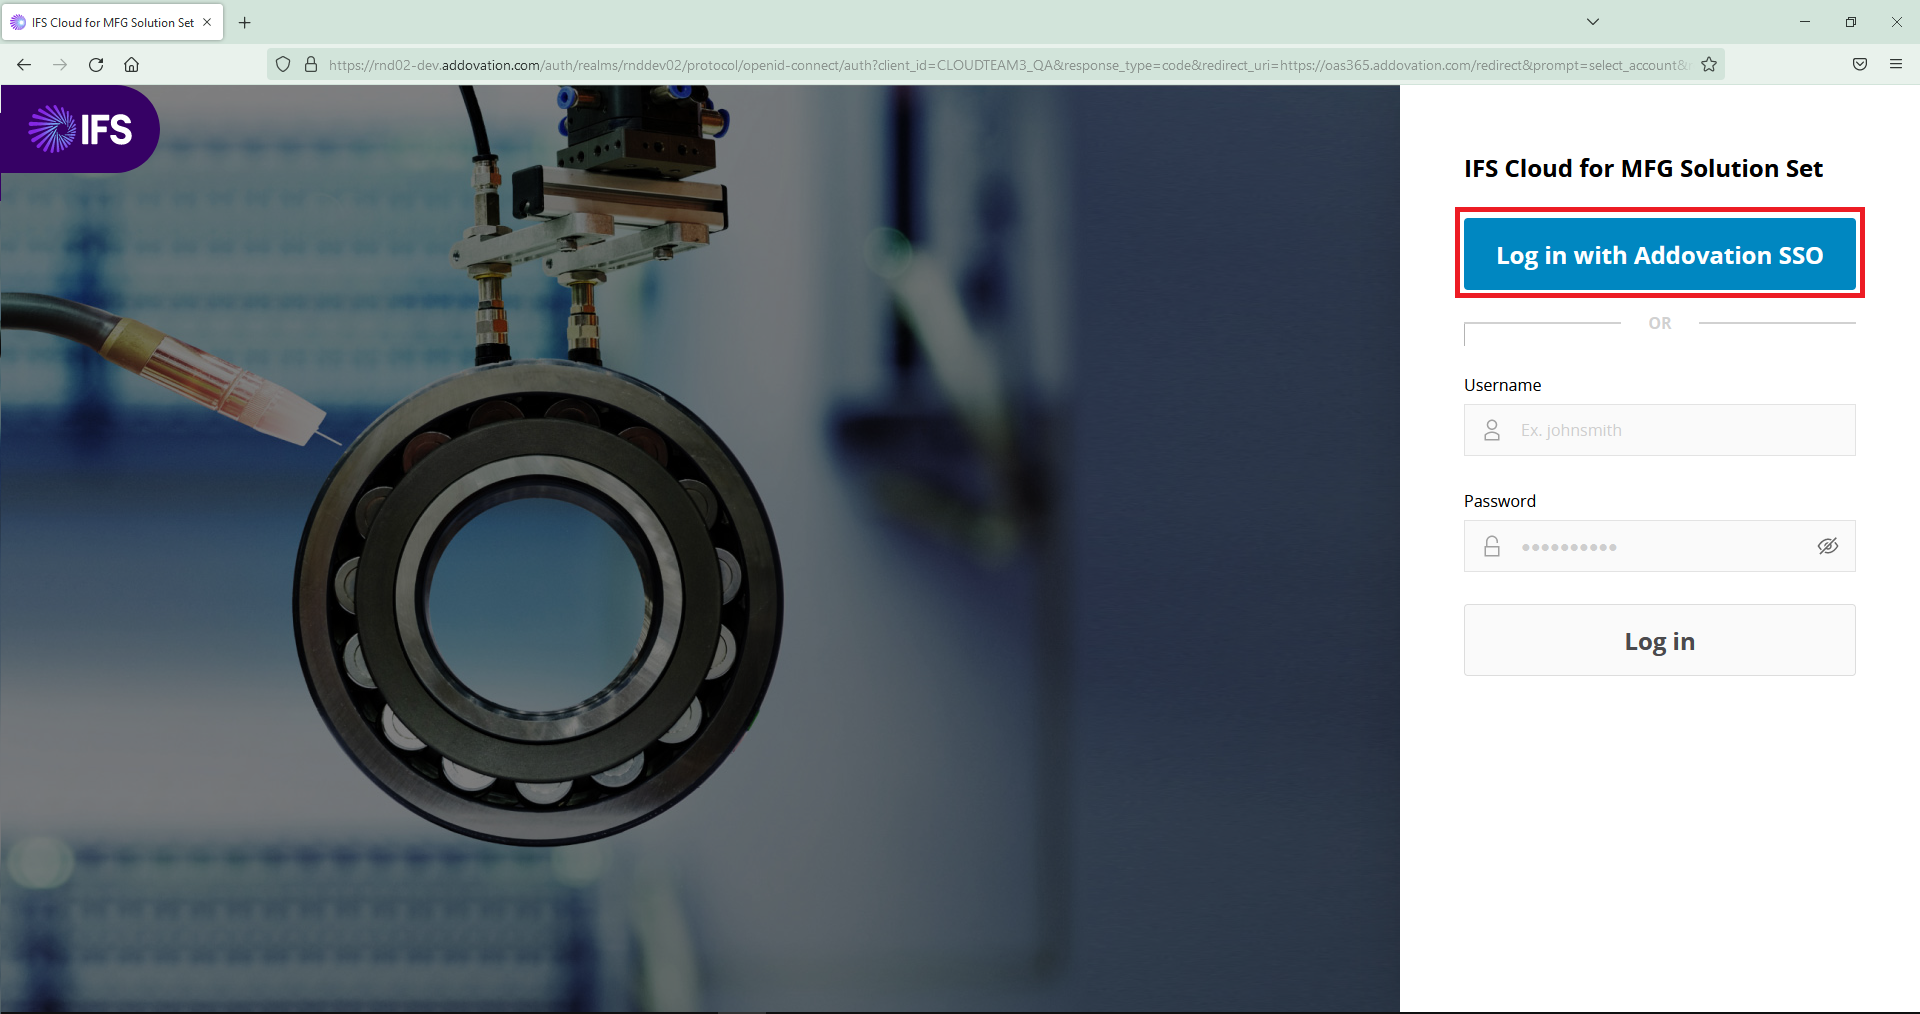
Sign in to Addovation Share
Addovation Share users need an IFS User ID which is connected to the Microsoft 365 account and necessary permissions.
Click Log in with Addovation SSO for IFS cloud.
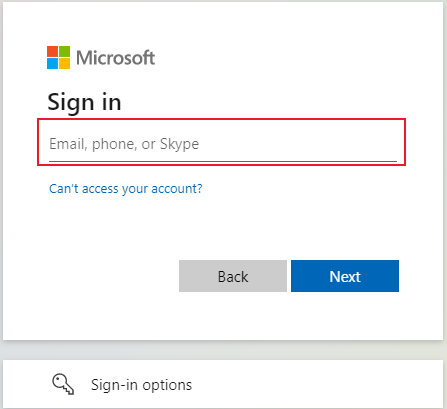
Enter the correct email address for username.
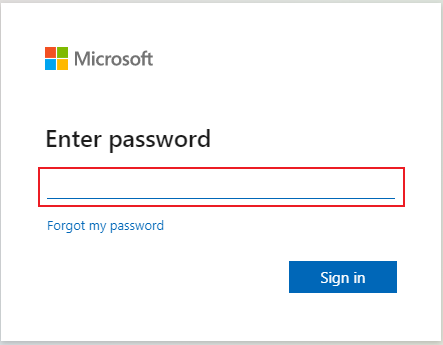
Then enter the password. Click on Sign in button.
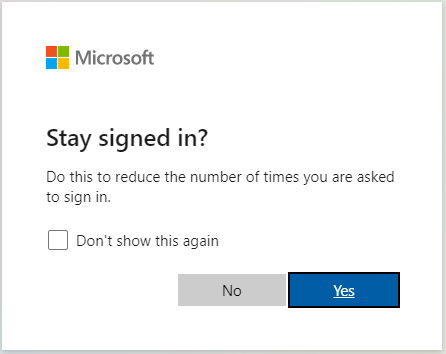
If you want to save your sign in, then click on Yes button. Otherwise click on No button.
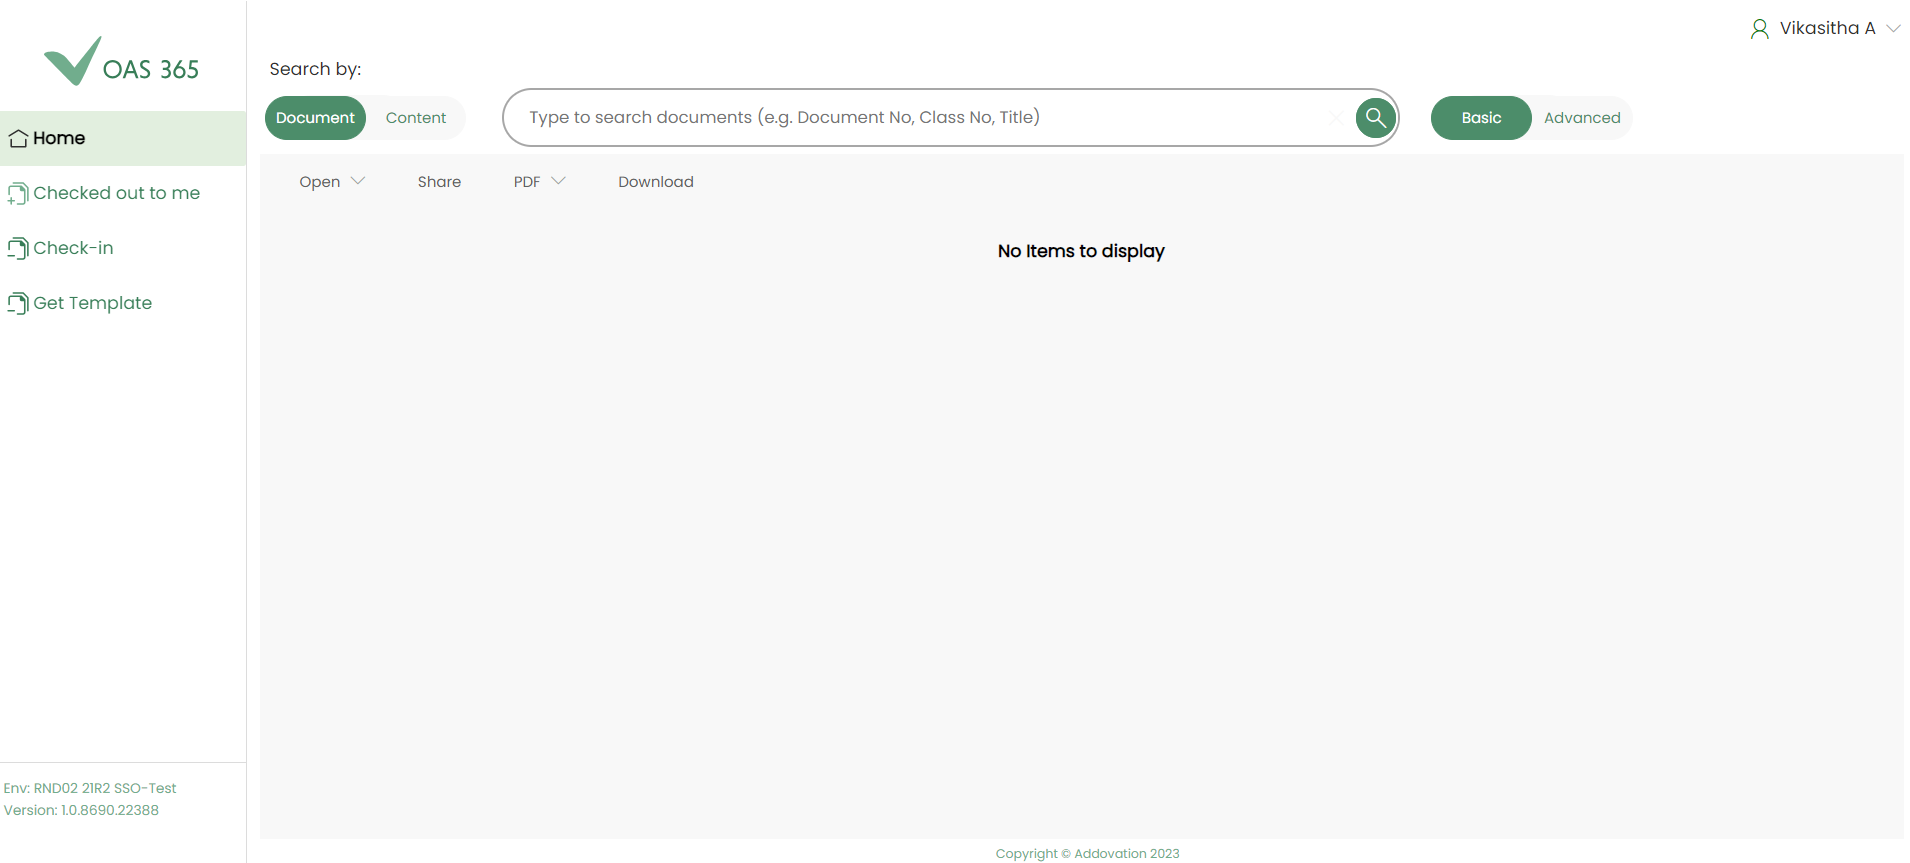
‘Home’ will be the landing page.
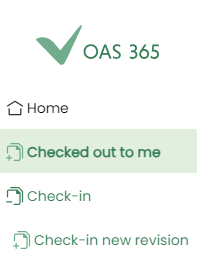
Addovation Share left menu contains;
- Home
- Checked out to me
- Check-in
- Get Template
- Details of
- Version
- Environment
Logged-in user details will be displayed on the top right corner.
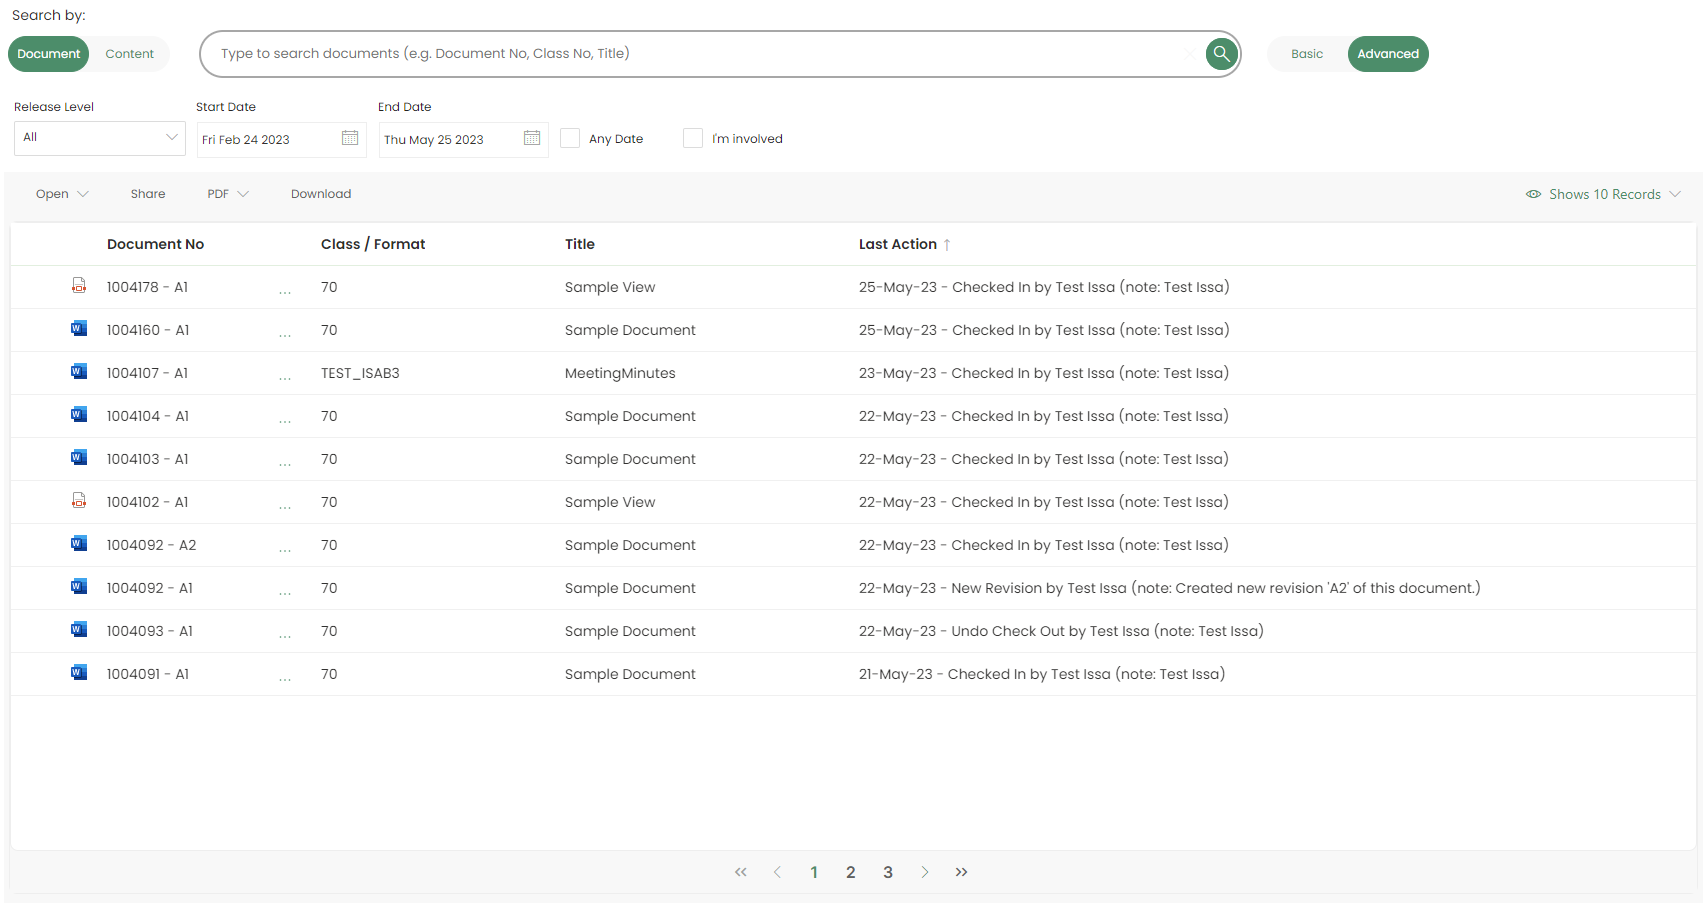
Basic Search
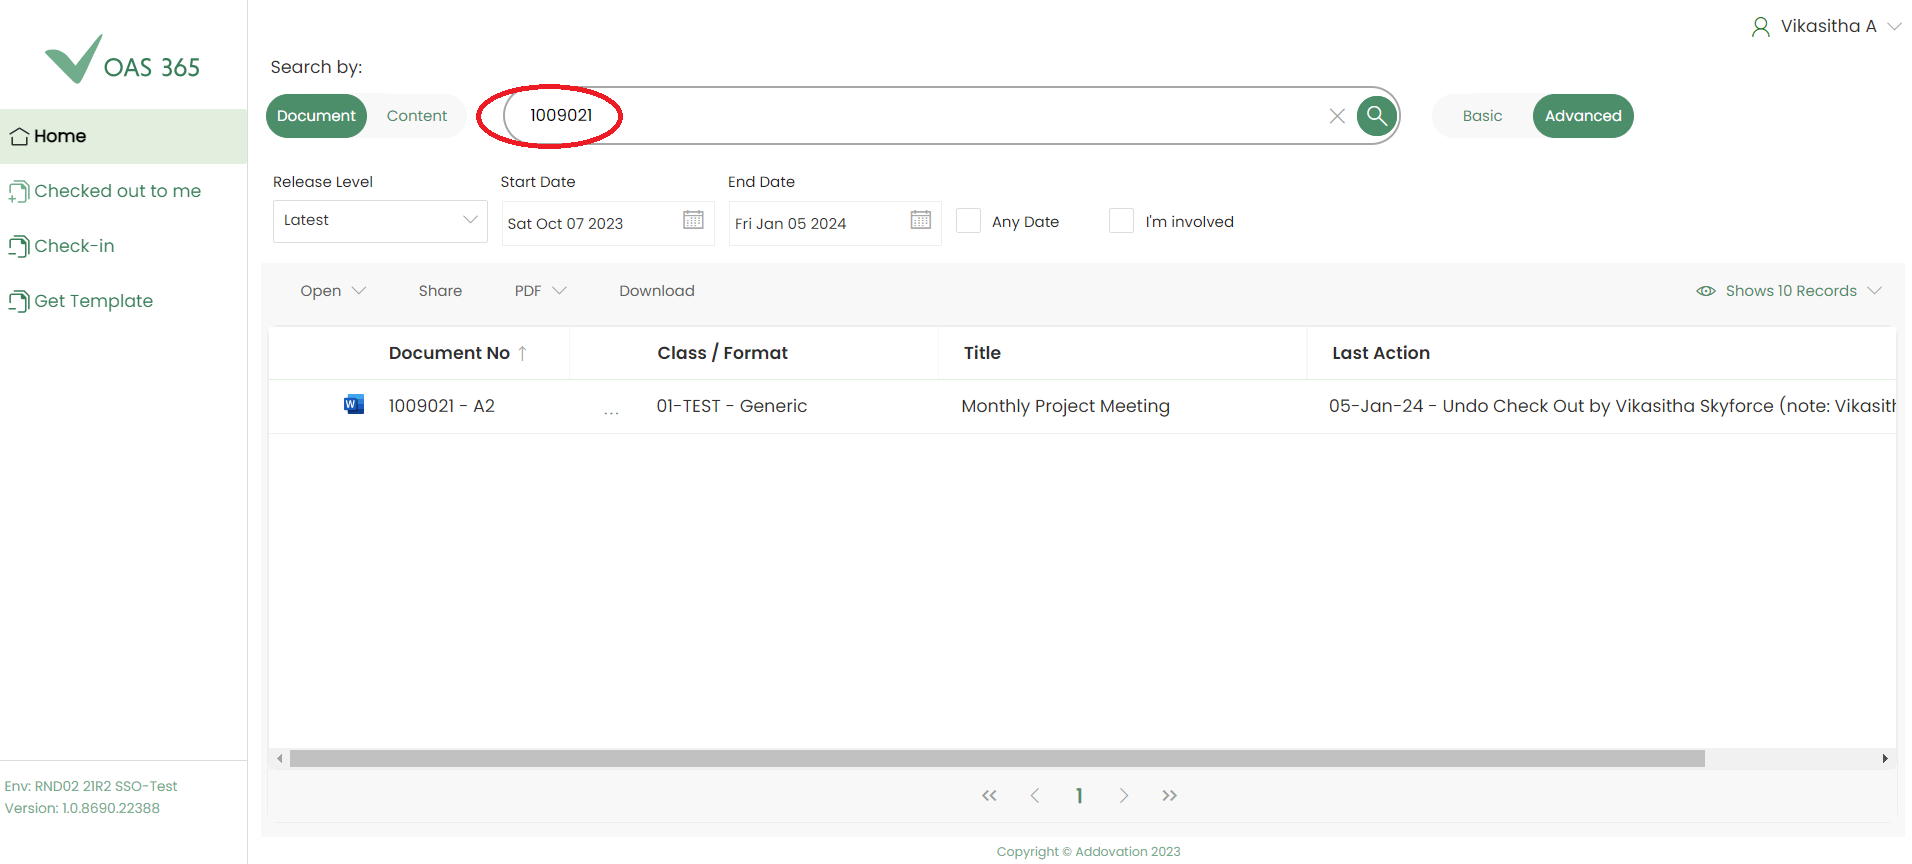
In the basic search mode, documents can be searched using a part of a Content, Document Number or Document Title.
There are two search options available for searching documents/files.
Document – This option is selected by default. User can search documents using a document number, document title or class. Make sure you are in Basic Search mode.
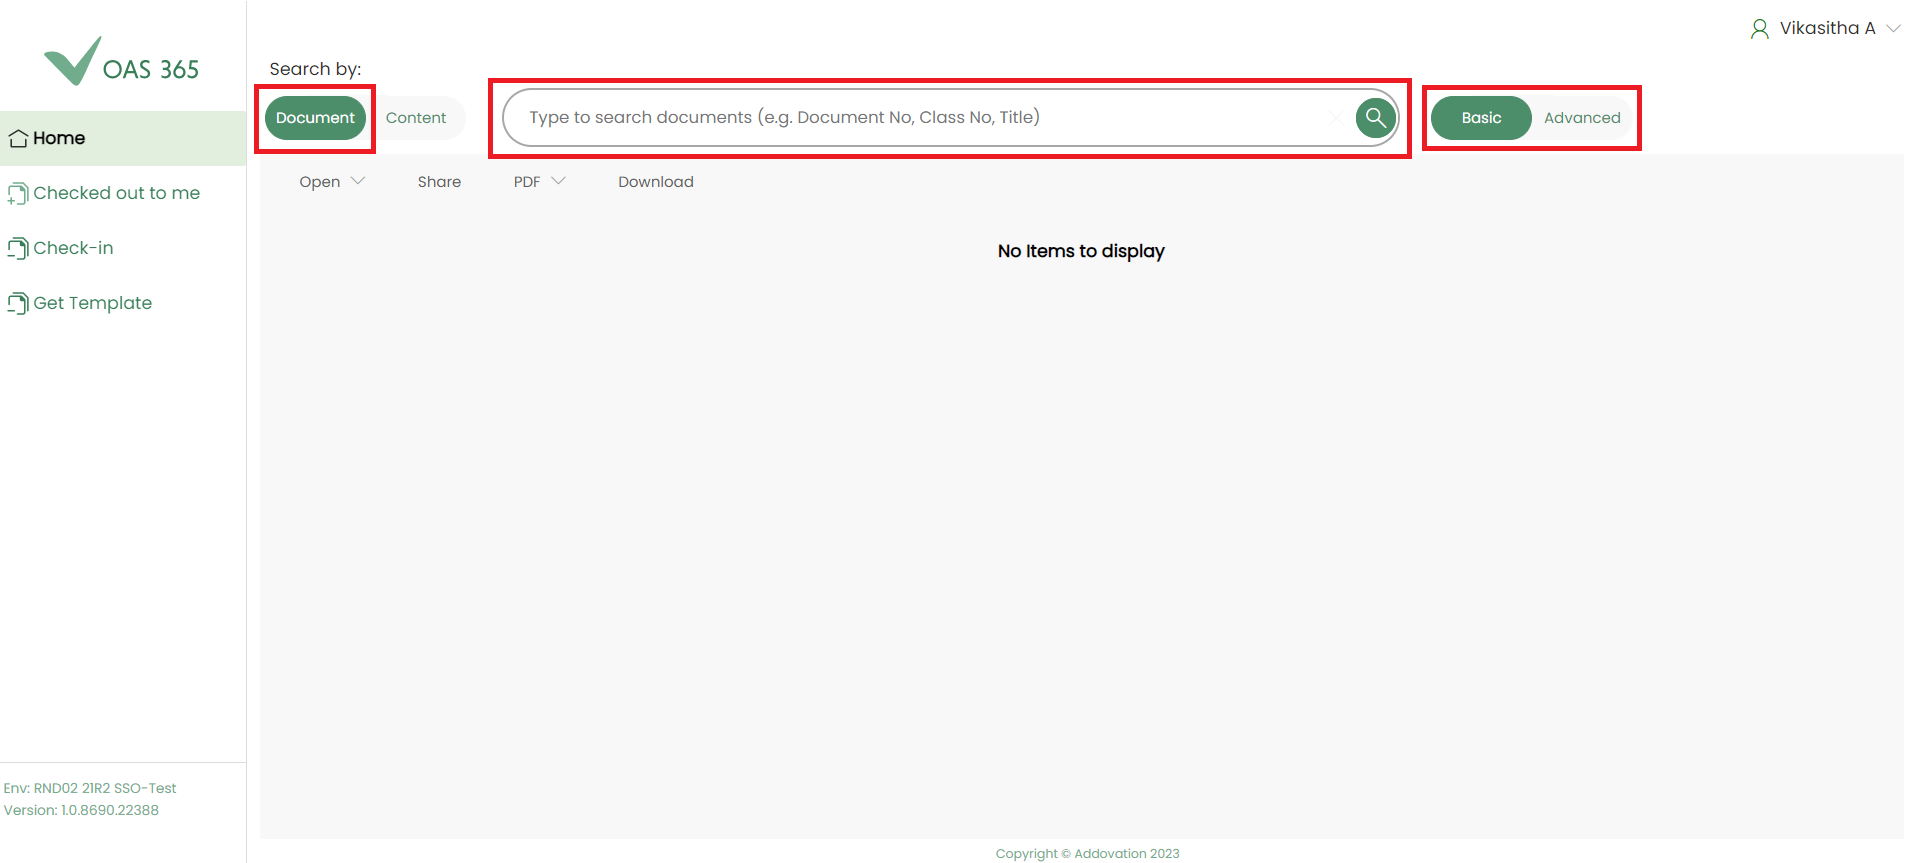
Select Document from the toggle button and give the document name or document number that you want to search.
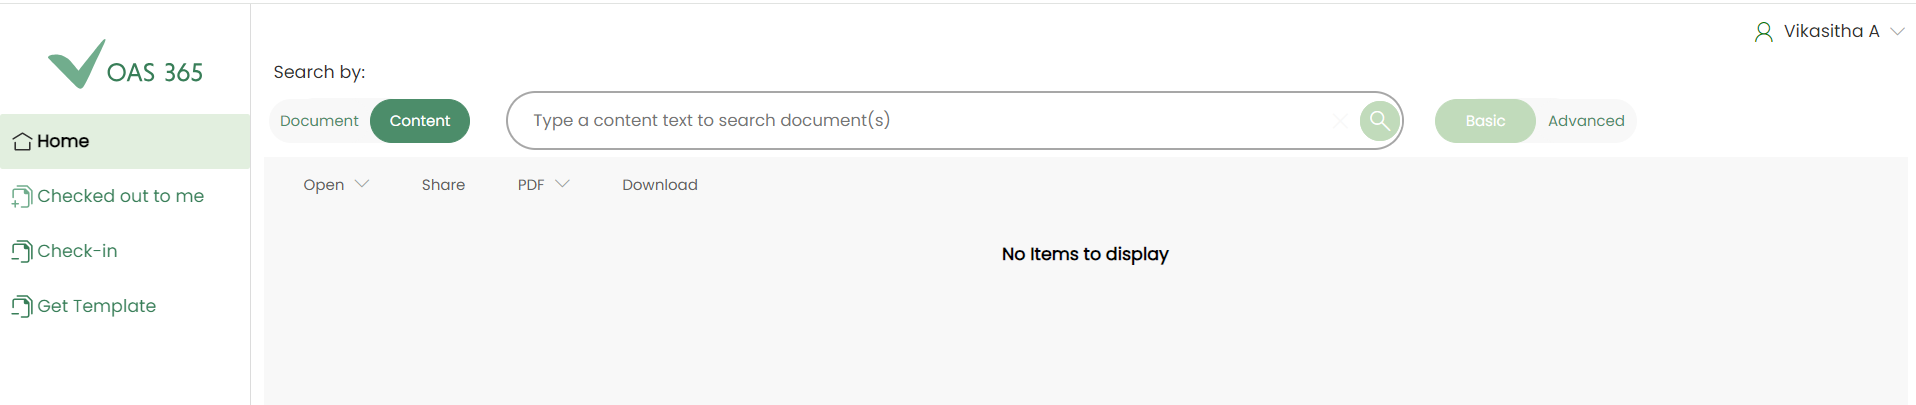
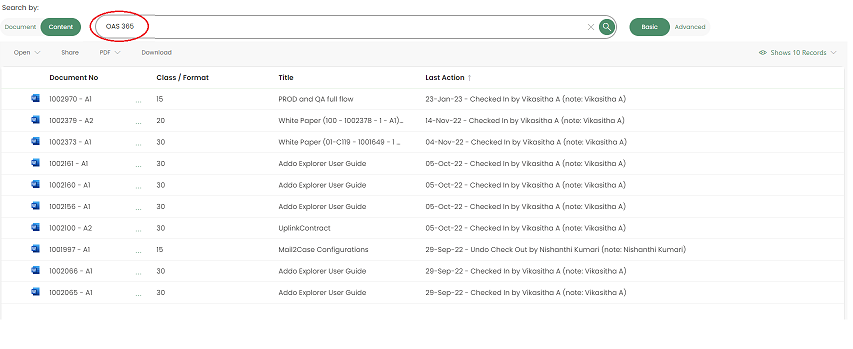
Content – User can search documents using a part of the content of a document resides in IFS.
Select Content from the toggle button and give the document content to search documents.
Main Menu
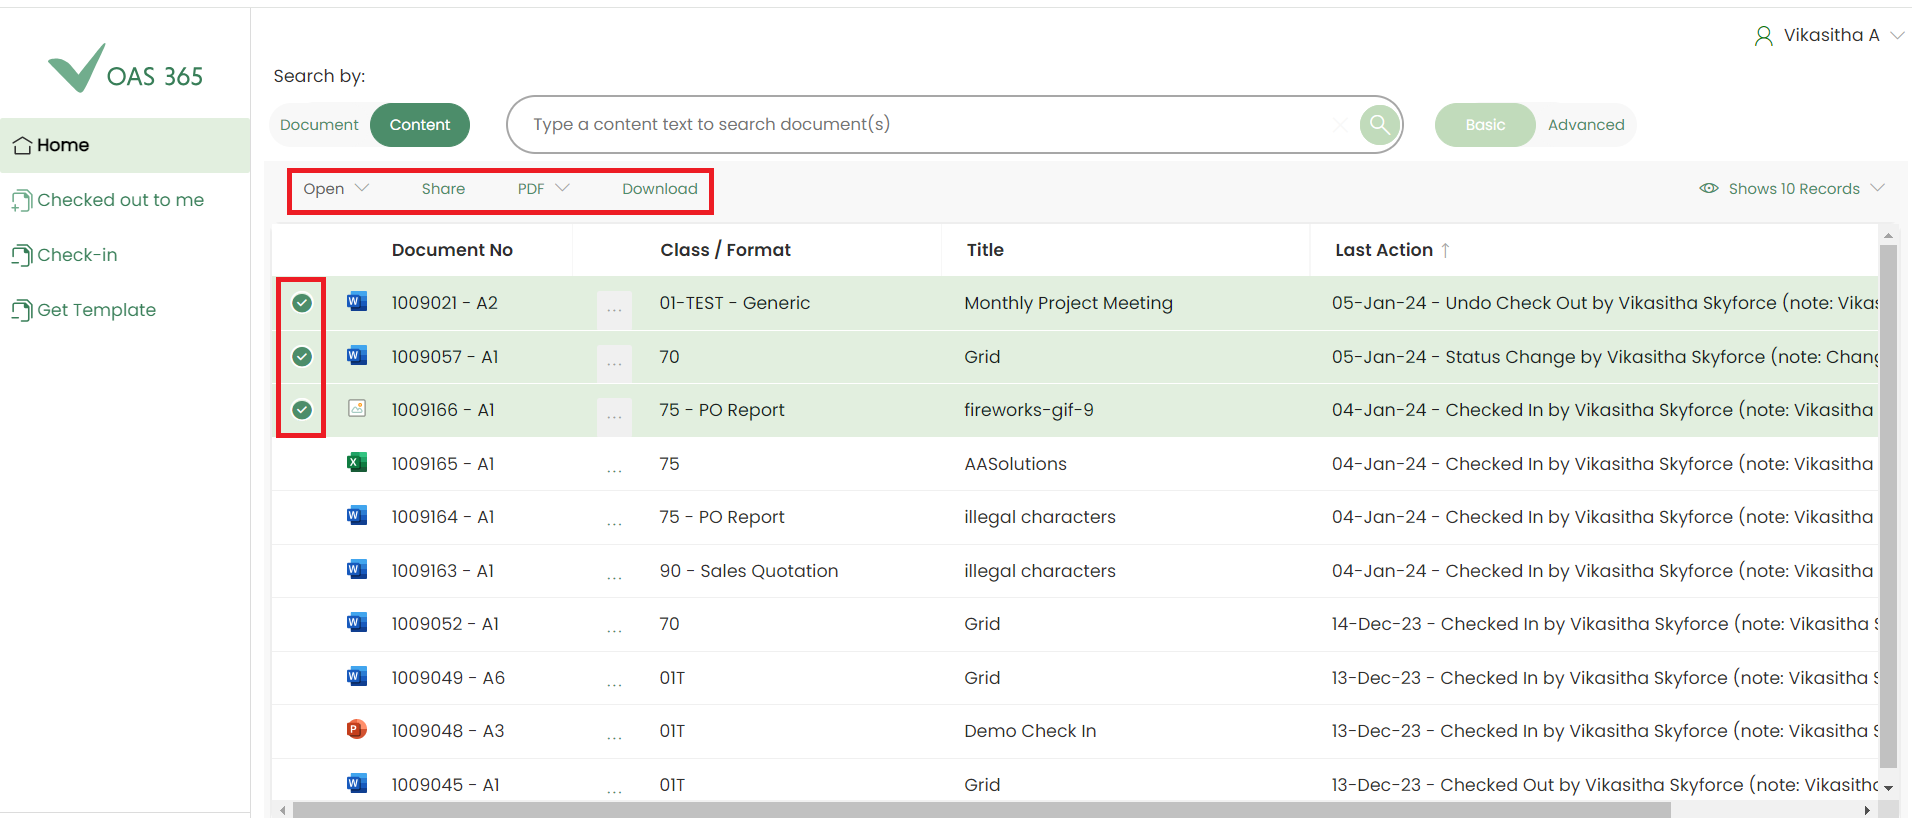
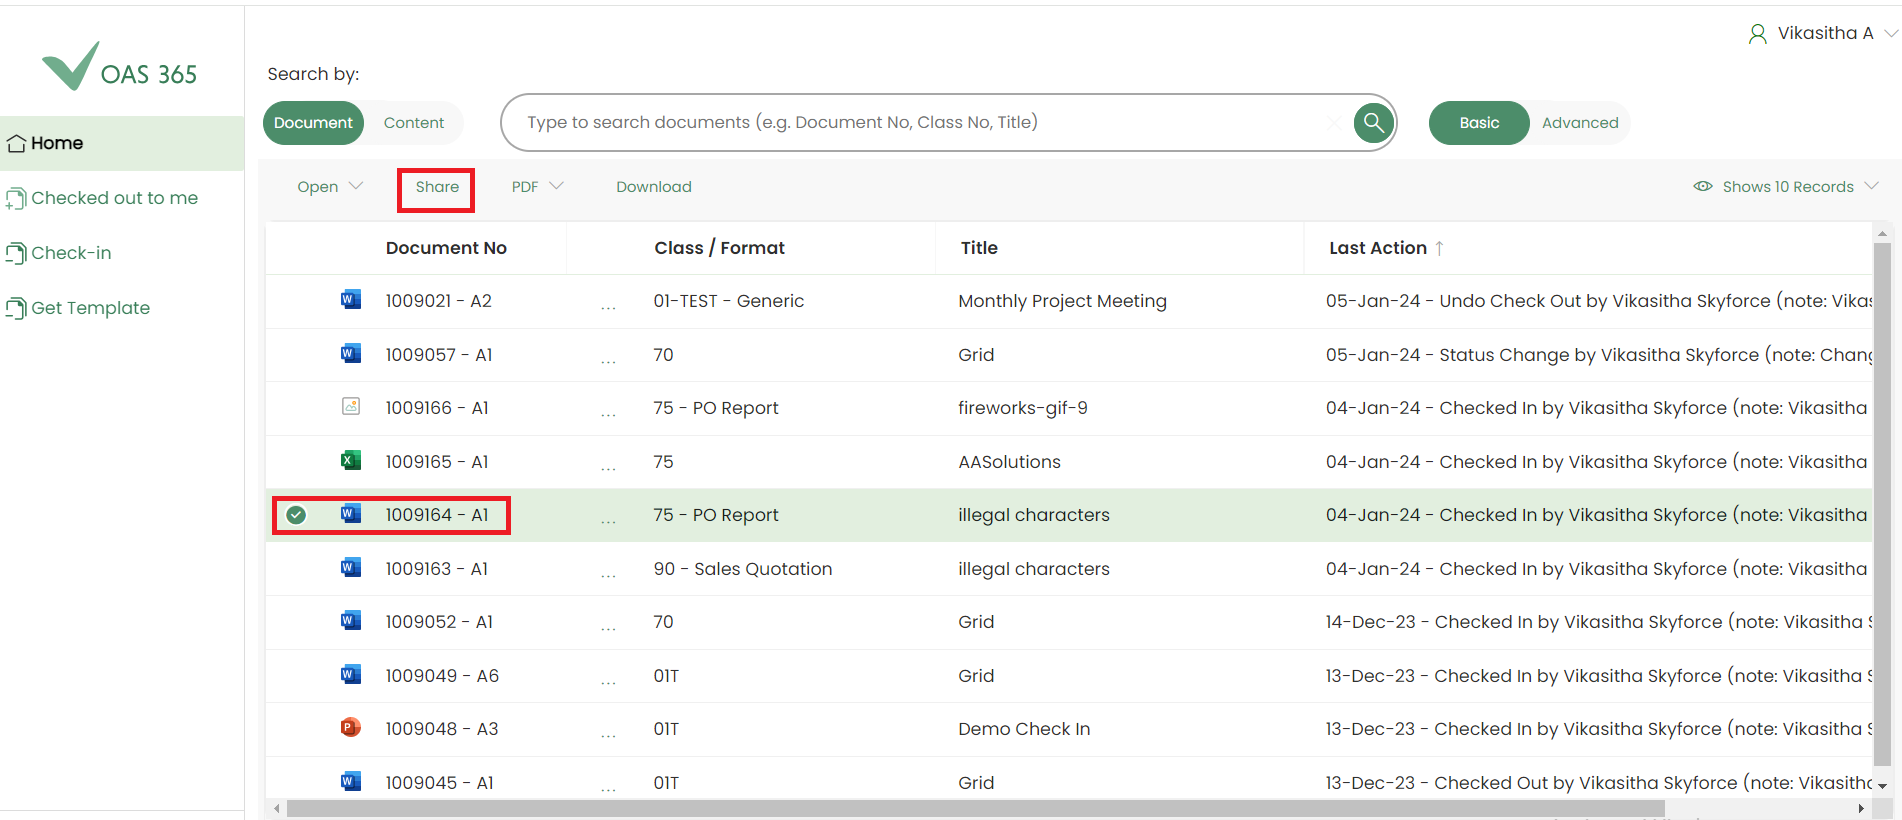
Menu items (Open, Share, PDF, Download) will be disabled until any document is selected.
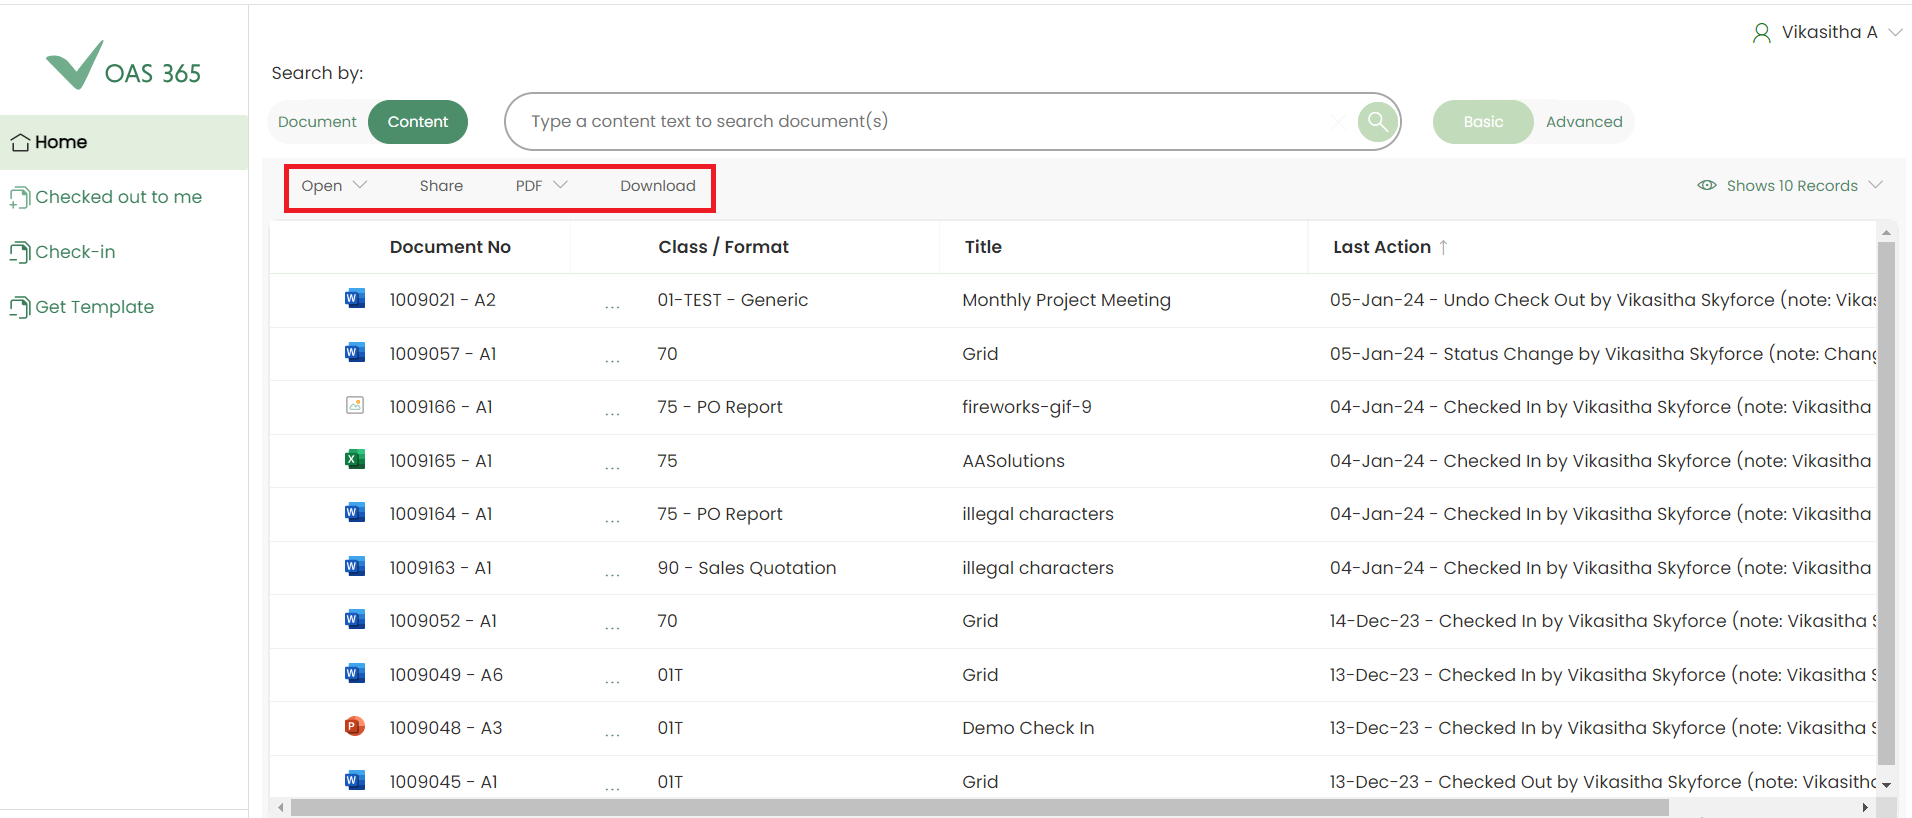
User can select one or more documents.

Note
Open menu will be enabled only for single document selection. Share, PDF and Download menus will be enabled for single or multiple documents.
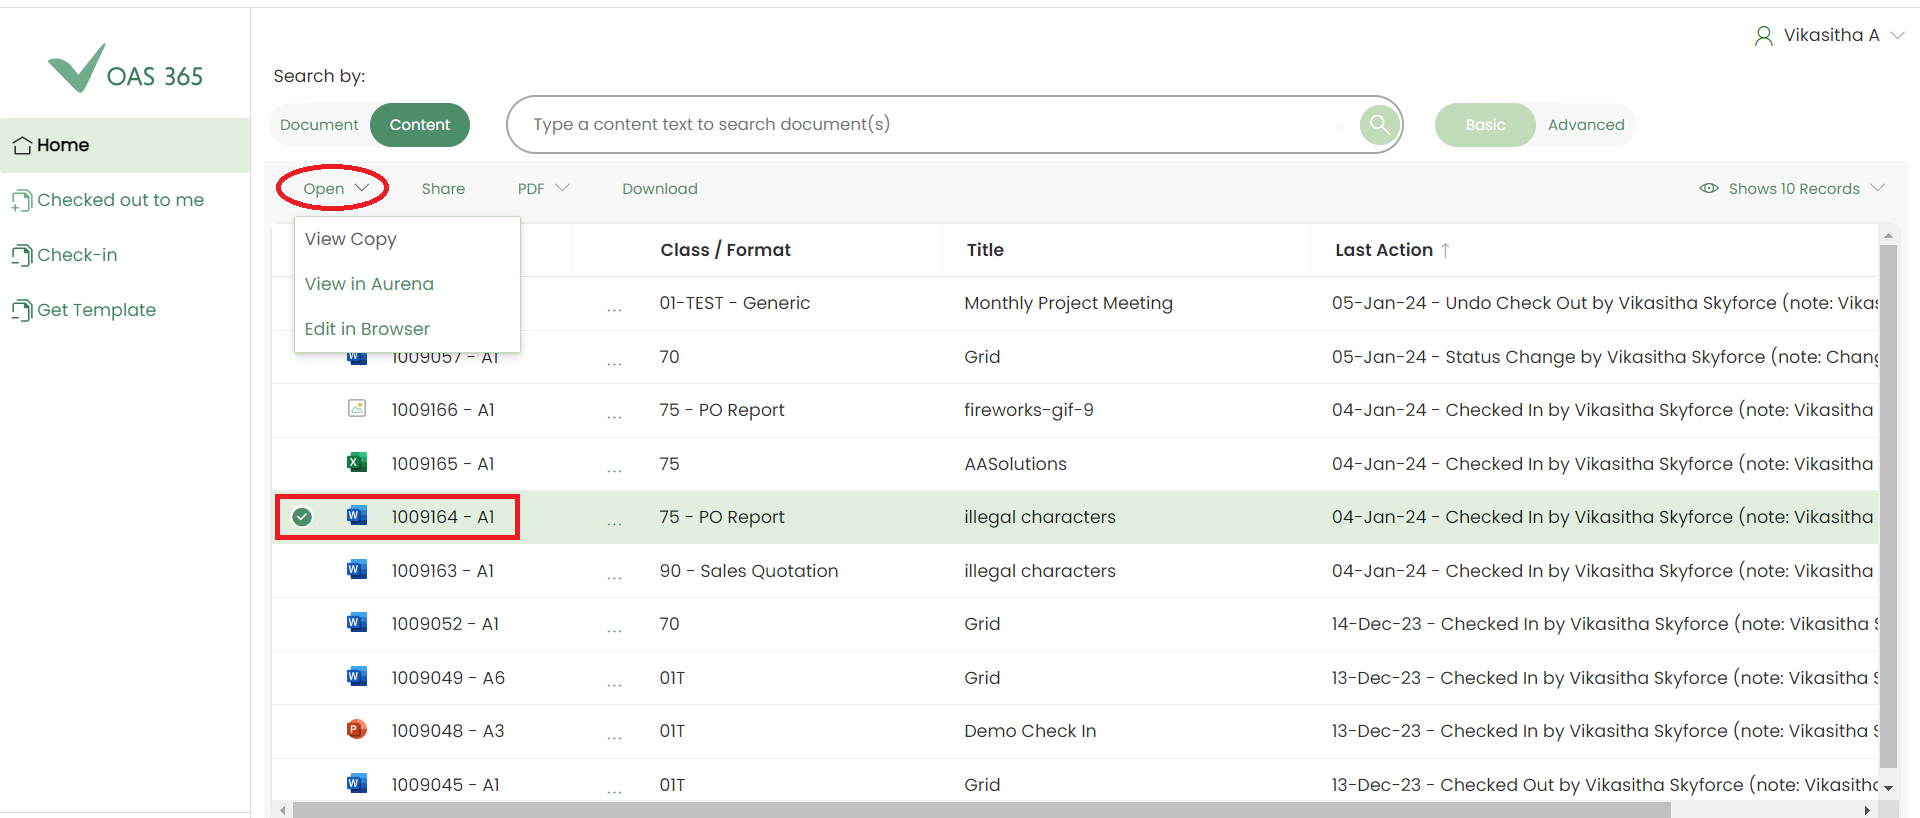
Open
This menu will be enabled only for single document selection. There are three major functionalities under Open menu as described below.
- View Copy
- View in IFS
- View in Aurena
- Edit in Browser
View Copy
View Copy option will be enabled , only If there is a view copy for the selected document.
Select any document which has a view copy and click View Copy option.
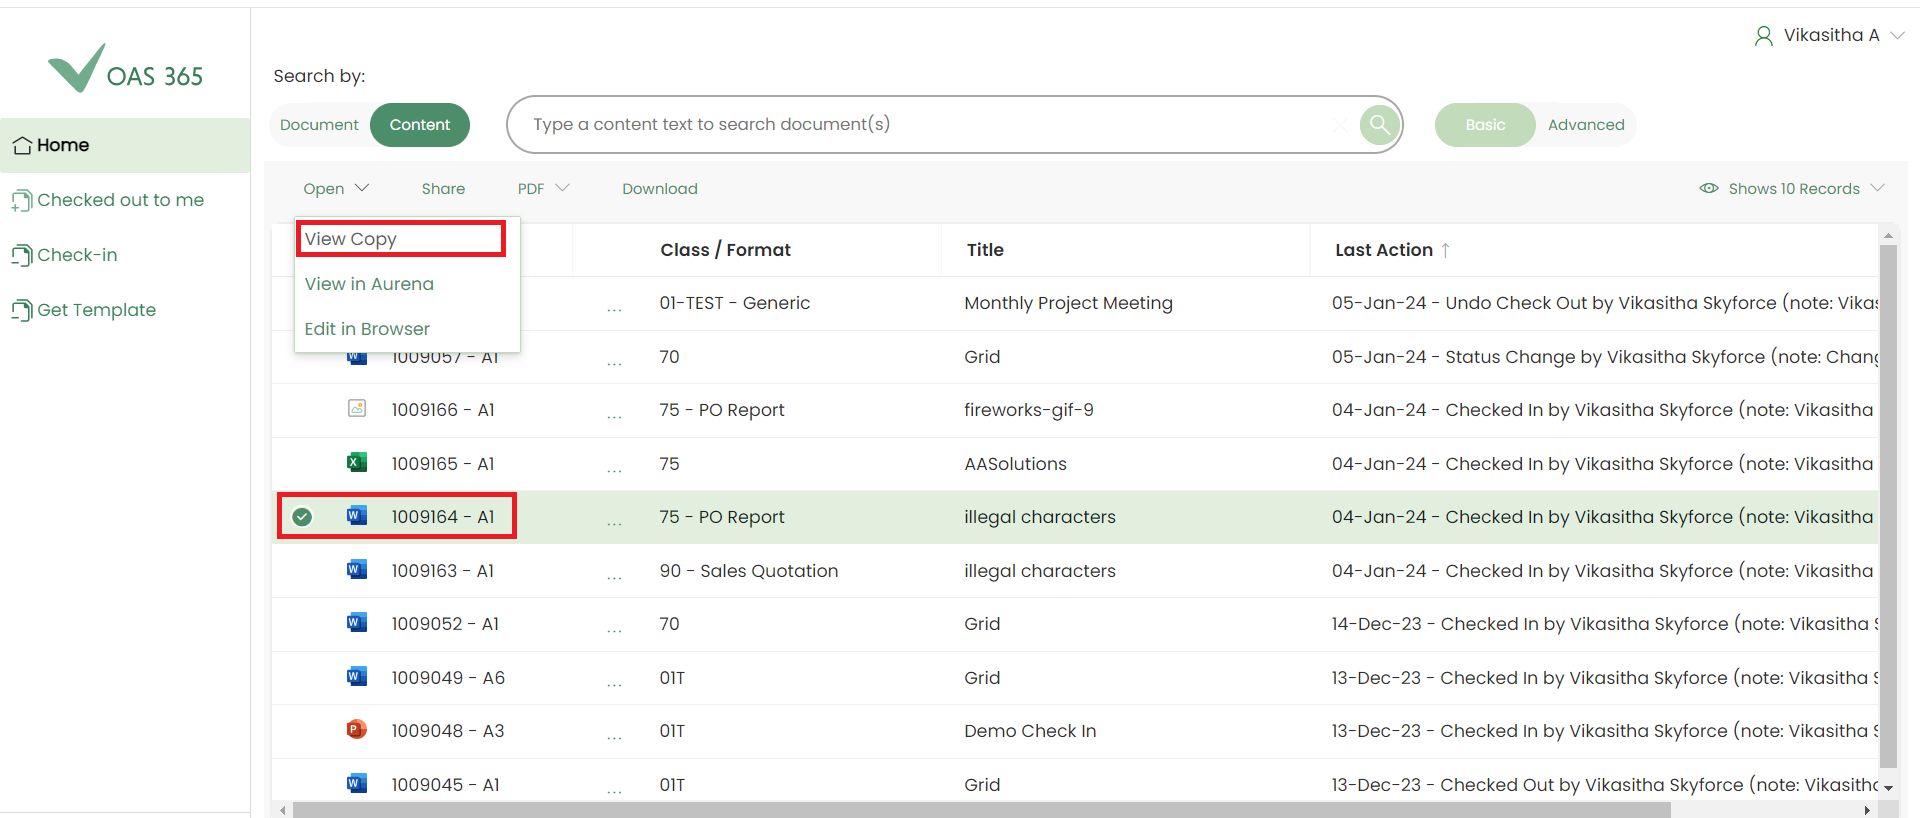
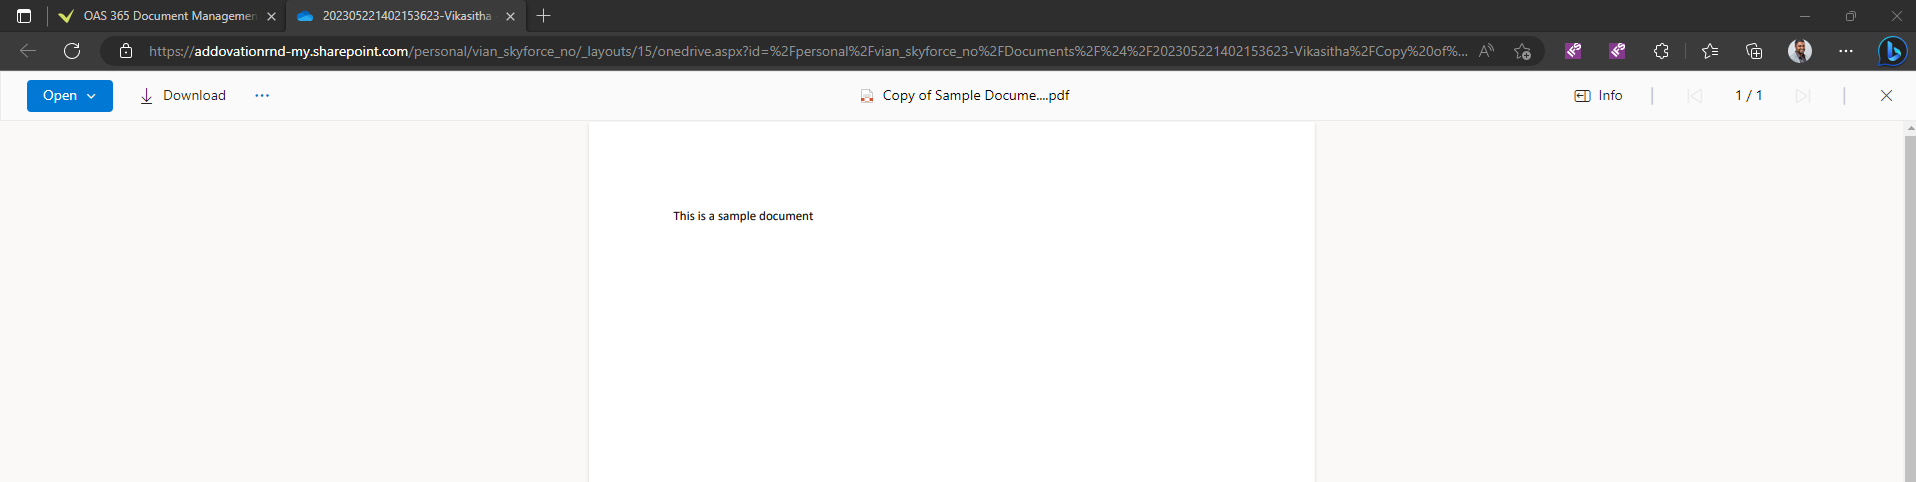
View copy documents will be opened in One drive.
Important
Transactions related to OneDrive will be processed, according to the policies that have been configured as each company requires.
Note
If there is no view copy for selected document, then View Copy option will be disabled.
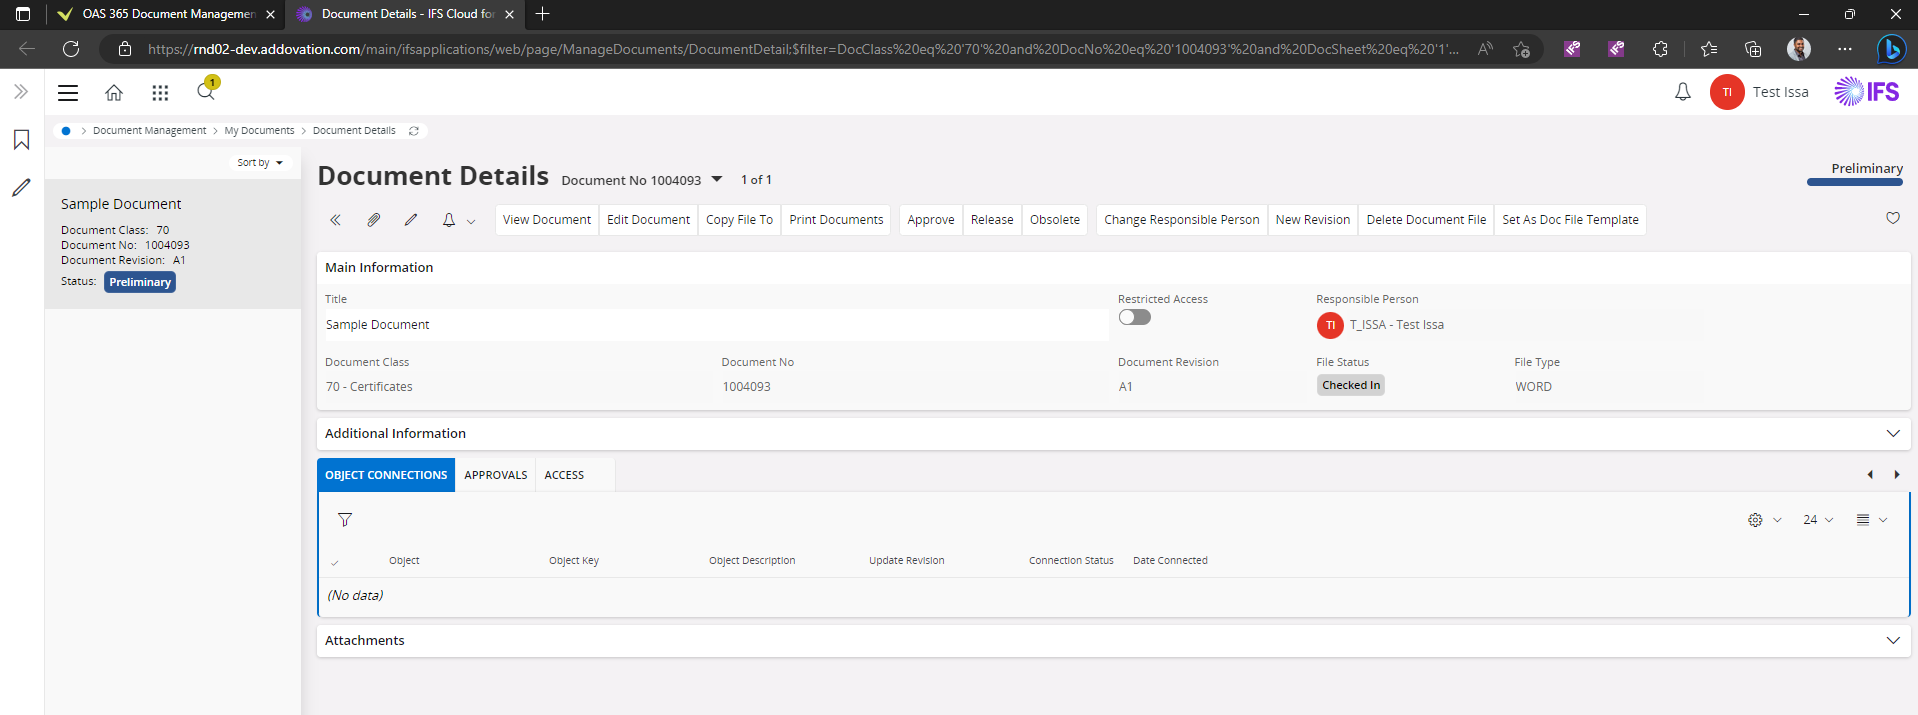
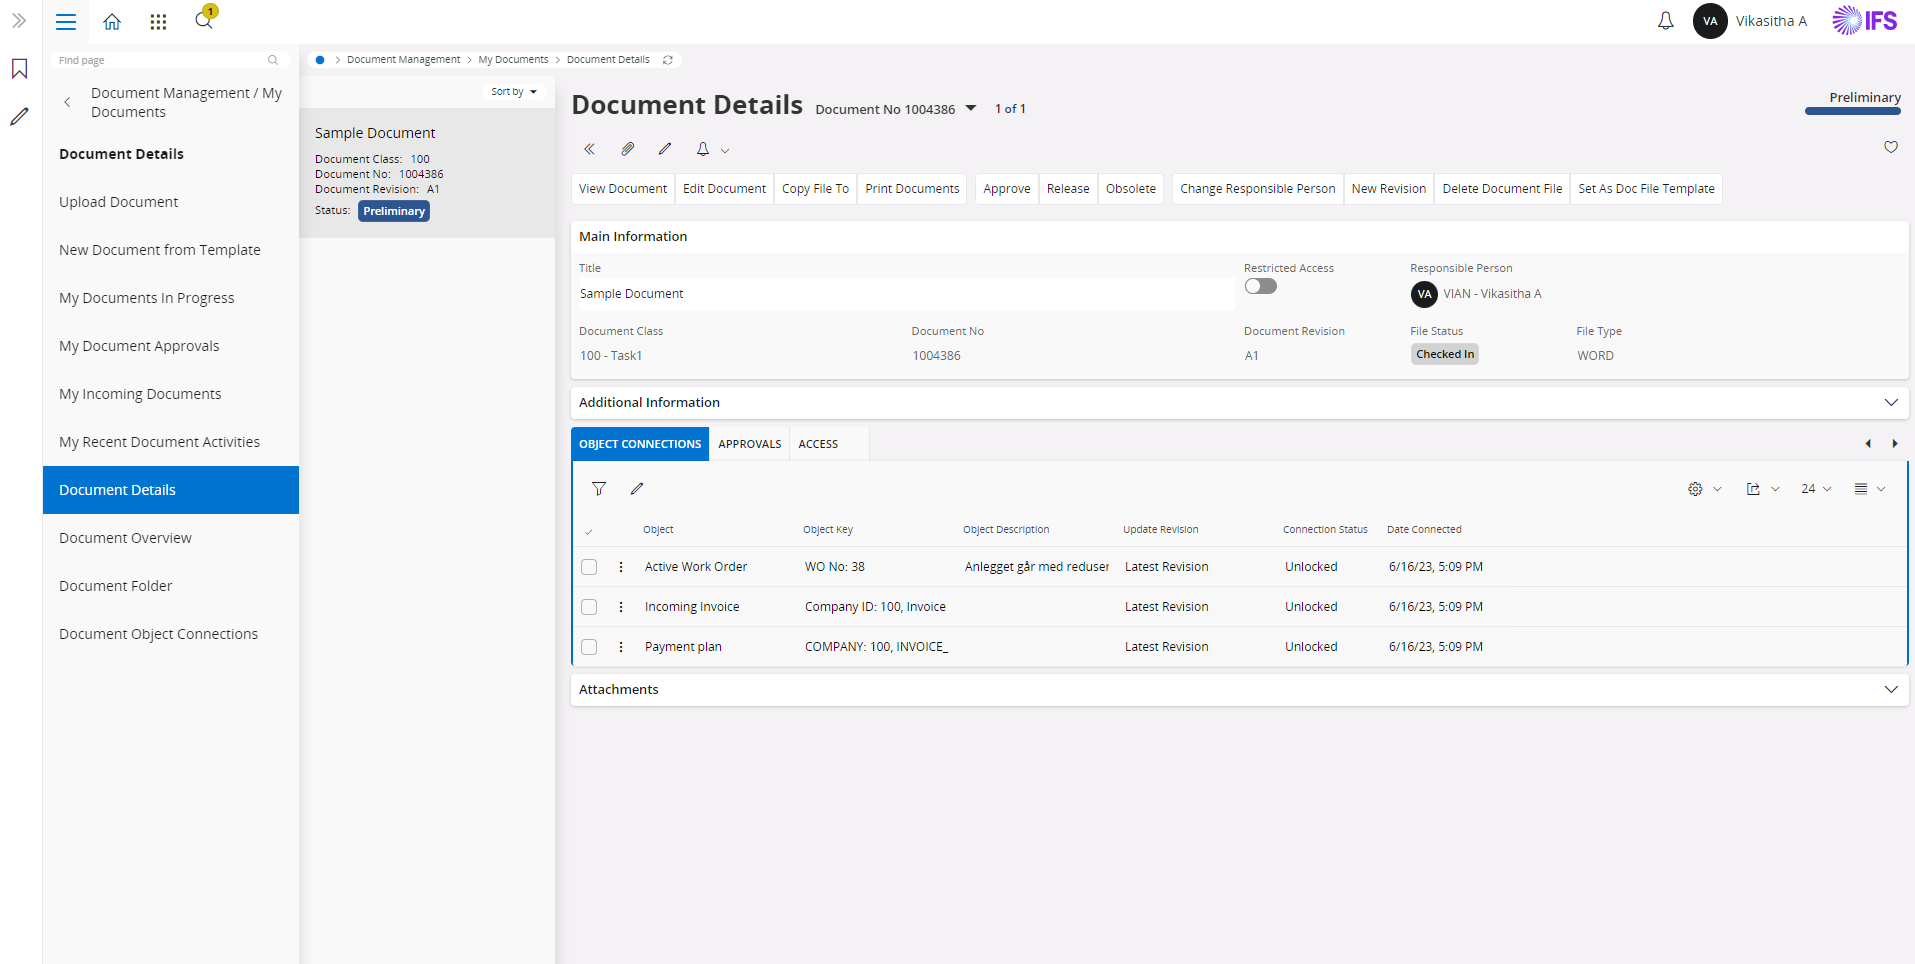
View in Aurena
- View in Aurena
Select any document and click Open.
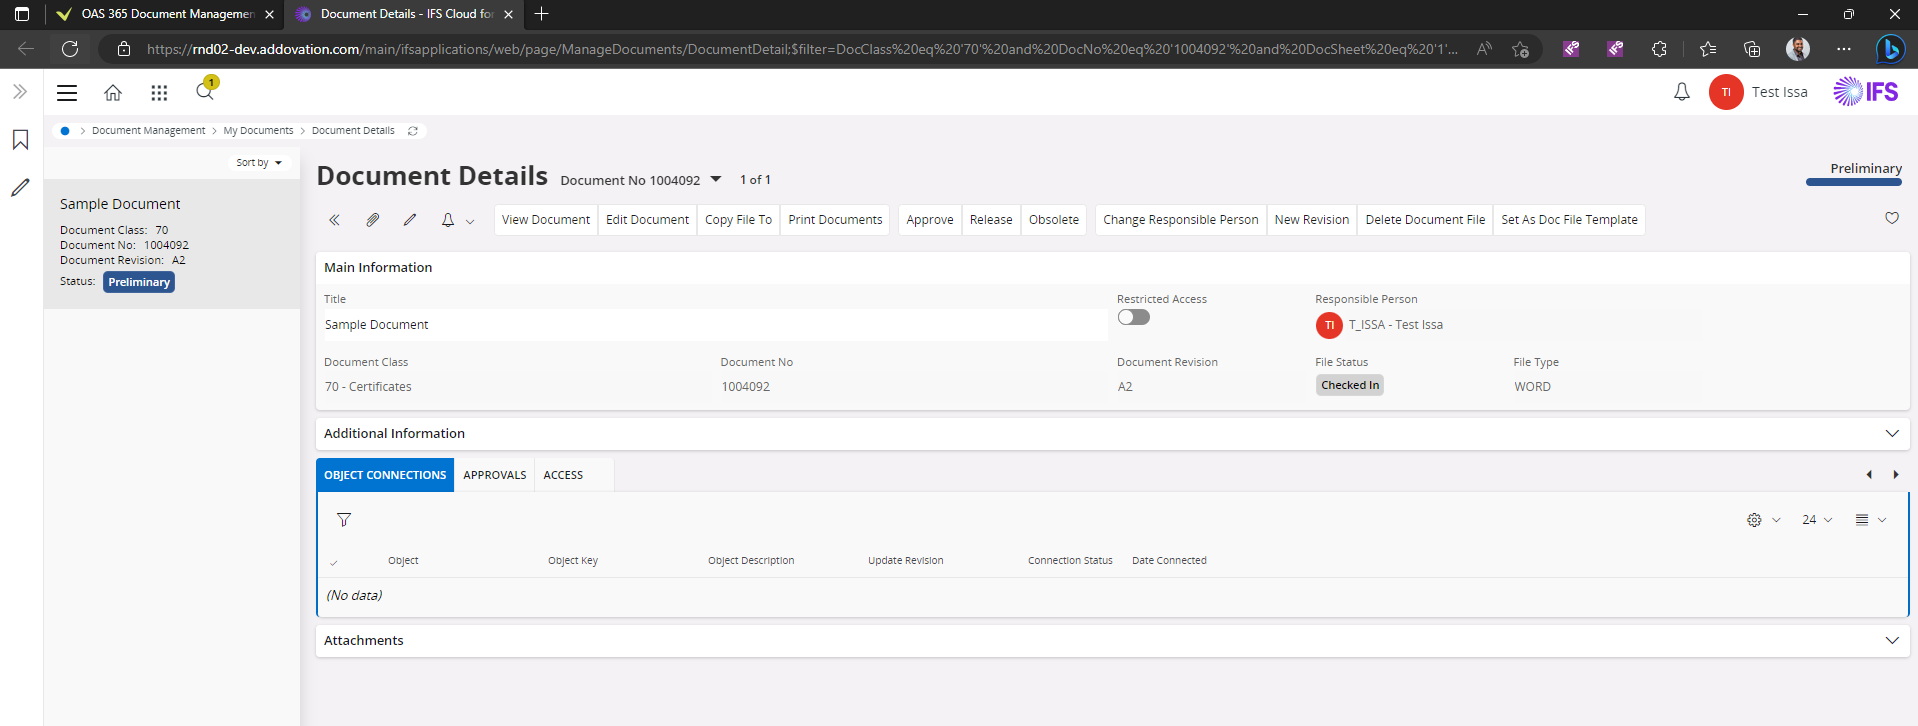
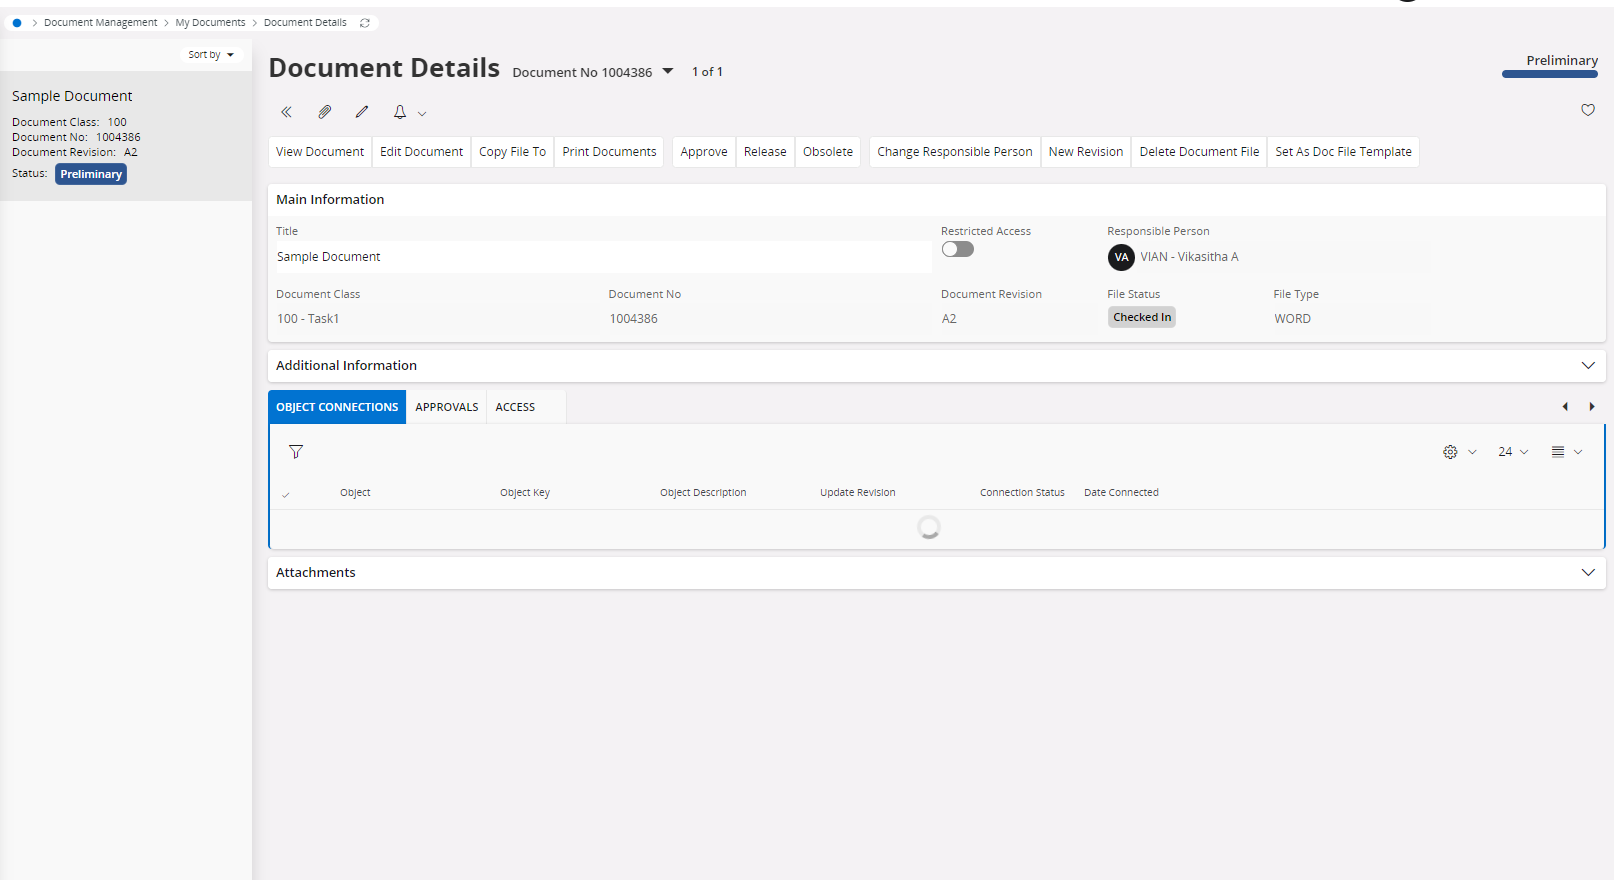
Then select View in Aurena option to view document to be opened in IFS Aurena.
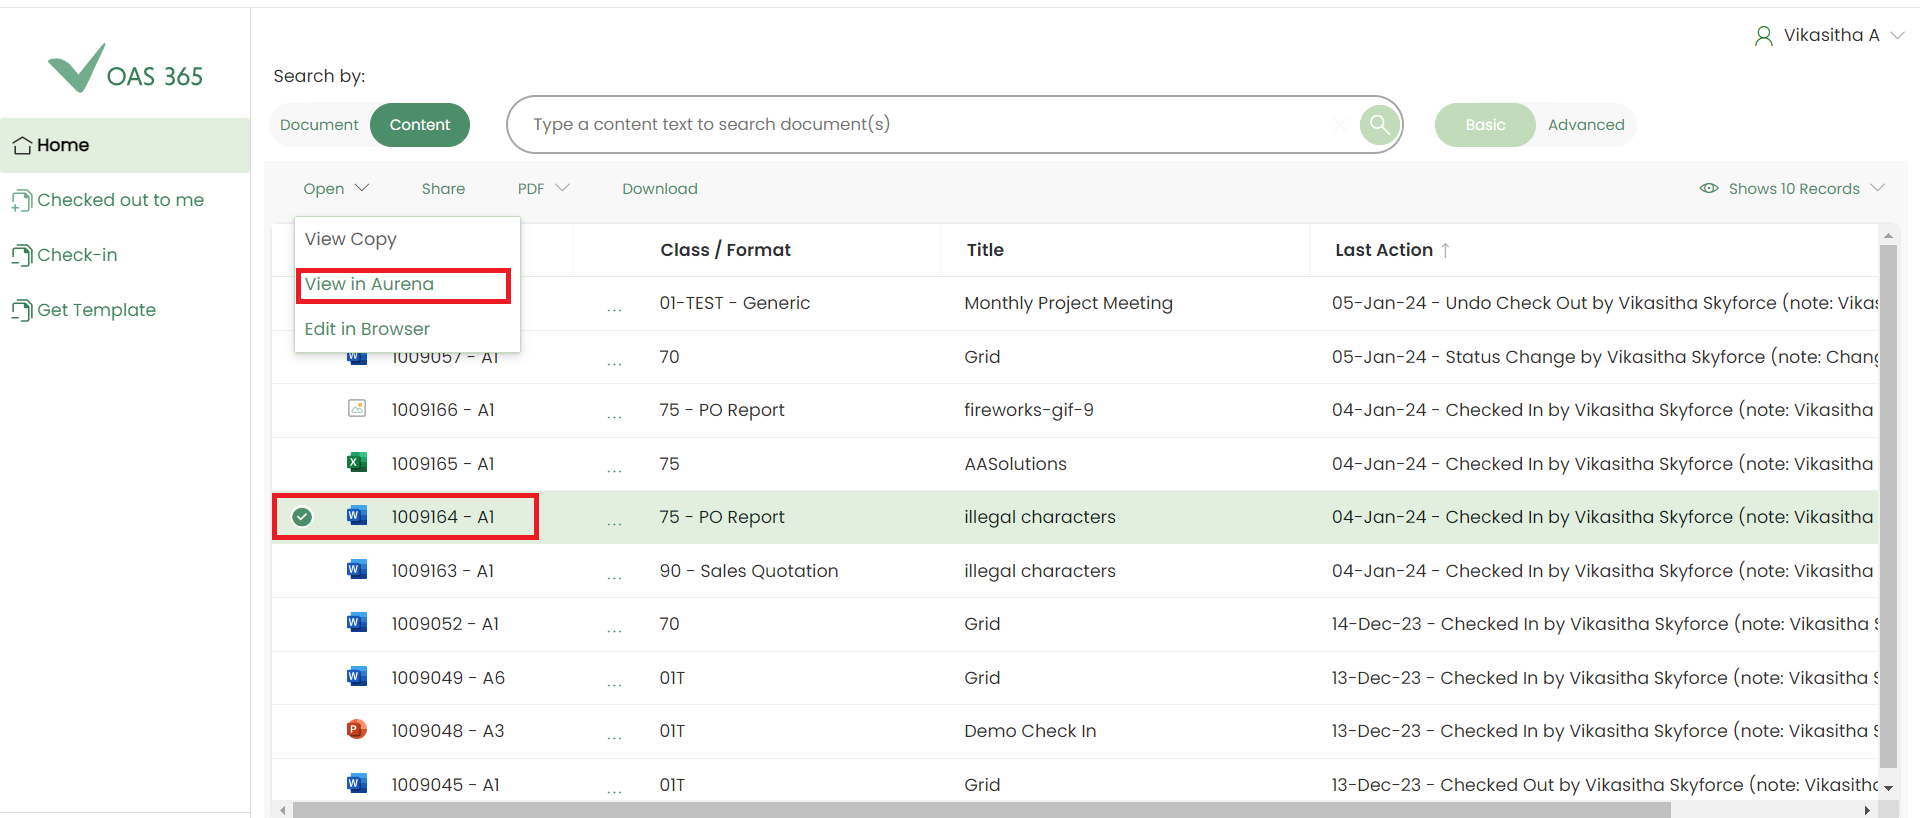
Document details window in IFS Aurena will be opened.
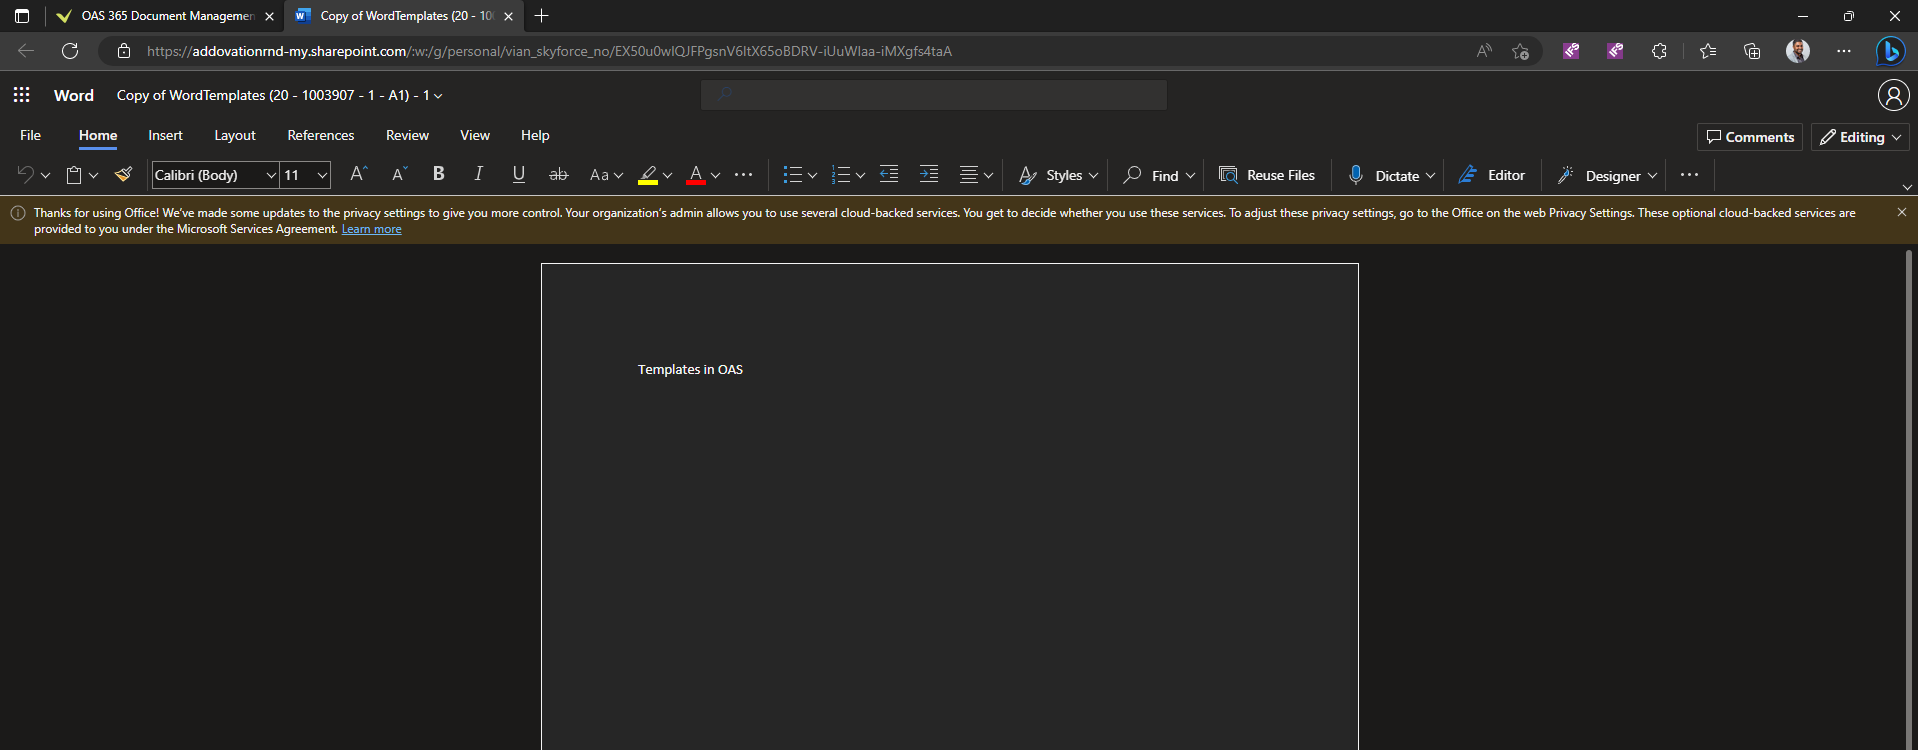
Edit in Browser
Select any document and choose Edit in Browser.
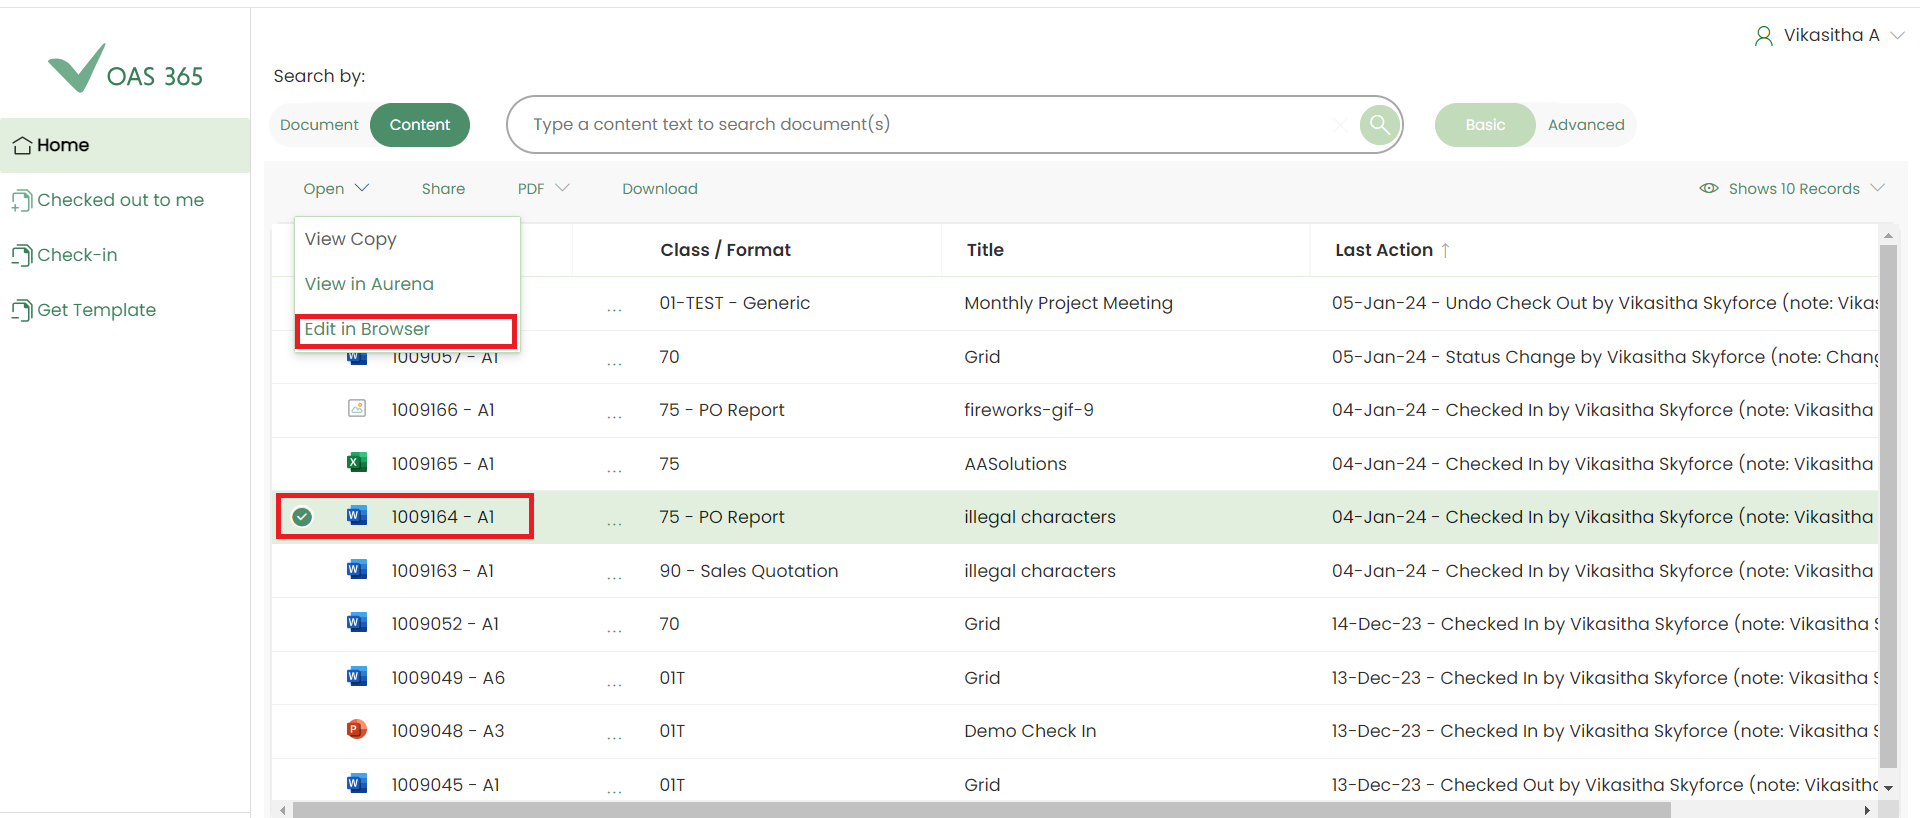
Selected document will be opened in OneDrive and user can edit the opened document which is saved in logged in user’s OneDrive.
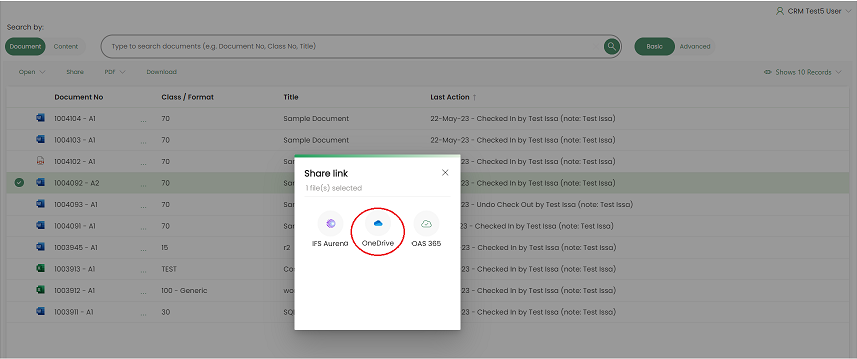
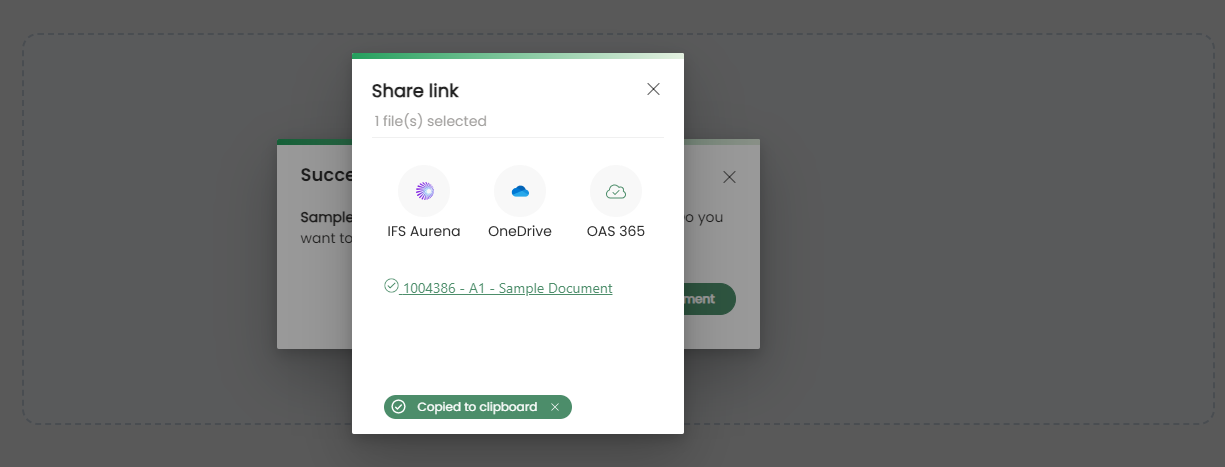
Share
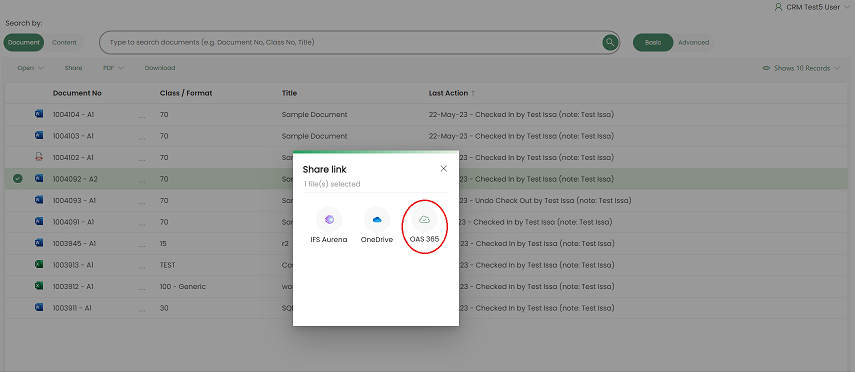
Using Share option, user will be able to share links of selected document/s.
There are four major ways to share document/s using Copy Link dialog.
- Link to IFS Aurena
- Link to OneDrive
- Anyone With the link
- People in organization with the link
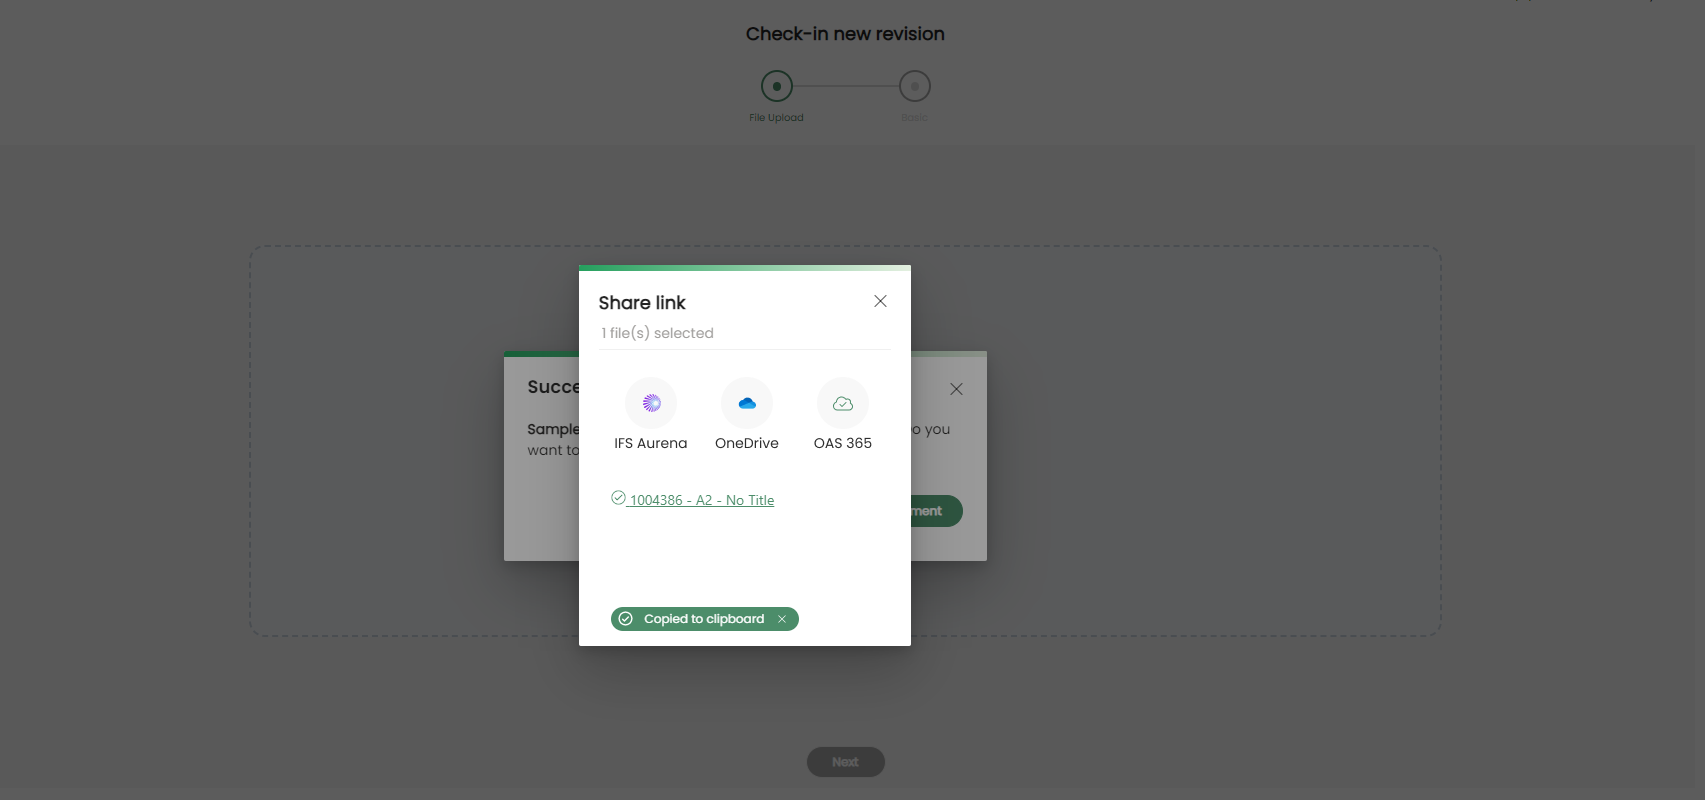
- Link to Addovation Share
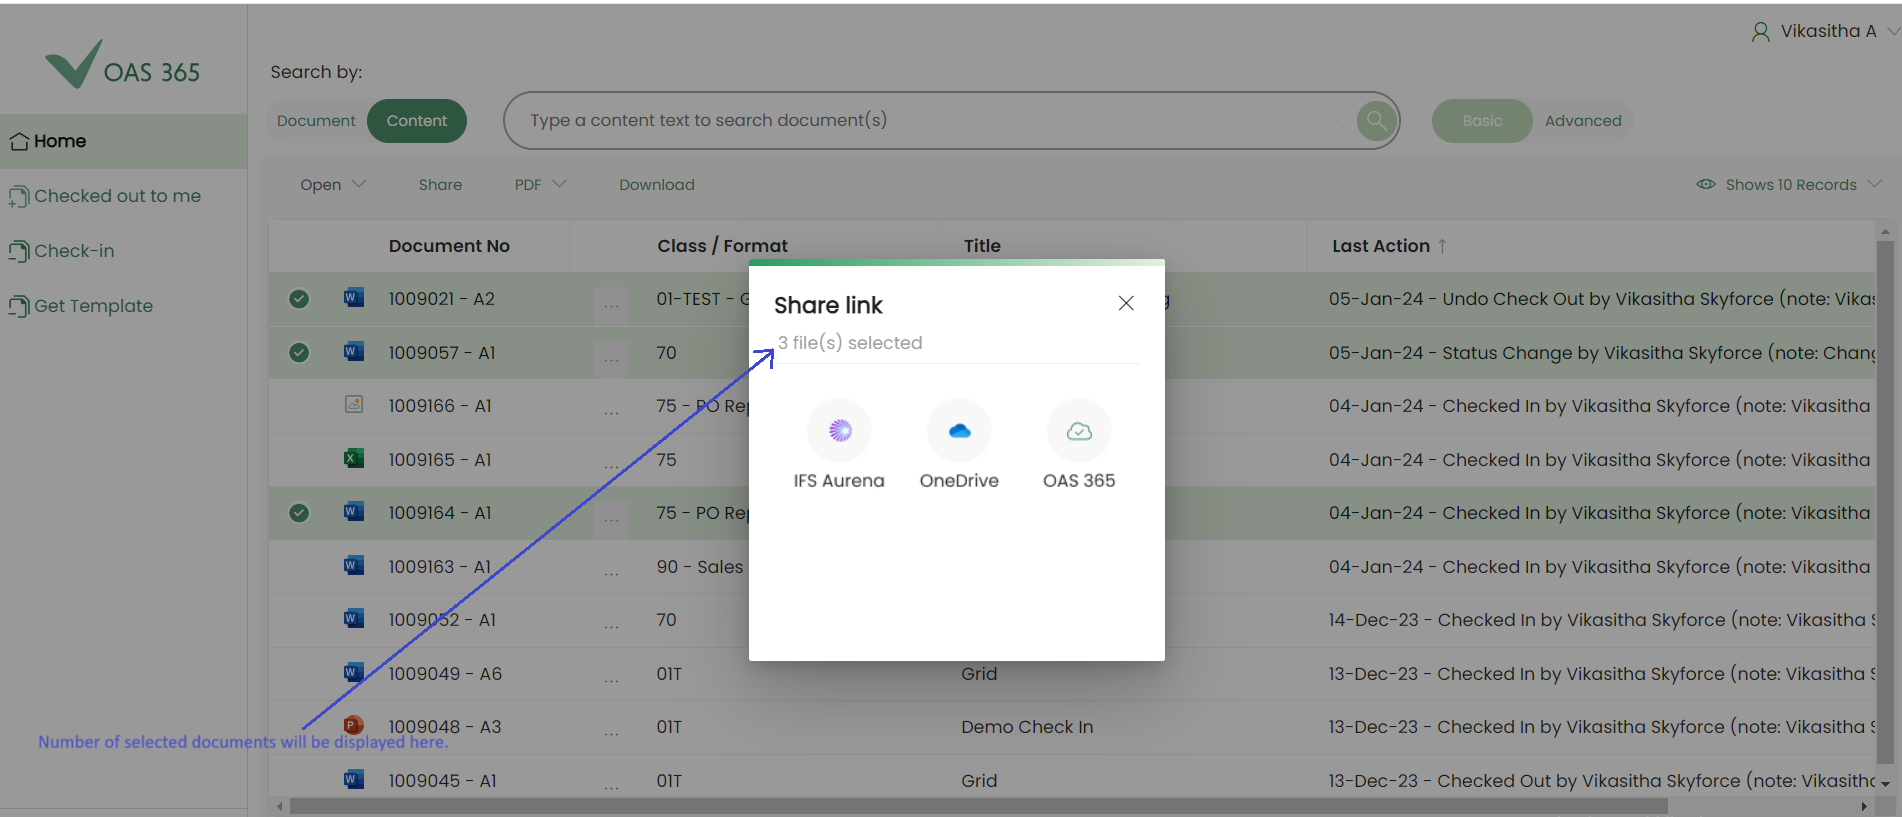
Link to IFS Aurena
Users can create link/s to IFS Aurena by selecting document/s.
It’s possible to open the document directly in IFS Aurena by clicking the generated link.
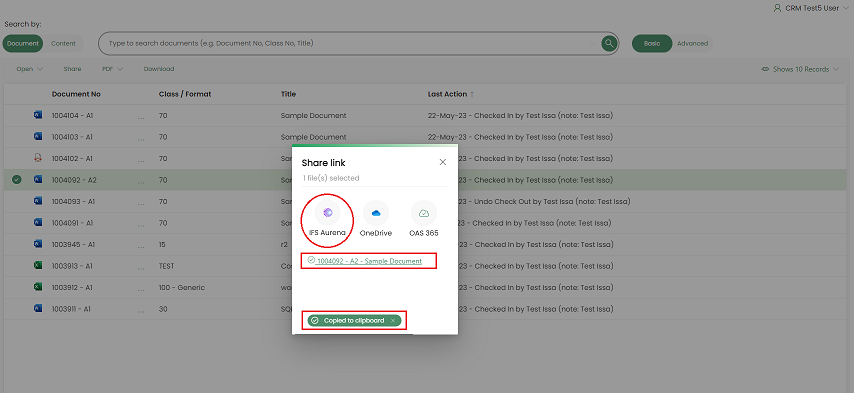
Generated links are copied directly to the clipboard so that links can be shared or pasted as required.
Link to OneDrive
Document link(s) can be shared to anyone using Link to OneDrive.
Important
Transactions related to OneDrive will be processed, according to the policies that have configured as each company requires.
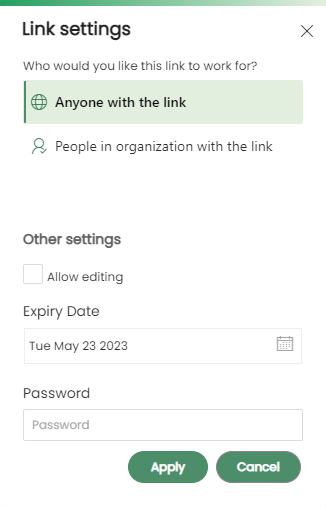
Once you select Link to OneDrive and click on 'Generate' button, the popup Link settings will give users two additional options to share document/s.
- Anyone with the link
- People in organization with the link
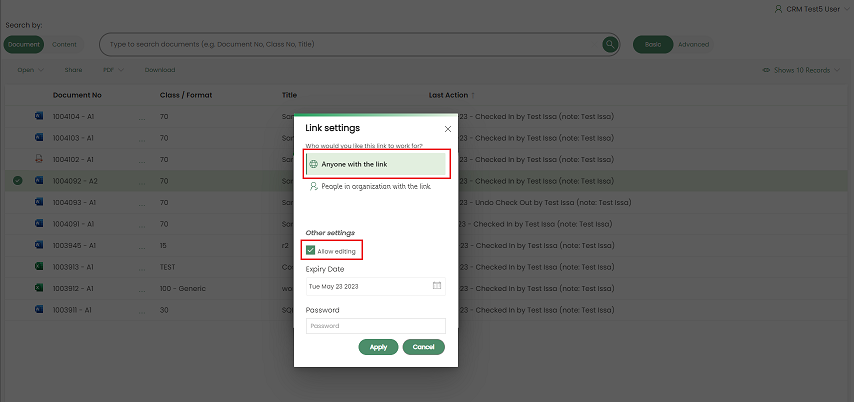
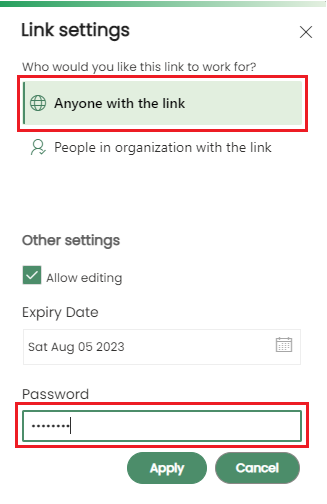
Anyone with the link
Anyone who has a link to the document/s can be accessed with granted view or edit access.
To facilitate sharing option more, additional functionality has been provided as below.
- Allow editing.
- Expiry Date.
- Password
Anyone With the link – Allow Editing
Users can share the document/s to anyone. Enabling Allow Editing check box will allow user to have privilege to edit documents which are shared.
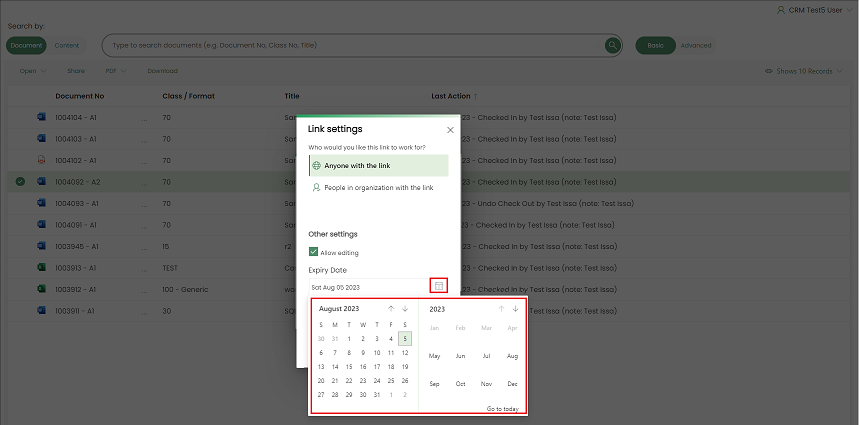
Anyone With the link – Expiry Date
Before sharing the document/s to anyone, user can select a Expiry Date by clicking on calendar icon.
Expire date is set to current date by default. It allows to select any future date, and shared document/s links will be expired after the date selected by user.
Anyone With the link – Password
User are allowed to set password to the shared document/s. If a password has been set, user who received the link will be required to enter the password you set to open the document/s.
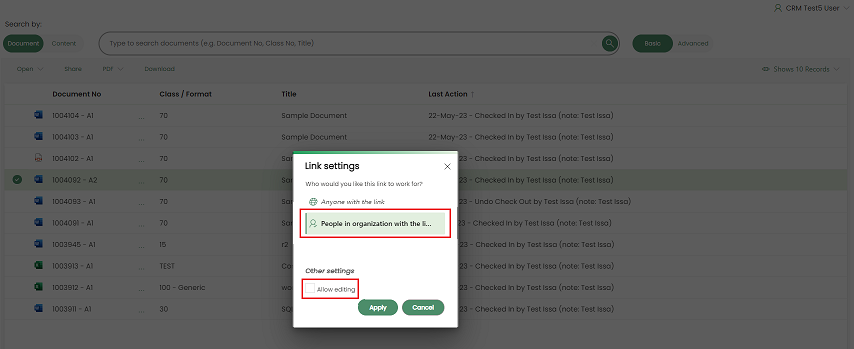
People in organization with the link
Document/s can be shared to anyone within the Organization with view or edit option. If this option is selected, anyone within the related organization will have the access to relevant documents automatically. Users can share the document/s by enabling or disabling ‘Allow Editing’ check box will allow user to have privilege to edit documents which are shared.
Link to Addovation Share
The purpose of this option is to generate a simple document link that will allow opening the document within Addovation Share.
The user will be redirected to the sign-in page if they have open the document in a different browser tab. Select any Document(s) and choose Addovation Share.
Document(s) link with View/Edit option will be generated by clicking Apply button.
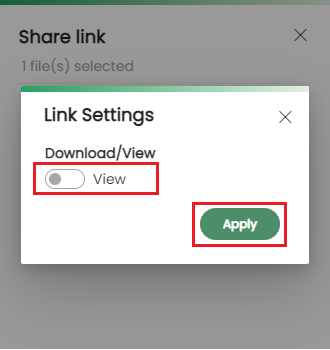
Generated link includes:
- Web address
- Document access mode
- Document number

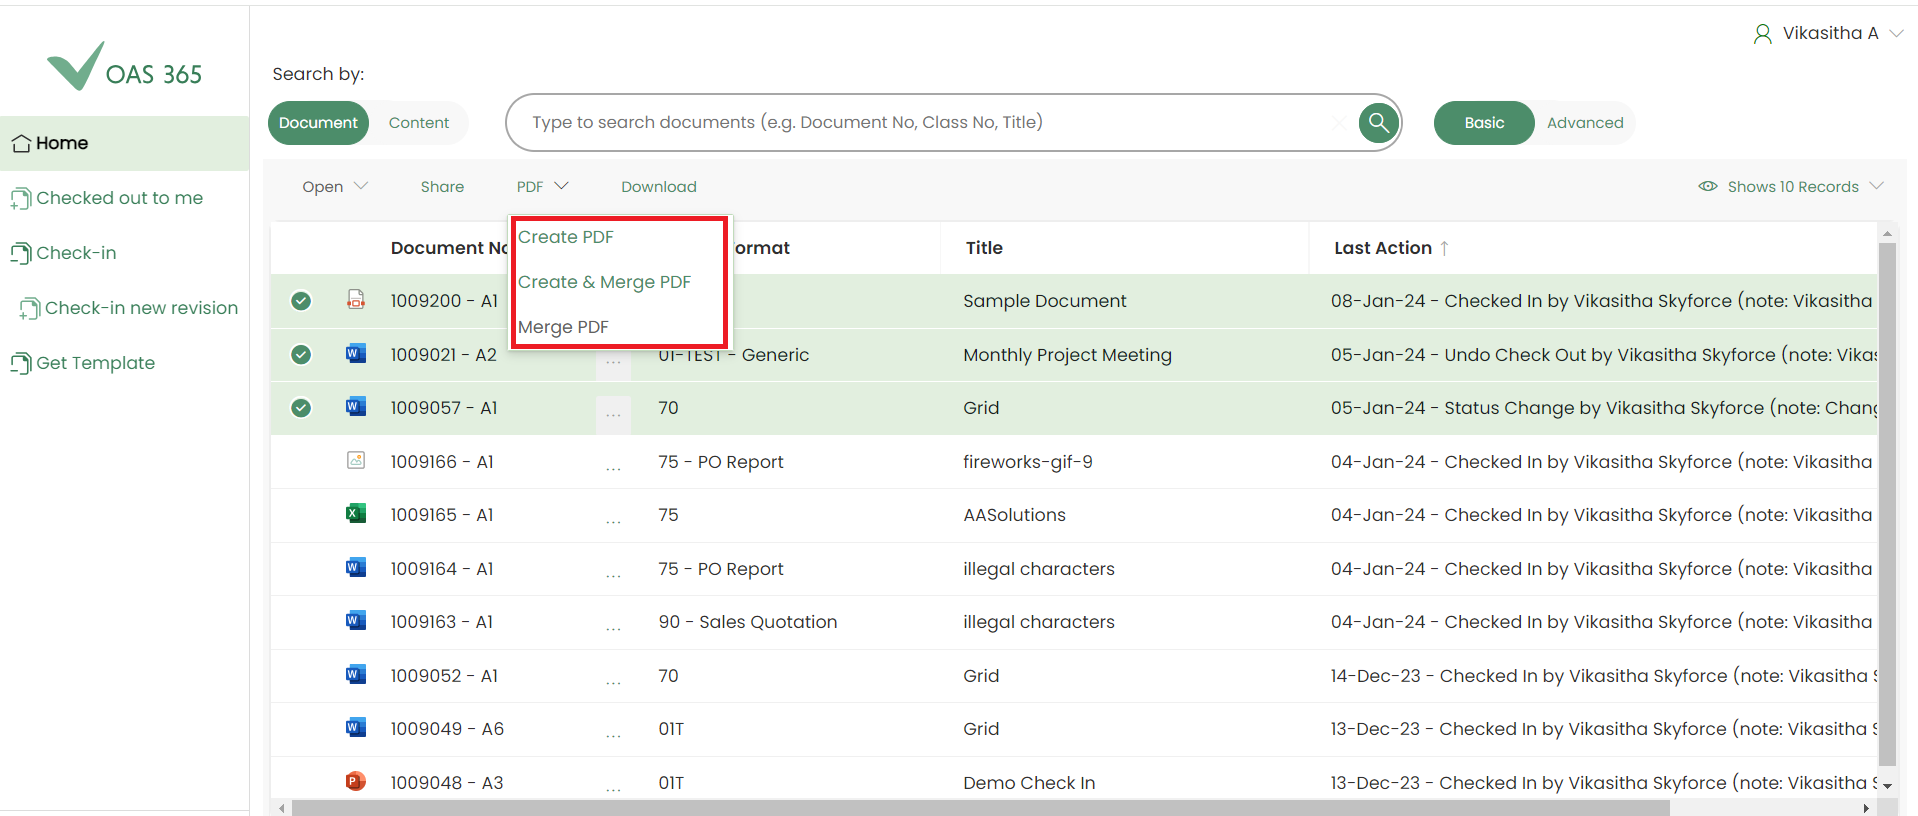
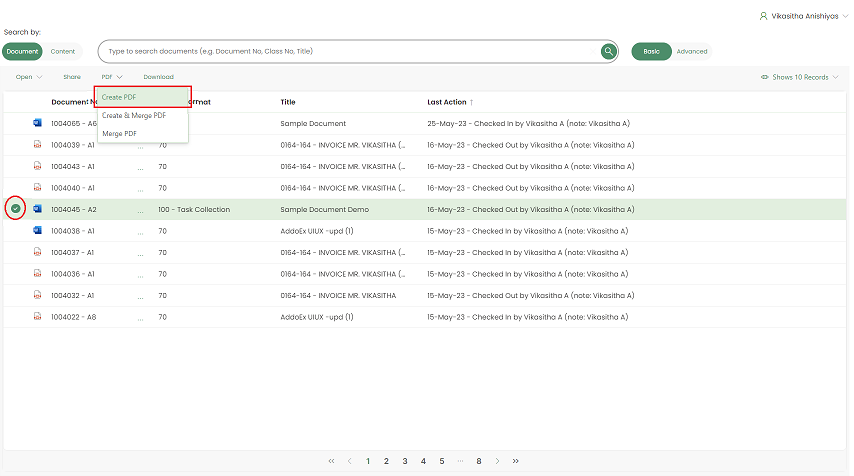
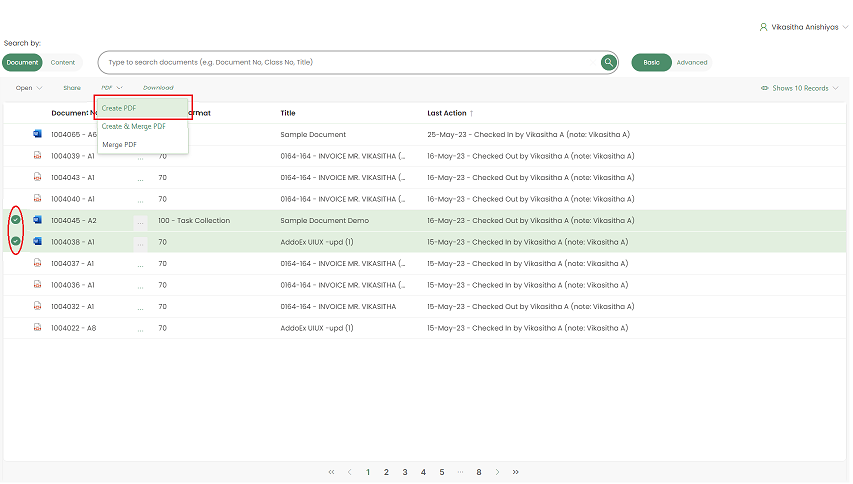
Users are allowed to convert word document/s to PDF document(s).
- There are three options available;
- Create PDF
- Create & Merge PDF
- Merge PDF
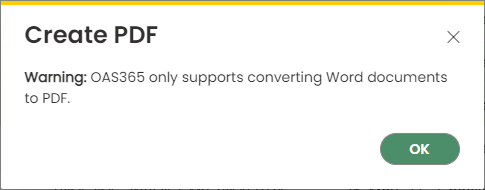
Important
Only WORD files are supported to create PDF documents in the first version of the solution and If user selects any other, a warning message will be displayed.
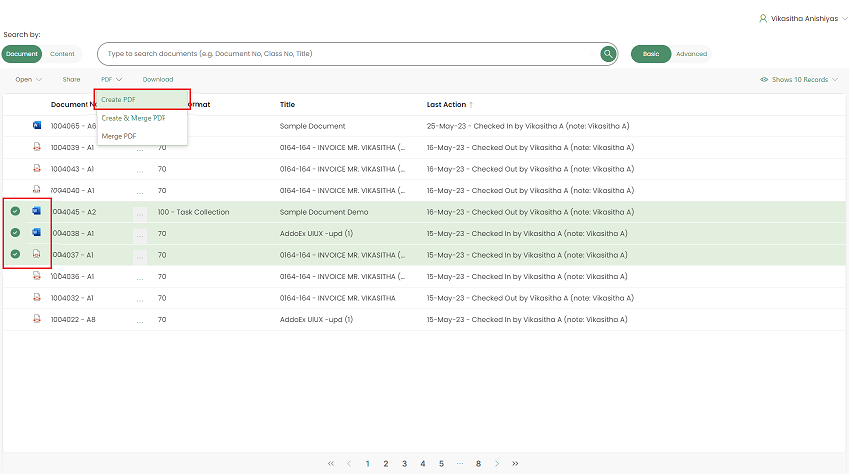
Create PDF
Users are allowed to select single or multiple document/s and covert them into a PDF file.
Select any document, click PDF menu, and choose Create PDF.
Only Word file types are allowed converting to PDF file. Created PDF file will be downloaded to browser’s default location. If user selects multiple documents, a zipped folder will be downloaded with PDF files.
Single word document:

Multiple Word Documents:


Multiple documents (Different file types) :
If user selects multiple types of documents including word documents to convert PDF, a warning message will be appeared and converted files of word files will be downloaded as a zip file.


Important
Only selected WORD documents are converted to PDF and download as zip file.
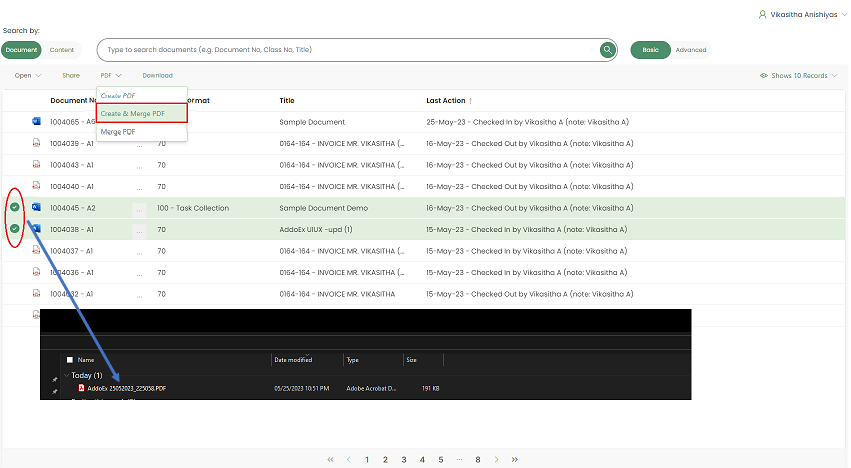
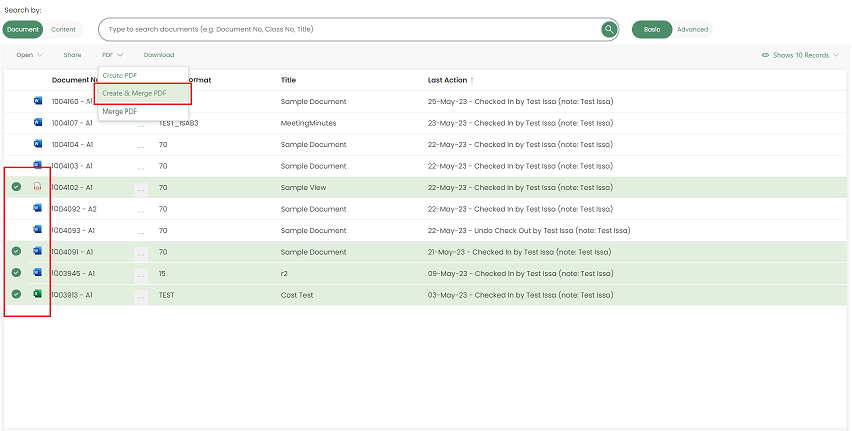
Create & Merge PDF
Users must select multiple word documents to enable Create & Merge PDF option.
Select multiple word documents, click PDF menu, and choose Create & Merge PDF. Selected word documents will be converted to PDF and merge into a single PDF file. It will be downloaded to browser's default location.
Multiple documents (Different file types/extensions) :
Choose multiple documents including word documents to create & Merge PDF.
Warning message will be appeared, and only words files will be converted into pdf and then merged all.


Note
Create & Merge PDF menu will be disabled when user selects single or multiple files other than word documents.`
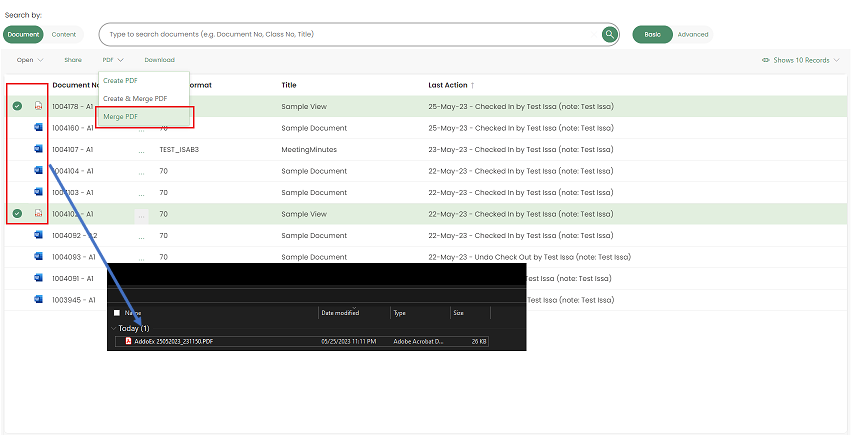
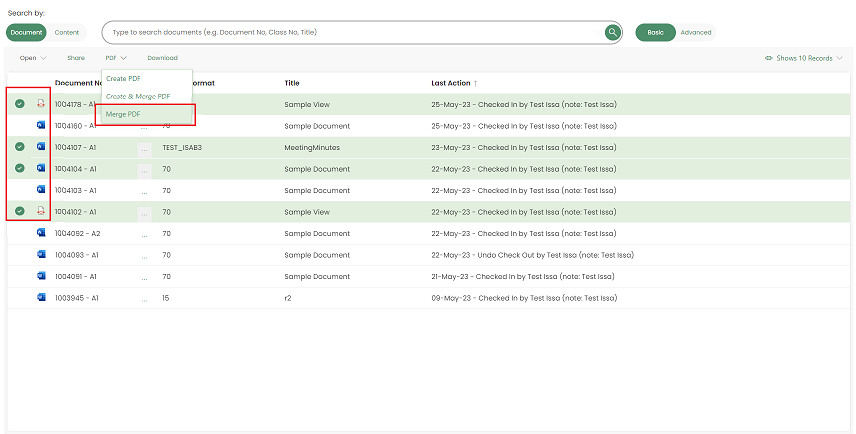
Merge PDF
Users must select multiple PDF documents to enable Merge PDF, which will allow to merge files in to a single PDF file.
Select PDF documents, click PDF menu, and choose Merge PDF. Only ‘PDF’ file types are allowed to be merged. Converted PDF file will be downloaded to browser‘s default location.
Multiple documents (Different file types) :
- Choose multiple documents including PDF documents to
Merge PDF.
- Warning message appear and only pdf documents will be merged into one pdf document.
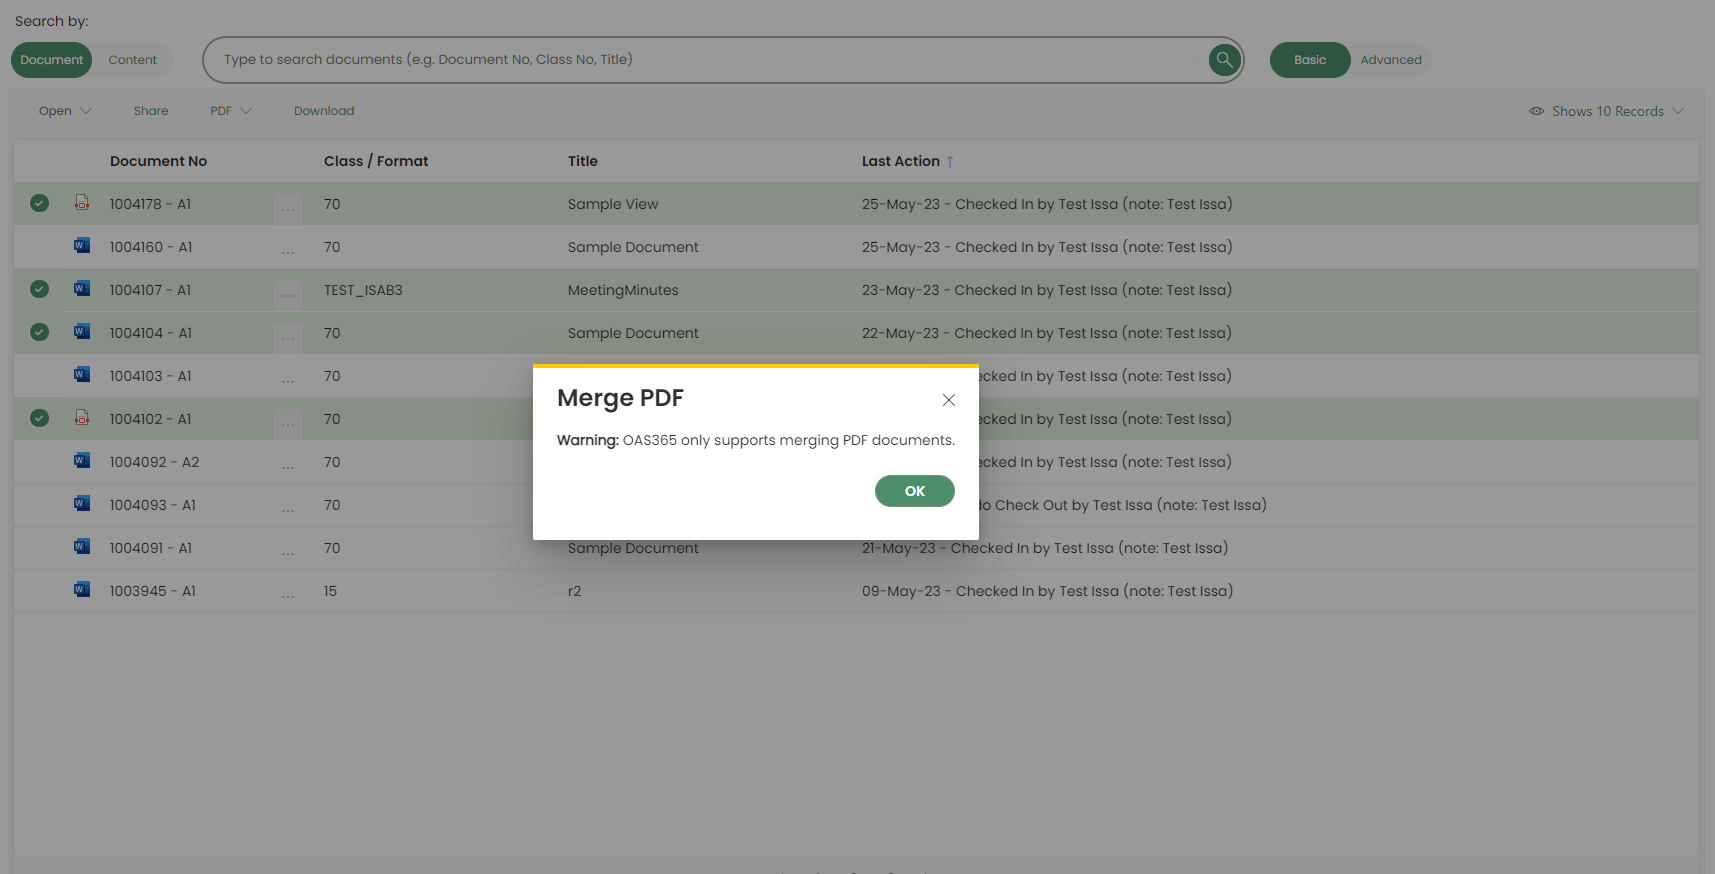

Note
Merge PDF menu will be disabled when user select single or multiple files other than PDF documents.`
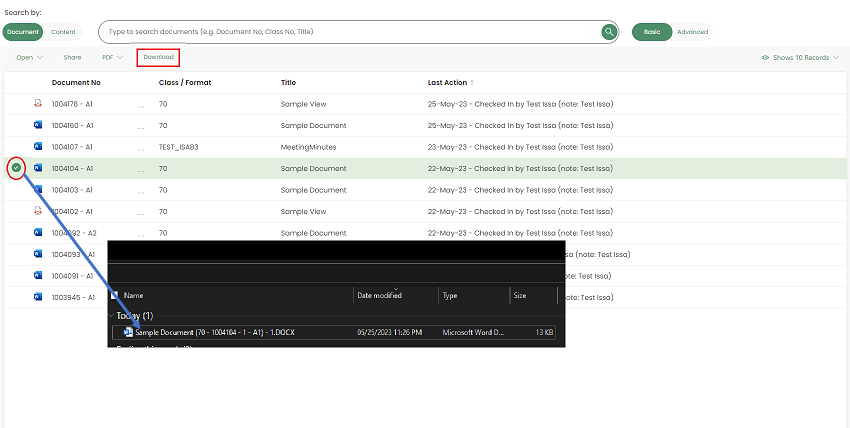
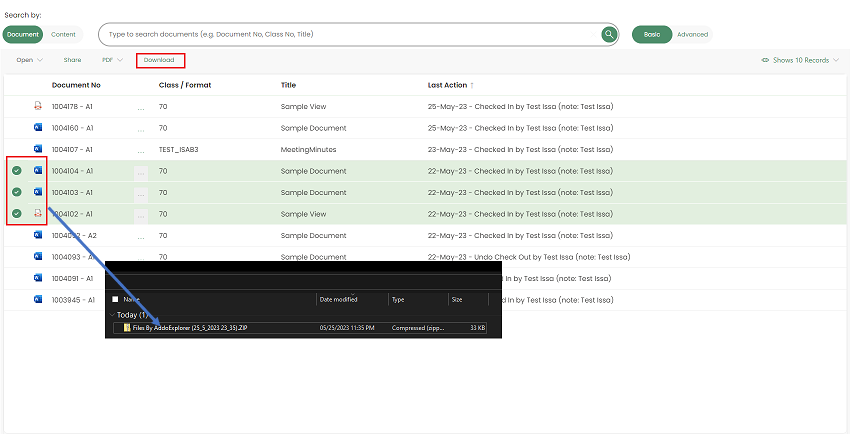
Download
Users can download single or multiple documents. Downloaded file will be saved in browser’s default location. If user selects multiple documents, a zip folder will be downloaded with selected files in it.
Single Document:
Multiple Documents:
Functionalities per document
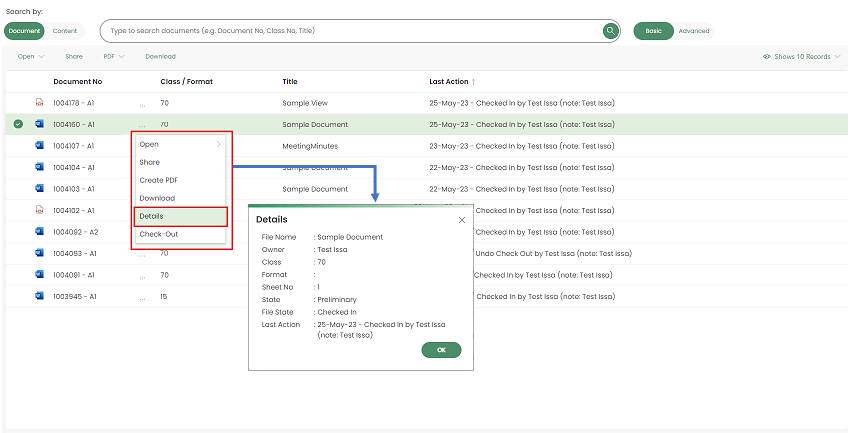
Each row of the documents has main options represented by horizontal three dots menu.
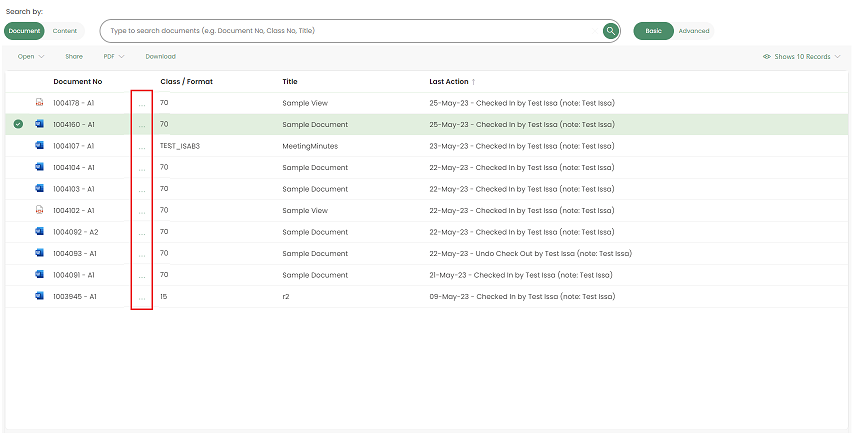
In addition to main menu, Details of each document has been provided related to selected document.
Note
Horizontal three dots menu will be enabled if user selects only a single document. Menu will be disabled for multiple selections.
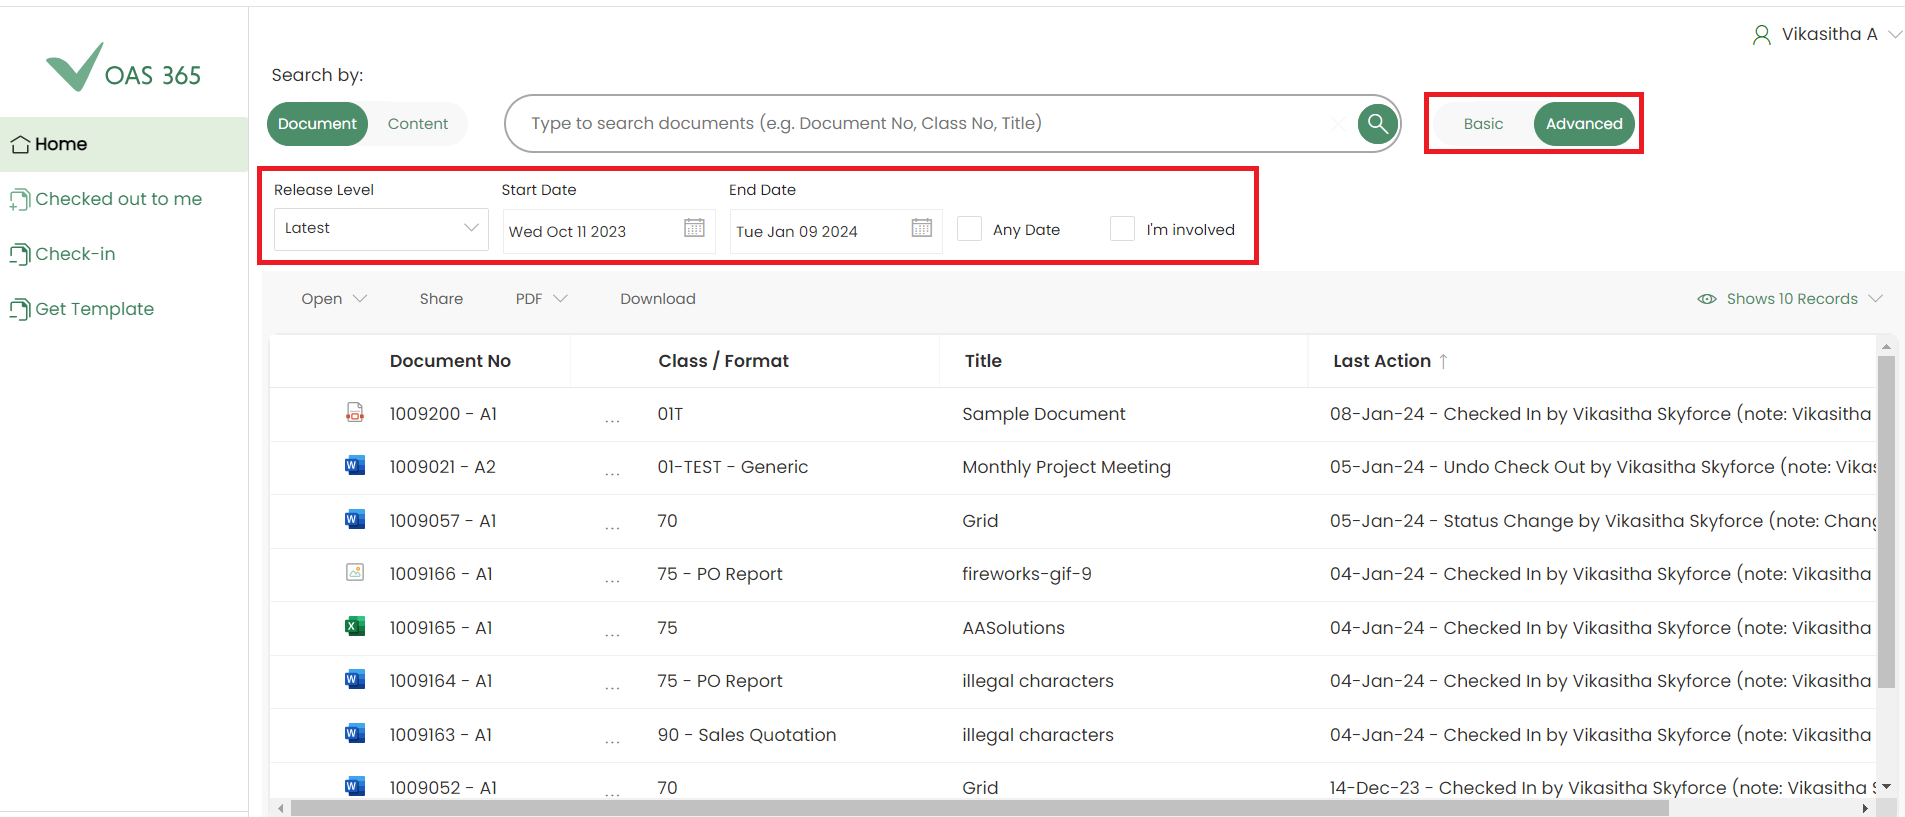
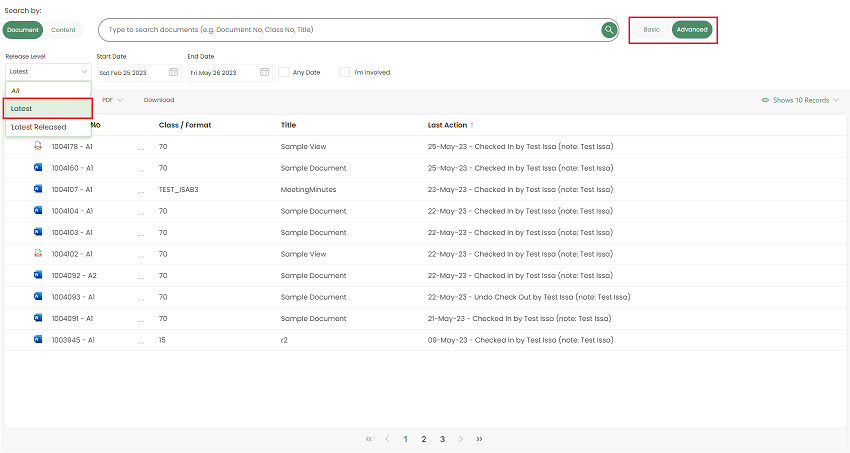
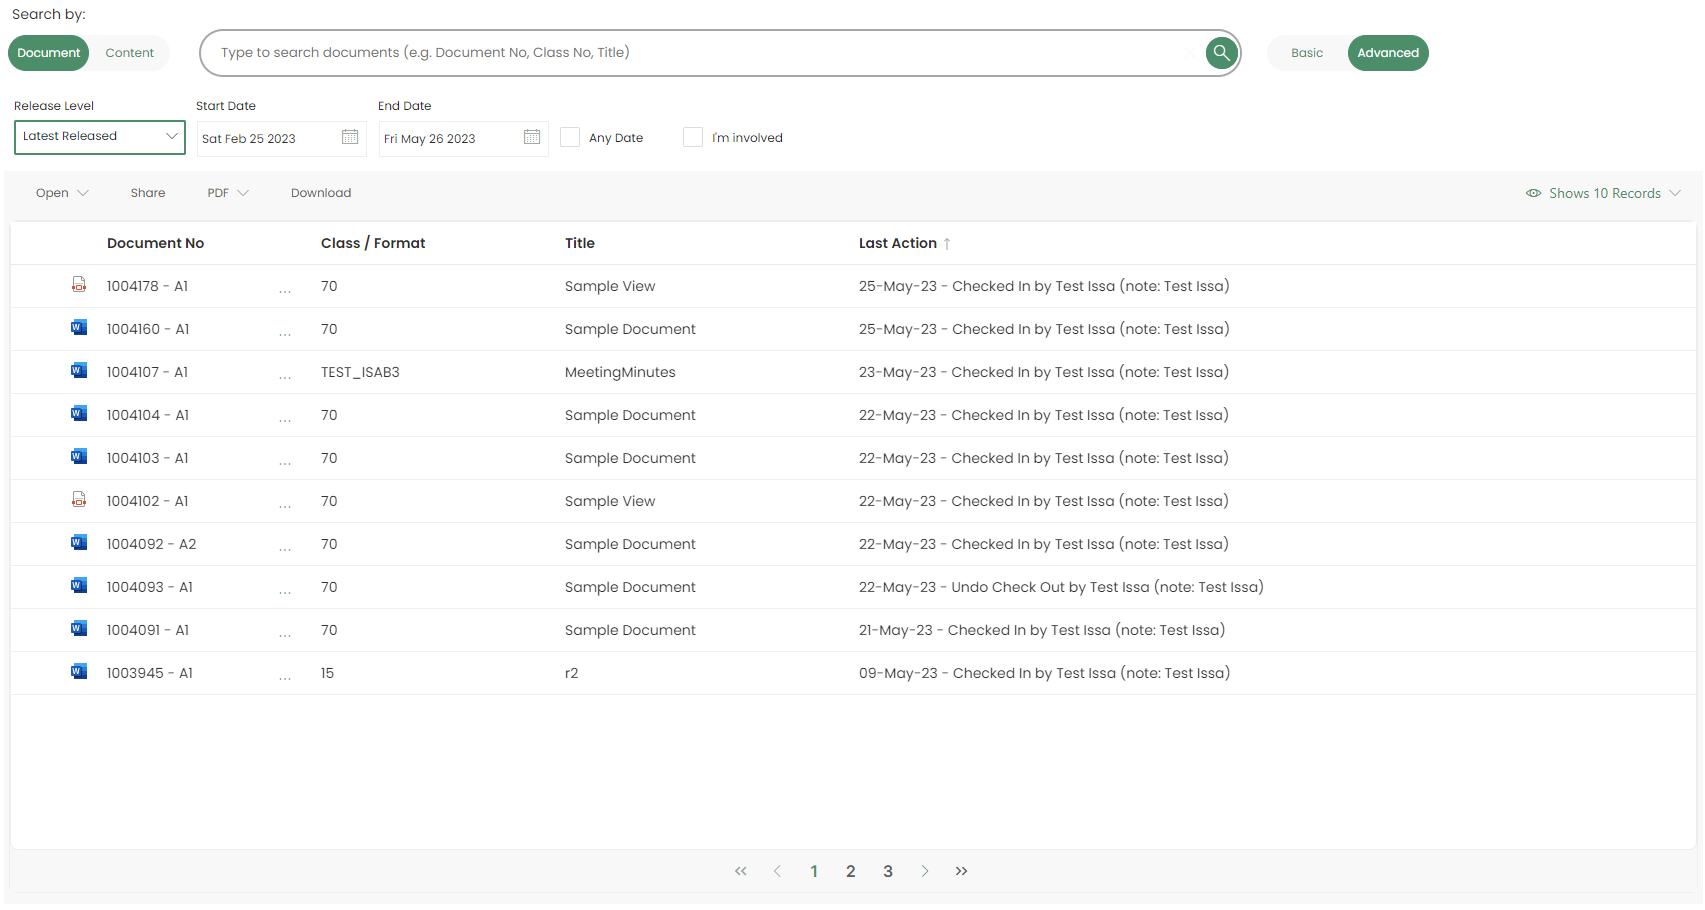
Advanced Search
Once the Advanced Search mode is enabled (using the toggle switch) following filters will be presented.
- Release Level
- All
- Latest
- Latest Released
- Start Date
- End Date
- Checkboxes
- Any Date
- I’m Involved
Users can simply hit the Search button, and the search for documents the user has access to and where the user has been involved and that has been modified the last 100 days.
There are several additional options for you to use in Advanced Search.
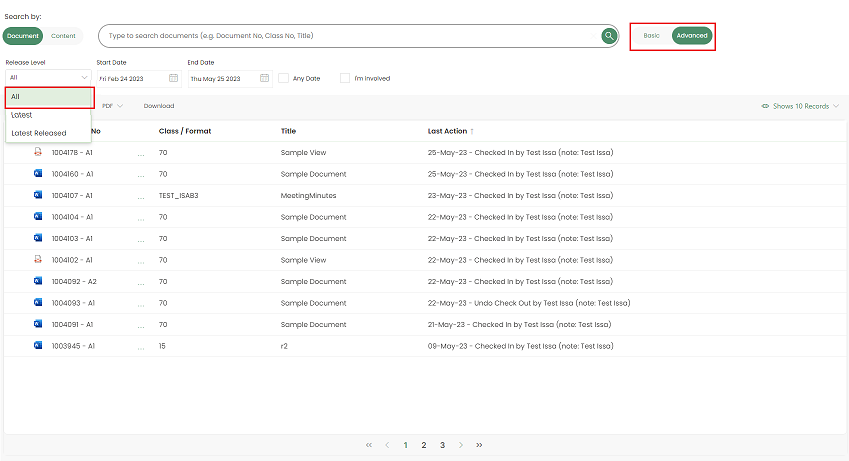
Release Level
In Advanced Search, there are three release levels available to search documents.
- All
- Latest
- Latest Release

• Release Level – All
Select All from Release Level drop down list and click on search button, then it will list all released documents.
Important
Every process will be affected by all enabled fields.
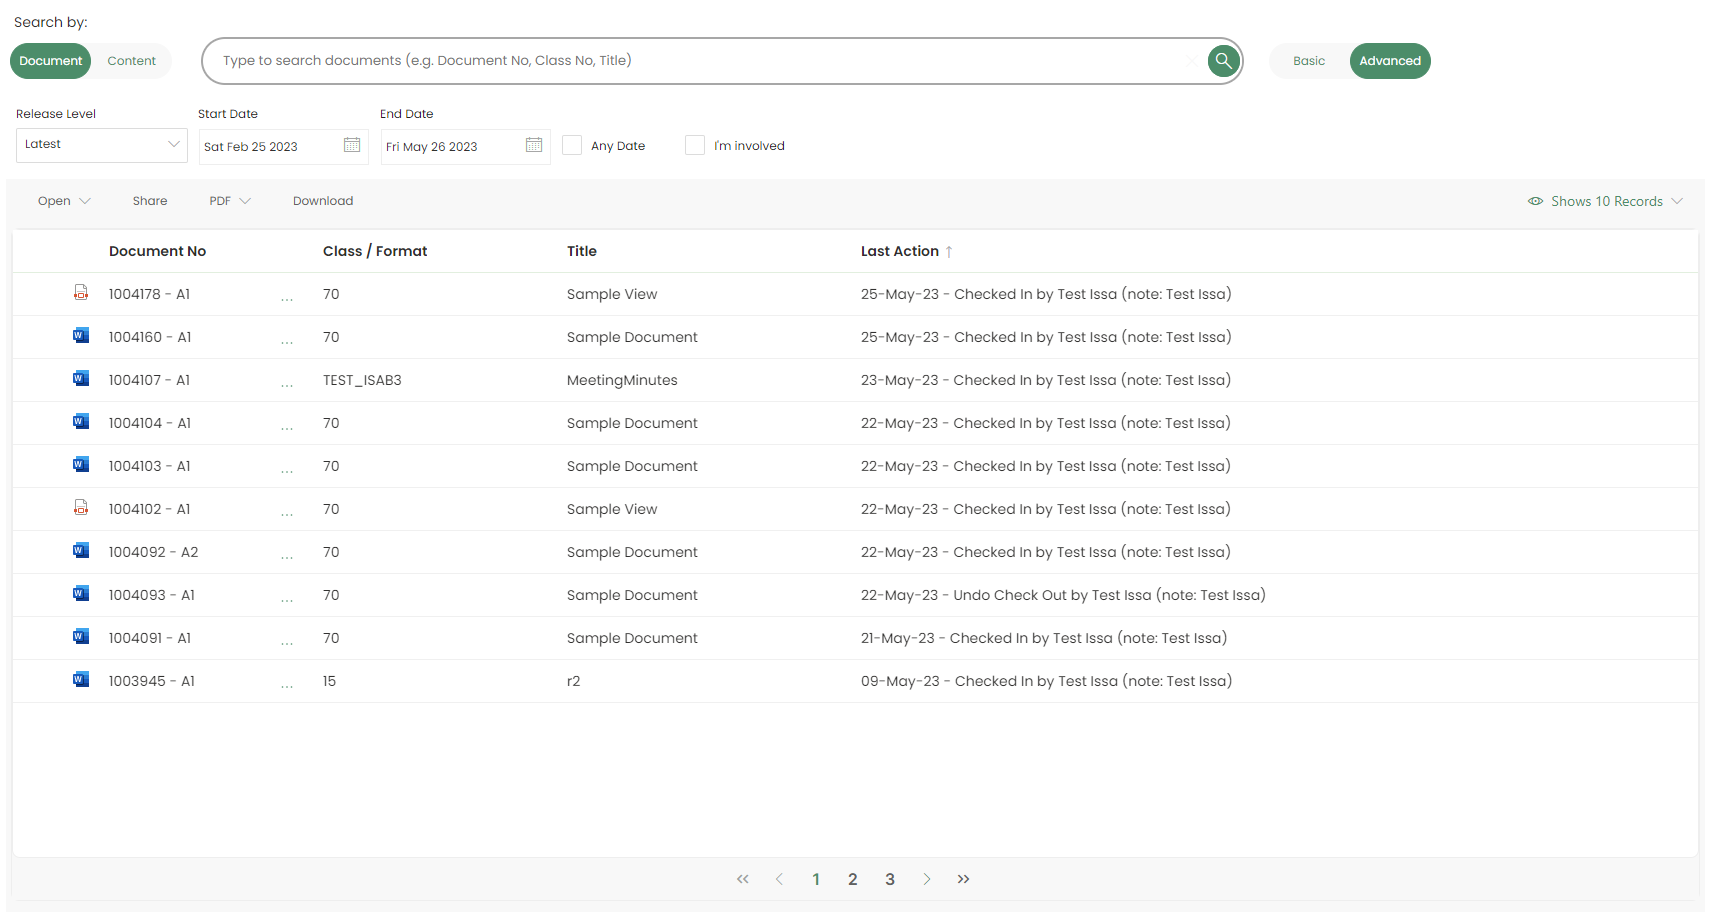
• Release Level – Latest
Select Latest from Release Level drop down list and click on search button, then list will be displayed with latest version of the documents according to the visible date range. Ex: For Document 115258-A1 and 115258-A2, only the 115258-A2 document will be listed.
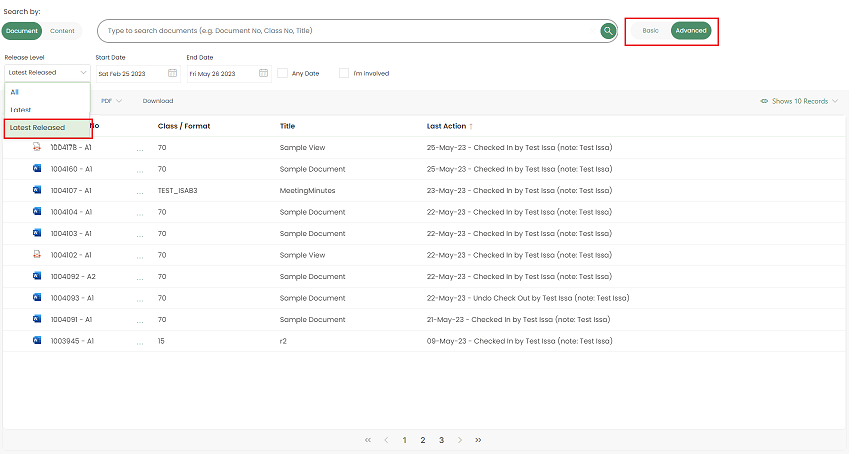
• Release Level – Latest Released
Select Latest Released from Release Level drop down list and click on search button, then it will list all latest released versions of the documents.
Example:
Start Date /End date
Users have the facility to filter documents by setting a specific date range according to the document modified date.
By changing the Start date and End date you can search for documents within a date range. Note that the Any date must be unticked for this option to take effect.
- Start date/End date will be allowed to choose up to
System Date

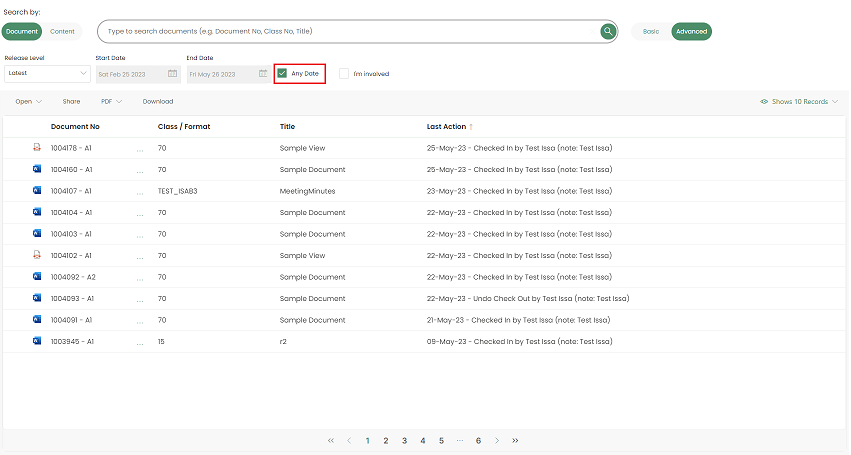
Any Date
By ticking this checkbox, you can search for documents by not paying any attention to when they were modified (i.e., the last 100 days constraint is removed, and any from / to dates will have no effect)
I’m Involved
Enables user to filter the result by specifying the relation you have to the document. If you haven’t been involved with the document in any way but still want to find other documents in IFS, you need to untick this checkbox.

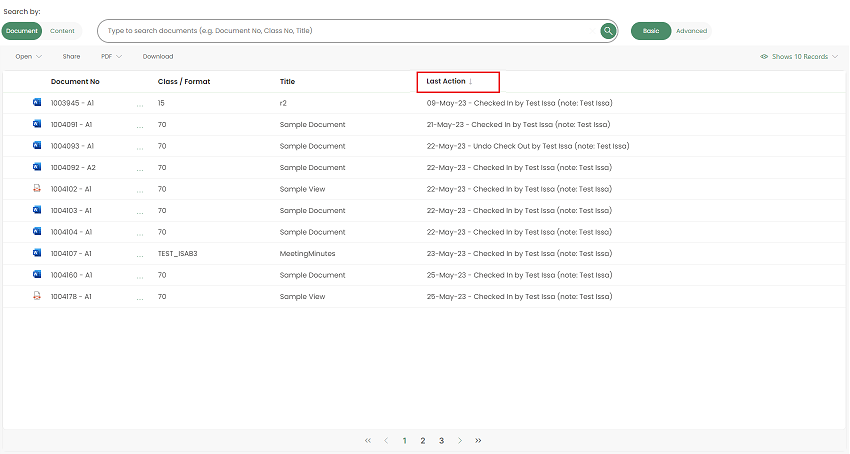
Sort Documents
There is an option to sort documents in the list.
It is enabled for both for Basic Search and Advanced Search. User can sort document/s by clicking on Document No, Class-Format, Title and Last Action that visible on headers as depicted below.
By default documents will be listed in descending order of Last Action.
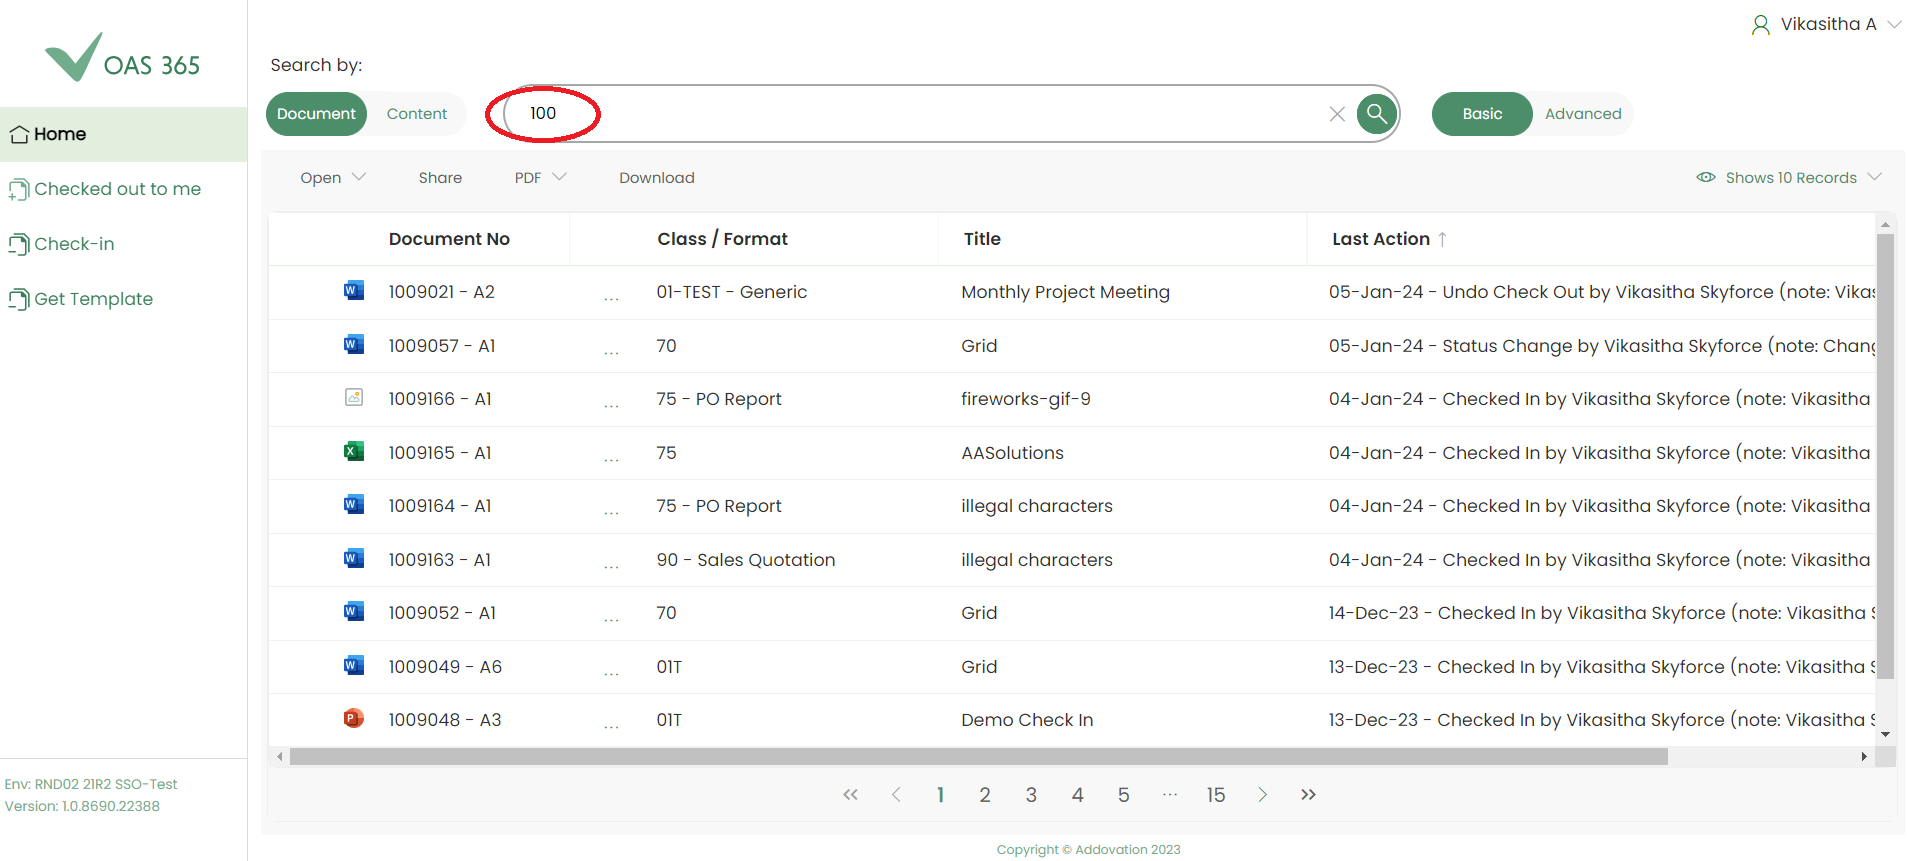
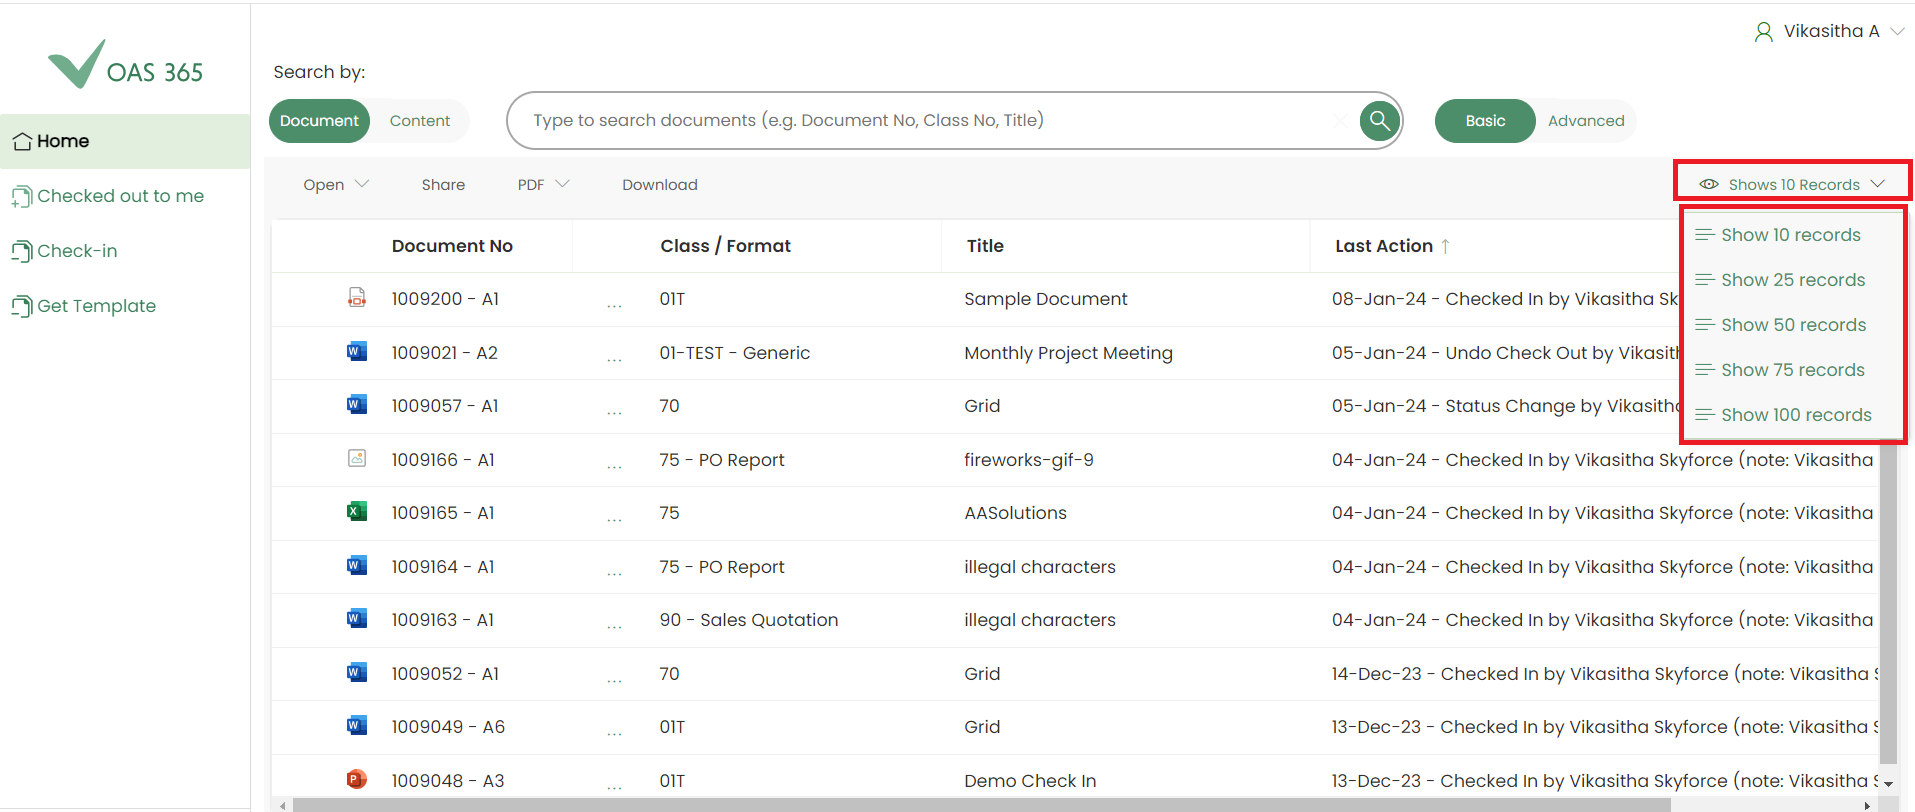
Show Records
User can select the number of records to be displayed per each page using the below depicted option.
By default, it displays 10 documents in each page. User can change it up to 100 records.
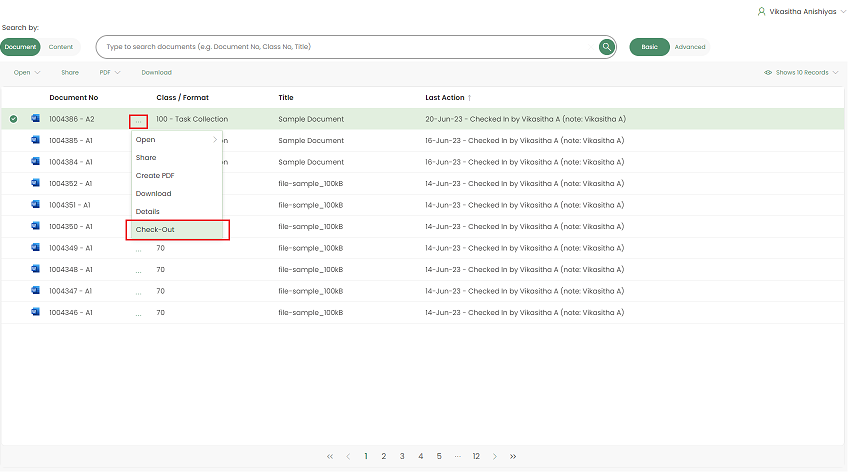
Check-out Document
User can Check-Out document by selecting Check-Out option from the menu.
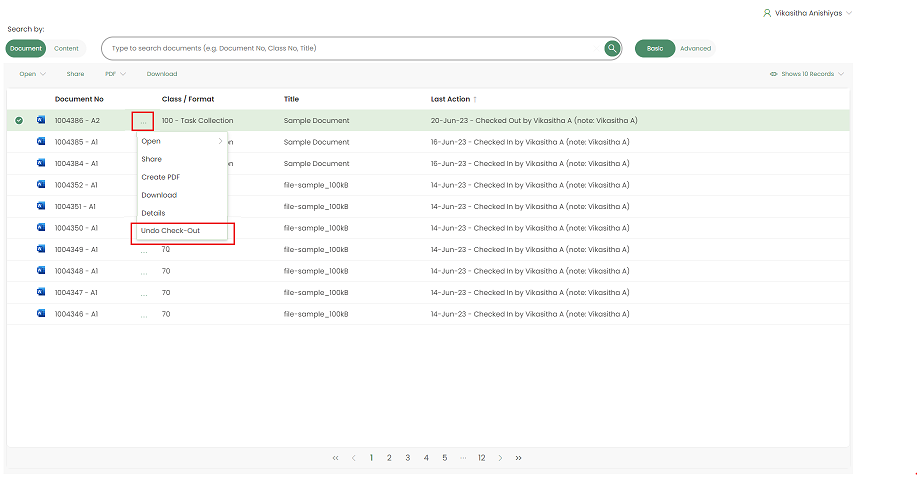
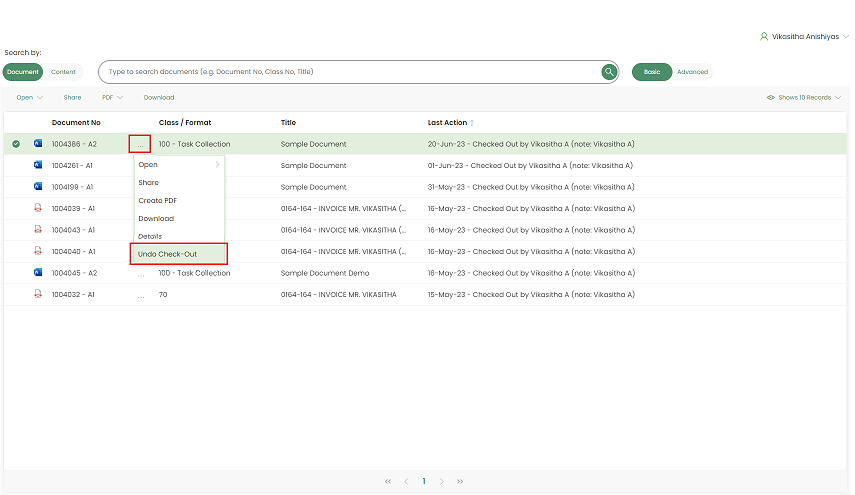
Undo check-out Document
User can undo check-out document by selecting Undo Check-Out option from the menu.
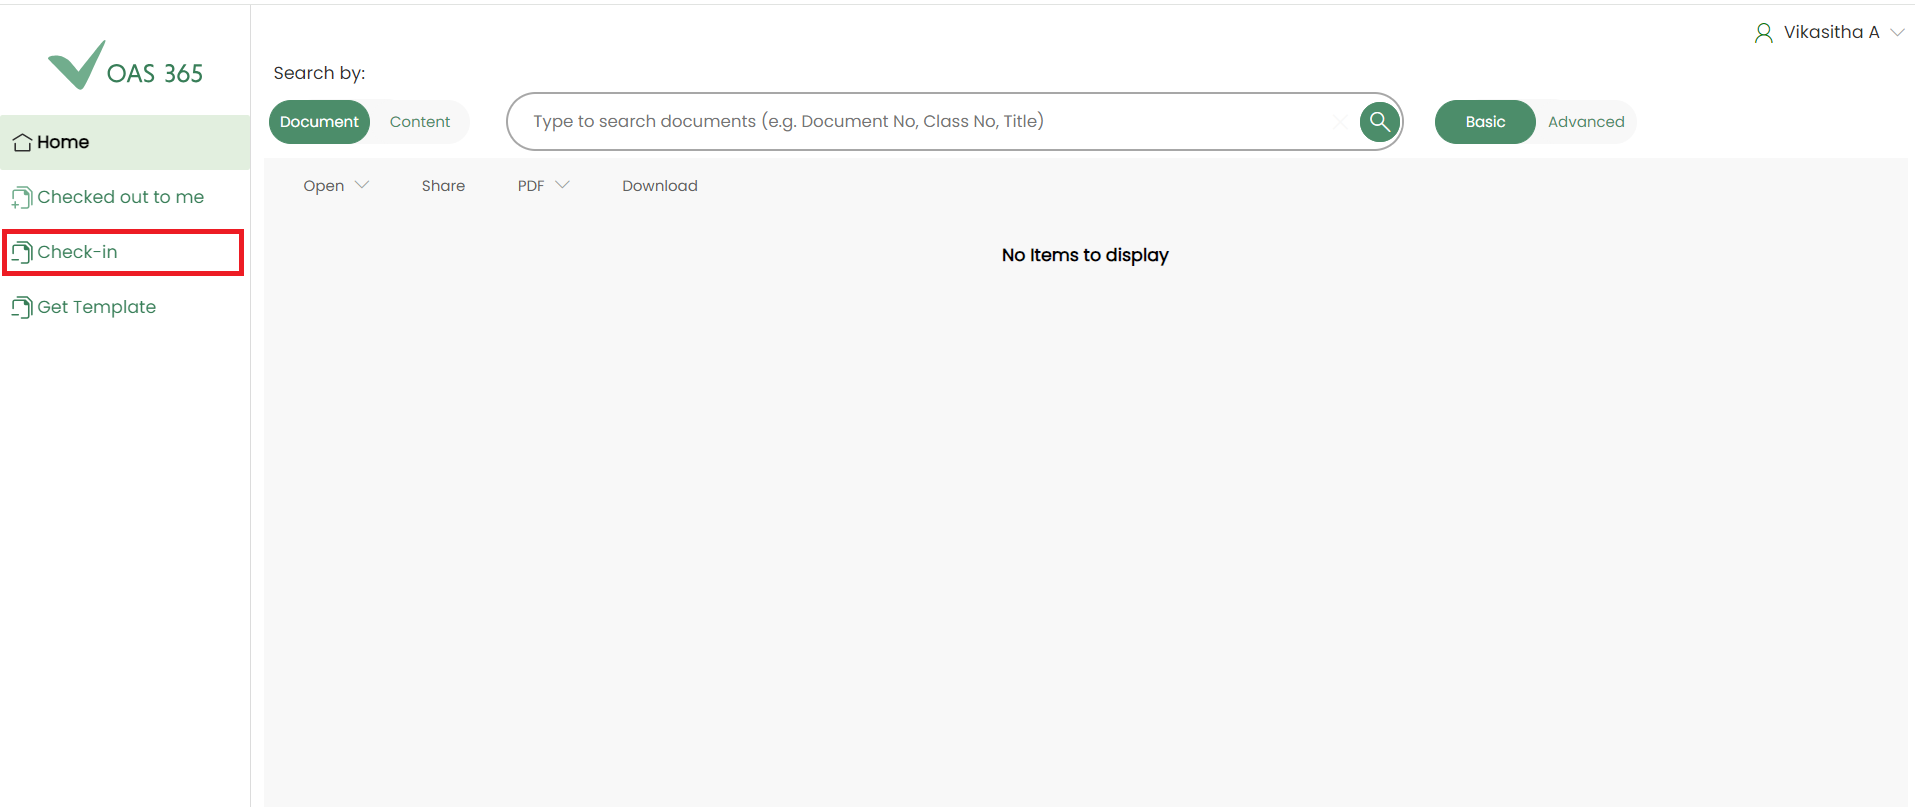
Checked-out to me
User can view all Checked-out documents here. Also Basic Search, Advanced Search, Open, Share, PDF and Download facilities are available same as Home Page.
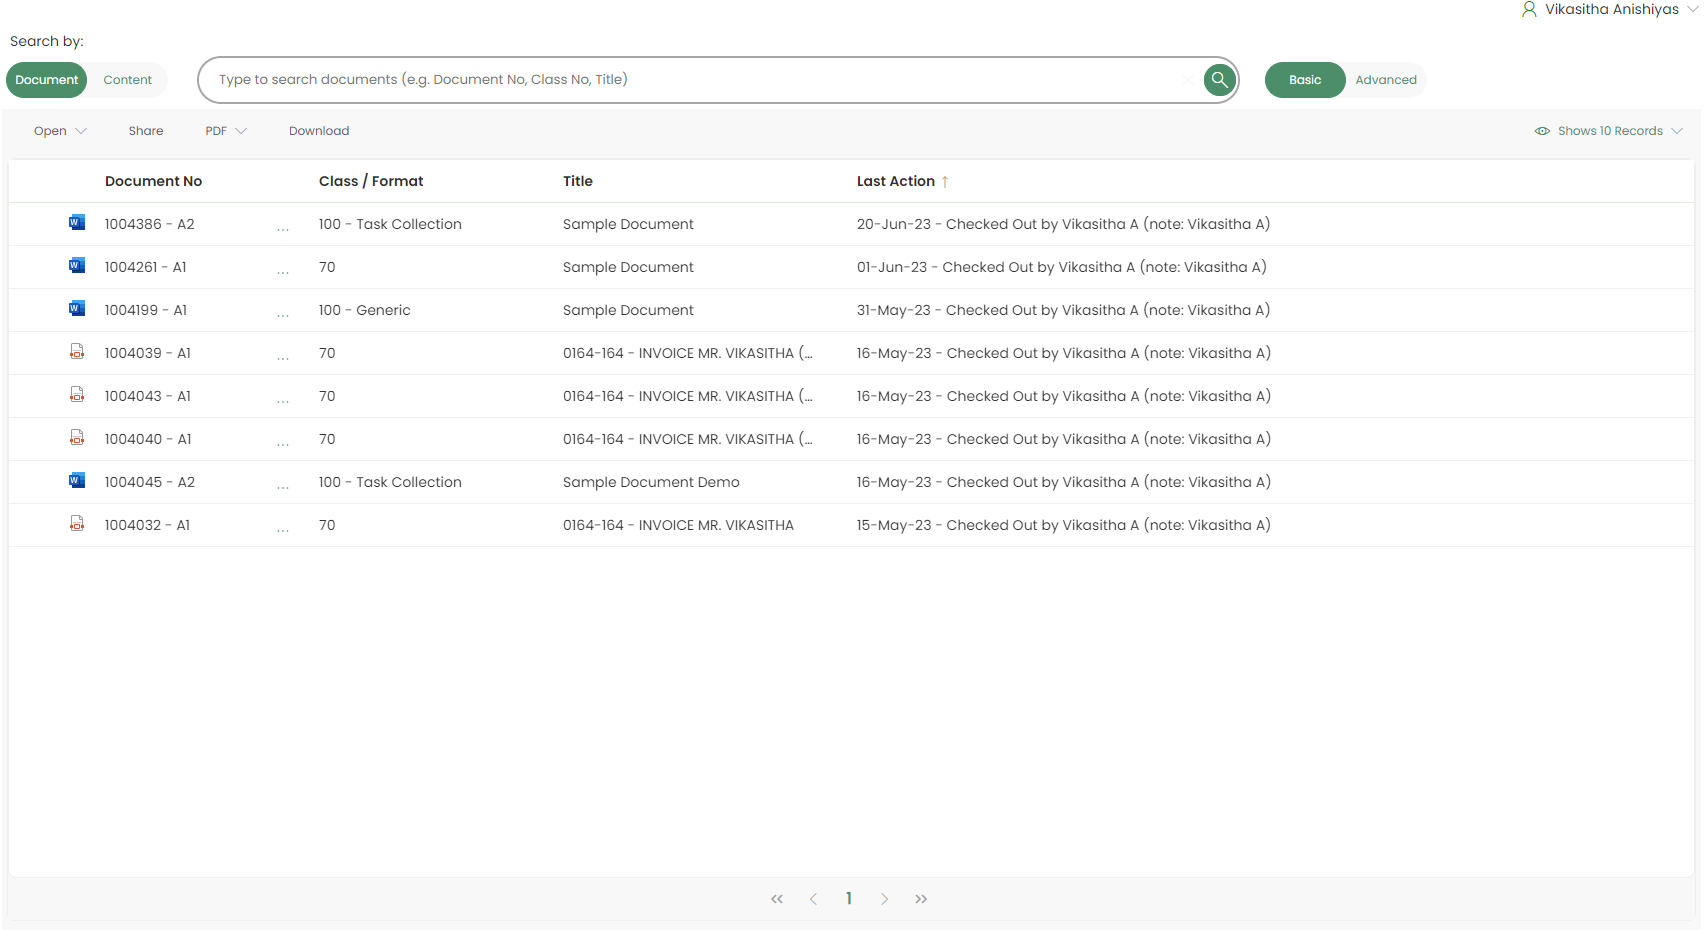
User can Undo check-out by selecting Undo Check-Out option as below.
Check-in New files
By navigating through Check-in menu, user will be re-directed to Check-in page.
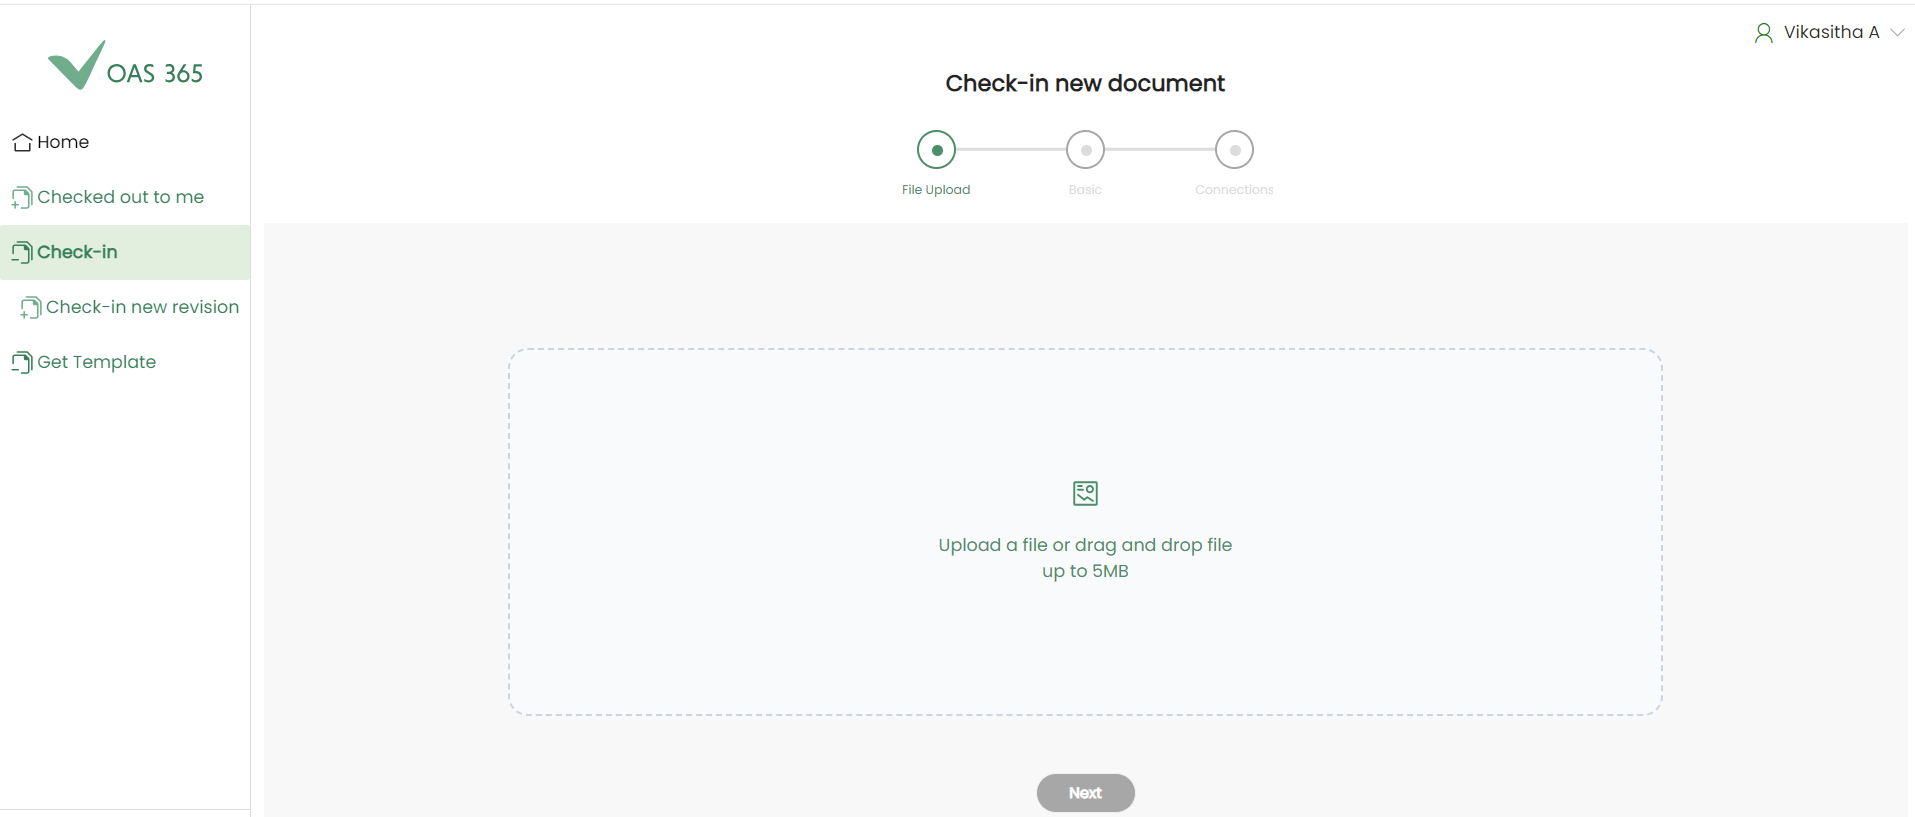
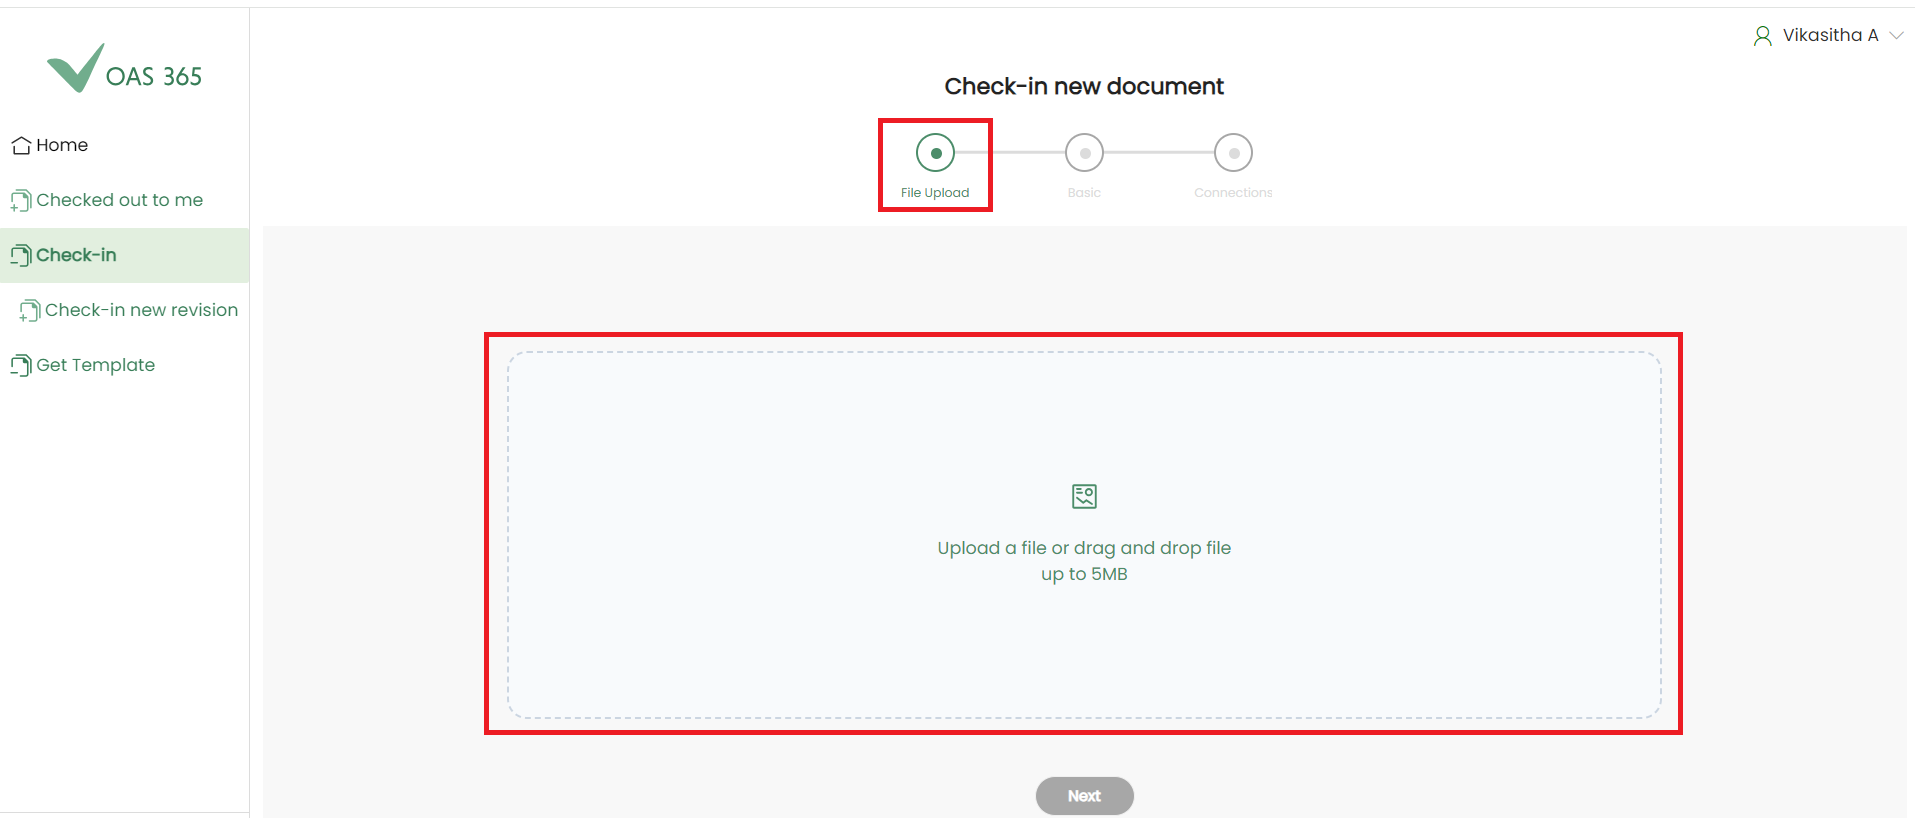
The check-in page includes a wizard comprising below three steps.
- File Upload
- Basic
- Connections
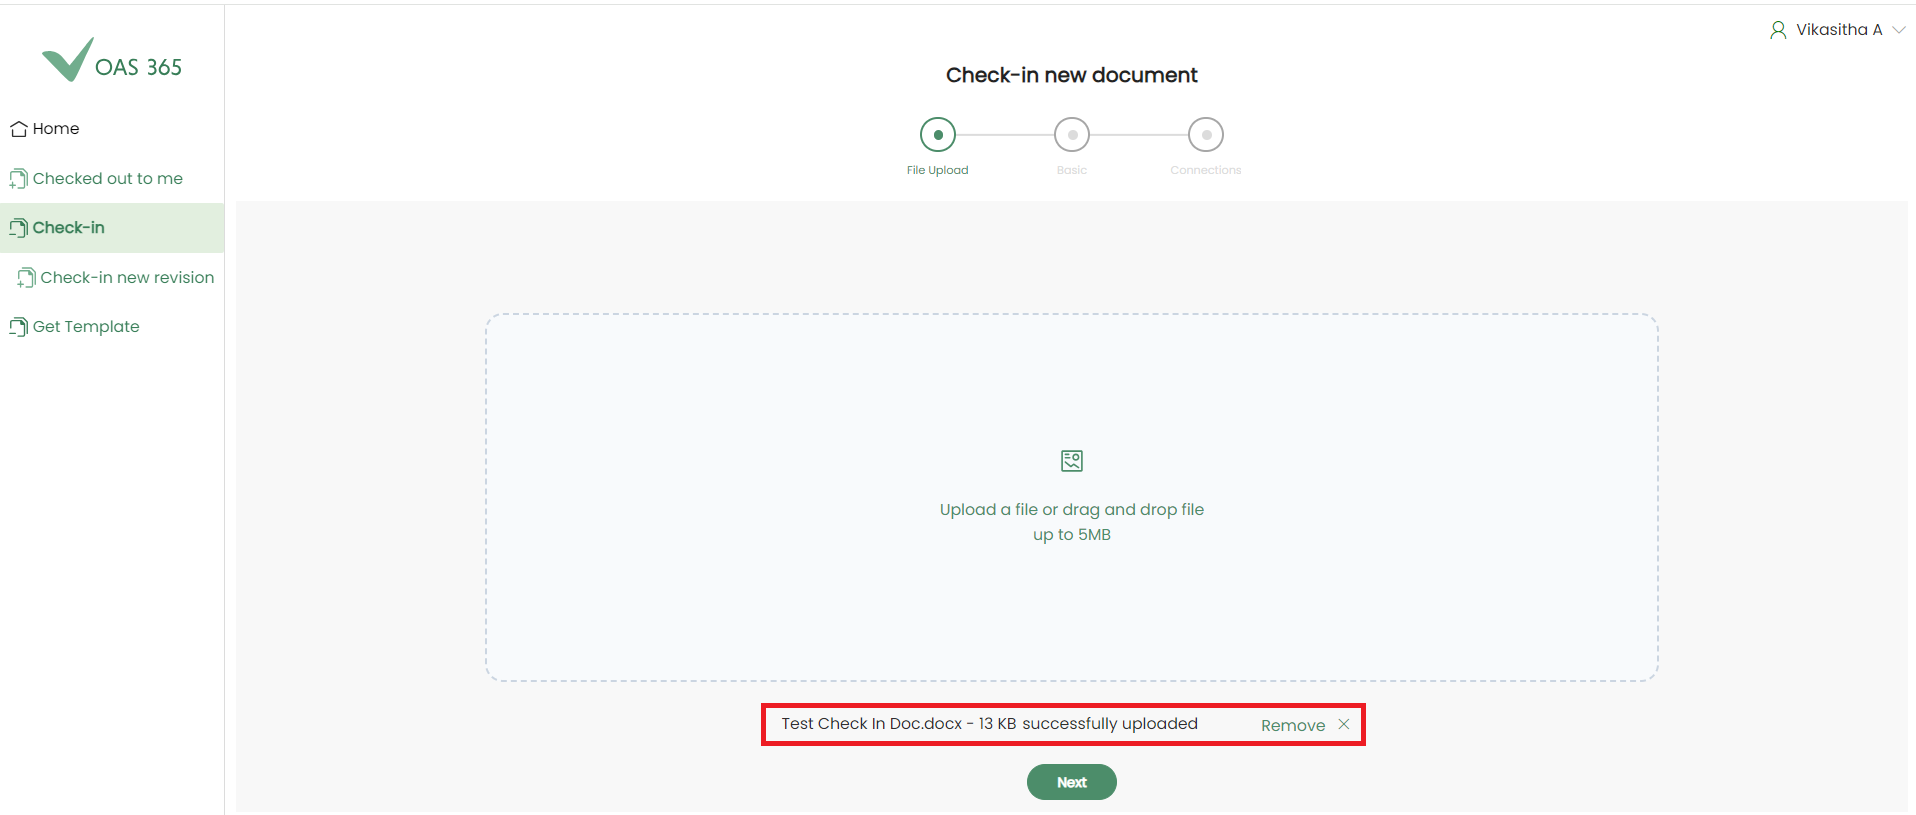
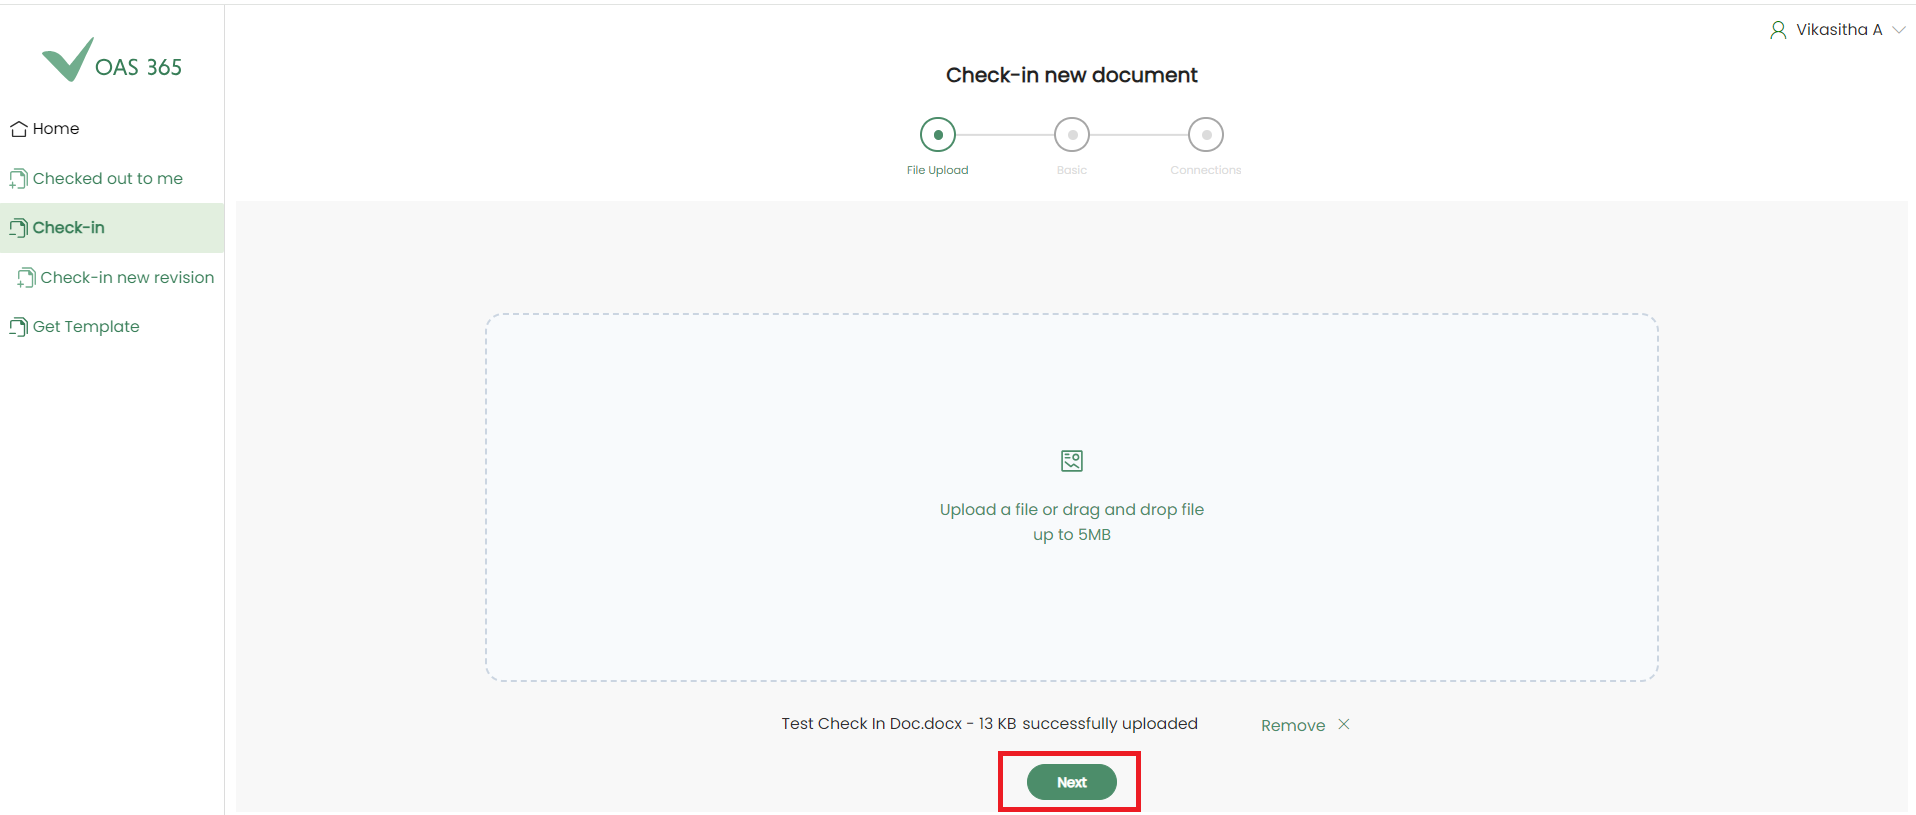
By default, user will be navigated to File Upload. By clicking the file upload area or by dragging and dropping a file, user can provide a file.
Important
All the file types are supported in IFS environment EDM Data will be considered as valid file type to upload.
If user selects an invalid file type, an error will be prompted.

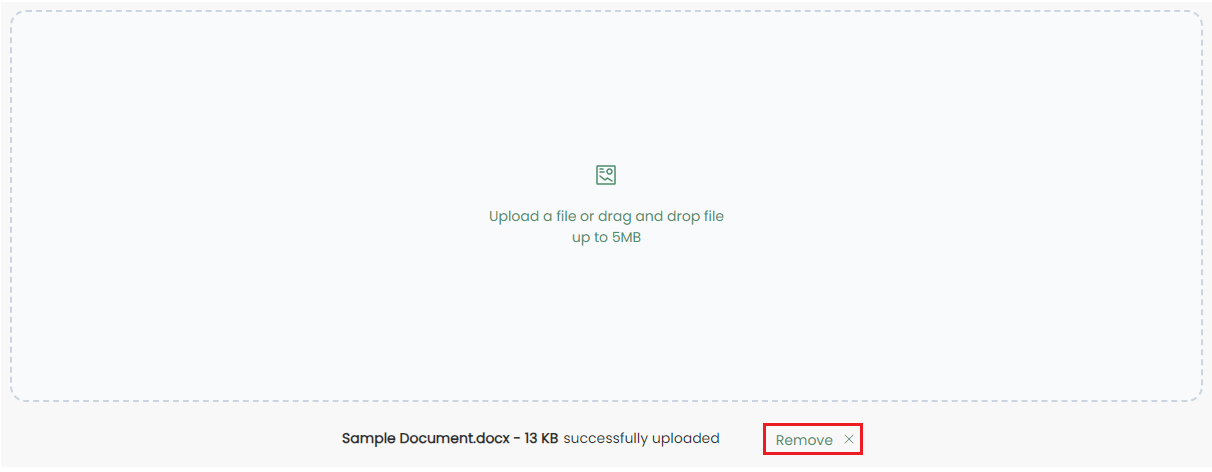
If user wish to delete the selected file and replace it by another file, user can click the remove icon and select a file again
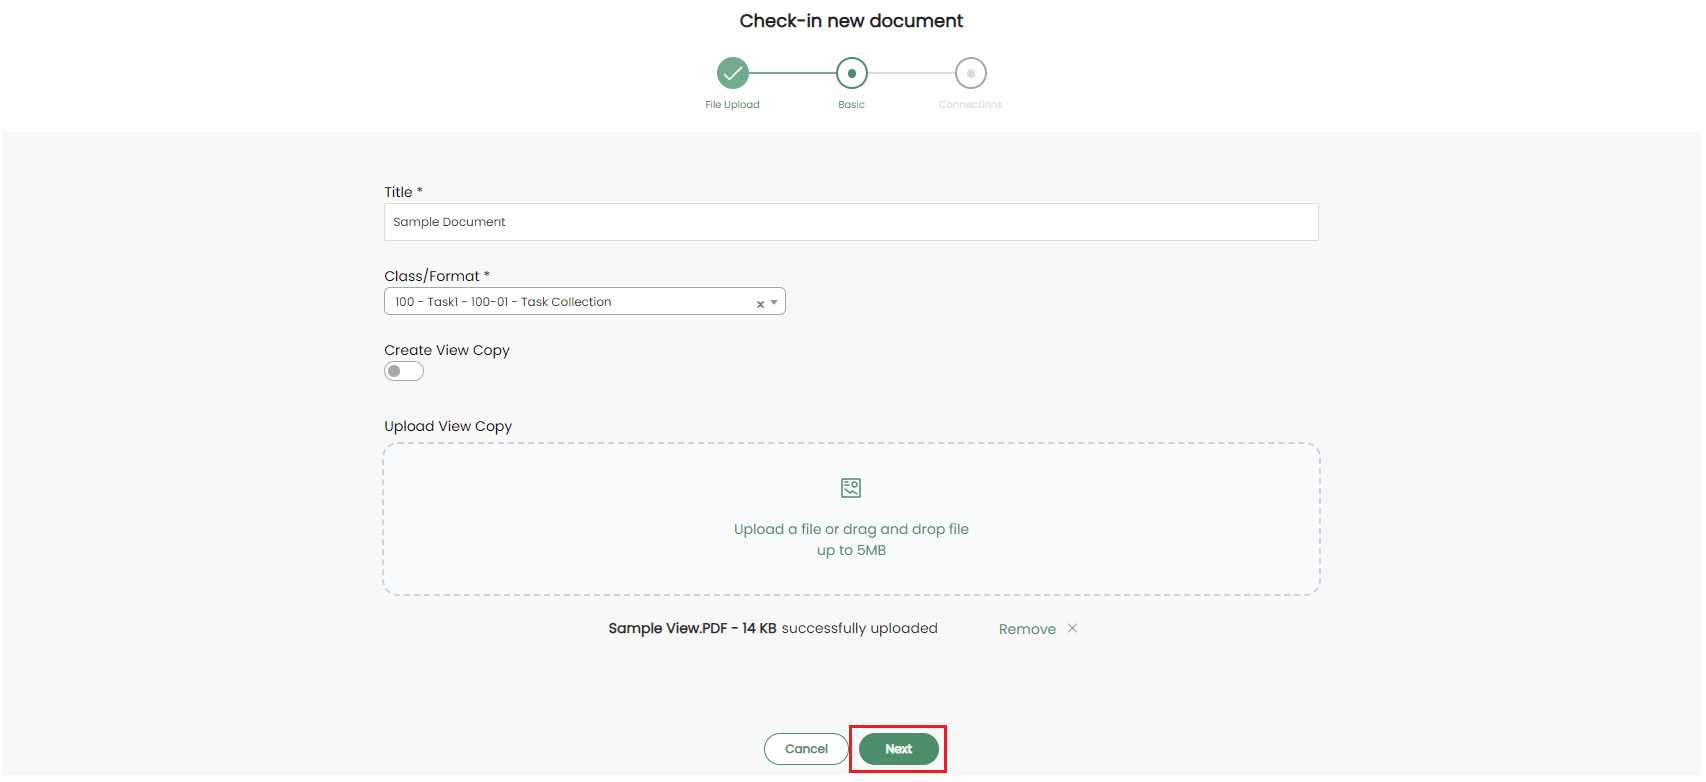
Then click the 'Next' button to navigate to the Basic section.
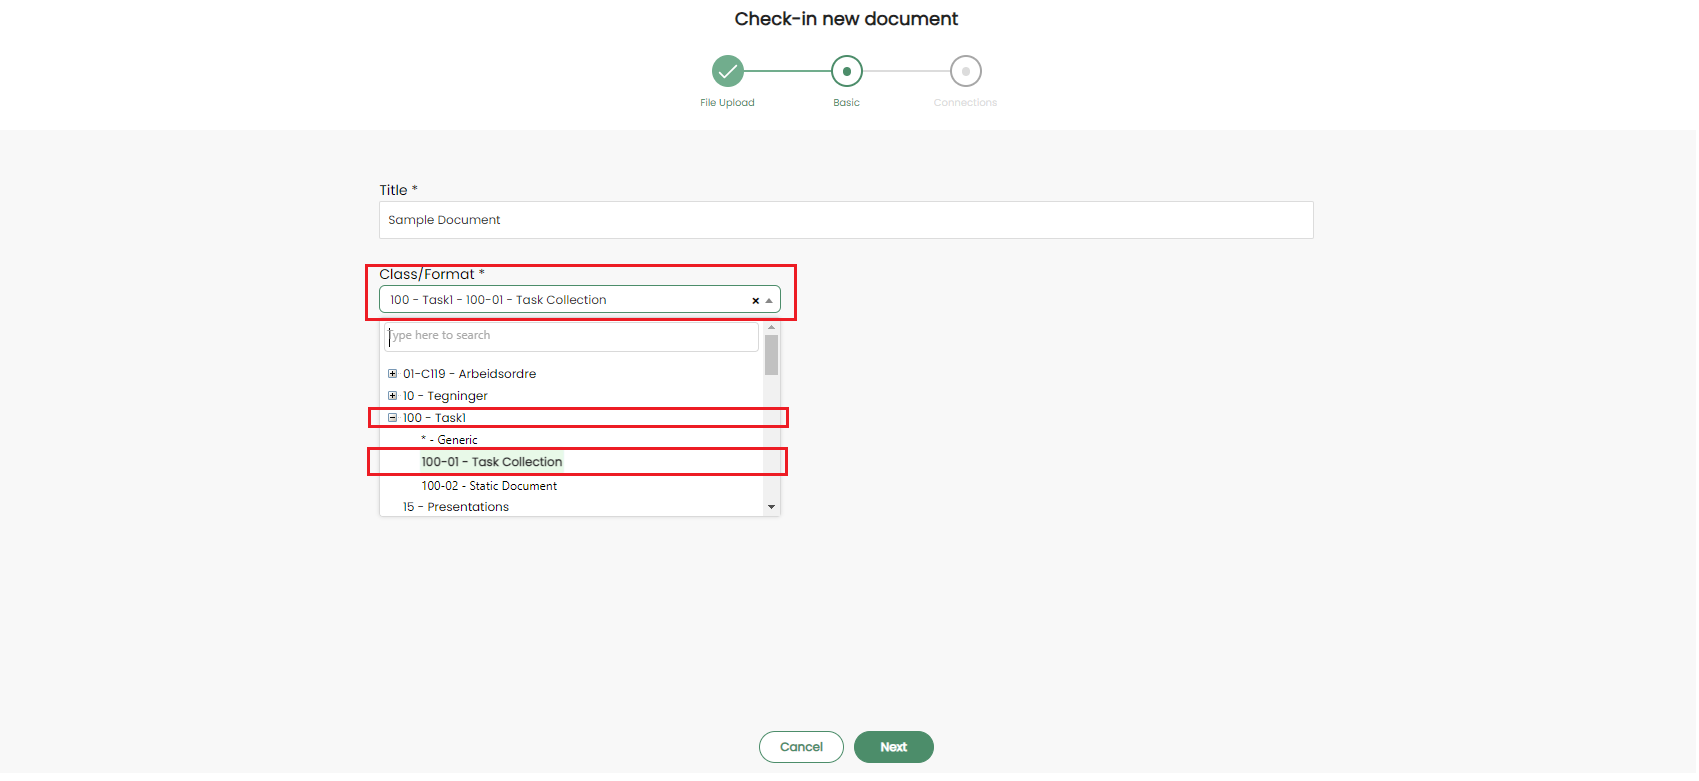
User can change the document title if needed.
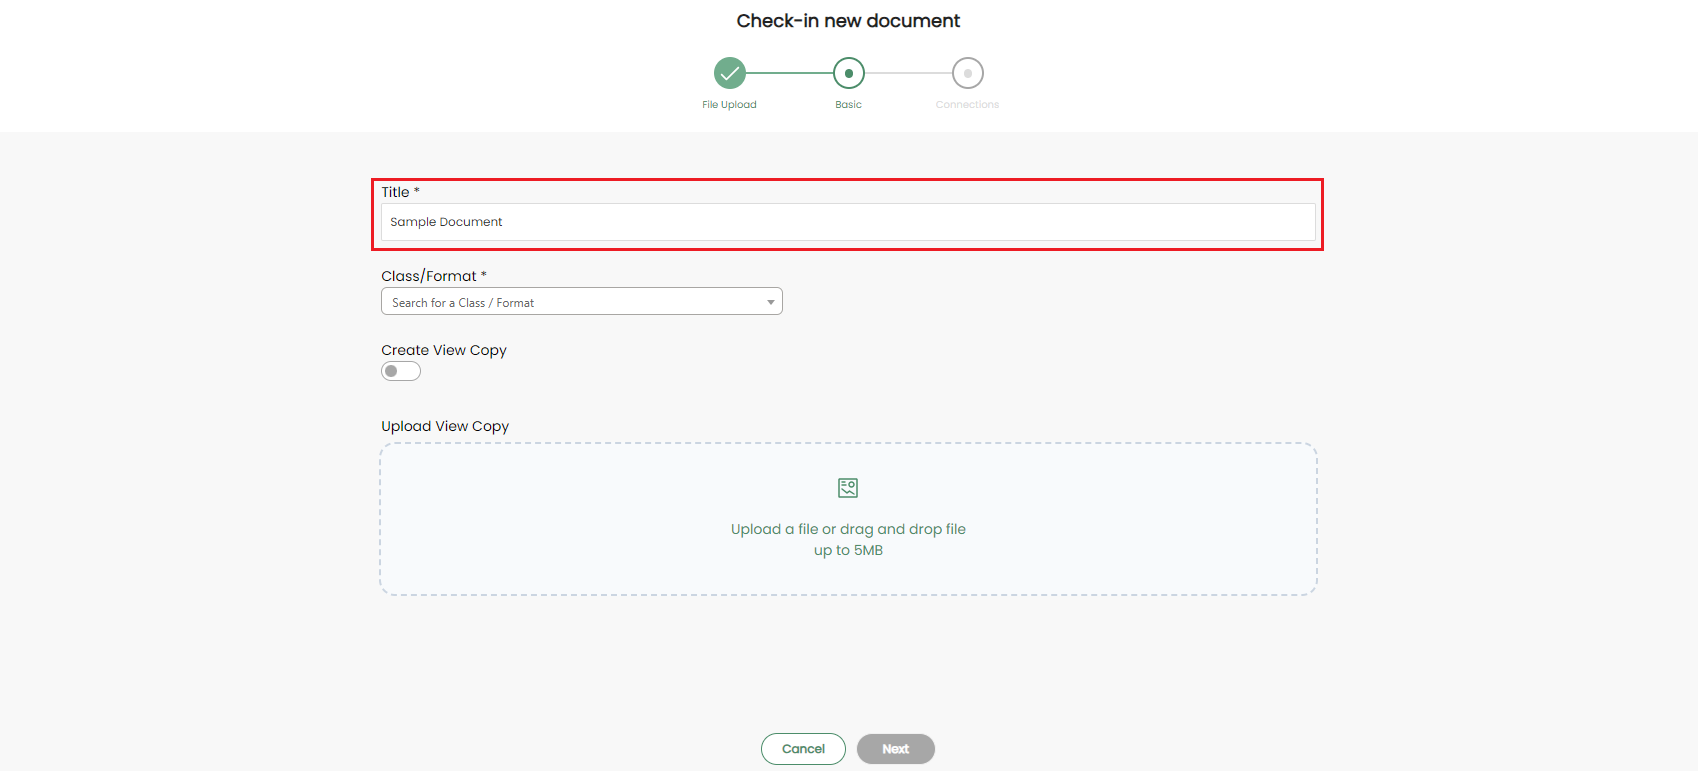
Then user can select a document class/format from the given list. The selected Class/Format will be displayed in the Class/Format text box.
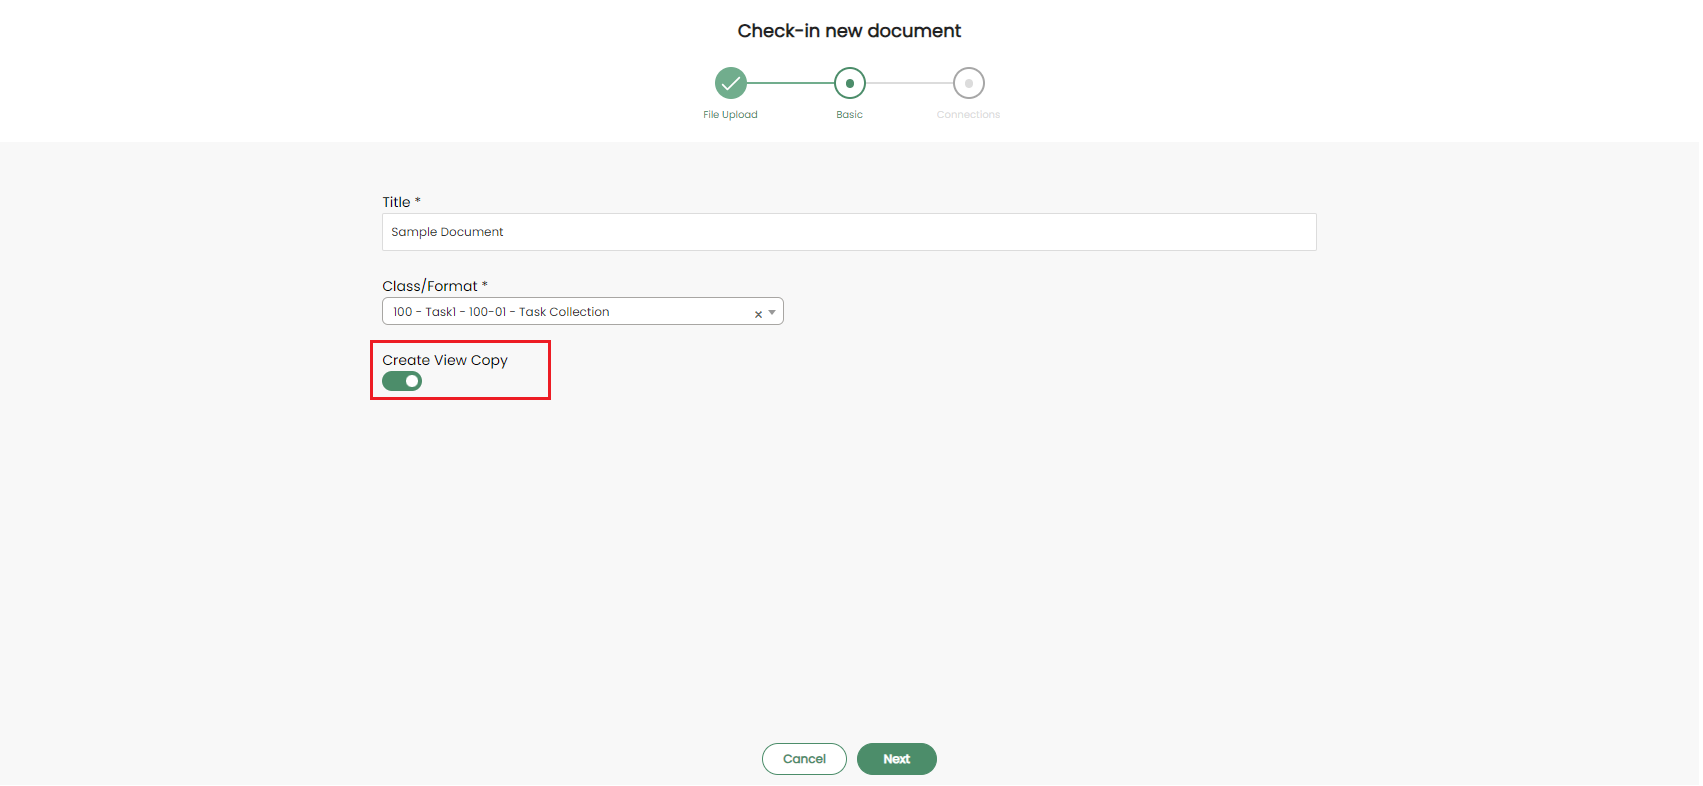
Create View Copy option will be enabled only for Word files at the moment. If you enable Create View Copy, a pdf version of the uploaded file will be created as a view copy in IFS for the created document revision.
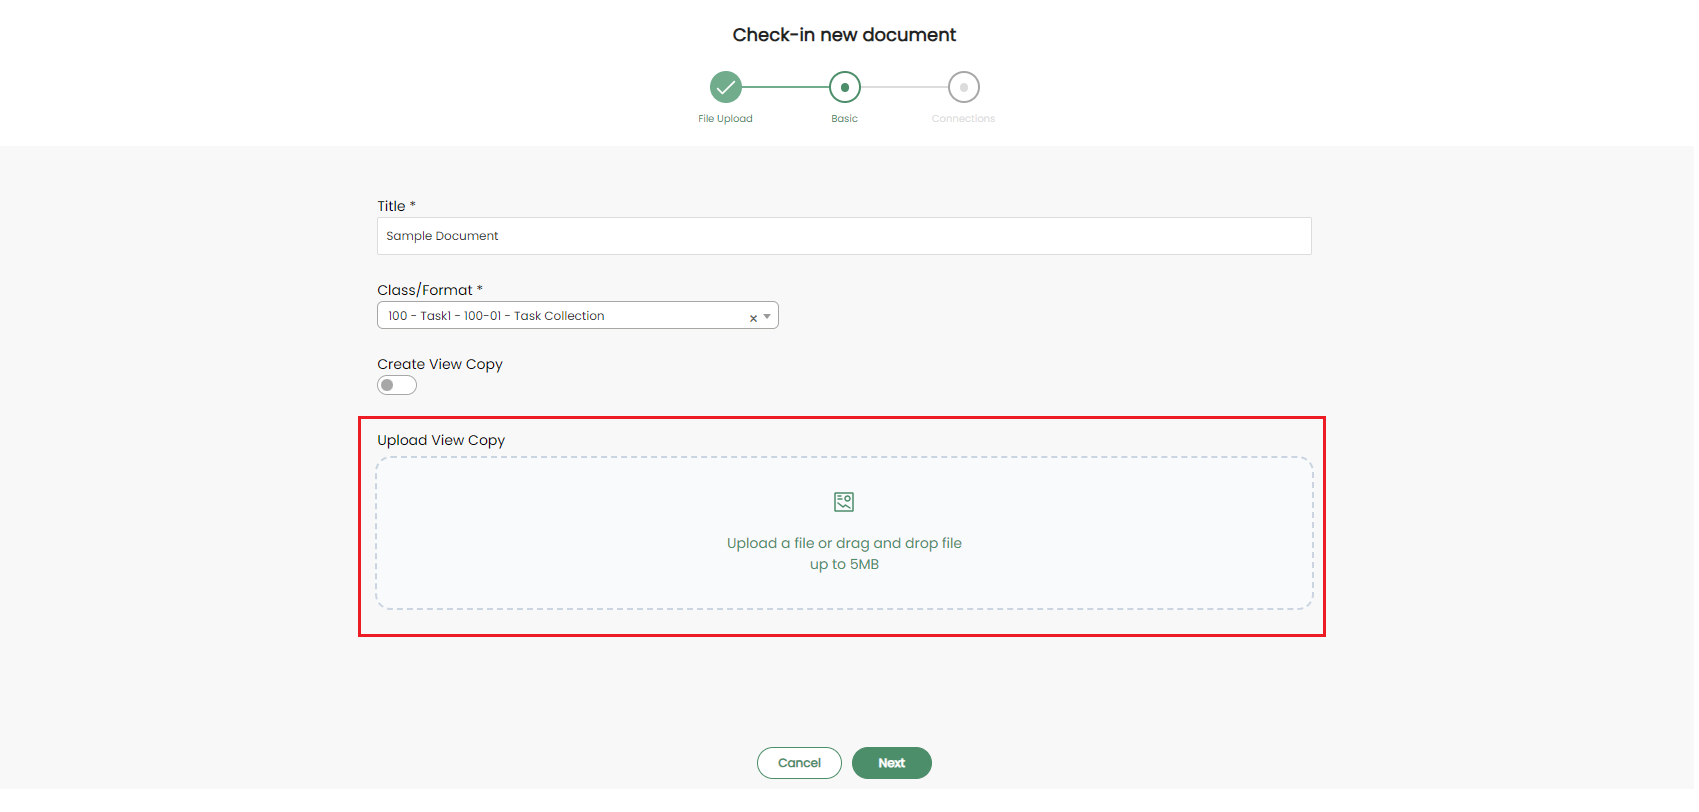
Or else user can select a file to be used as the View Copy of the original file.
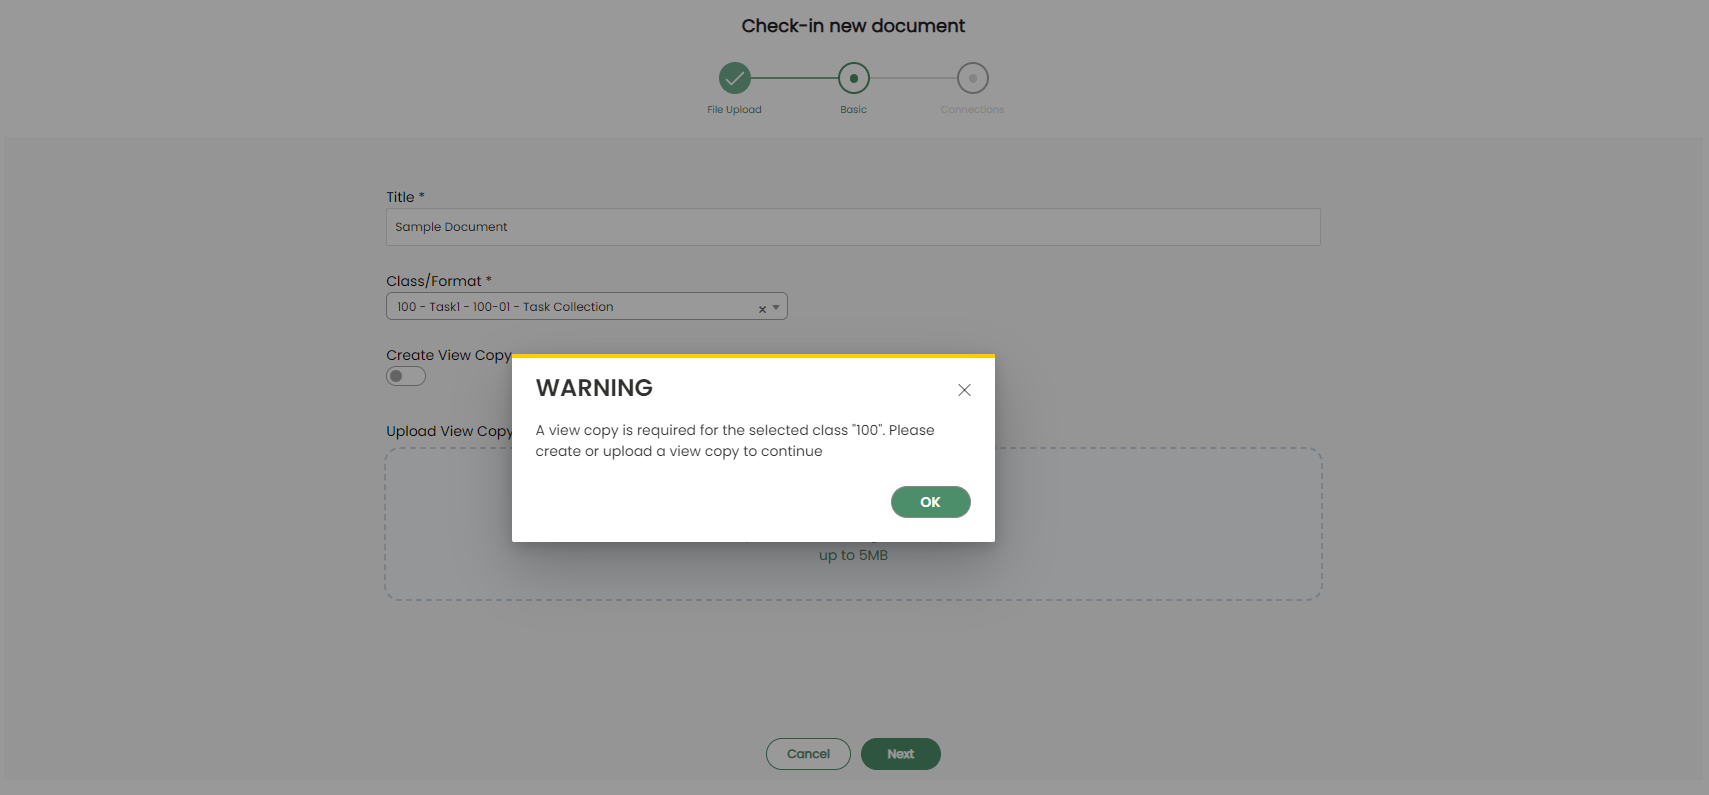
View Copy is not mandatory in every scenario. But there could be some Classes and Formats, where creating a View Copy is mandatory to proceed. In such instances, if user tries to proceed without creating the View Copy, a warning message will be displayed.
Then click Next button to navigate to Connections.
Click on Add New to add new object connection(s).
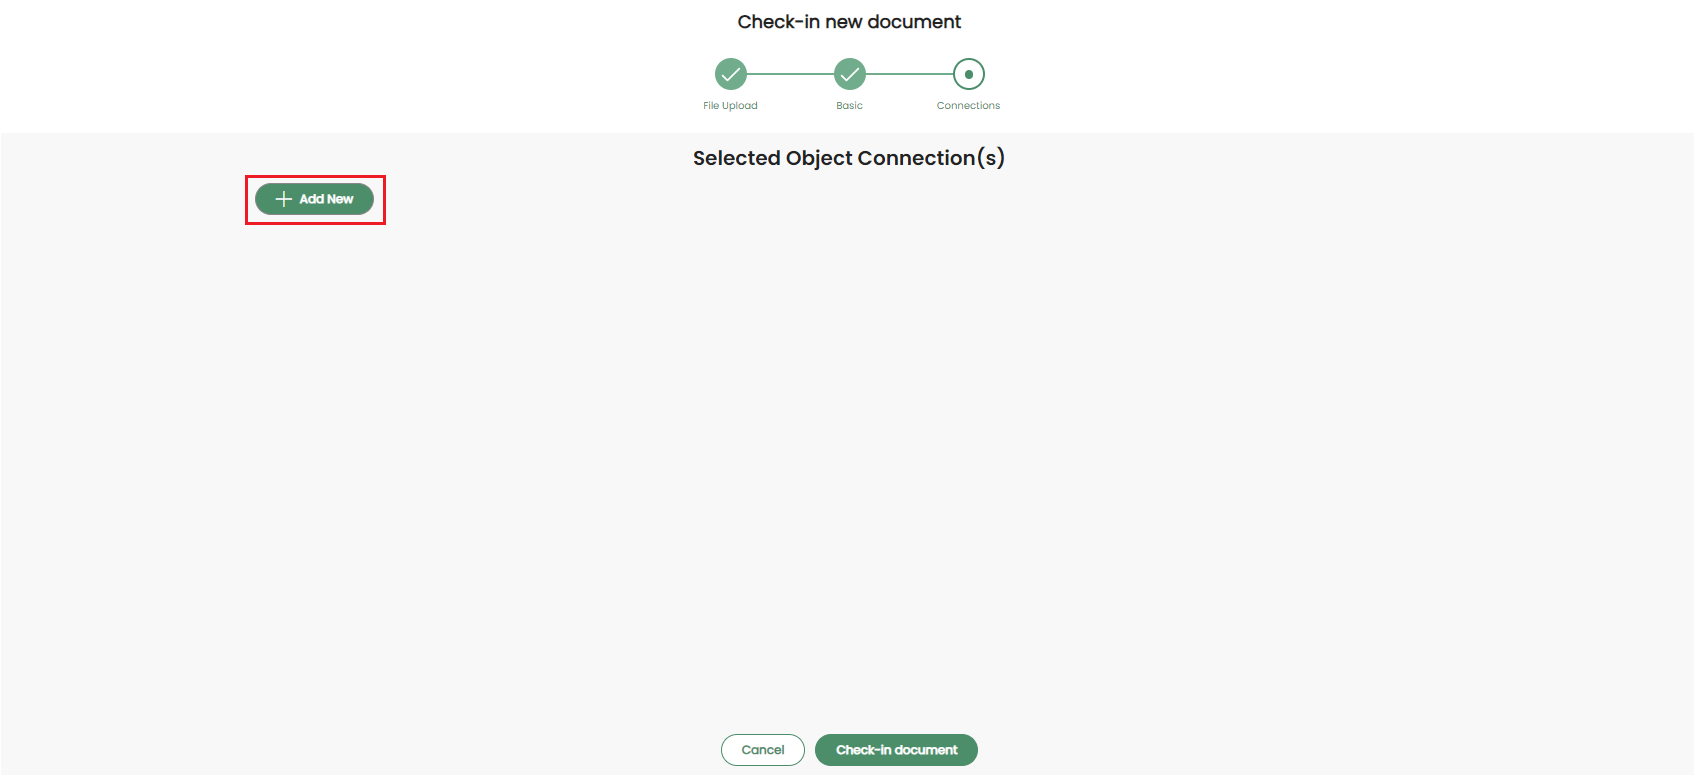
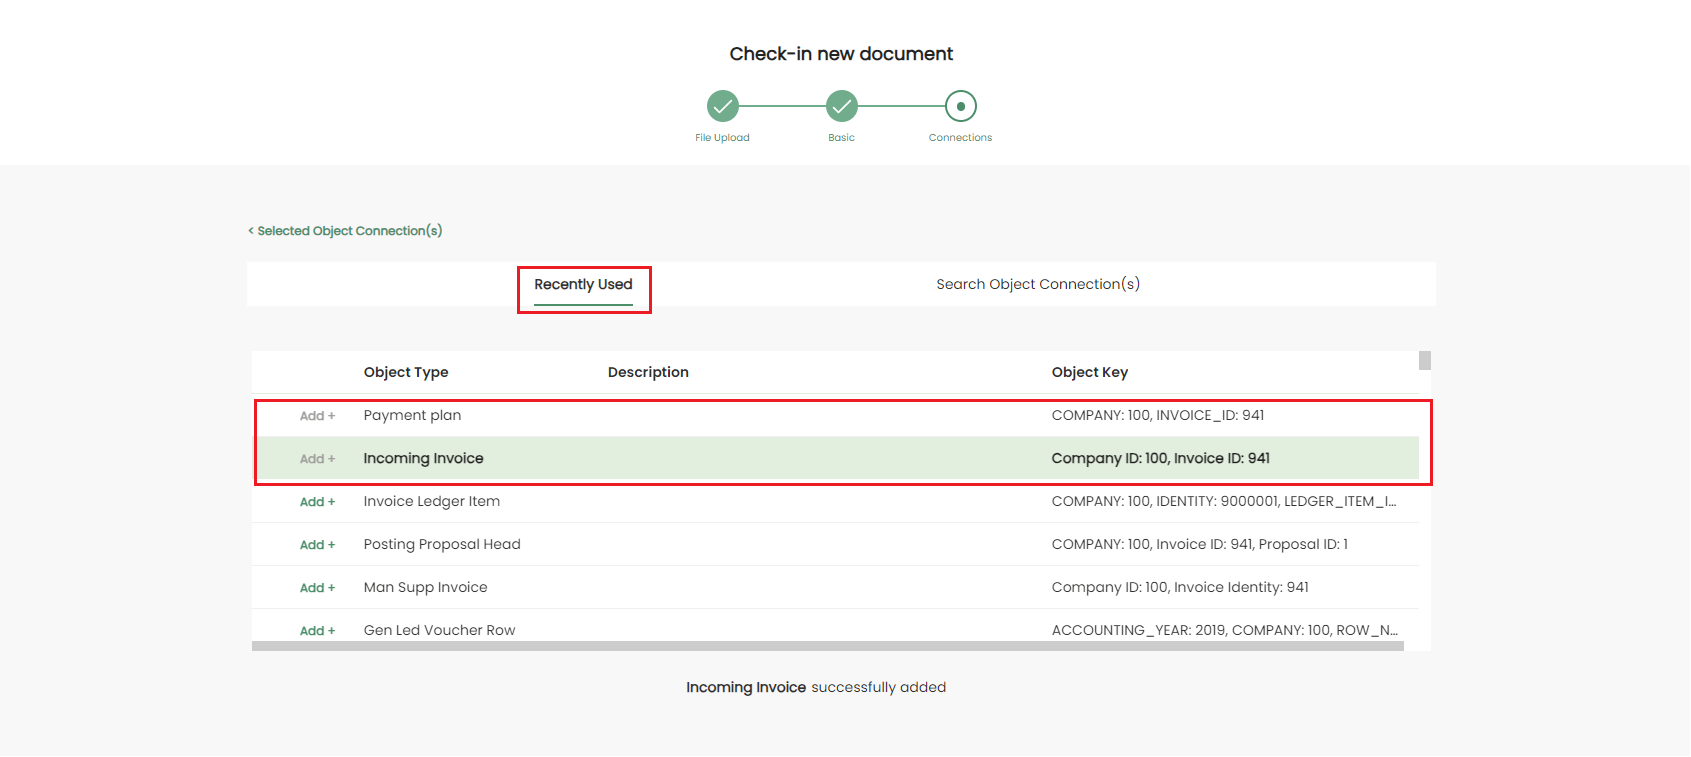
It will direct the user to the list of Recently Used object connections.
User can select one or more object connections from Recently Used connections list.
Also user can search for specific object connection(s) from Search Object Connection(s).
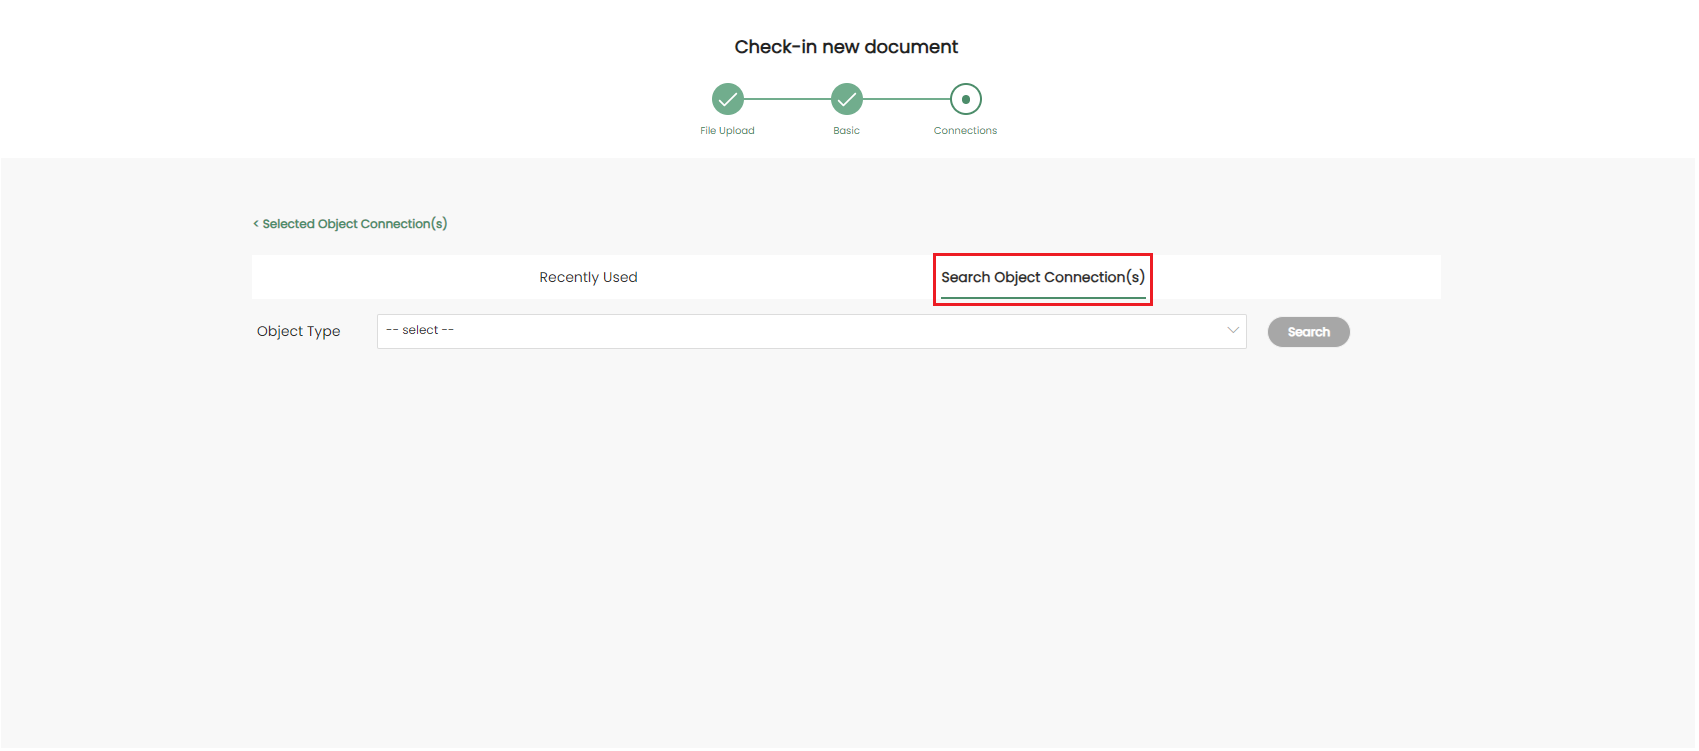
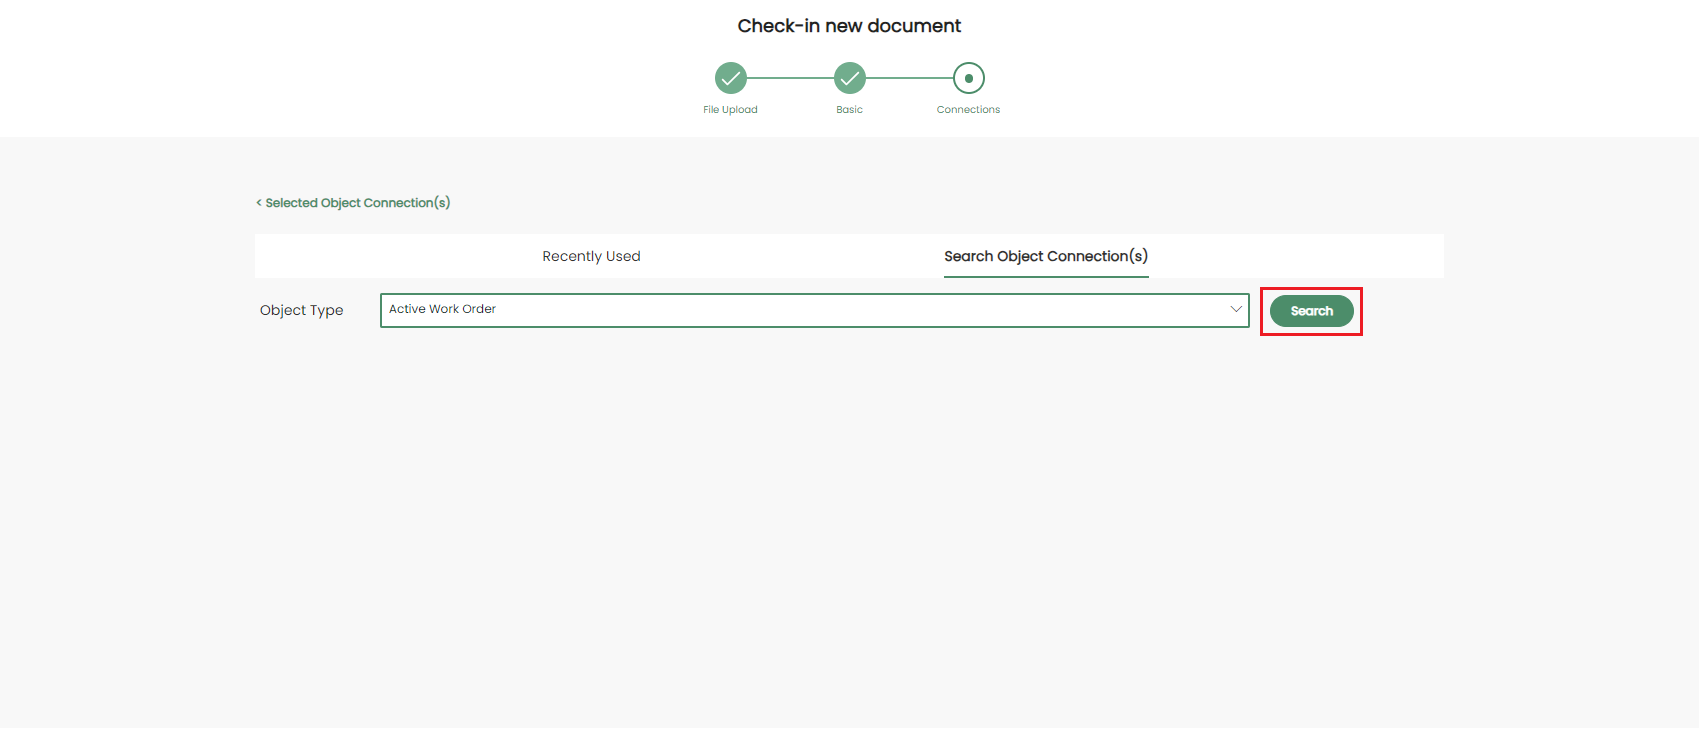
Select an Object Type first by clicking on the dropdown icon.
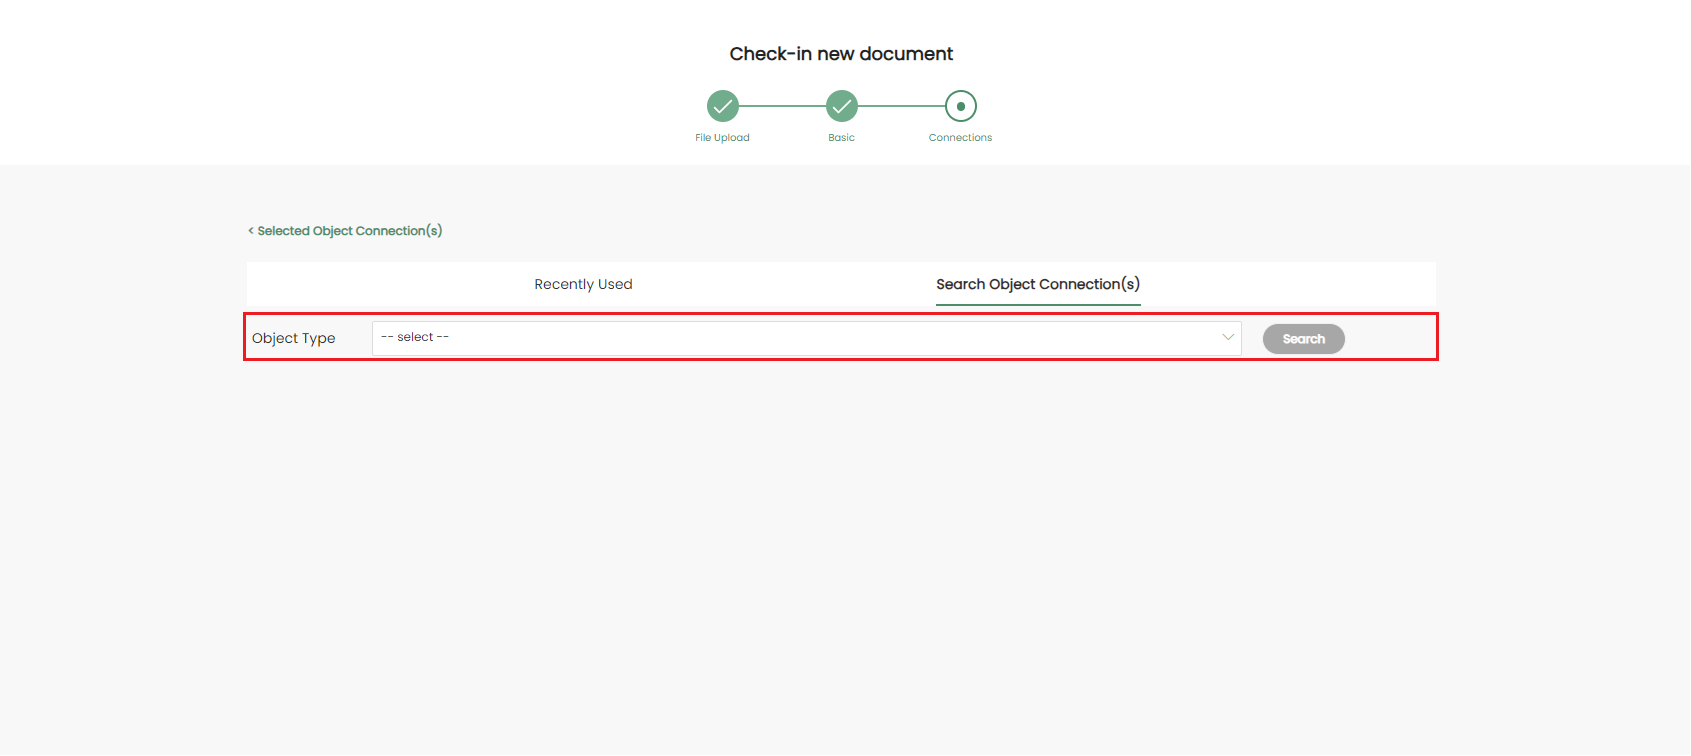
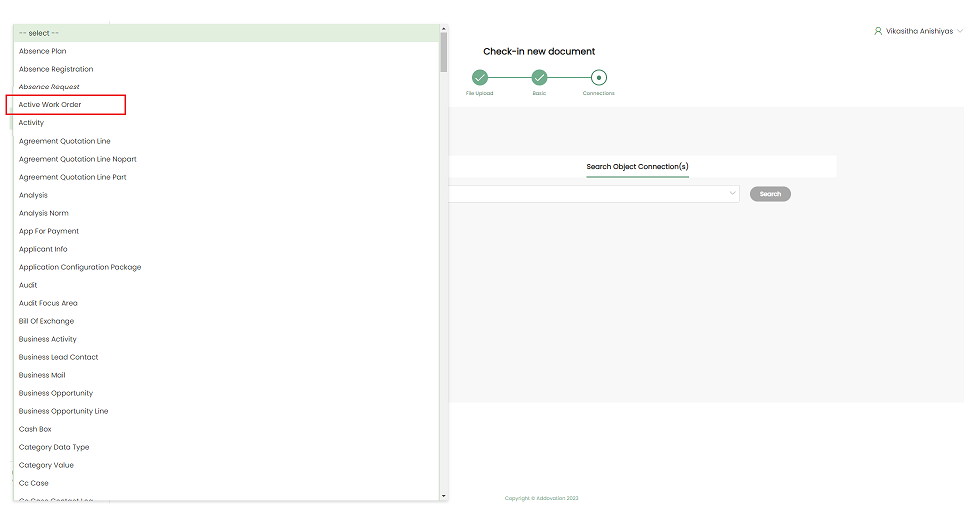
Then search for object connection(s) under selected object type.
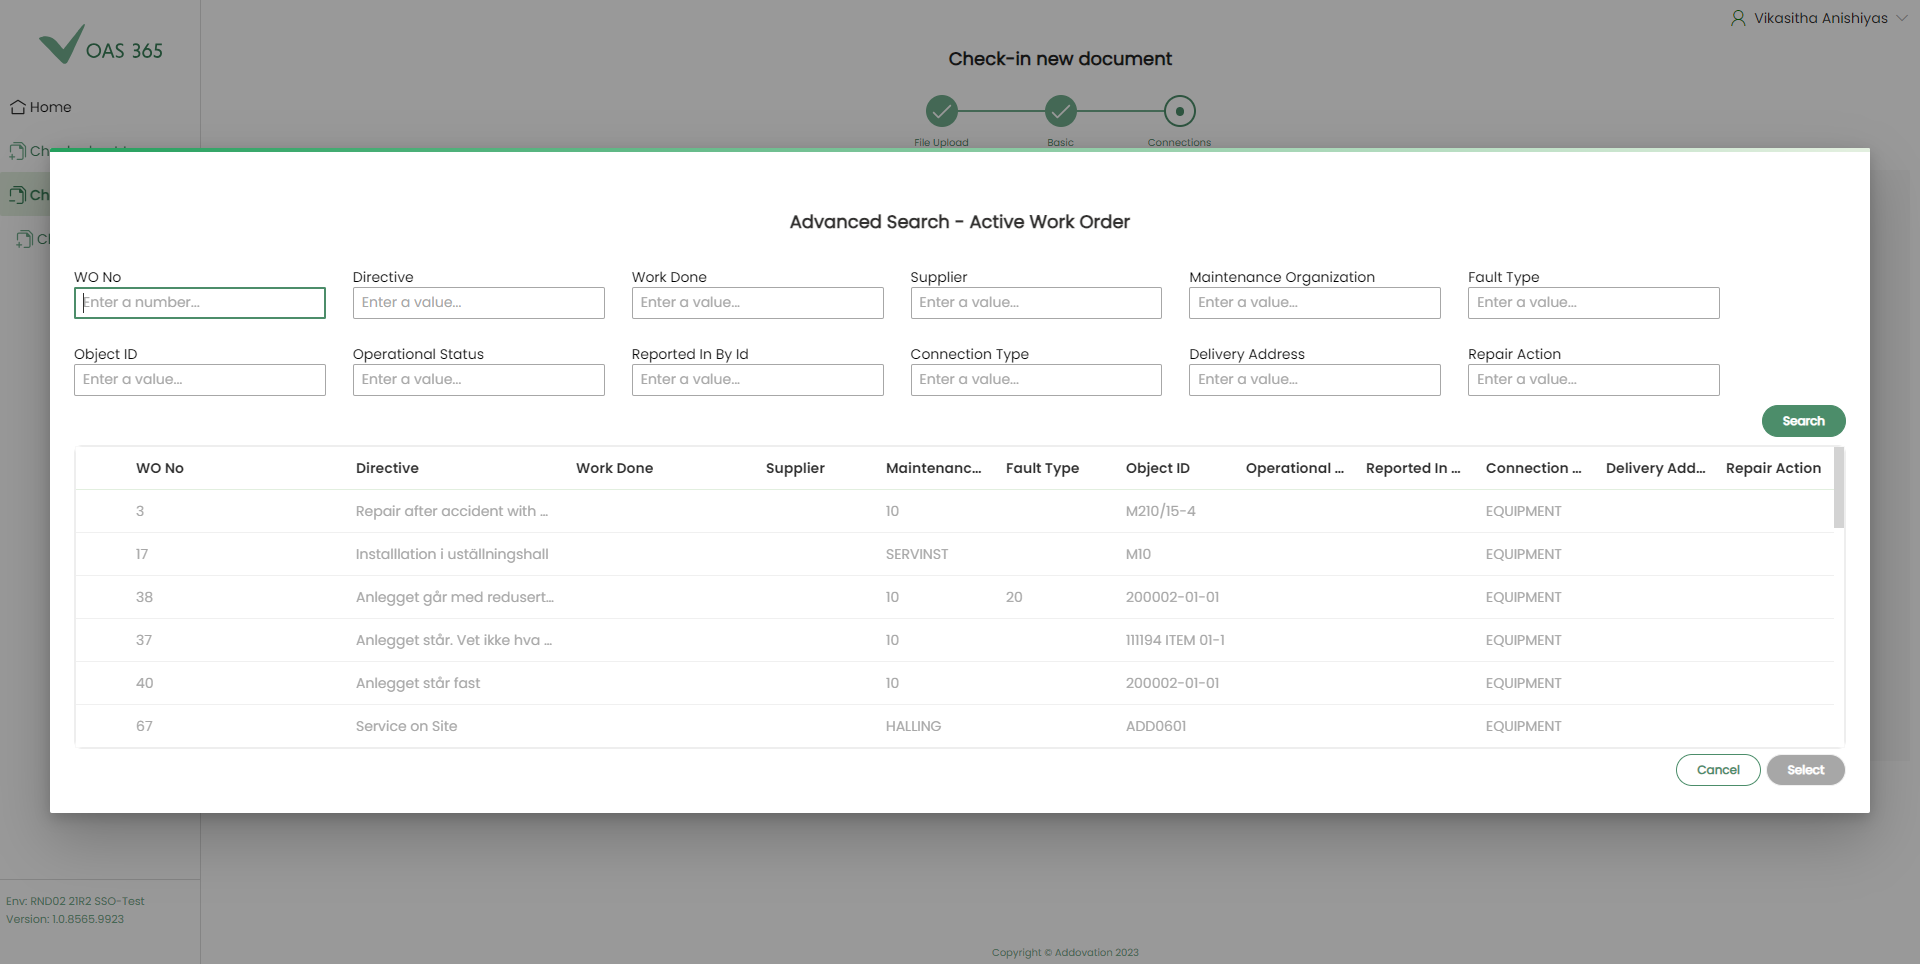
When you click on the See More option, a list of advanced search options will be loaded.
Users can filter the object connections list by entering values into the provided fields and clicking the Search button. Then, the required object connections can be selected from the list of search results.
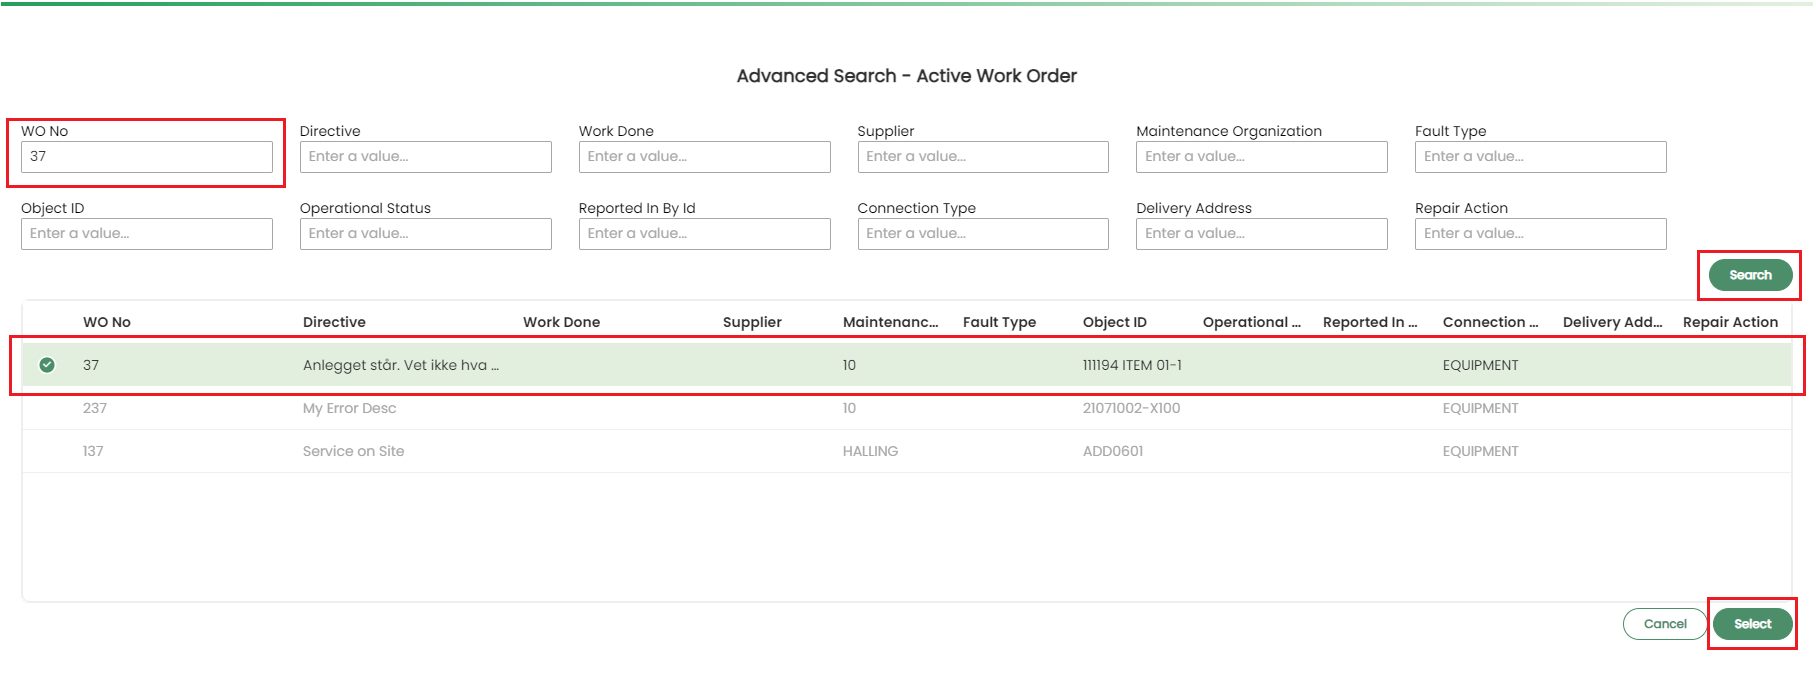
The selected object connection(s) will be listed once the Select button is clicked.
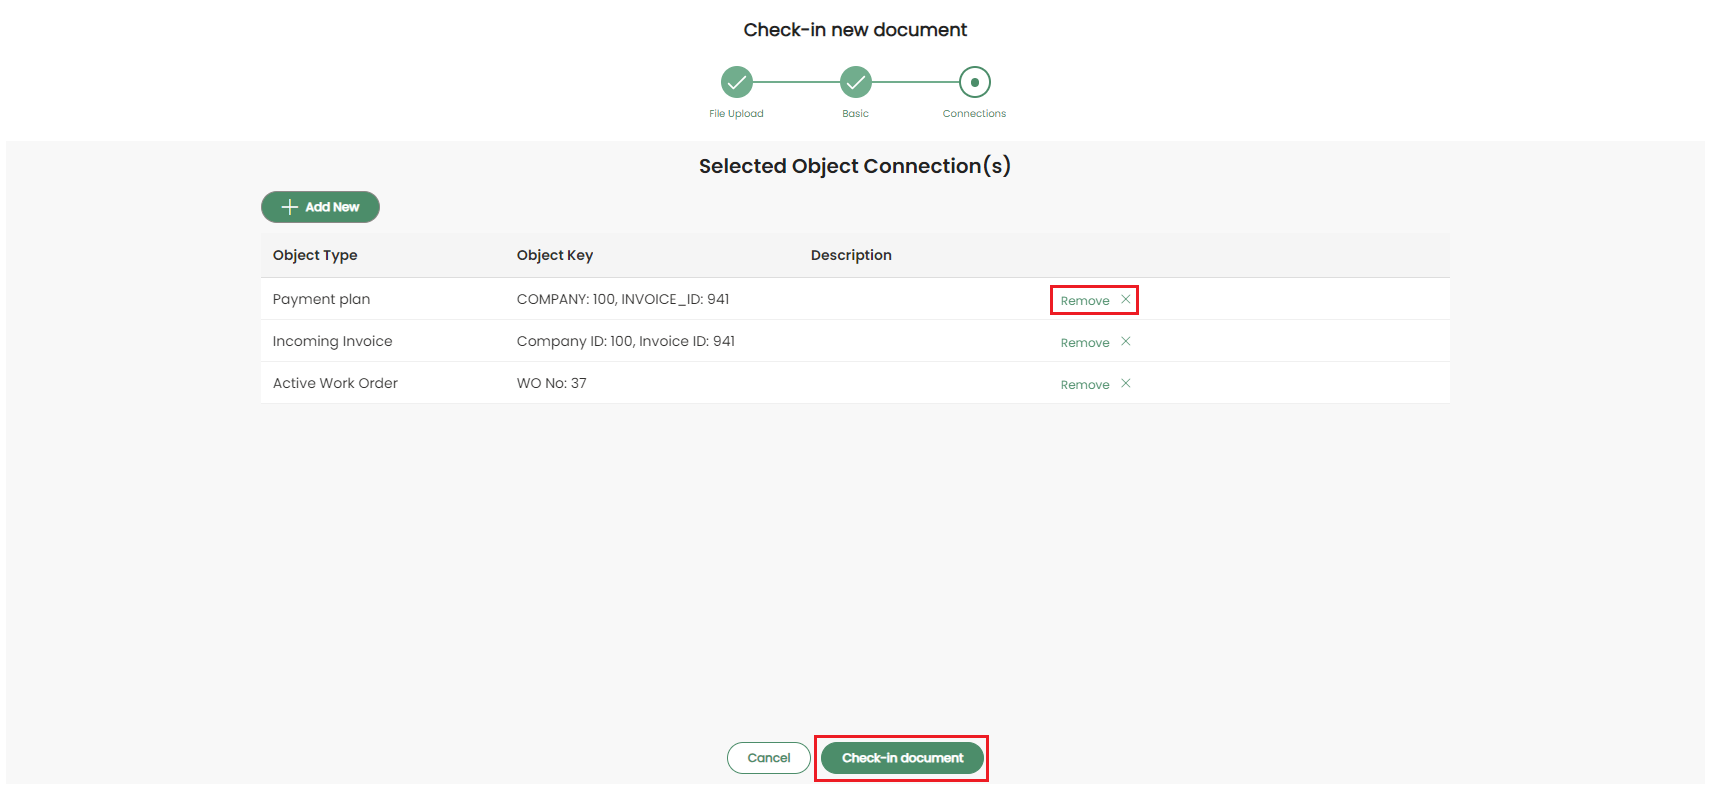
If user wish to delete the selected Object Connections, it can be done by clicking the Remove x button next to the Object Connection Description.
Then click Check-In to check-in the file to IFS.
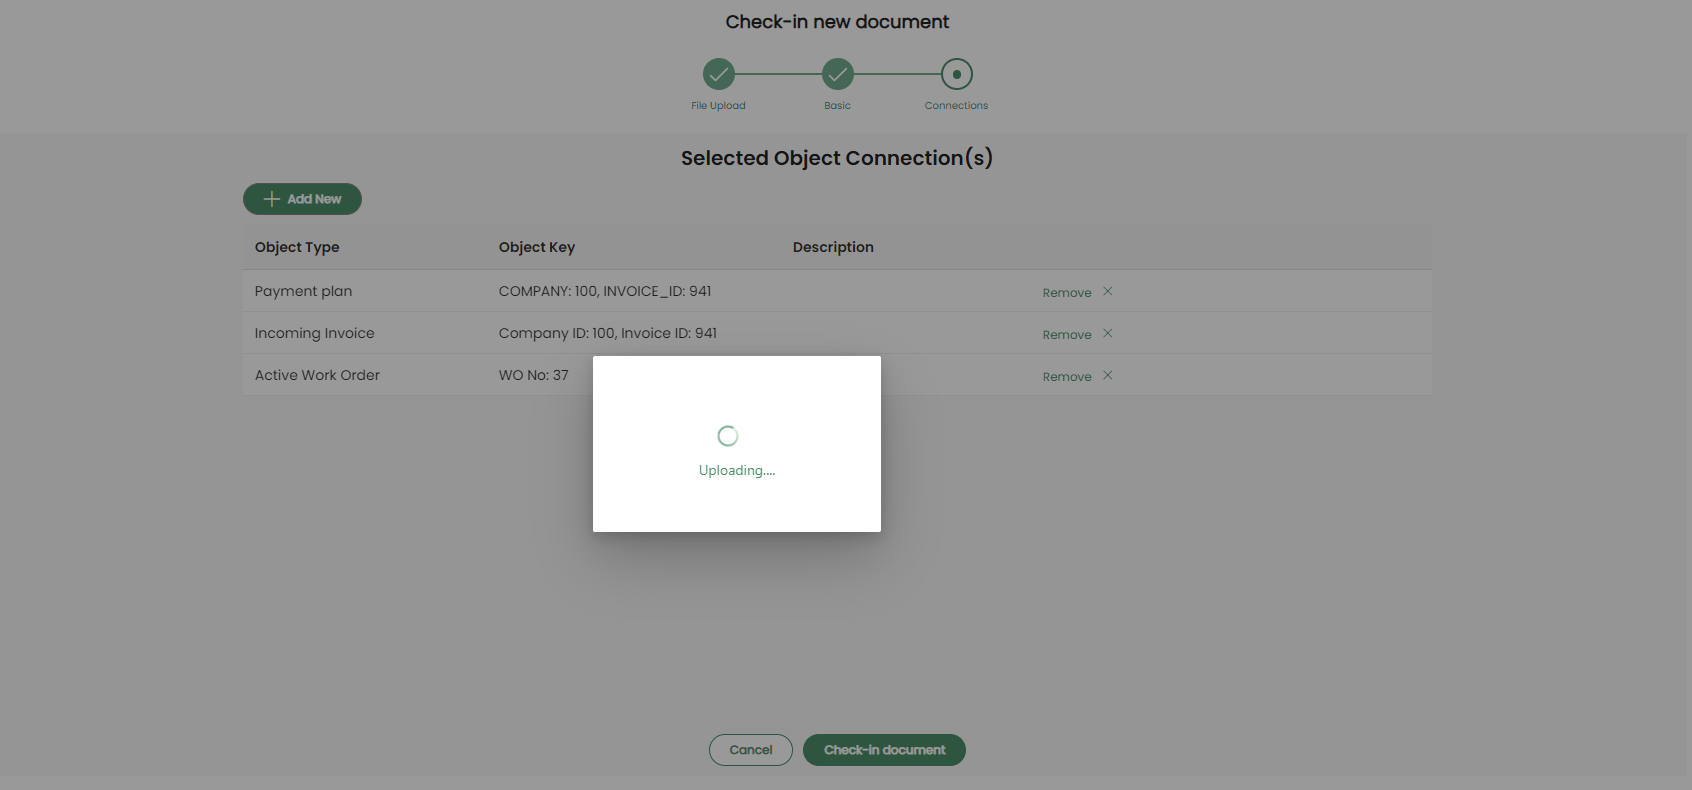
Once the file is successfully checked in to IFS, following message will be displayed.
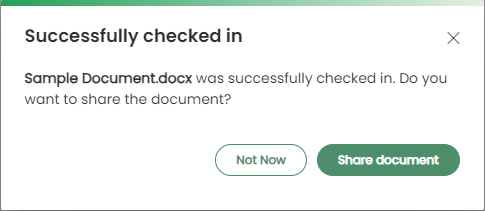
If the user wishes to share the newly checked-in document, they can use the Share Document option.
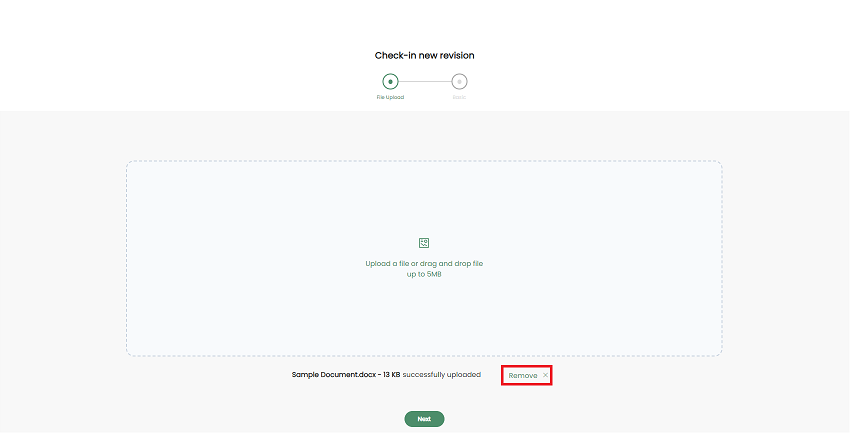
Check-in New Revision
Click Check-in from the menu and click Check-in New Revision sub menu.
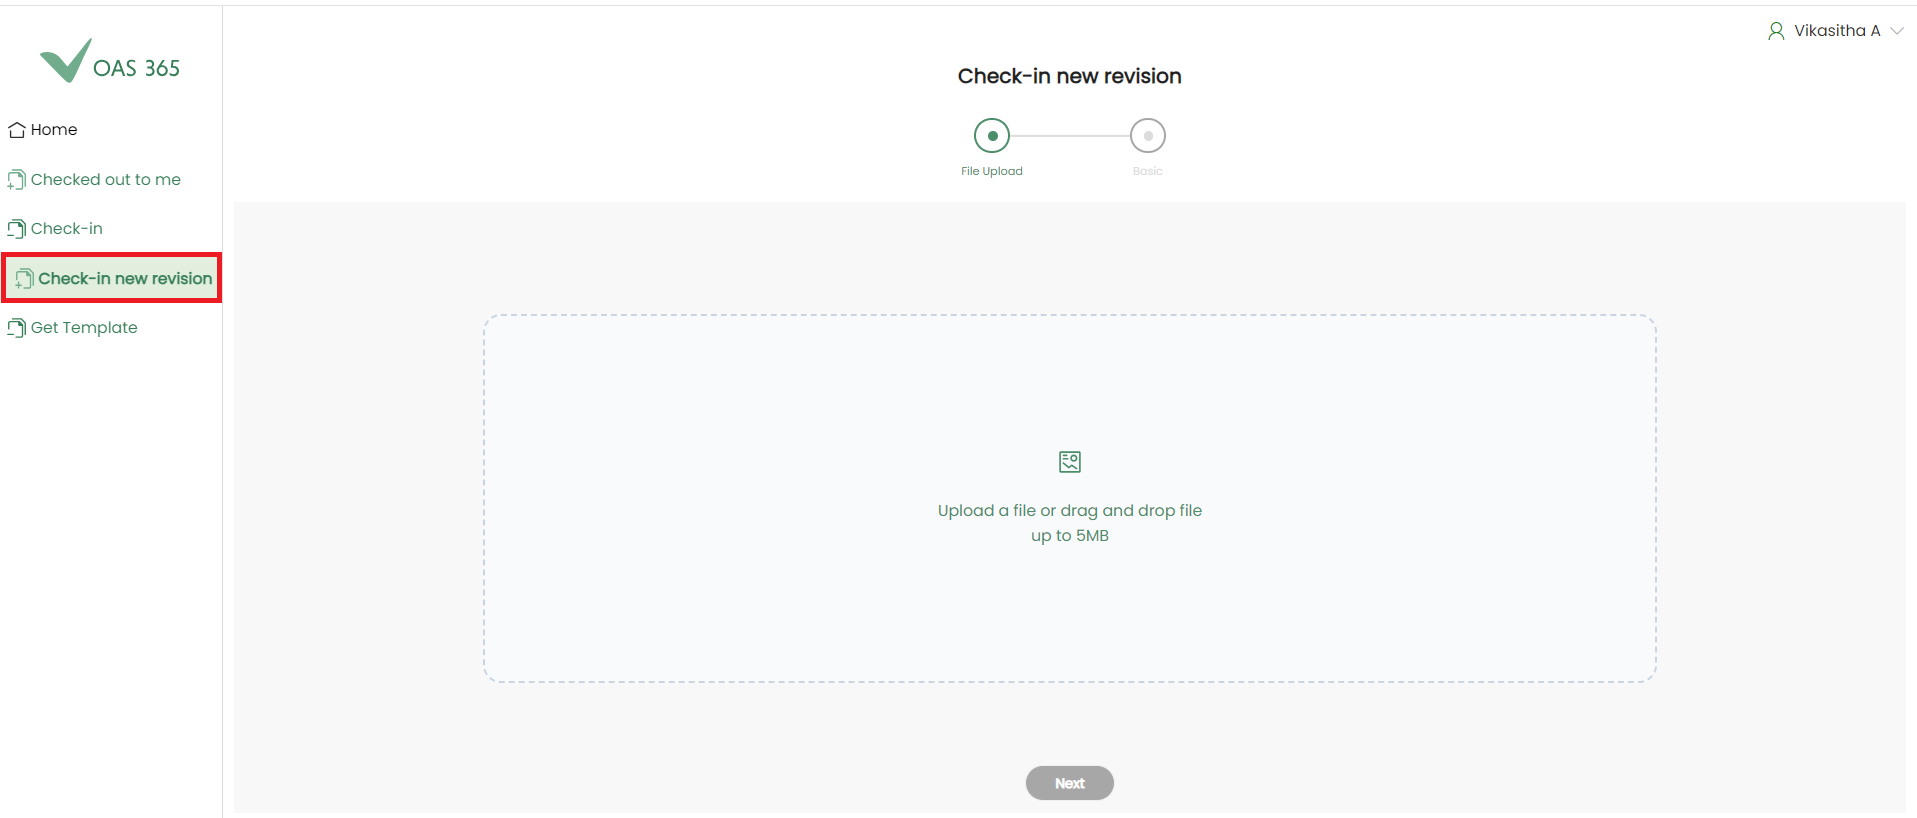
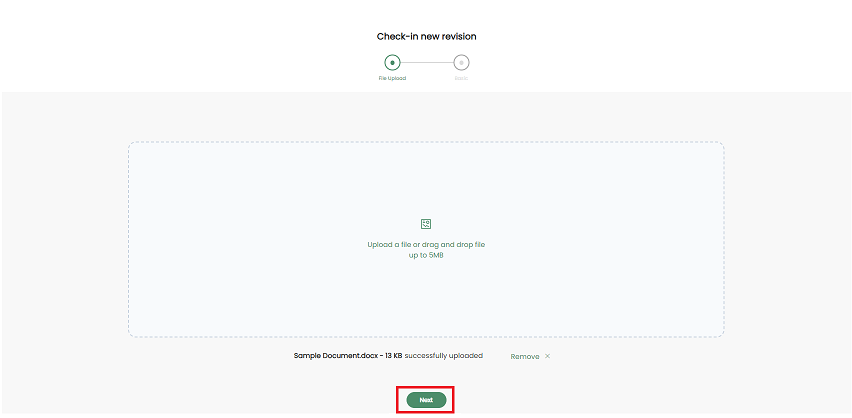
User can upload file(s) by clicking on Upload a file or drag and drop file up to 5MB from upload file section.
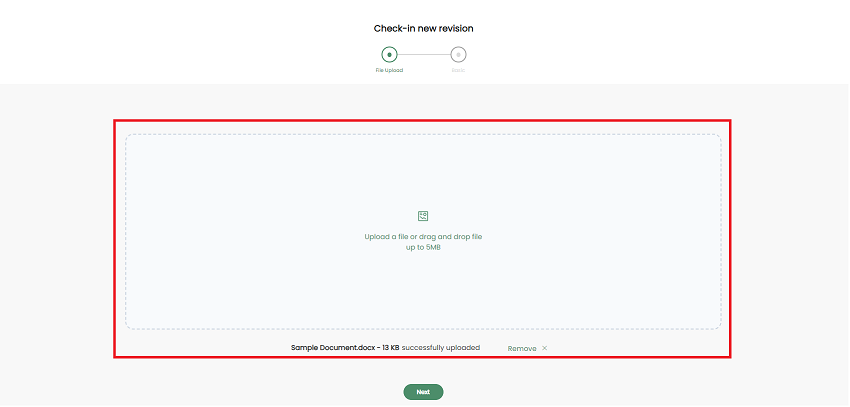
If user needs to delete a document it can be done by using Remove button.
Click Next to proceed to the next step.
User can select a document by clicking on the Search button.
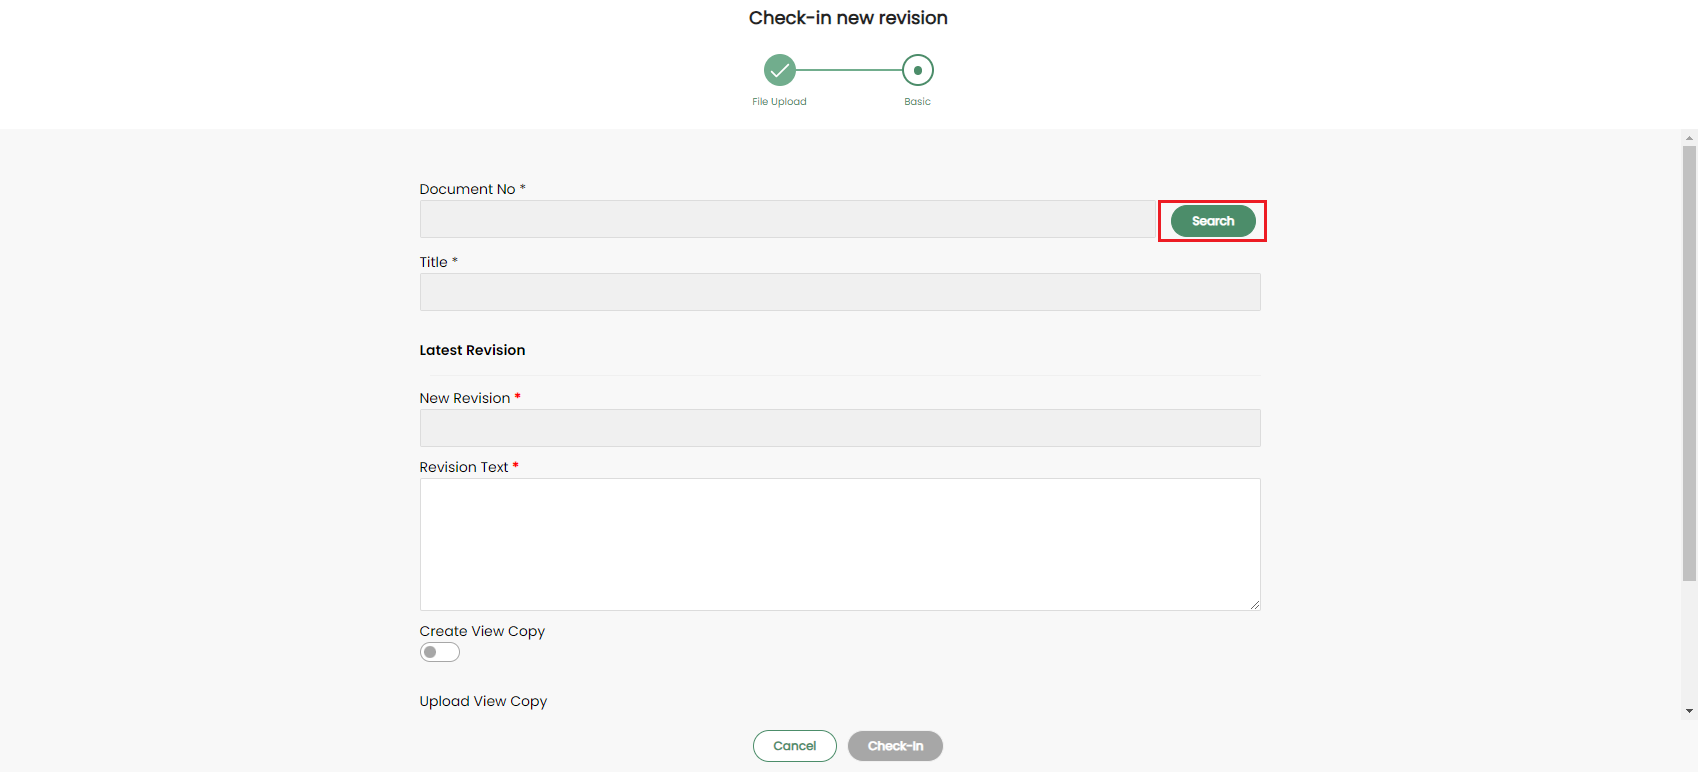
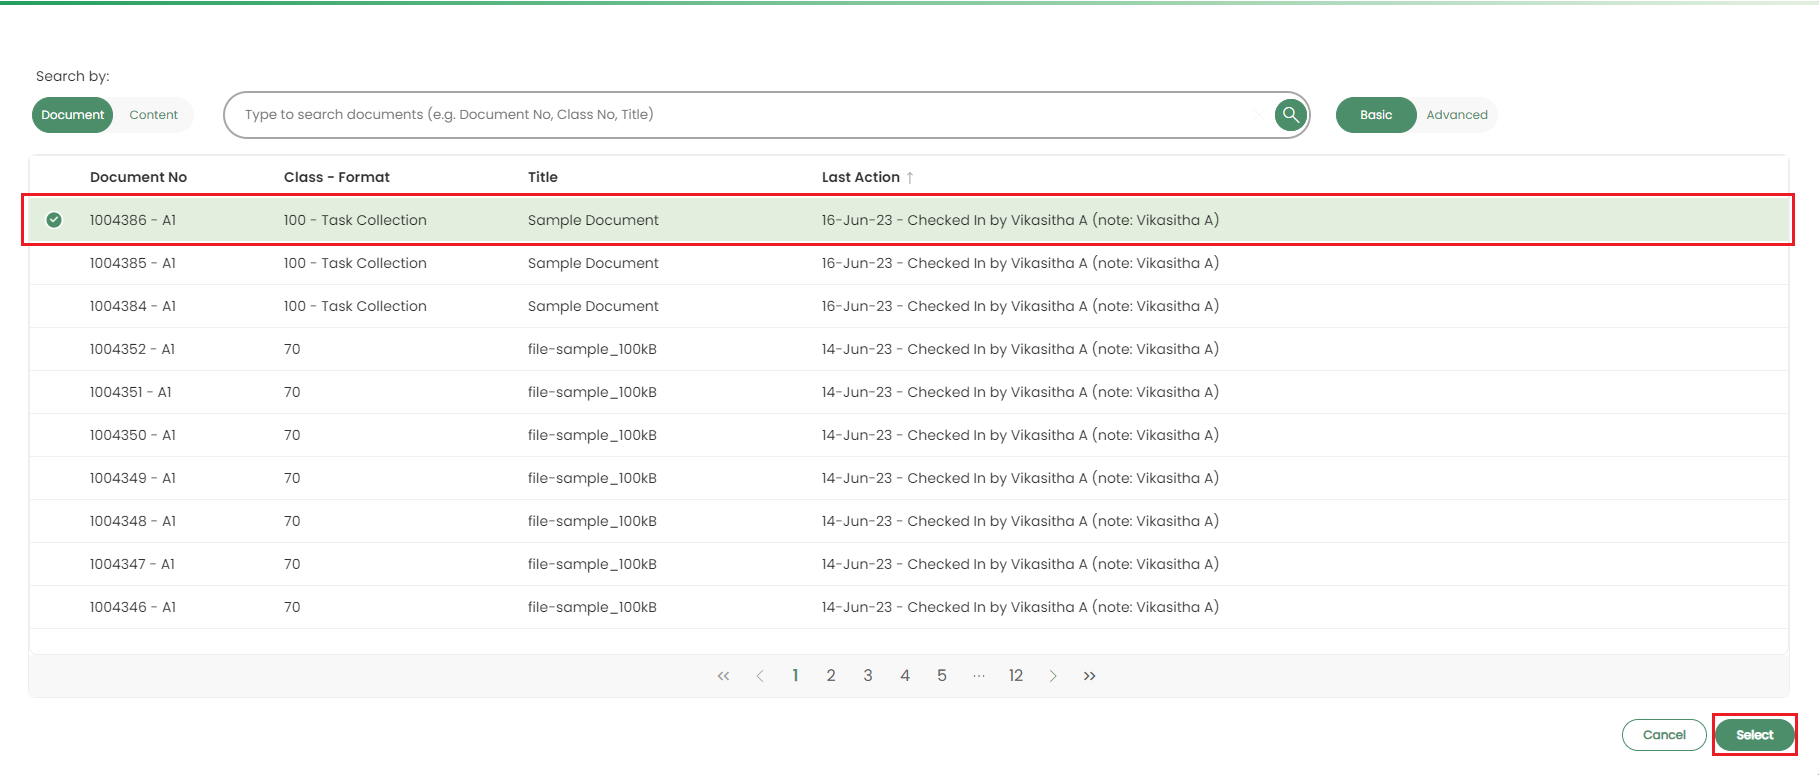
It will open the document search window. This will show only the latest checked-in documents. Users can search and select a document. Then, click on the Select button.
Users can now view details of the Latest Revision.
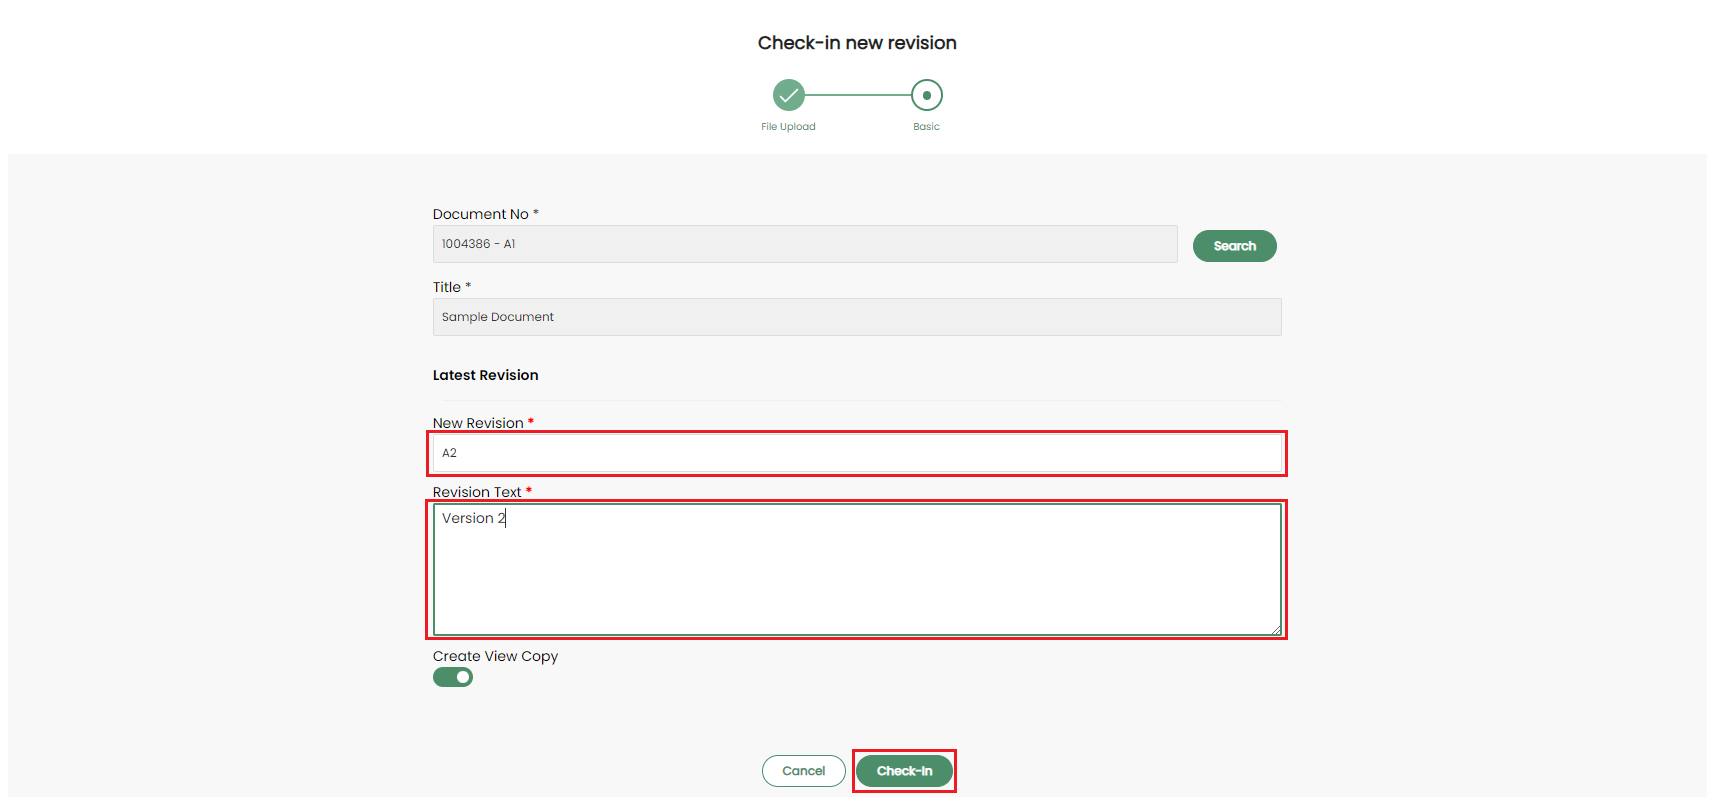
- New Revision - Automatically generated. (If the last revision is A1 then new revision will be named as A2).
- Revision Text - User must add a revision text.
- Create View Copy - This option is available only for DOCX files. If the file type has view enabled, then Create View Copy is enabled.
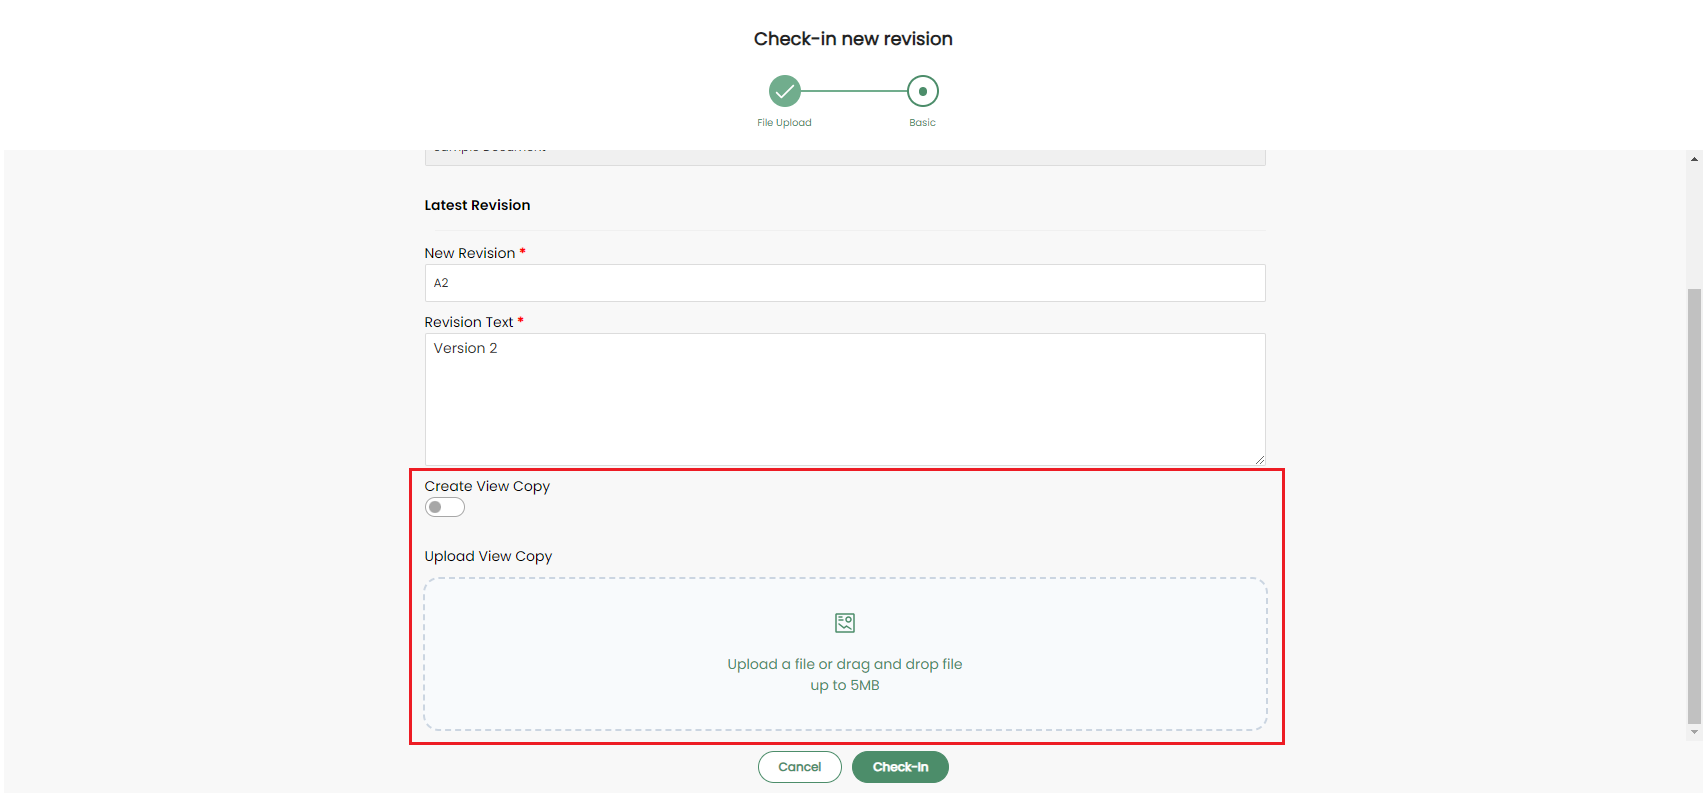
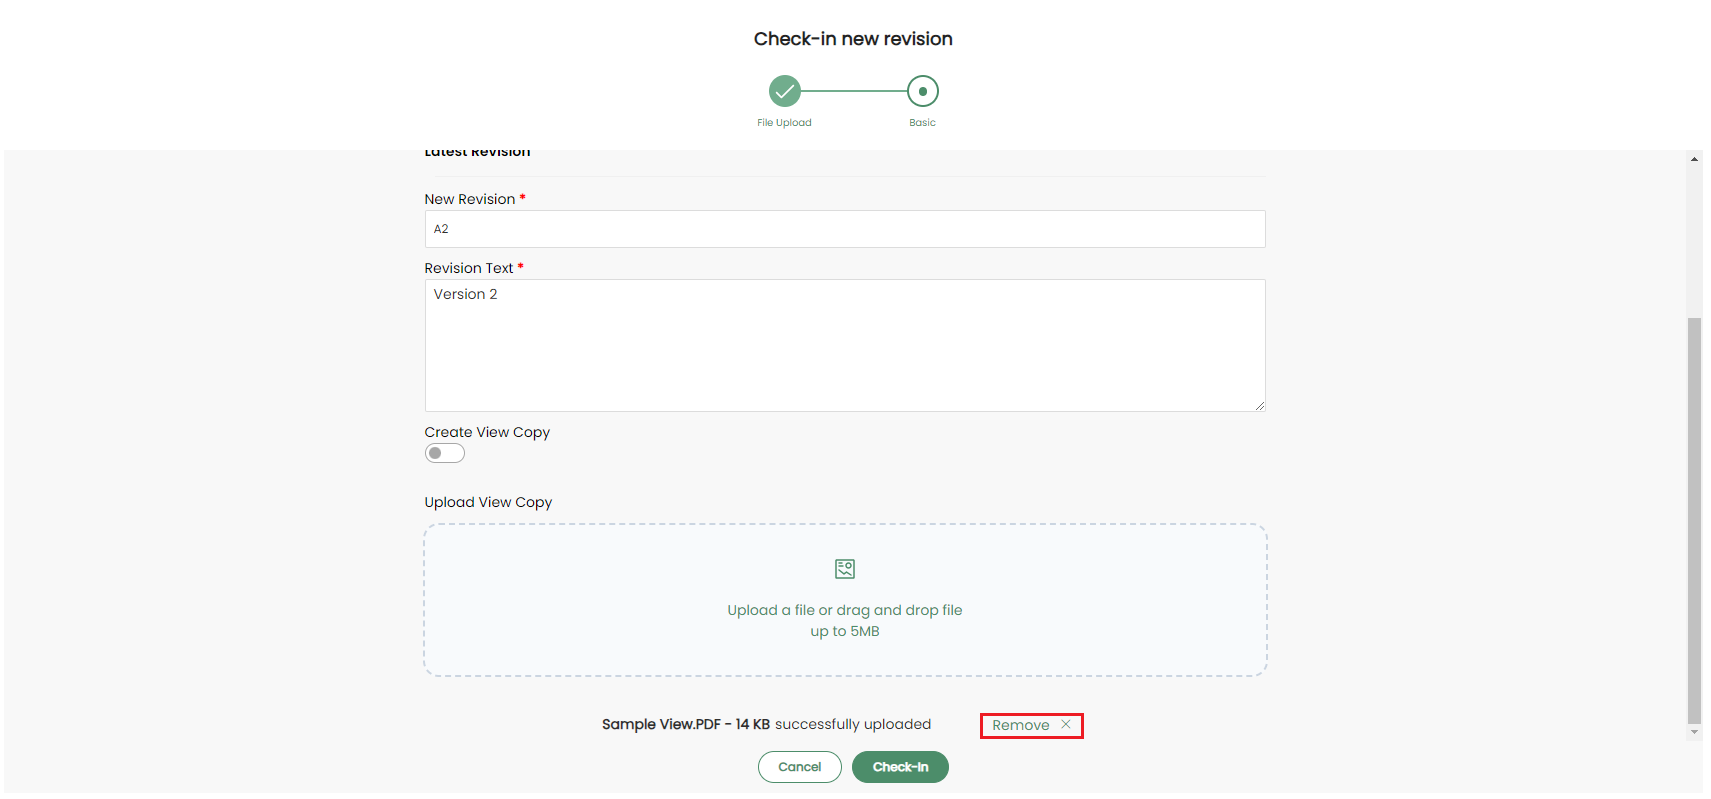
User can upload a file by clicking on Upload a file or drag and drop file up to 5MB from upload file section.

User can delete an uploaded document by clicking on the Remove icon.
After adding required fields click Check-In button.
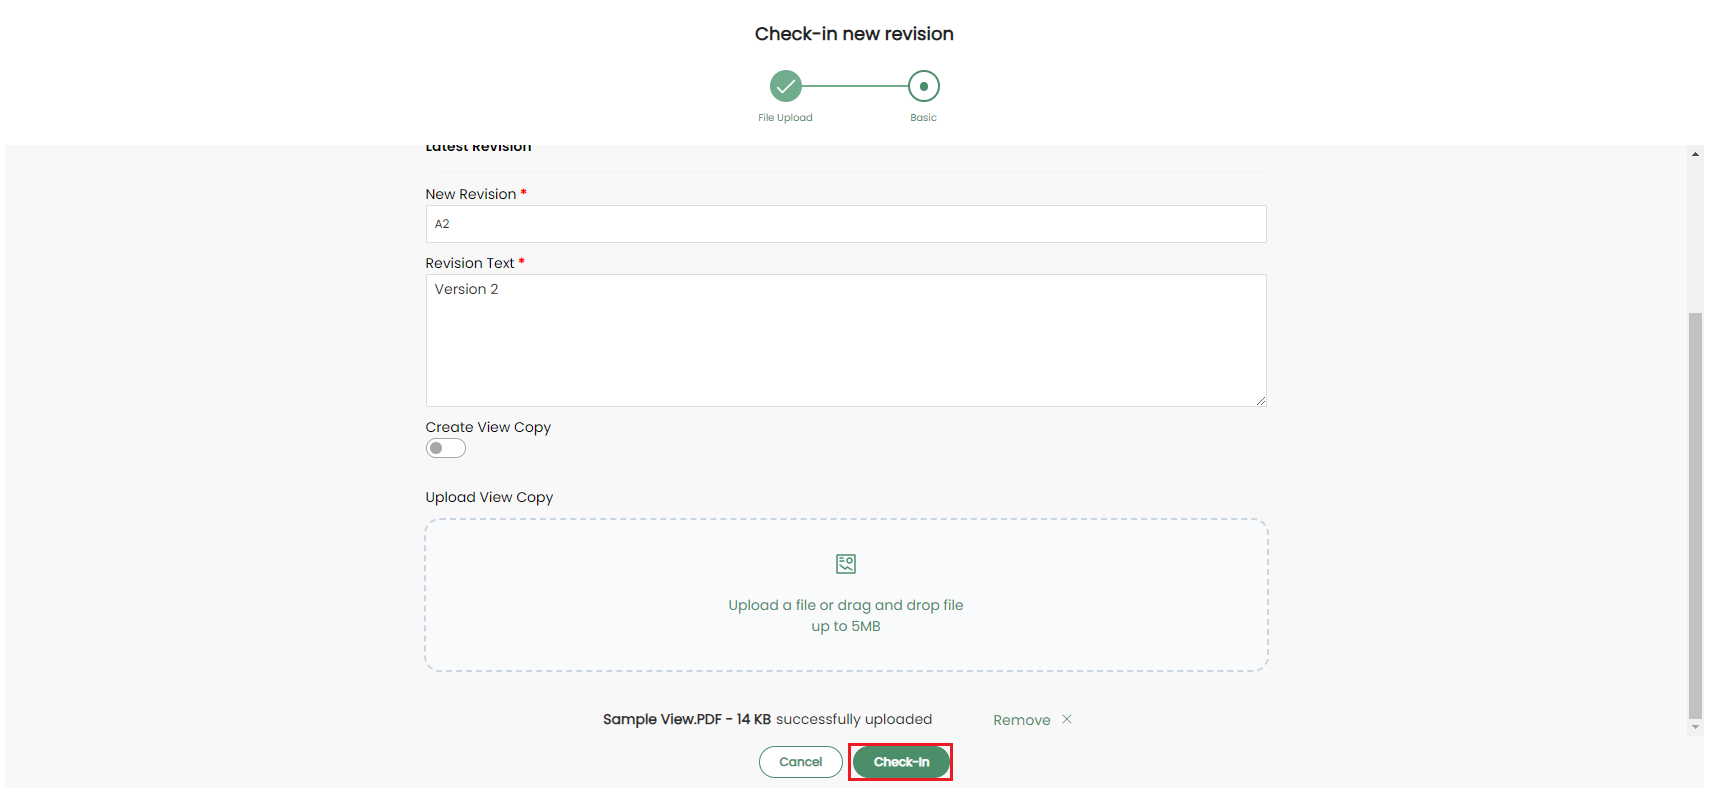
It will check-in document successfully as a new revision.
Once the file is successfully checked in to IFS, following message will be displayed.
If the user wishes to share the newly checked-in document, they can use the Share Document option
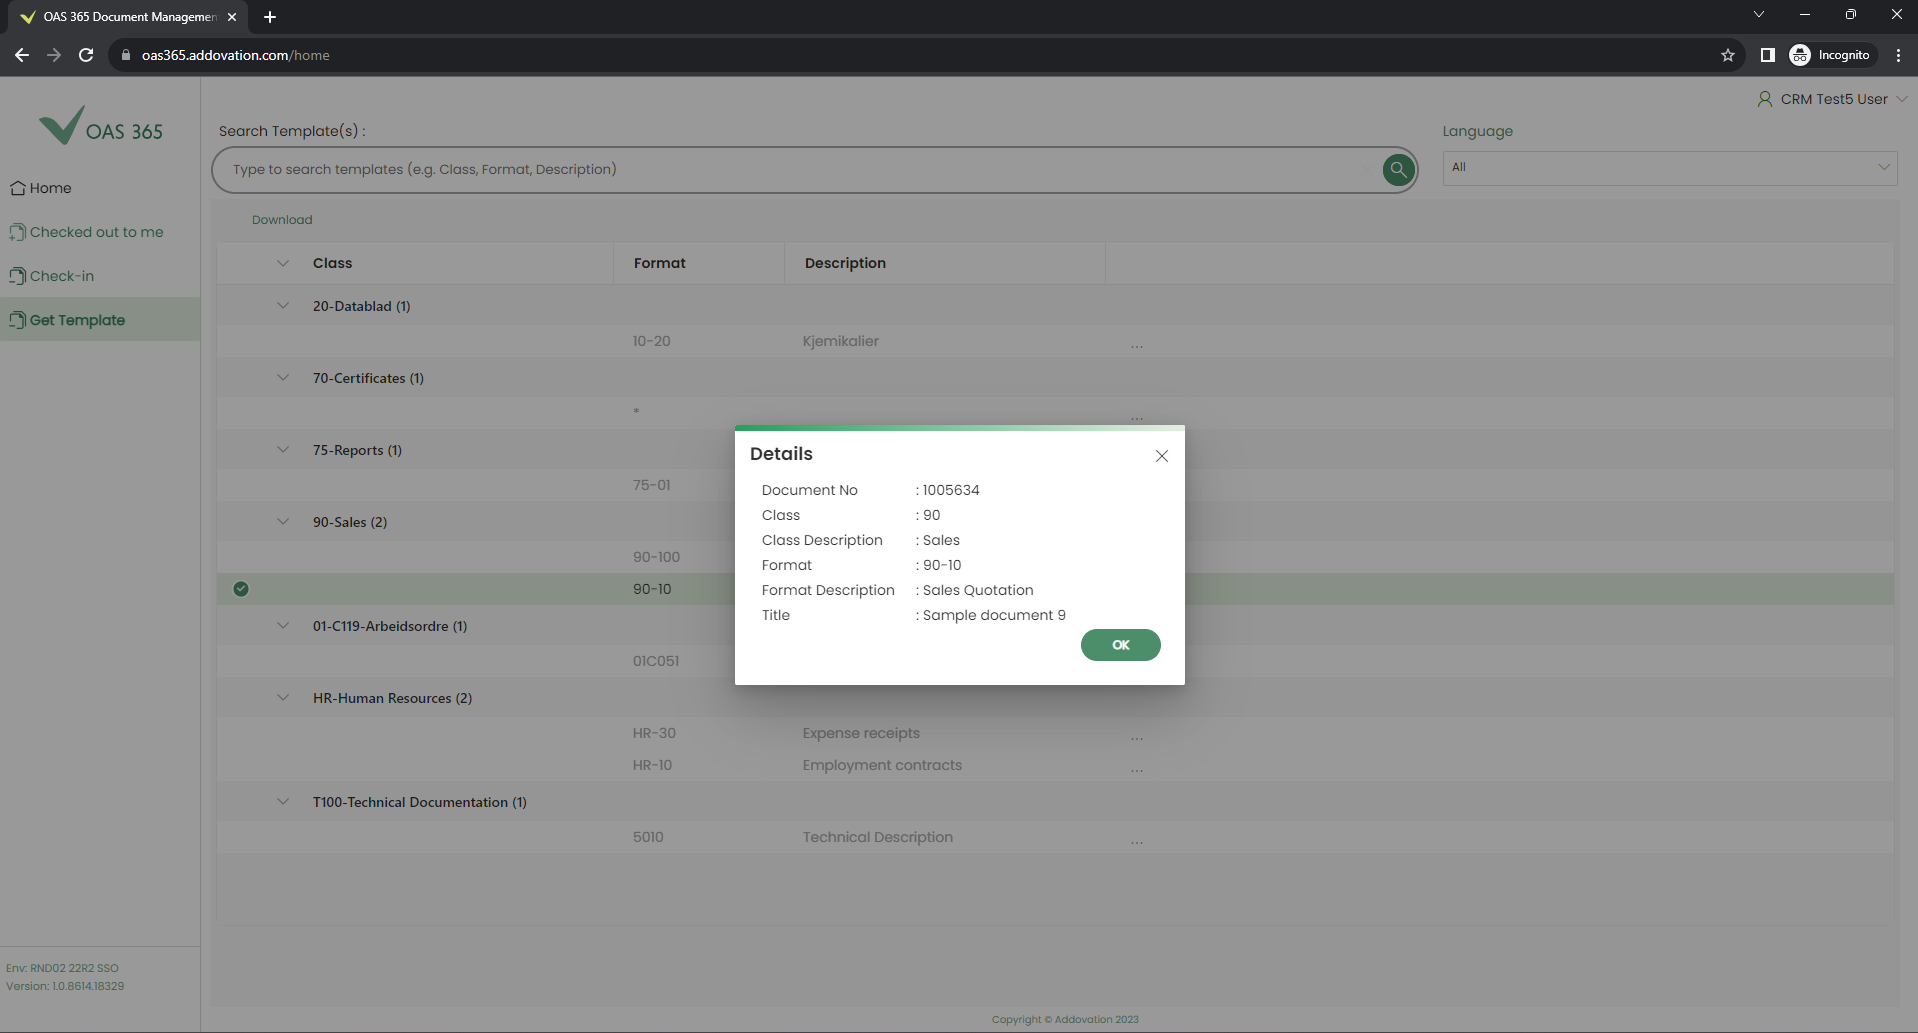
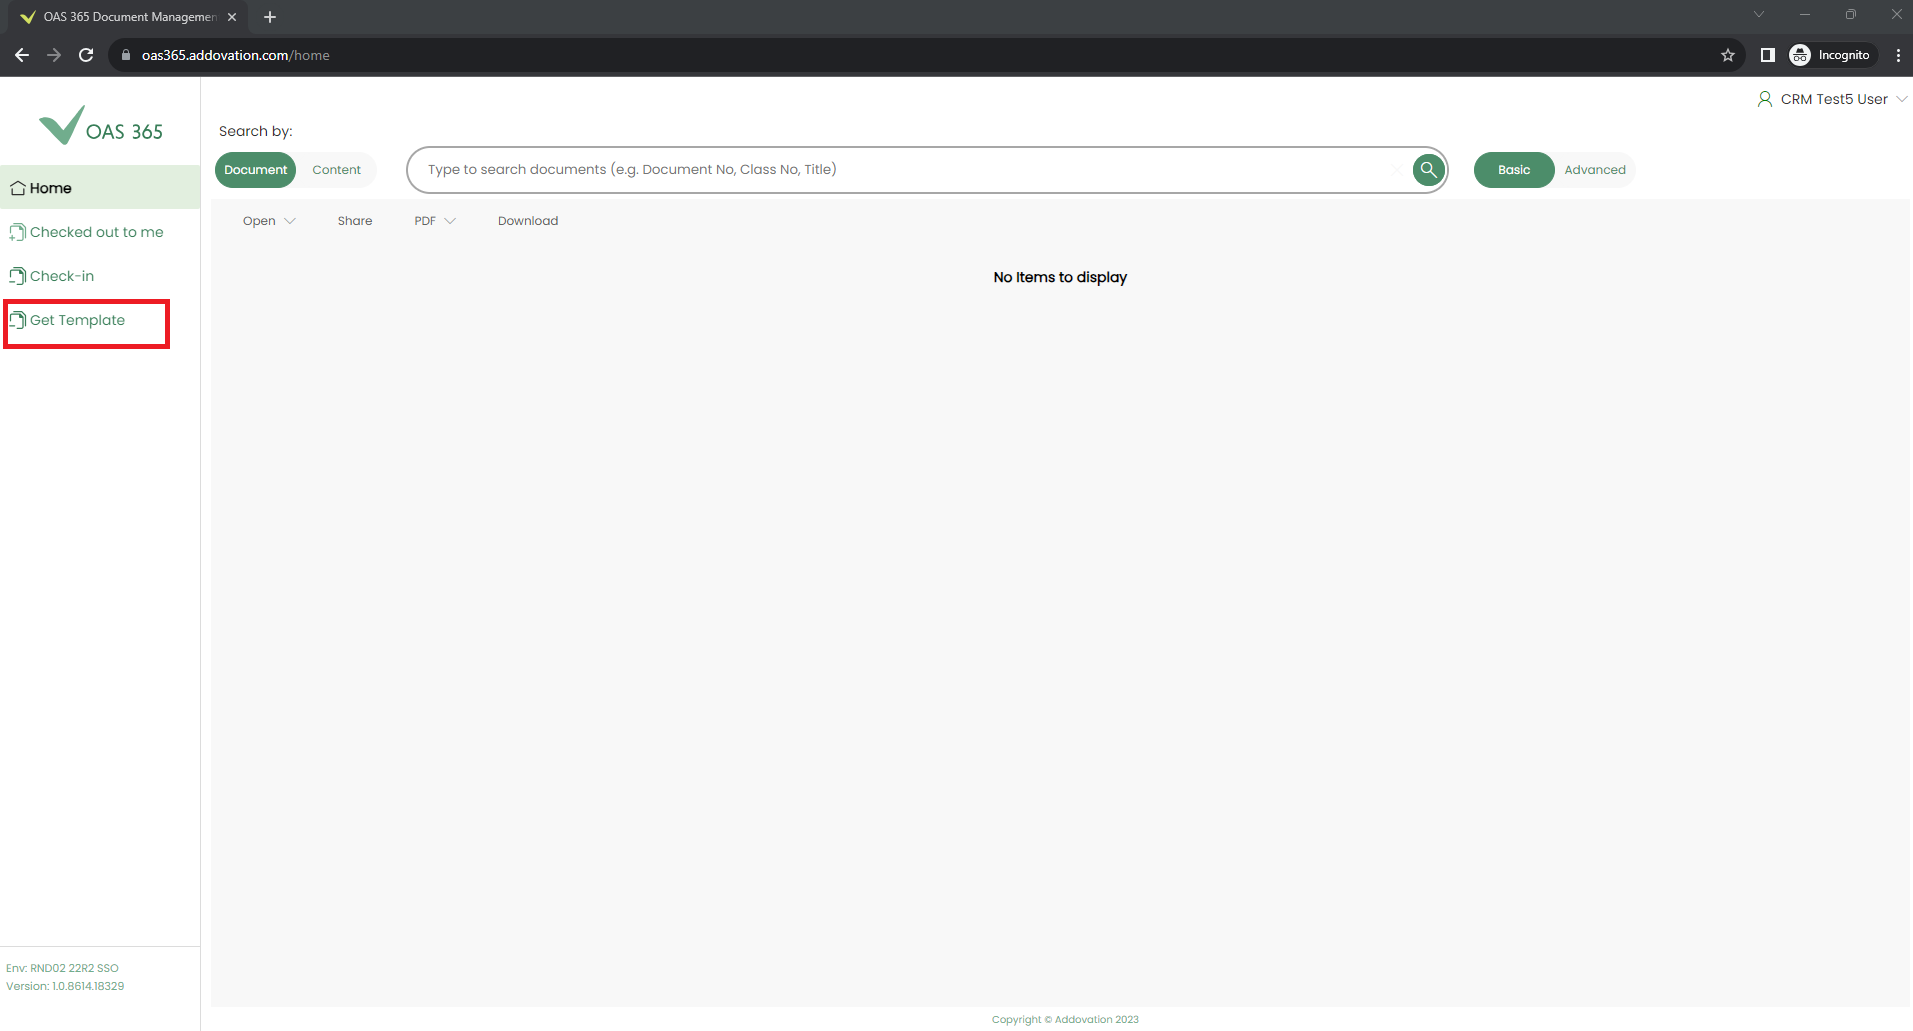
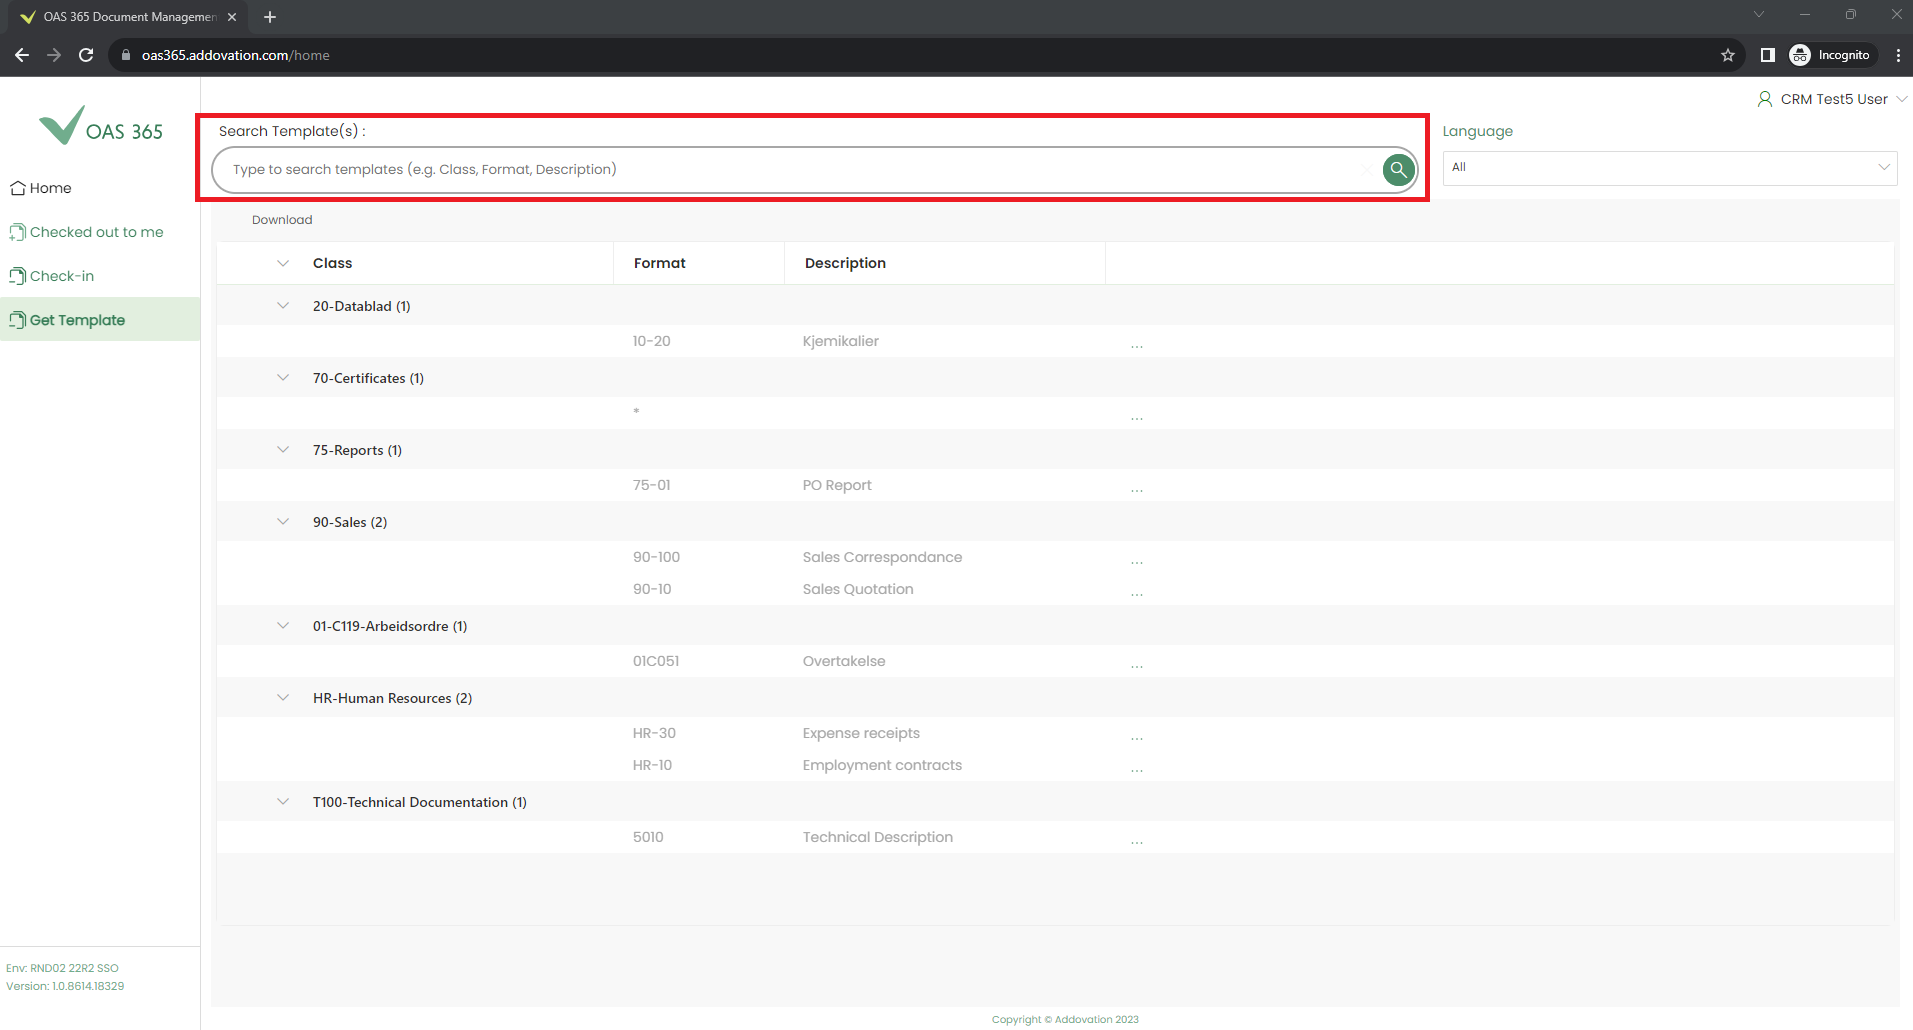
Get Template
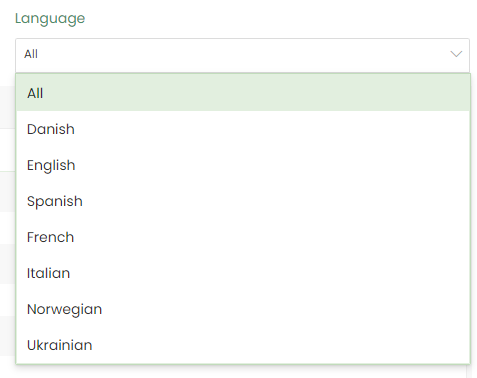
User can view and download Approved or Released document templates(s) according to the corresponding Class, Format, Description or Language.
Initially it will show all the templates regardless of the language.
Templates are grouped according to their Class.
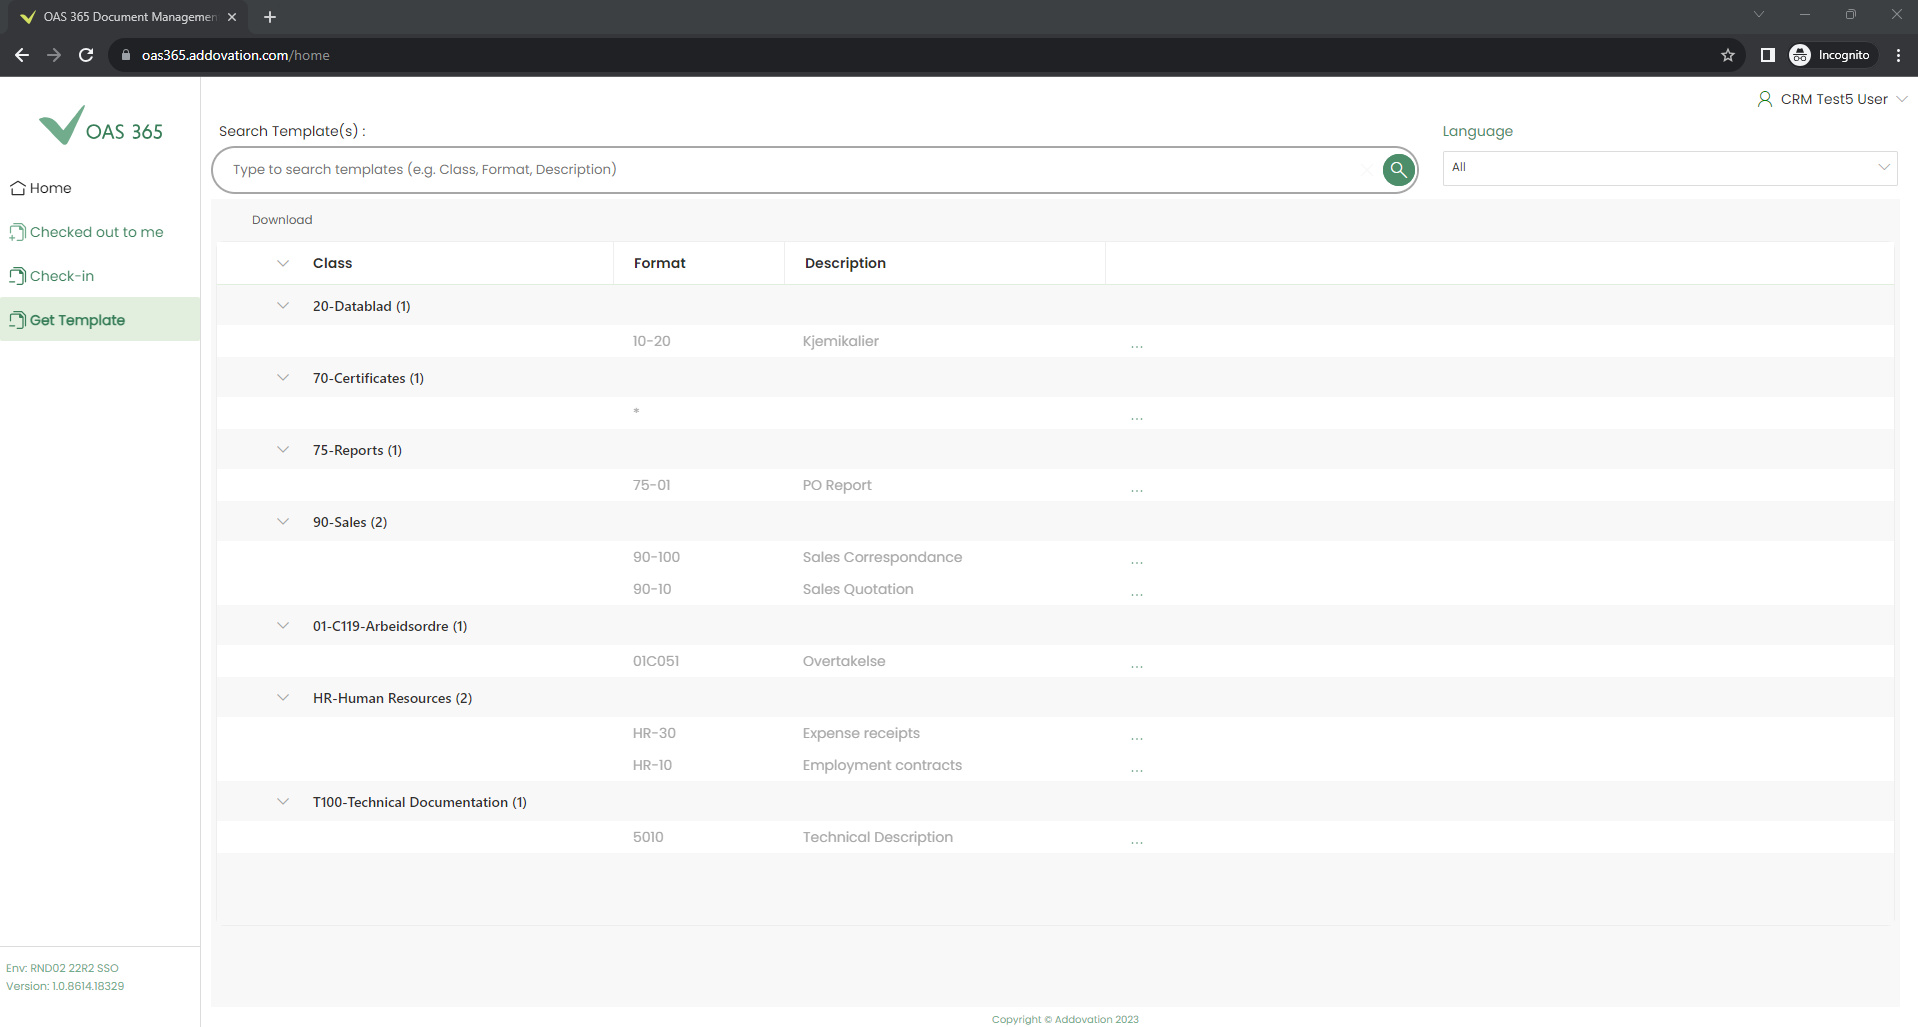
Only the document template(s) for the languages related to the logged-in user are populated inside the dropdown.
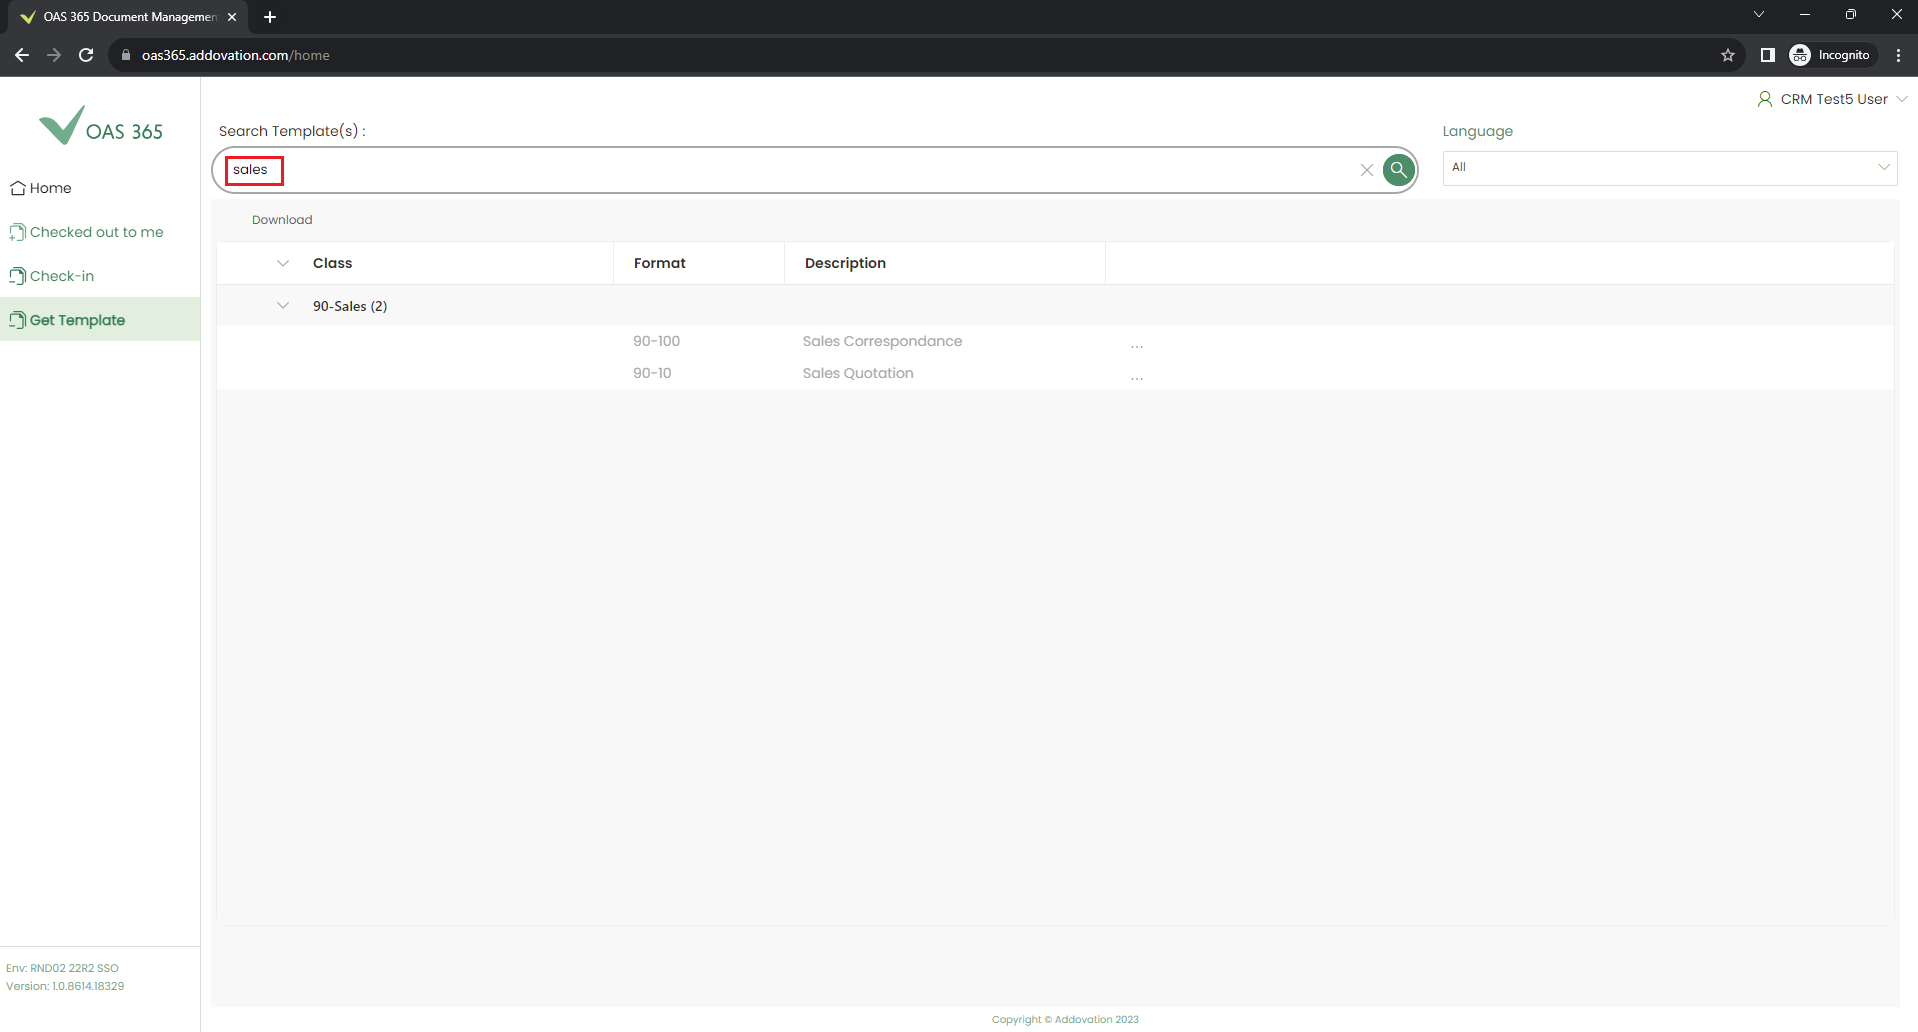
User can search for template(s) according to the corresponding Class, Format or Description. Users can search for template(s) based on the corresponding Class, Format or Description .
Once the user selects a specific language, the relevant template(s) will be displayed.

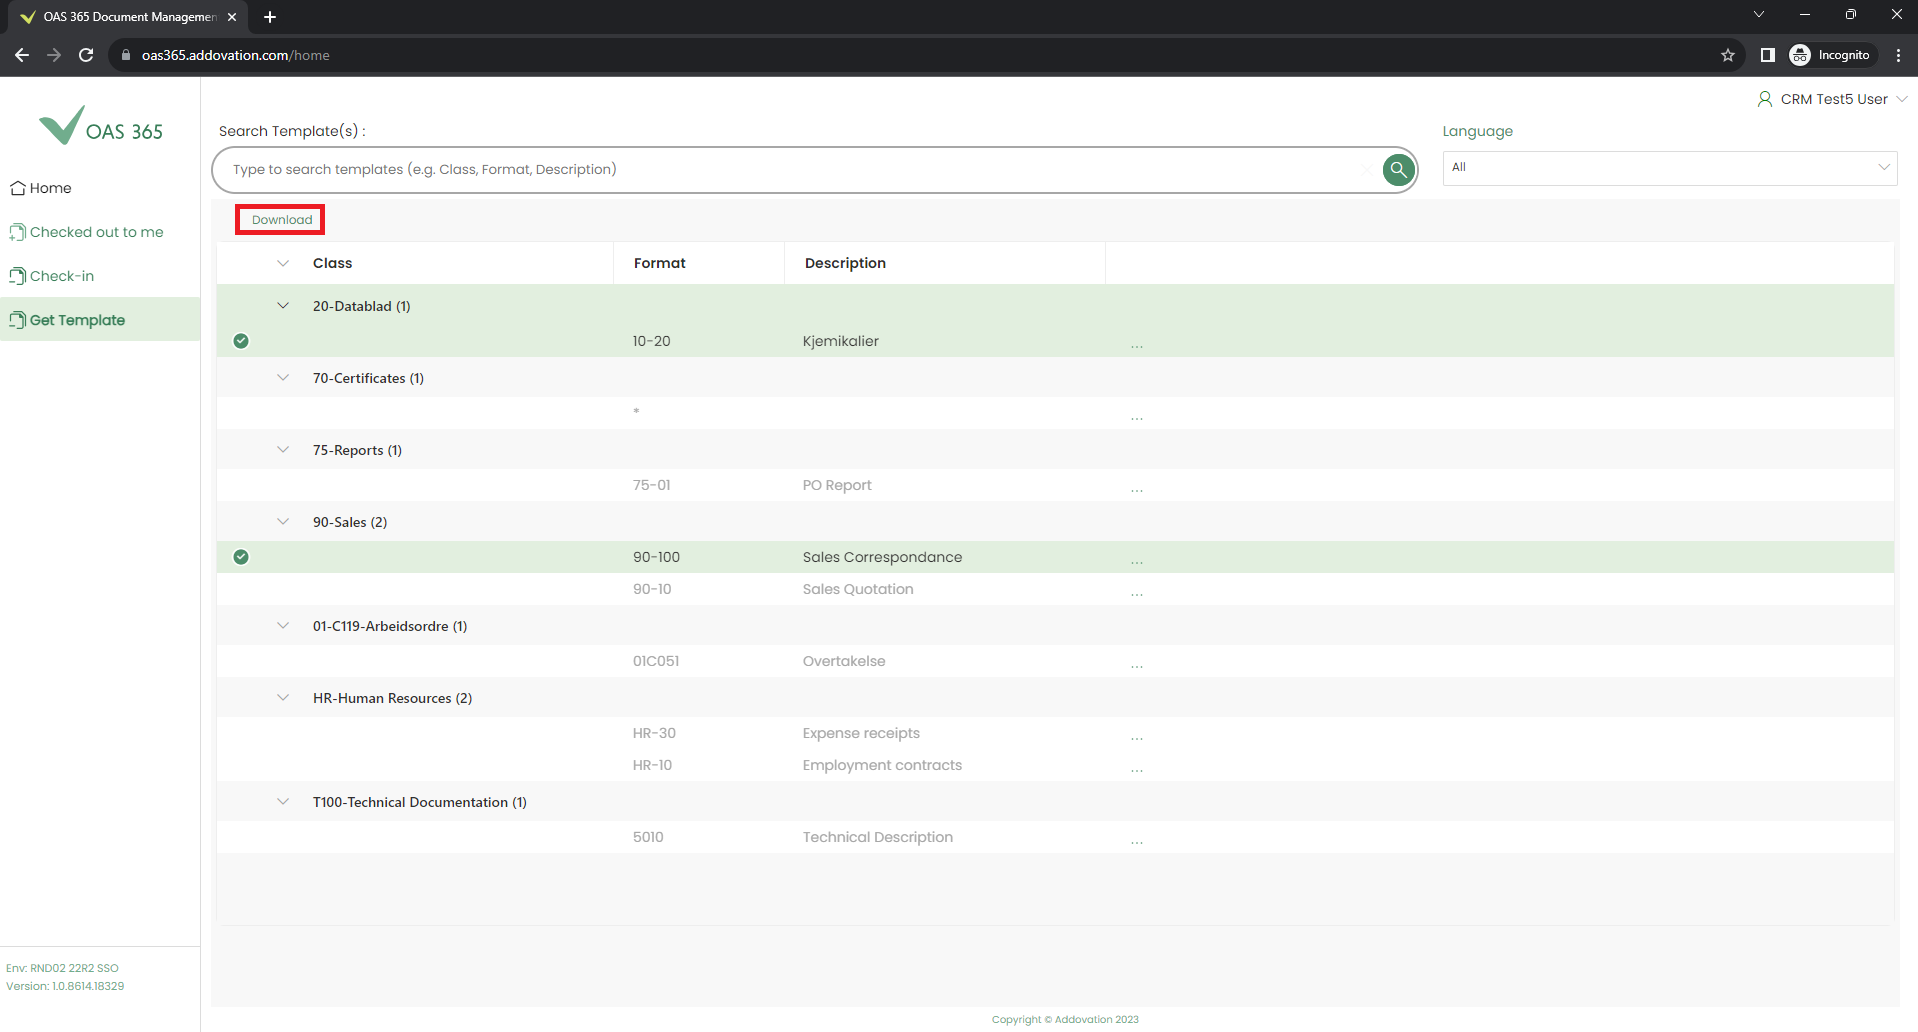
User can select a template or multiple templates and download them.
User can view more details of a selected template.