Addovation Stream - Setup Guide(Customer)
Last Updated: 2025-06-25
Overview
This customer setup guide provides a comprehensive overview and step-by-step instructions for configuring the Addovation Stream on IFS Cloud. It details the essential tasks the customer needs to perform, including gathering data and calling stream services, deploying the utility to gather data, creating a queue, importing the application configuration package, deploying the projection, and enabling communication. Each step is thoroughly explained to ensure a smooth and efficient setup process, empowering the customer to successfully configure the Addovation Stream on their IFS Cloud environment.
Setup IFS Cloud
Gather Data & Call Stream Service
Create Queue “ADDO_DOCGEN_OUT” in IFS Connect to Call the Stream Service
- Go to Message Queues and Click on + option.
/MessageQueue.png)
Provide the Instance name to continue.
Provide a description and select Insequence as the Execution Mode.
/MessageQueueDetails.png)
Import Application Configuration Package
This section explains configuring a button to call the Stream Service.
This package Contains,
Projection configurations.
Page Configurations for Prepare Work Order window.
Download the application configuration package file here
Now go to Solution Manager-> Configuration -> Application Configuration Packages -> Import Configuration -> Import Configuration Package.
Provide the package file as below.
/ProvidePackageFile.png)
- After successful configuration, you can see the Create DocGen Report in Prepare Work Order as below.
/CreateDocGenReport.png)
Import Permission Set
Download the Permission Sets file here
DOCMAN_STANDARD.xml: This permission set is required for document handling.
Go to Solution Manager-> Users and Permissions -> Permission Sets -> Import Permission Sets.
Provide files.
/PermissionsetsImport.png)
Open Up for Communication
Import Routing Addresses
Download the RoutingAddress_Addovation DocGen Service.xml located here
Go to Solution manager-> Integration -> IFS Connect -> Import Configuration.
Brows the downloaded file and set the Import Method as Add and click on Import.
/SelectImportMethod.png)
- Navigate to the created routing address. Set the Rest Root Endpoint to the HTTP POST URL in IFStoDocGenUtil, which was copied at the end of step 2.2.
/SettingEndPoint.png)
Import Routing Rules
Download the RoutingRule_Addovation DocGen integration routing rule.xml file from Routing Rules
Go to Solution manager-> Integration -> IFS Connect -> Import Configuration and Brows the downloaded file and set the Import Method as Add and click on Import.
/ImportRoutingRules.png)
Allow Access from IFS to IPs
Below logic app in Addovation tenant needs access to the customer’s IFS environment.
- IP whitelisting for Logic App (sending Queue messages /upload images to the Blob) /(inbound)
Network Configurations
Click here to read details about network configurations.
IFS Integrations
- Make sure you add the token generating user to company and site
- Two quick reports must be generated to get details from IFS
Create new “Quick Report”
Select New Report
Fill relevant info as follows
/NewReport.png)
Report title – A report name of your choice
Type – “SQL Statement” must be selected from dropdown
Category – Create a new Category in Report Category or select an existing one
/QuickReportCategory.png)
- Query Details – SQL query for the report
/save.png)
Queries
Query to fetch work order details SELECT wo_no, reg_date, err_descr, plan_hrs,reported_by, mch_code, mch_code_description, customer_no FROM ACTIVE_SEPARATE WHERE WO_NO ='&WO_NO'
Query to fetch work order tasks SELECT ORDER_NO, WO_NO, SITE, LONG_DESCRIPTION, REPORTED_BY, REPORTED_DATE from ifsapp.jt_task WHERE WO_NO='&WO_NO'
After creating the two quick reports, view details of them and projection name can be fetched as follows.
/QuickReportDetails.png)
Get the numerical value from projection name and replace them in following fields in manifest. E.g.: QuickReport97831 -> 97831
orderDetailsQuickReportId – Query to fetch work order details report’s projection name numerical value
orderTasksListQuickReportId - Query to fetch work order tasks query report’s projection name numerical value
Setup Azure
Logic App for IFS Integration
- Go to the Azure Portal’s main page and search for Logic Apps and select.
/LogicAppSelect.png)
- Add new Logic App.
/AddNewLogicAPp.png)
- Select Workflow Service Plan Hosting Plan and click Select.
/SelectHostingOption.png)
- Enter required fields and click on create button.
/CreateNewLogicApp.png)
- Subscription: Select the subscription you use.
- Resource group: Create Resource group by clicking ‘Create new’ and enter a proper name for the resource group and click ‘OK’
/createNewResourceGroup.PNG)
- Or else
- select the resource group which has created in step Resource group. (Resource group should be the same for other resources as well).
- Logic App name: give the app name as “HandleGroupSubscriptions”.
- Region: use same region as in Resource Group.
- Windows Plan: Select an existing Plan or create a New App Service Plan.
- Pricing Plan: Select plan type as Standard and choose a Resource Group before selecting a plan.
- Zone Redundancy: Make sure to select zone redundancy as Disable.
- After logic app is created successfully -Click on “go to resources”, this will redirect you to Logic App overview page. Go to "workflows"
/SelectWorkflow.png)
Click Add, select Select Stateful and Enter a proper name for workflow Name, and click on Create.
It will navigate to the WorkFlow designer and click on Code and delete existing content.
/Code.png)
Go to StreamIFSIntegration.txt from the
Release Packages.Copy the content of StreamIFSIntegration.txt,
And change the content as below.
- Give the IFS client id, client secret values for client_id / client_secret each place in code view as below.
/Clientsecret.png)
- Give the HTTP POST URL of **IFStoDocGenUtil** logic app, as Url.
/SecondLogicAppURL.png)
- Give IFS Access Provider URL and Releam for as below
/AccessProviderAndReleamReplace.png)
/AccessProviderAndReleam.png)
- Give IFS Access Provider URL for below lines.
/GetTables.png)
/GetWODetails.png)
/GetImages.png)
Go to designer click on When a HTTP request is received from IFS and Choose Relative Path from Advanced parameters and Add the following text to Relative Path field.
workordernumber/{workOrderNumber}/subscription/{subscriptionKey}/customer/{customerId}/processimages/{processImages}
/ProcessImage.png)
• Select change connection
/InvalidConnection.png)
Add Required fields and click Create New
/CreateConnection.png)
• Connection Name: Connection name of your preference • Authentication Type: select storage account connection string • Storage Account Connection String: Copy the connection string from your blob storage as shown below
Navigate to the Access Keys section of Azure Storage Account. Click the Show button next to key1 Connection string and Copy the value. Enter the copied value.
/BlobConnectionString.png)
Change connection of “Upload blob to storage container” request as follows
/ChangeConnection.png) Select the added connection in above step.
Select the added connection in above step.
Note
[!The standard workflow is to utilize the above Logic App to generate the manifest file. However, if you prefer to proceed using the utility package, please refer to the details provided in Utility].
Azure storage account
Azure storage account contains all your Azure storage data objects including blobs, files shares, queues, tables, and disks. Data in your storage account is durable and highly available, secure, and massively scalable.
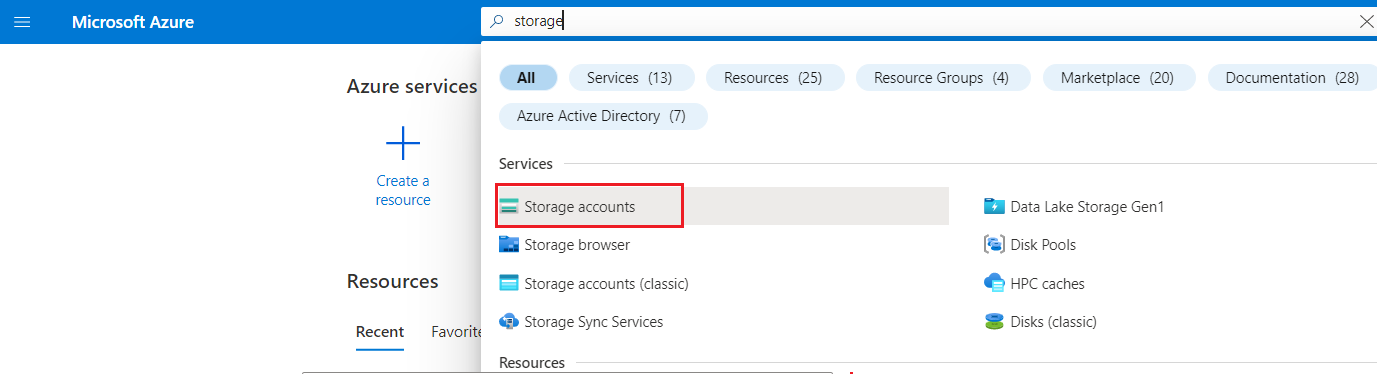
- Now go to app portal main page and click Storage accounts or you can type on search field and find.
- Click on Create and fill the mandatory fields in ‘Basics tab’ as below and click on Review + Create.

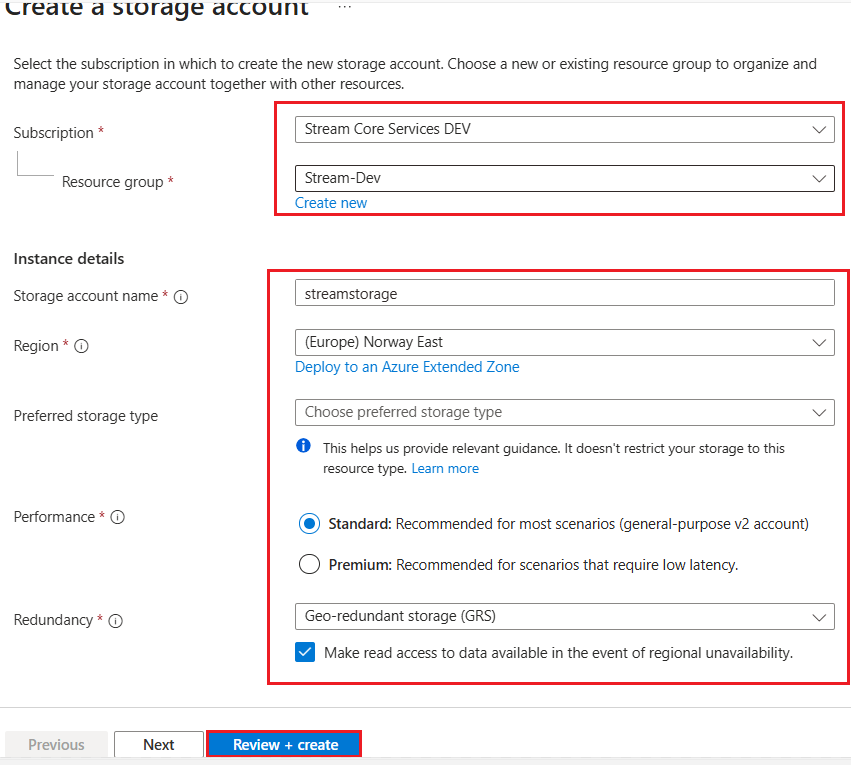
- Subscription: Select the subscription you use.
- Resource group: Create Resource group by clicking ‘Create new’ and enter a proper name for the resource group and click ‘OK’.
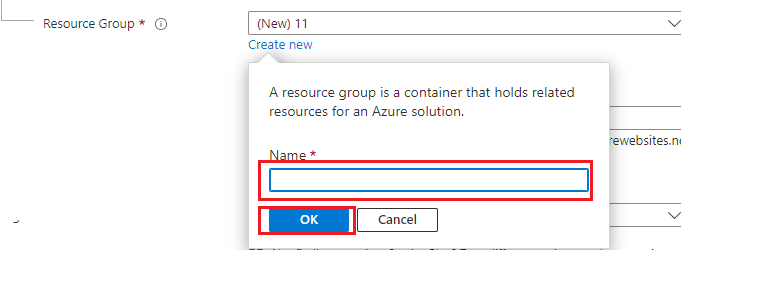
- Or else
- select the resource group which created in previous step. (Resource group should be matched with the resource group used in other resources of Stream service).
- Storage account name: Provide a name which contains between 3 and 24 characters, and name only allows lowercase letters and numbers.
- Region: use same region used in created resource group
- Preferred storage type: Azure Storage offers several types of storage accounts. Each type supports different features and has its own pricing model. Select 'Azure Blob Storage or Azure Data Lake Storage Gen 2'.
- Performance: Azure Storage offers two options – Premium and Standard.
- Premium Storage: the data is stored on Solid State Drives (SSD). Premium Storage provides better performance in terms of IOPS (Input/Output Operations Per Second) and throughput.
- Standard Storage: Hard Disk Drives (HDD) instead of Standard Storage.
- Choosing the right performance level at the time of account creation becomes essential. Once a storage account is created with a performance level, it can’t be changed ex: you can’t change a “Standard” storage account to a “Premium” storage account and vice-versa. Furthermore, not all services are supported for all performance levels. Ex: if your application makes heavy use of Storage Queues or Tables, you cannot choose “Premium” as these services are not supported.
Redundancy: Azure Storage always stores multiple copies of your data so that it's protected from planned and unplanned events, including transient hardware failures, network or power outages, and massive natural disasters. Redundancy ensures that your storage account meets its availability and durability targets even in the face of failures.
Azure storage offers two options in Primary Region [Data in Azure storage account is always replicated three times]:
Locally redundant storage (LRS) Lowest-cost option with basic protection against server rack and drive failures. LRS is the least expensive replication option Recommended for non-critical scenarios.
Zone-redundant storage (ZRS) Intermediate option with protection against datacenter-level failures. Recommended for high availability scenarios. Redundancy in secondary Region:
Geo-redundant storage (GRS) Intermediate option with failover capabilities in a secondary region Recommended for backup scenarios.
Geo-zone-redundant storage (GZRS) Optimal data protection solution that includes the offerings of both GRS and ZRS. Recommended for critical data scenarios.
- Select Review + Create
- Select Create. It takes a few seconds to create a storage account.
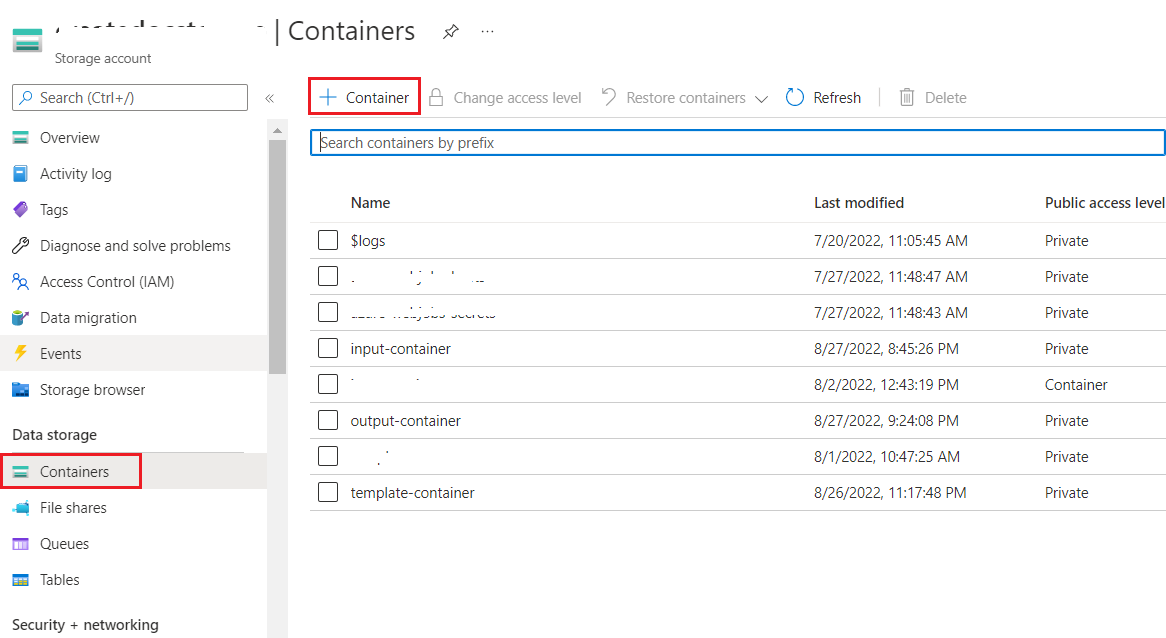
Containers
- Select Containers and click on Container and fill mandatory fields and click on Create.
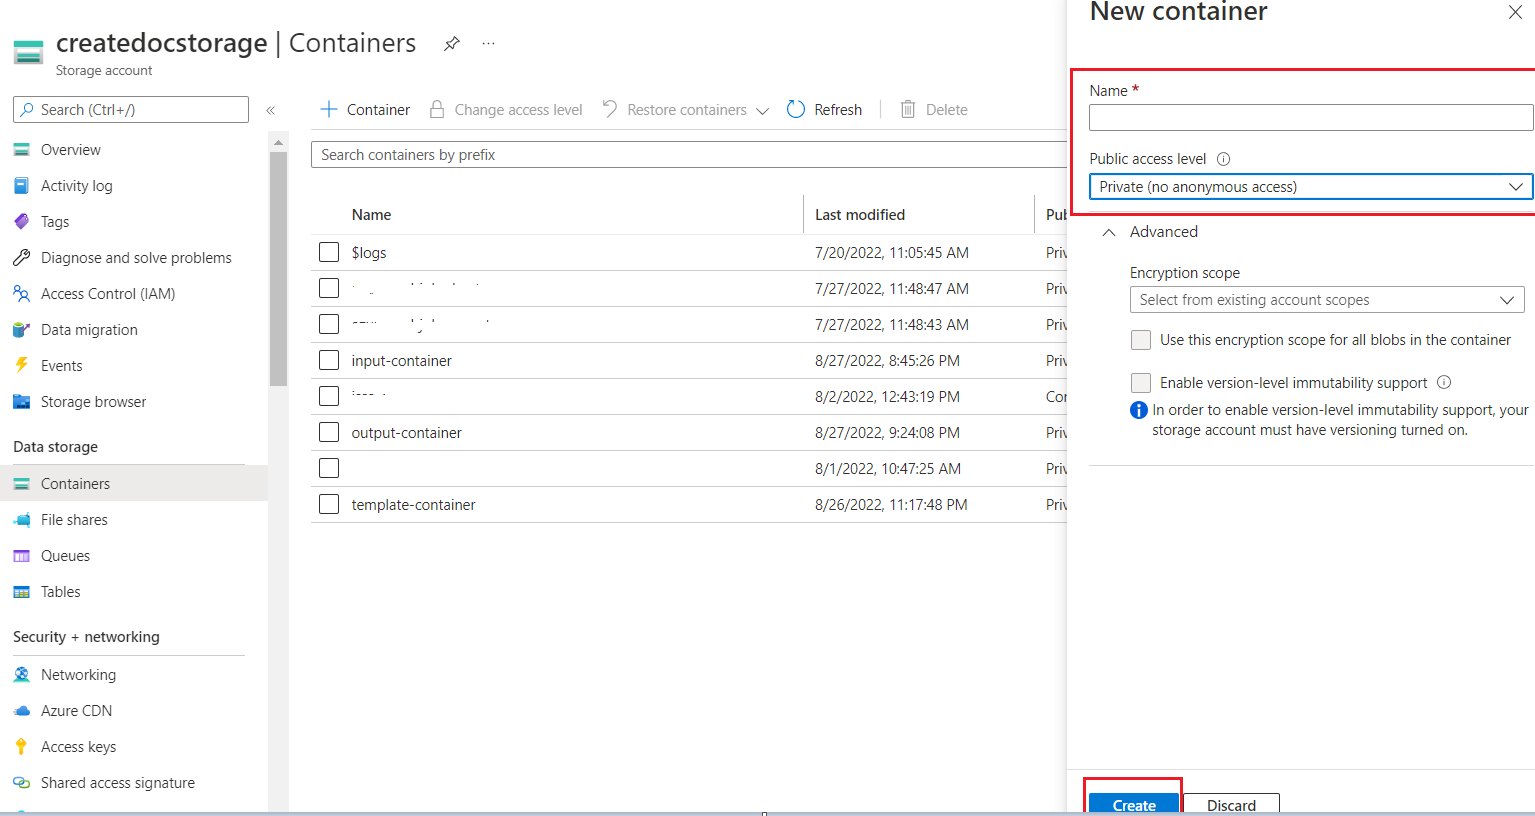
Name: Provide a name which contains lowercase letters, numbers, and hyphens, and must begin with a letter or a number. Each hyphen must be preceded and followed by a non-hyphen character. The name must contain characters between 3 and 63.
Public Access Level: Specifies whether data in the container can be accessed publicly or not.
- Private: by default, container data can not be accessed publicly.
- Blob: allow public read access for blobs.
- Container: allow public read and list access to the entire container.
Select Private for Public Access Level.
After creating the container, If you need to change the access level,
- Click on the created container, go to the Overview tab and click on Change access level on and Click OK.

- Click on the created container, go to the Overview tab and click on Change access level on and Click OK.
Create 3 separate containers, for templates, inputs and outputs.
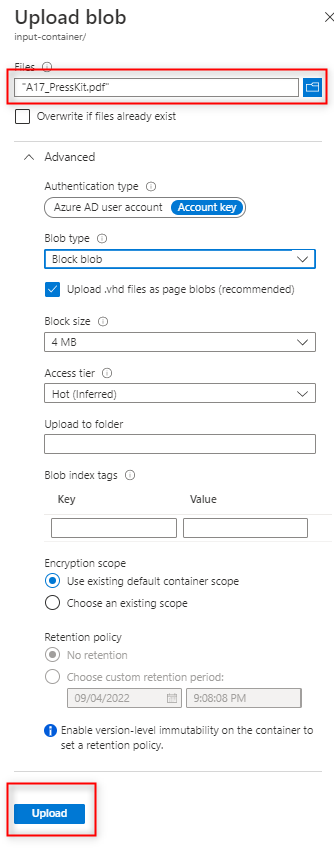
Input container: User should upload input files which are referenced in the manifest (ex: images etc..) to this container (Refer User guide for more information). In order to upload files, click on created input-container and click on Upload.

Select the file by clicking on file icon, keep the default settings and click Upload.
template-container: User should upload predefined template (ex: html templates) files to this container.In order to upload files, follow the previously defined steps in step 1.
output-container: All the merged files and converted files(Ex: PDF) will be saved in this container.
In order to access the files saved in Private containers SAS (Shared access Signature) should be created and it should be communicated with Addovation consultants for configuring db.
- Create Shared access token for each container,
Click on Shared access tokens under Settings in left pane
- Input container - select only Read Permissions
- Template container- select only Read Permissions
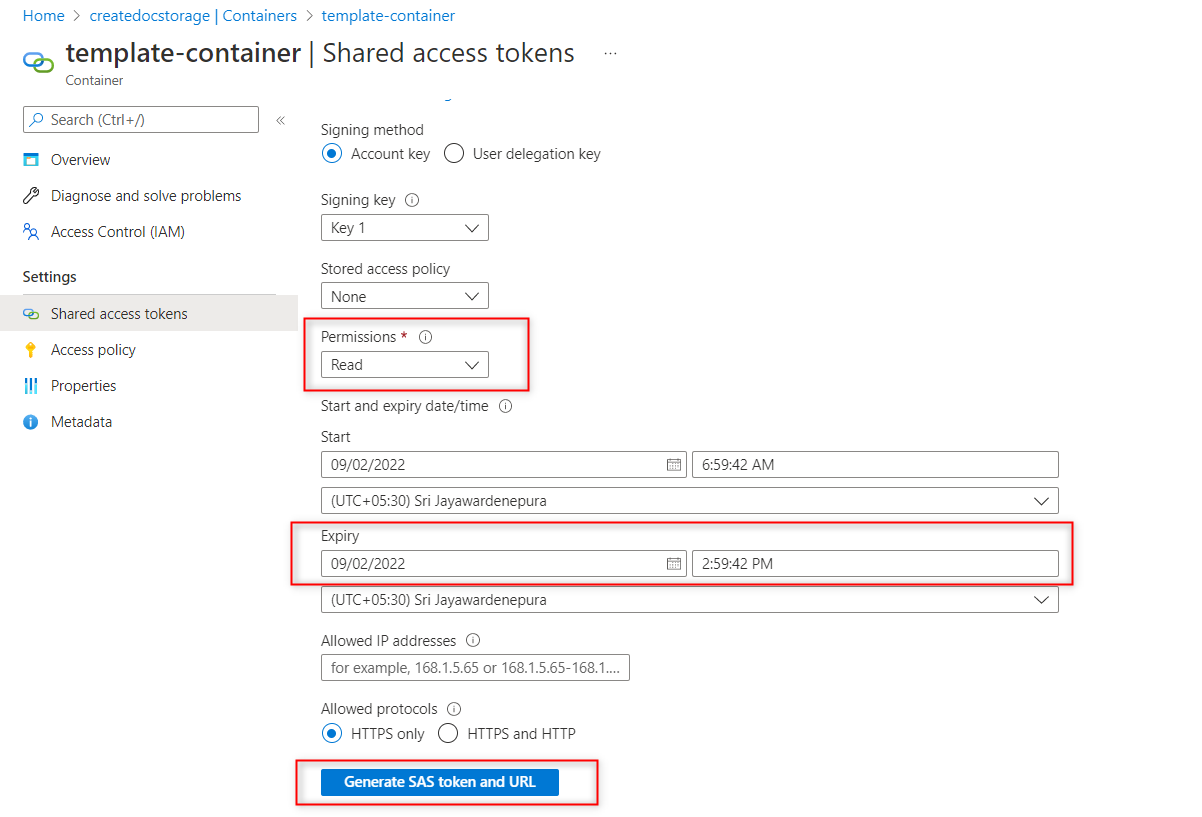
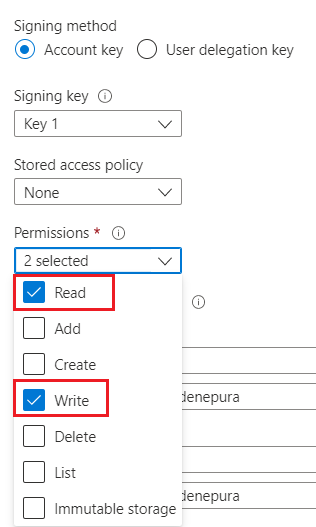
Output container- select Read and write Permissions
Set the date range - The SAS token will be expired after the Expiry Date.