Addovation Stream Template Designer - User Guide
Last Updated: 2026-02-19
Introduction
The Stream Template Designer is a web-based application that allows users to create, customize, and generate document templates using HTML and JSON files. It enables users to design dynamic templates by inserting Quick Reports and Objects as tables or merge fields, preview the output, and generate final documents in PDF format.
The application provides an intuitive interface for searching and selecting data sources, managing template components, and controlling template structure through interactive preview, JSON, and HTML configuration tabs.
Login
To log into the Stream Template Designer, user may enter the URL on browser and open the web page.
Then the IFS Authenticator window appears, allowing the user to:
- Enter their username and password, or
- Sign in using Addovation SSO or Skyforce SSO by selecting an account.
Once signed in, the Template Preview and Template Designer pages will be loaded.
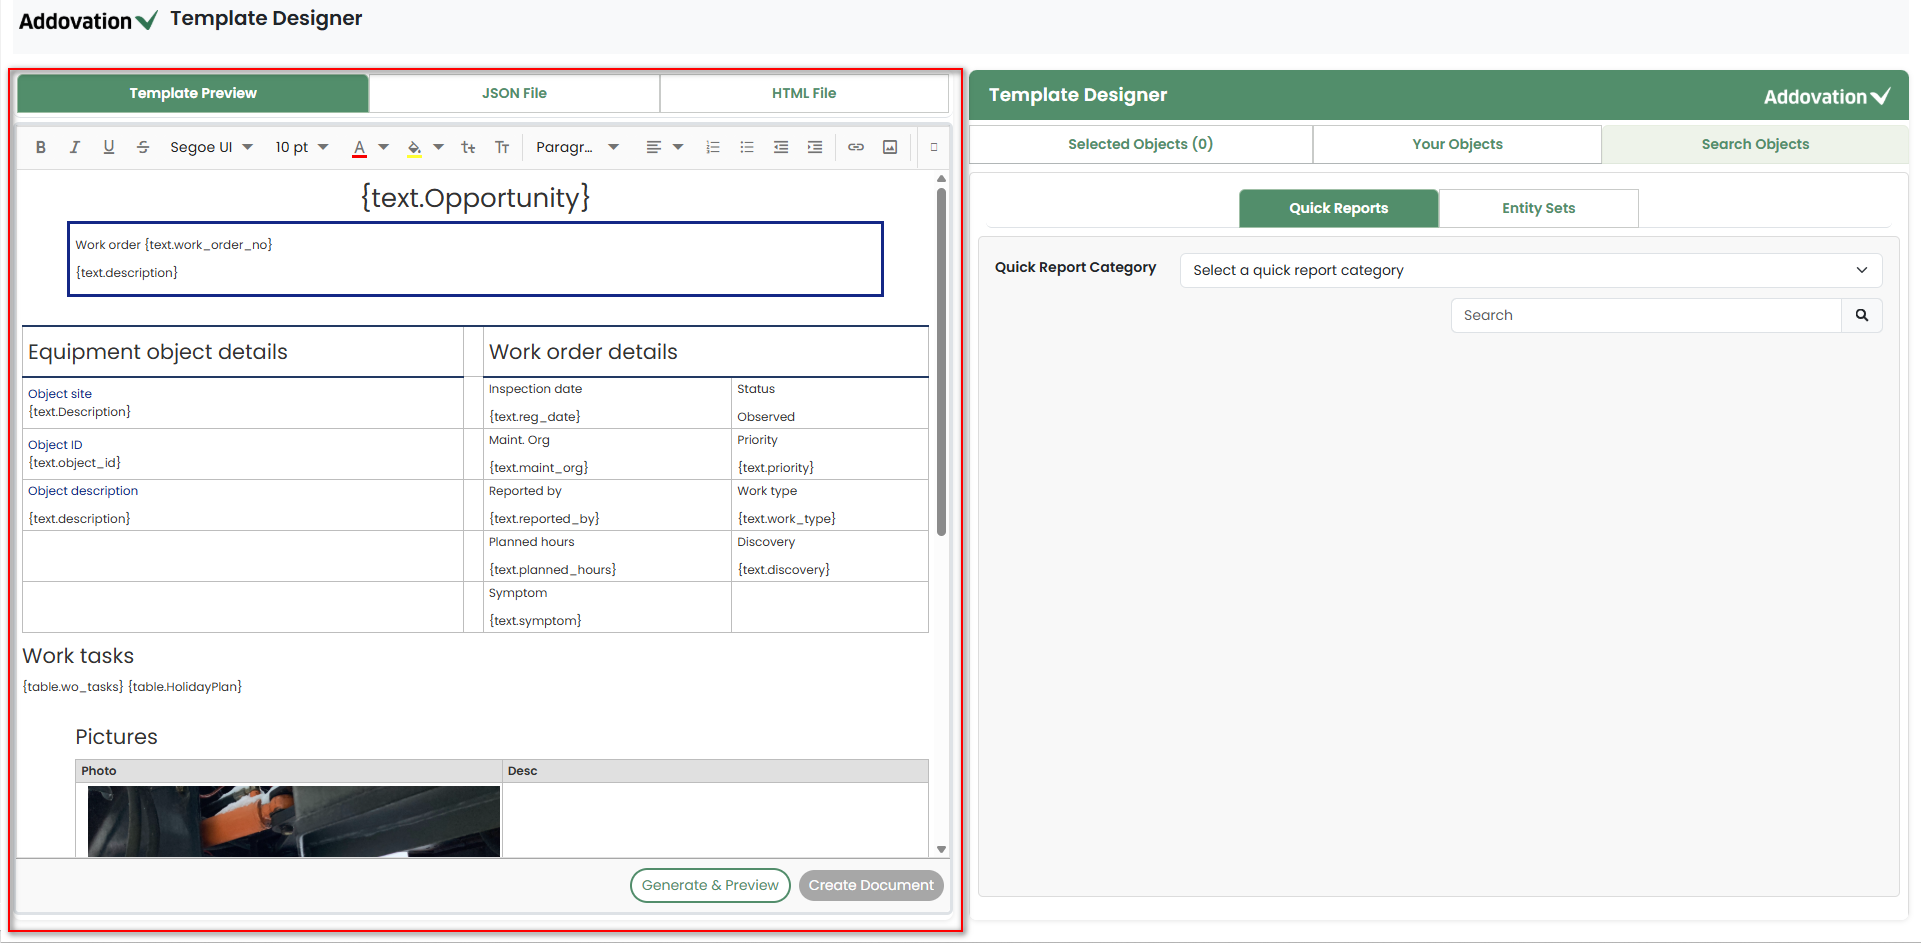
Template Preview, JSON File, and HTML File Tabs
The Template Preview, JSON File, and HTML File tabs are located on the left side of the screen.
Template Previewis the default active tab. Its toolbar remains visible within the tab.
To begin working with the Template Designer, the user may upload an
HTML fileand aJSON file. Uploading these files will replace the default template preview currently displayed.An Upload button is available in both the HTML tab and the JSON tab allowing users to upload new files.
After uploading the files, the Template Preview tab will display the preview based on the uploaded HTML and JSON files.
Placeholders defined in the template will be visible, allowing the user to populate them with the required objects or tables.
Success and error notifications that occur while the user is working will appear in the lower-right corner of the window.
Error notifications will not close automatically; the user must dismiss them manually.
Template Designer Home Page
Template designer has three tabs:
- Selected Objects
- Your Objects
- Search Objects
Search Objects
This tab is kept as the default tab.
Within the Search Objects tab, the user may find two sub-tabs:
Quick ReportsandEntity Sets.Quick Reports is set as the default active sub-tab for the user.
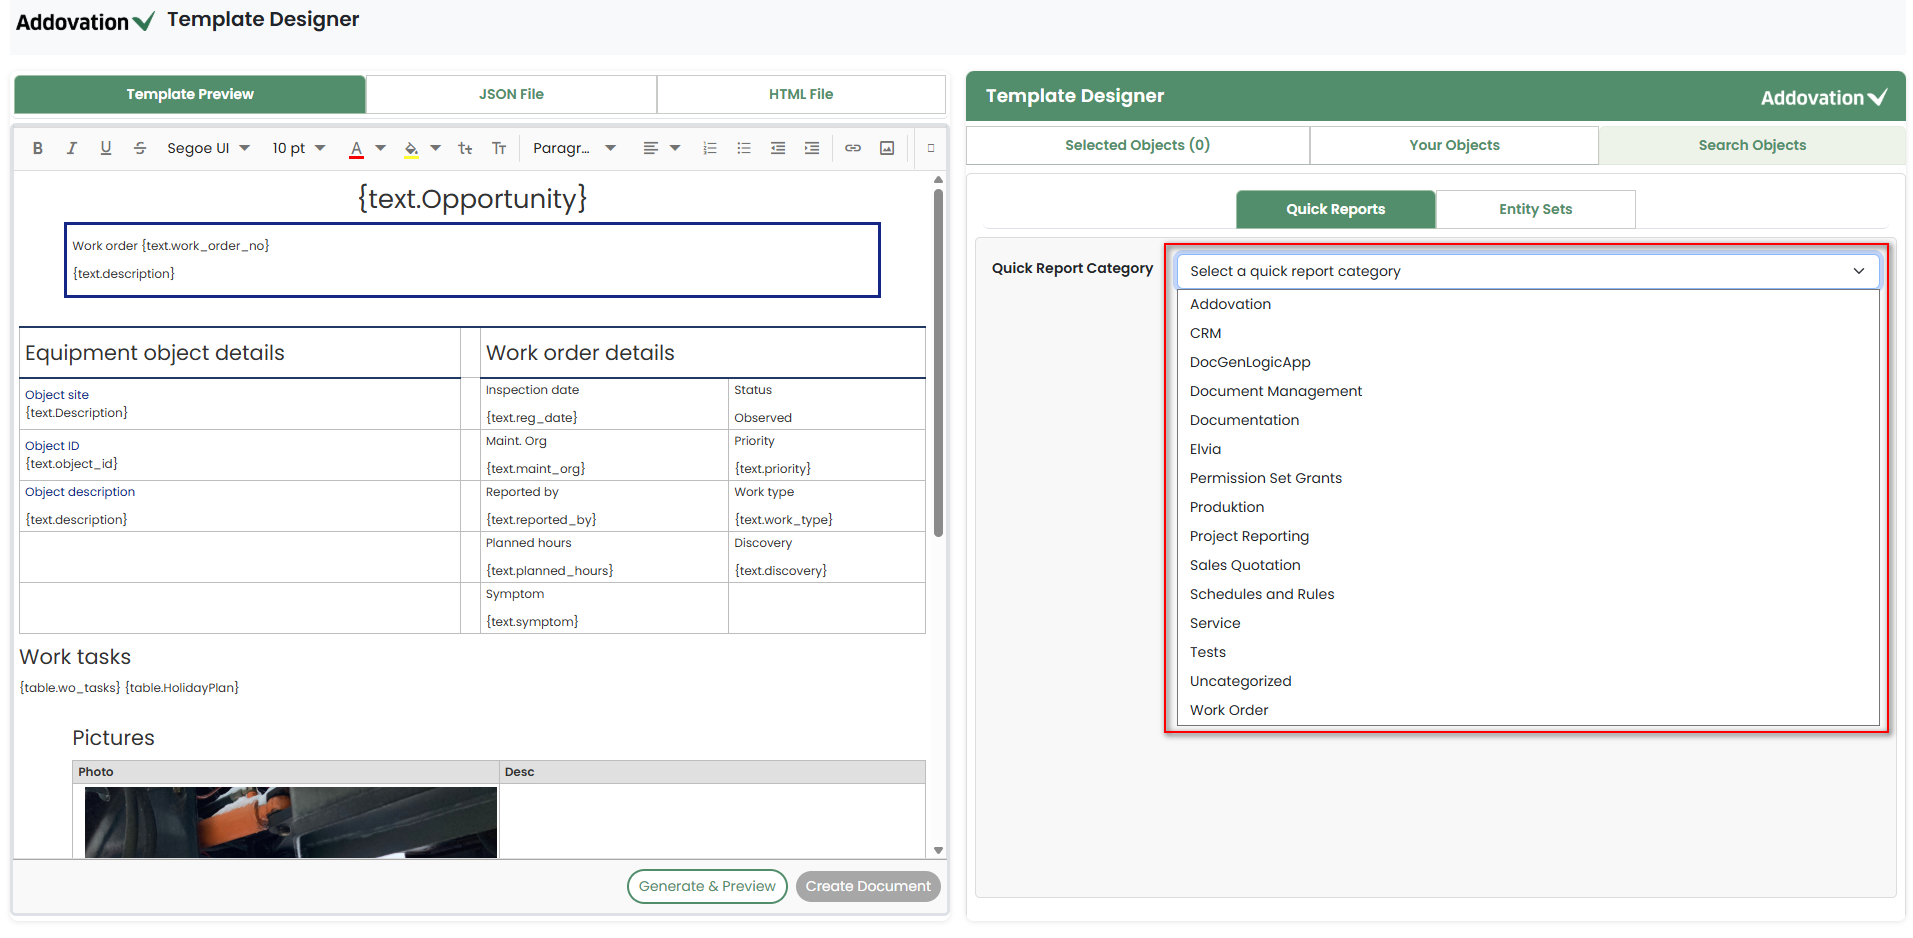
Search for Quick Reports
To initiate the Quick Reports search, user may select a Quick Report Category first. Selecting a category will narrow the search results accordingly.
When the user clicks the Quick Report Category drop-down, a list of available categories will appear.
The user may then select a category from the list.
After selecting a category, the list of quick reports under that category will appear on the screen.
The user may add the required report to the Selected tab by clicking the plus
+icon next to the report name.
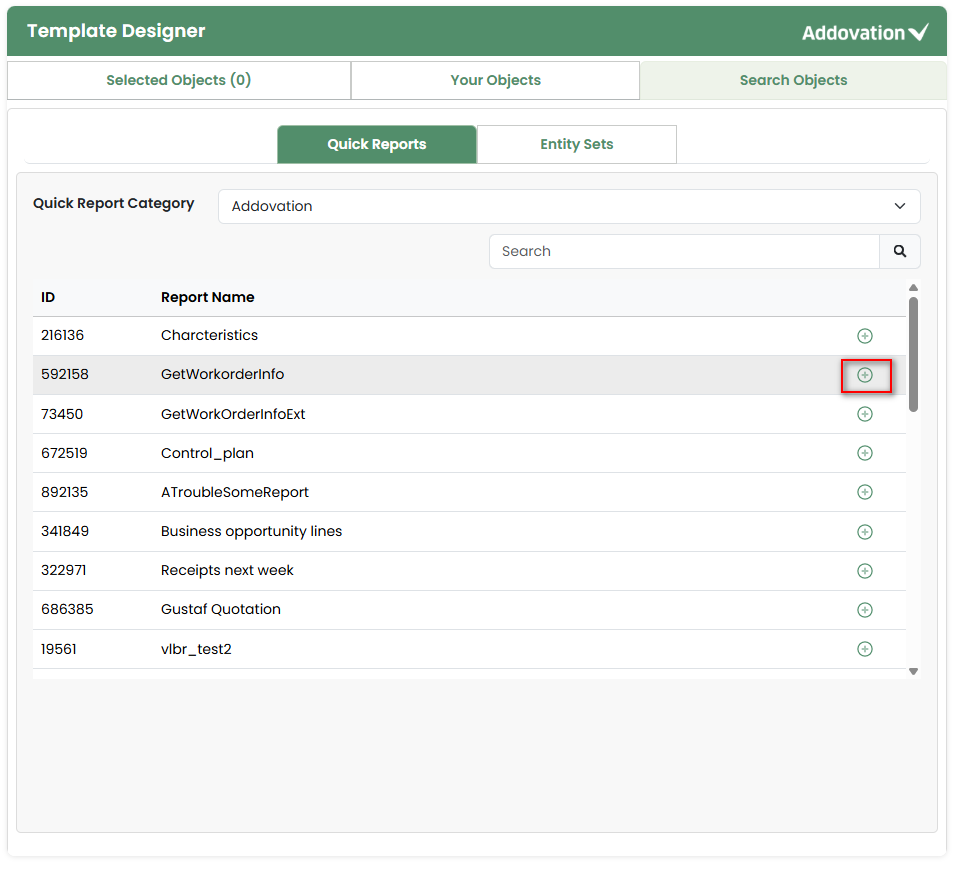
If required, the user may further filter the list of quick reports by entering the report name in the Search field.
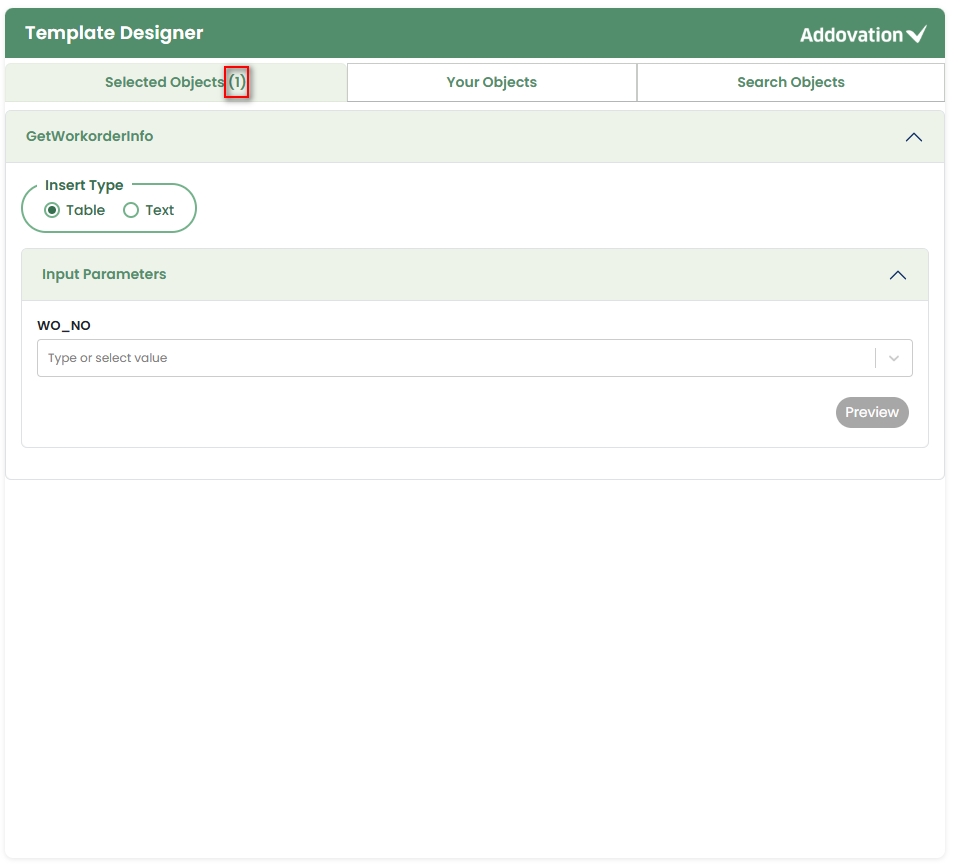
Once the user clicks the plus icon, they are automatically directed to the Selected tab, and the count indicator next to the Selected Objects tab will update accordingly.
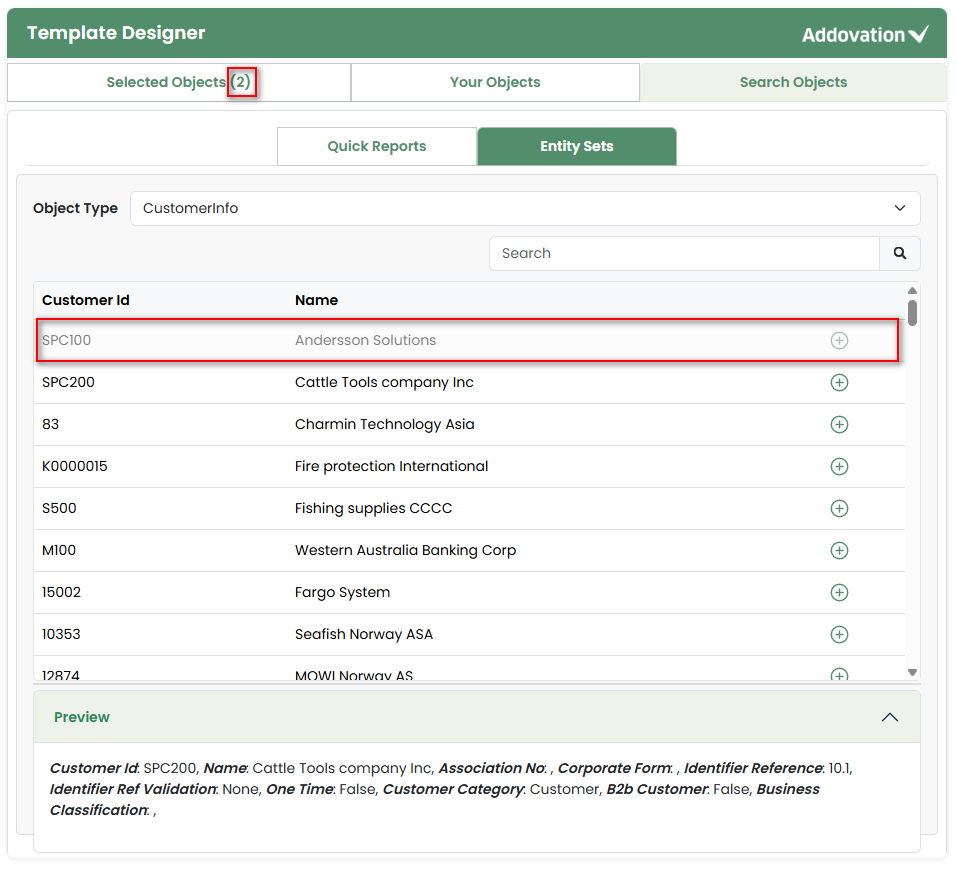
Search for Entity Sets
- In the Entity Sets search, the user may either search for an
object typeusing the searchable drop-down or view the list of available object types by clicking the drop-down first.
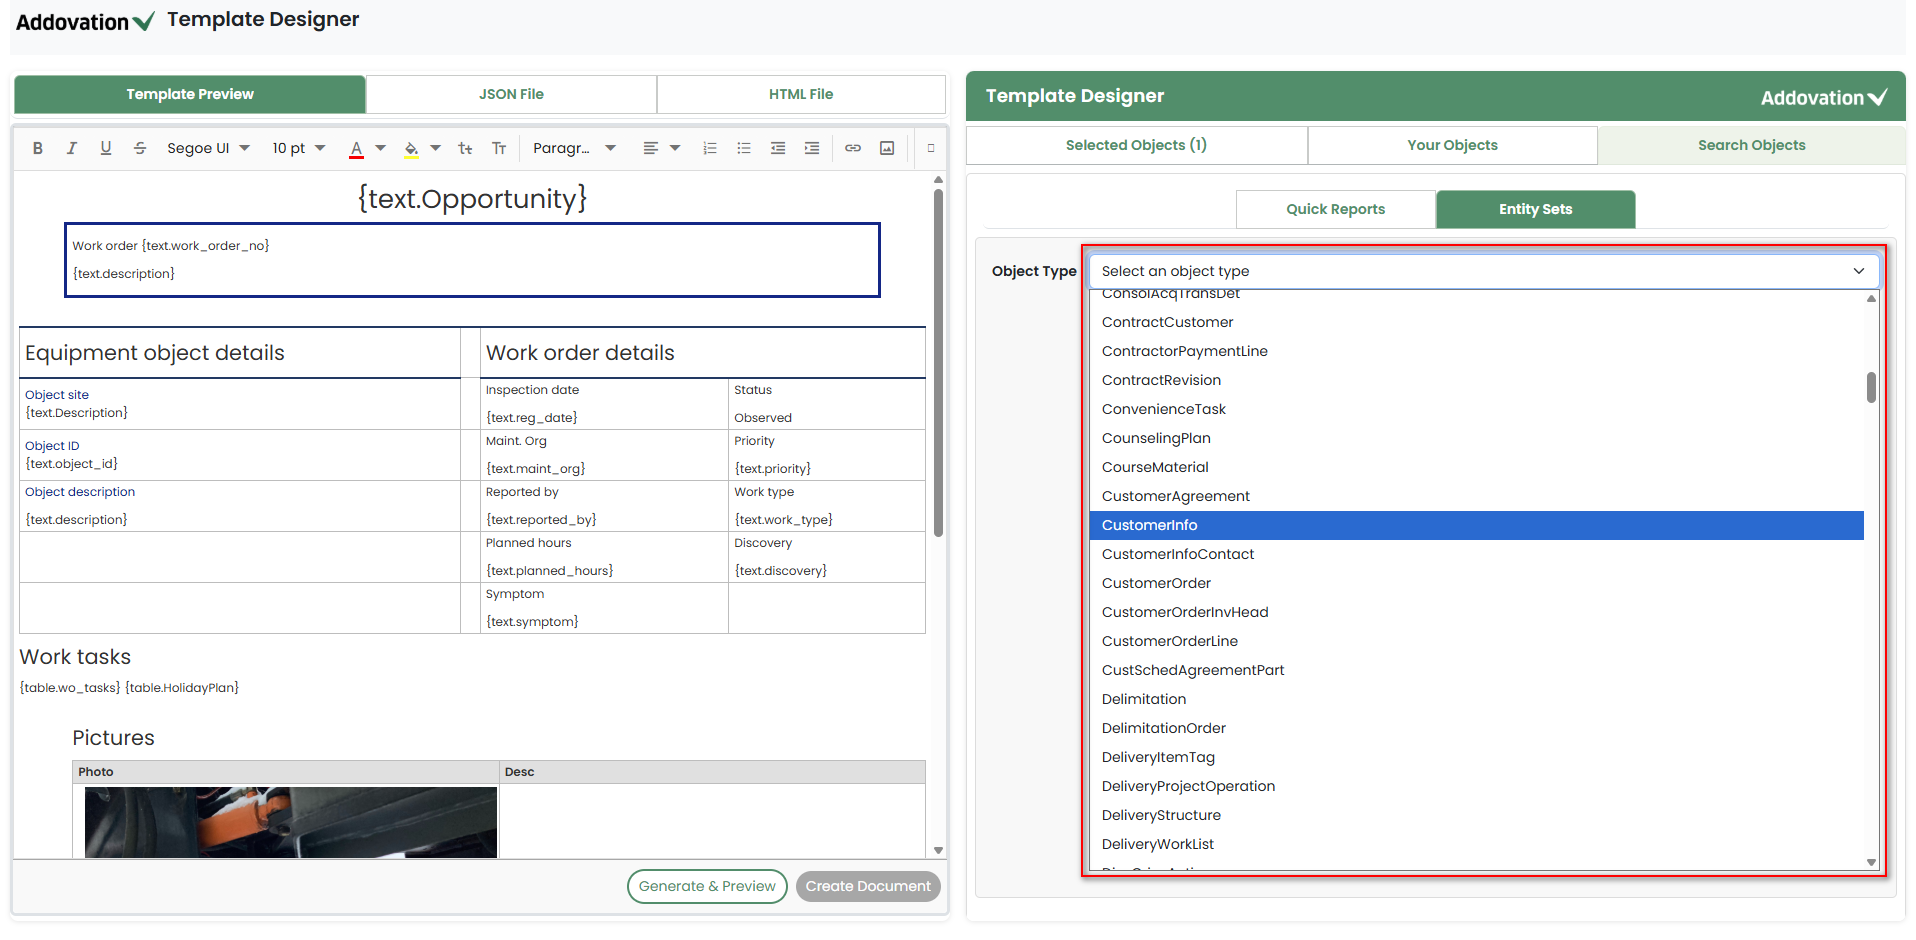
Once the user selects an object type, all connected objects under that type will be displayed in a results grid.
The user may use the Search field to filter the results. The search supports queries across the first two fields for each object type in the results grid.
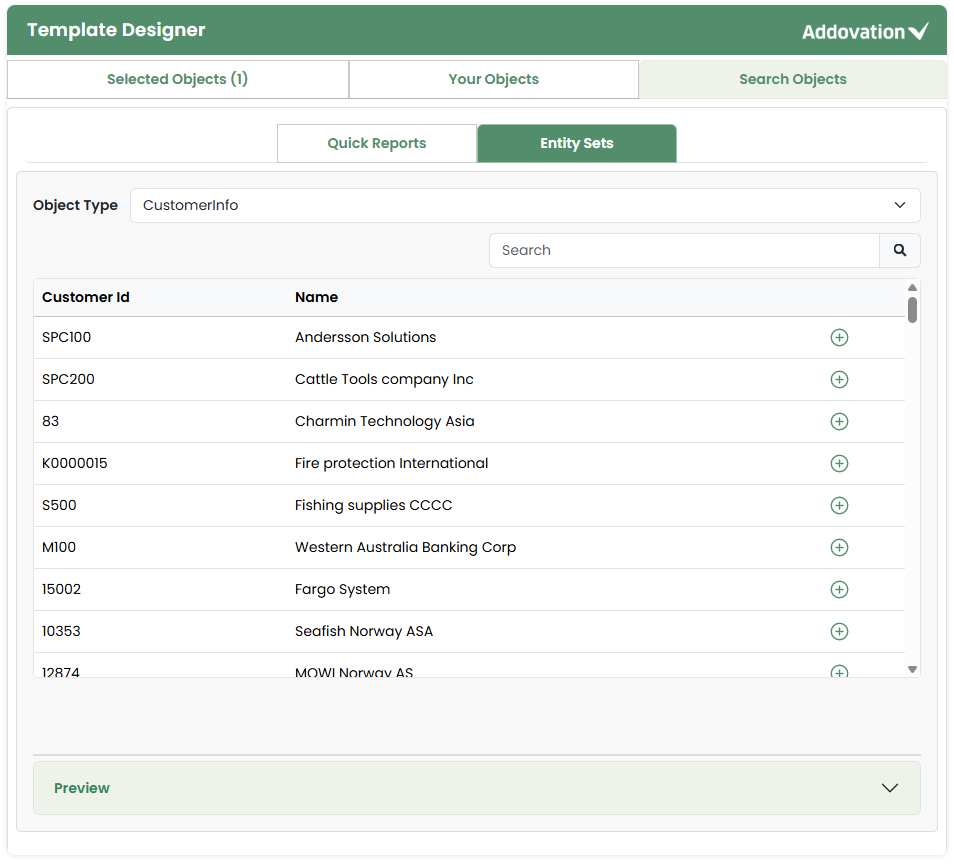
- A Preview section is available at the bottom of the screen. It will remain empty until the user selects a record from the results grid.
![]()
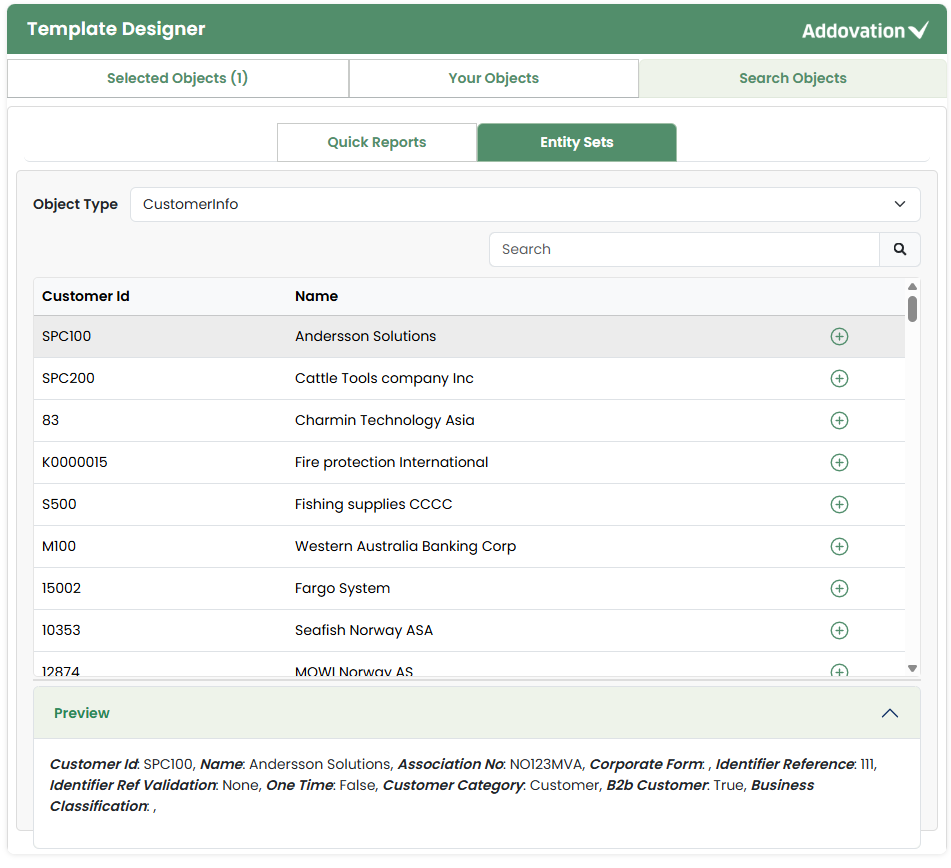
- When the user selects an object, a preview will appear, showing the details of the selected object.
- The user may click the plus
+icon next to the object name to add it to the Selected tab.
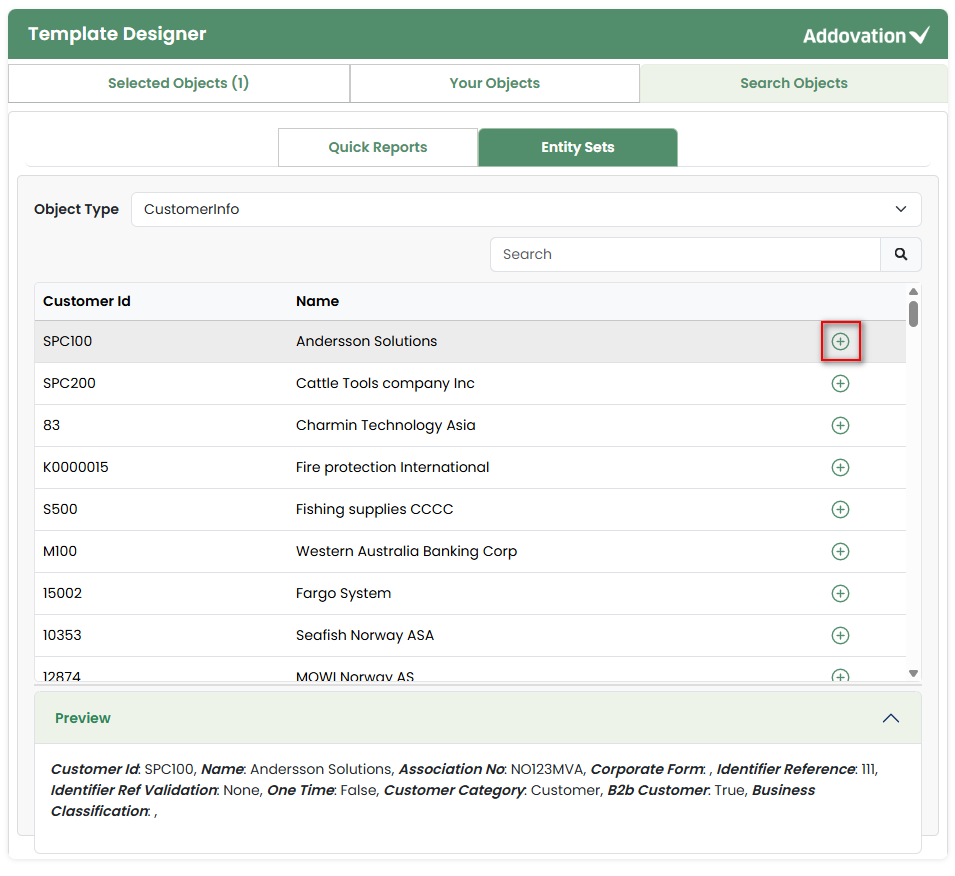
- Once the user adds the object, the count indicator next to the Selected Objects tab will update accordingly, and the added records will be disabled to prevent selecting them again.
Selected Objects
Inserting Quick Reports
In the Selected tab, each quick report or object added appears in an
expandable section.When the user is automatically directed to the Selected Objects tab after adding a quick report, the section for the newly added quick report will be automatically expanded
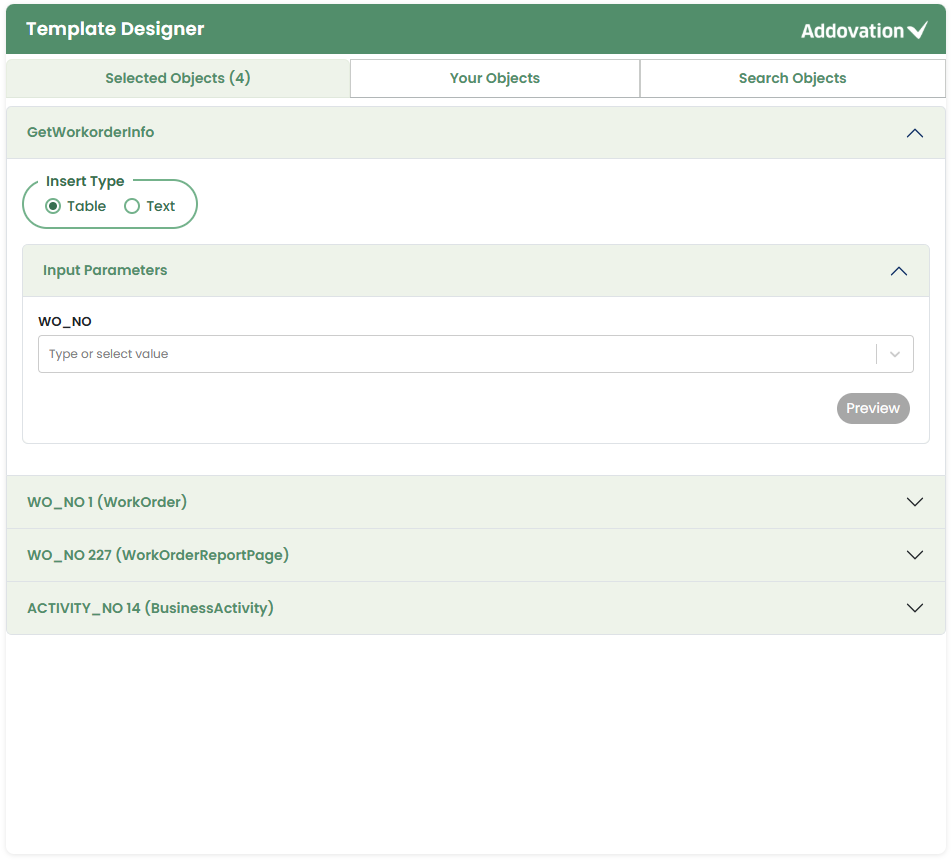
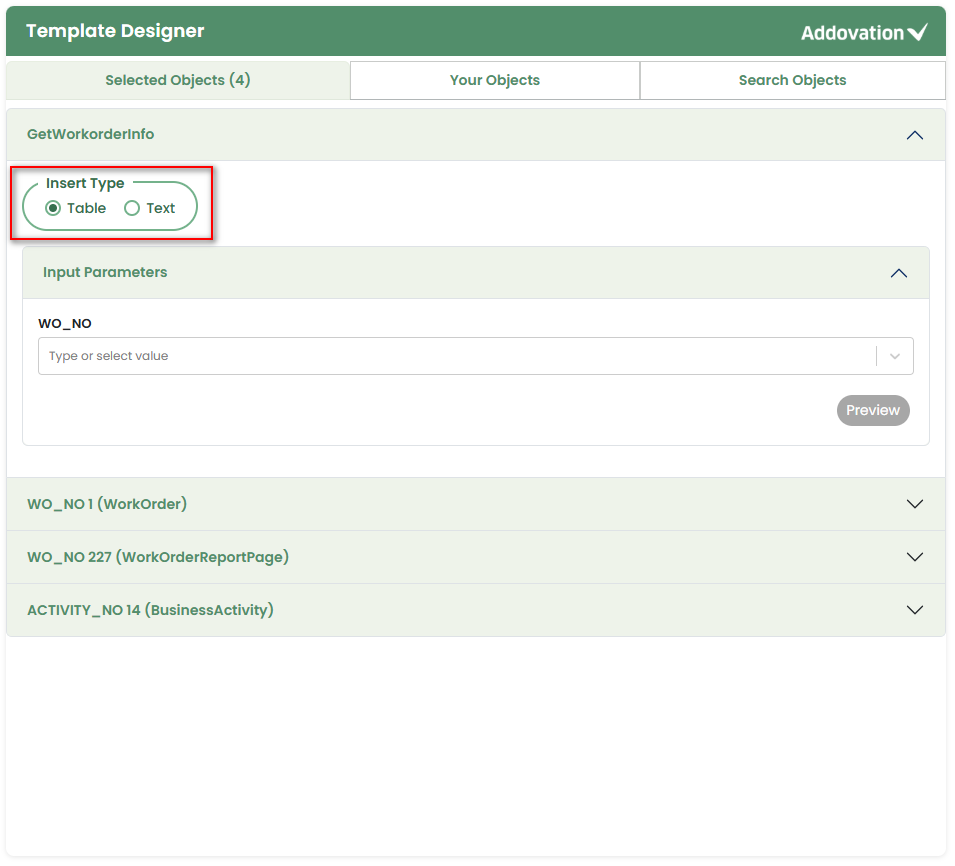
The user may insert quick reports into the Template Preview either as a
tableor astext.To support this, the first option under the Quick Reports section is a
radio buttonthat allows the user to choose between Table and Text, with Table selected by default.
If the user selects Table, the entire table will be inserted into the template.
If the user selects Text, only the selected field value will be inserted into the template.
This behavior will be explained in more detail in the following sections.
Insert as Table
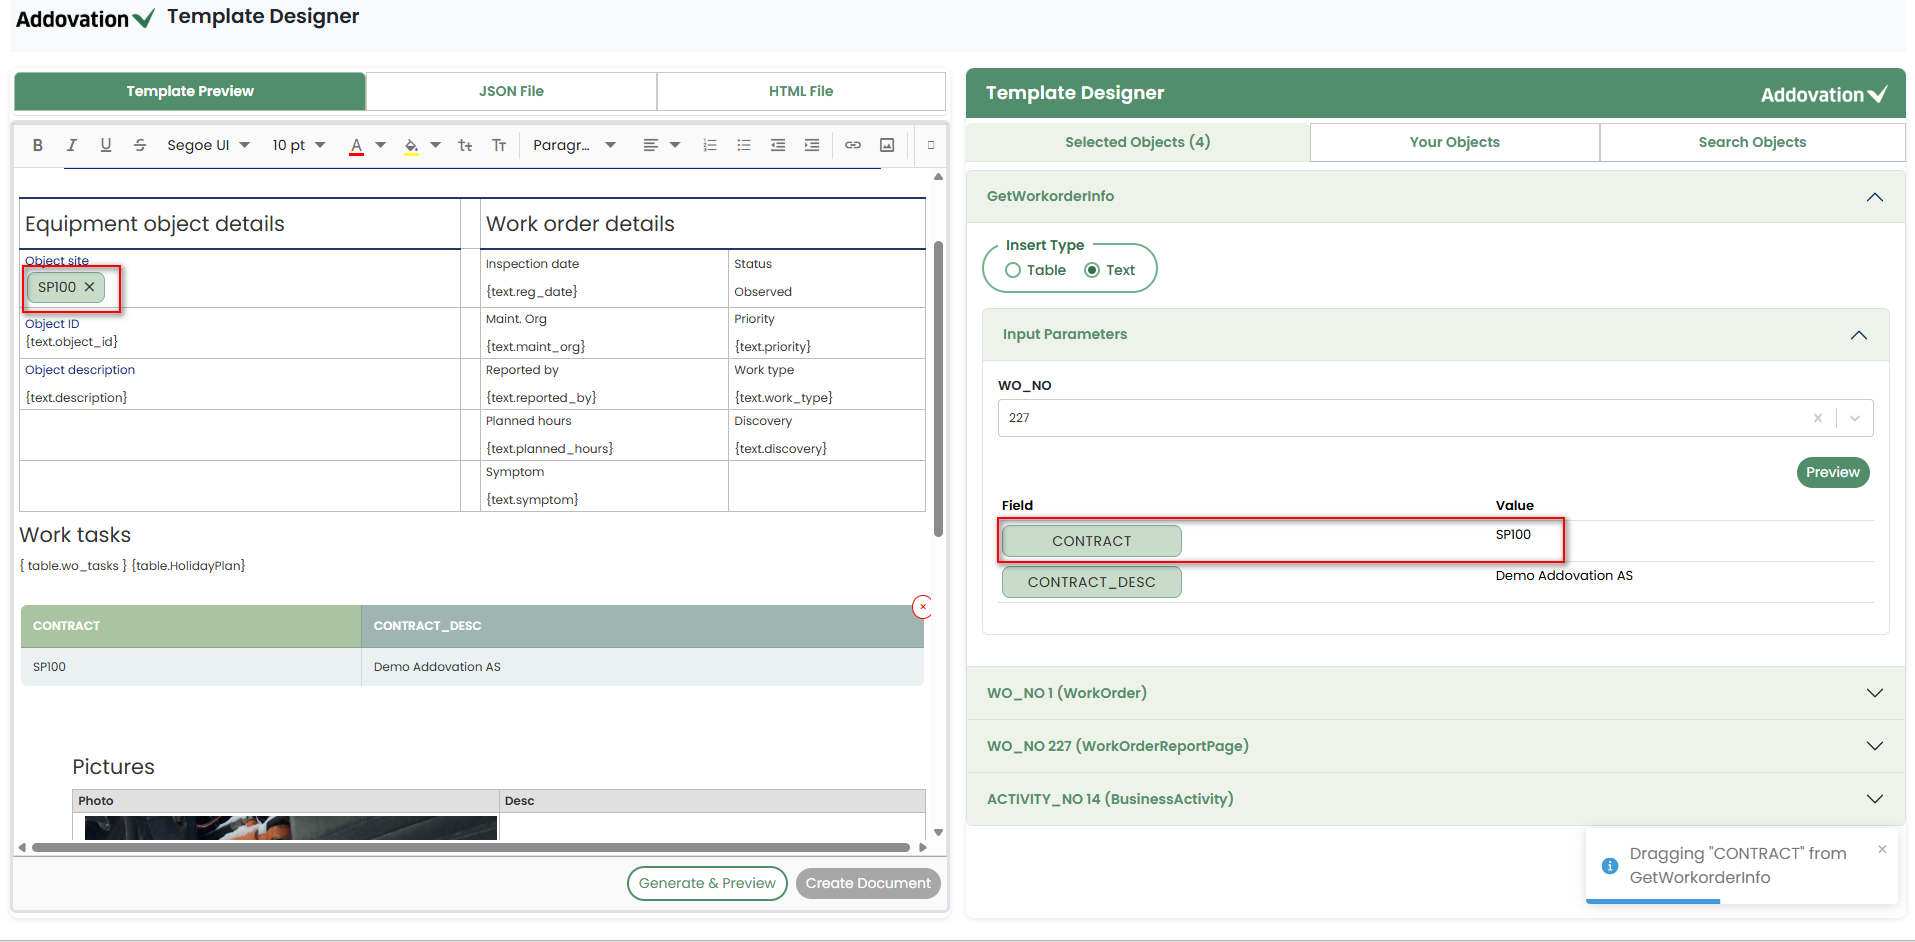
Input Parameters
To insert a table, the user must first provide the
input parametersrequired to load data from the selected quick report.This section is collapsible but is expanded by default.
For each input parameter, if any objects exist in the Selected tab from previous selections, they are displayed as selectable options, allowing the user to choose or type a value.
If no objects are available, the user must manually enter a value.
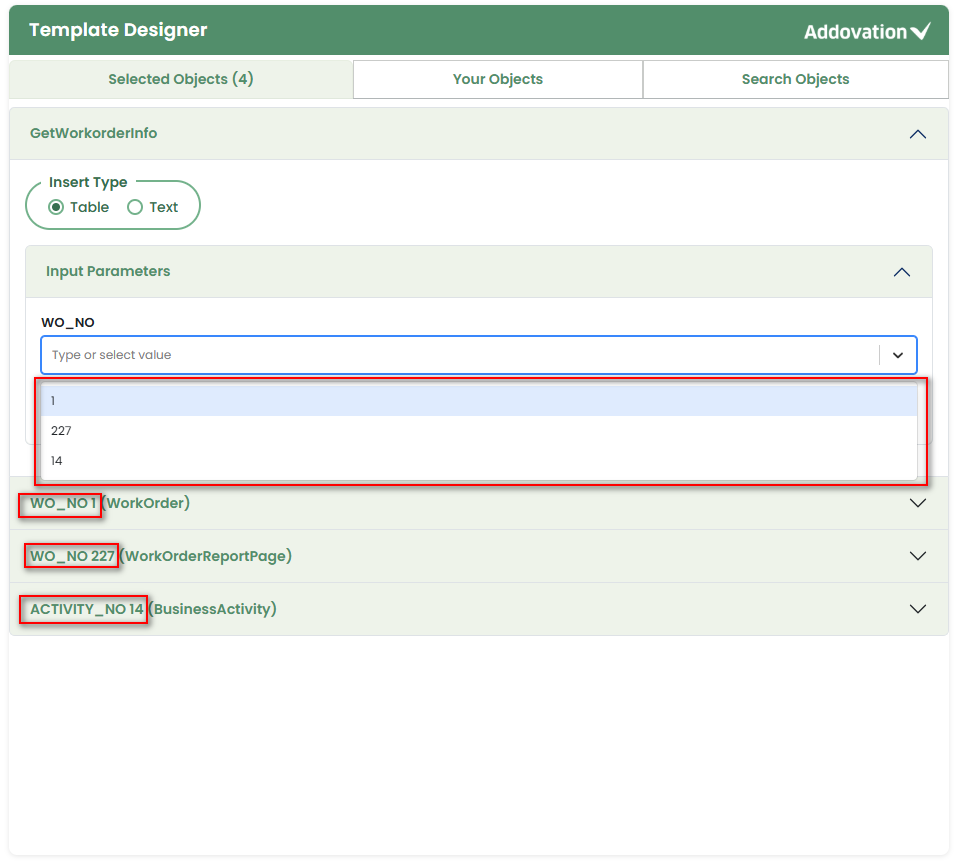
- Some QRs may require more than one input parameter. Once the input parameters are selected/entered, user may click the
Previewbutton.
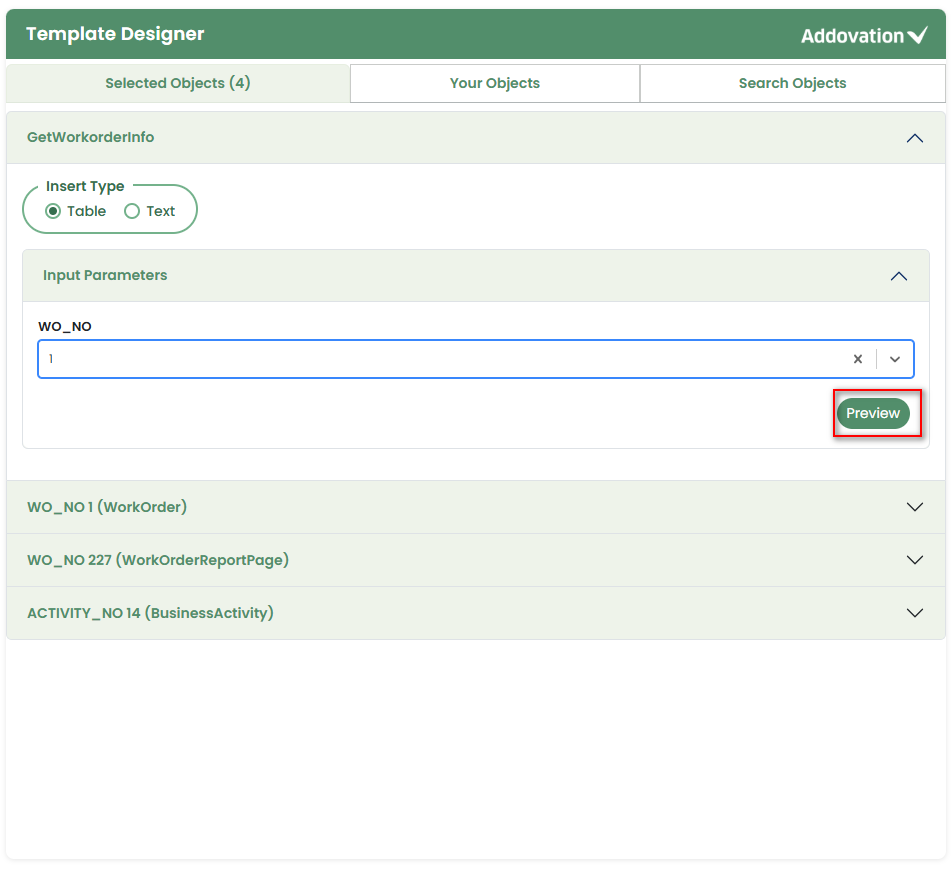
Clicking the Preview button will display a preview of the Quick Report, showing only the first five records for each Quick Report.
The Preview button is enabled only after one or more input parameters have been entered.
The user can remove any added QR or object by clicking the Remove button, which deletes it from the Selected tab.
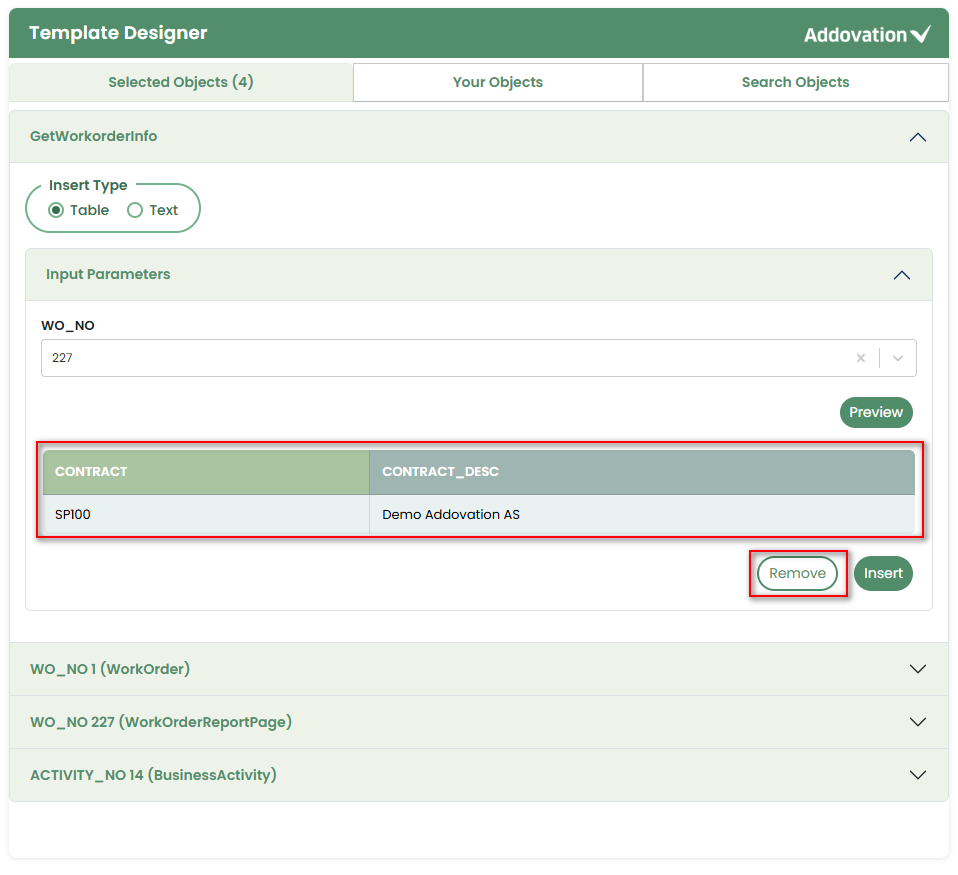
- When the user clicks the Insert button, the quick report (table) will be inserted at the location where the user has placed the cursor.
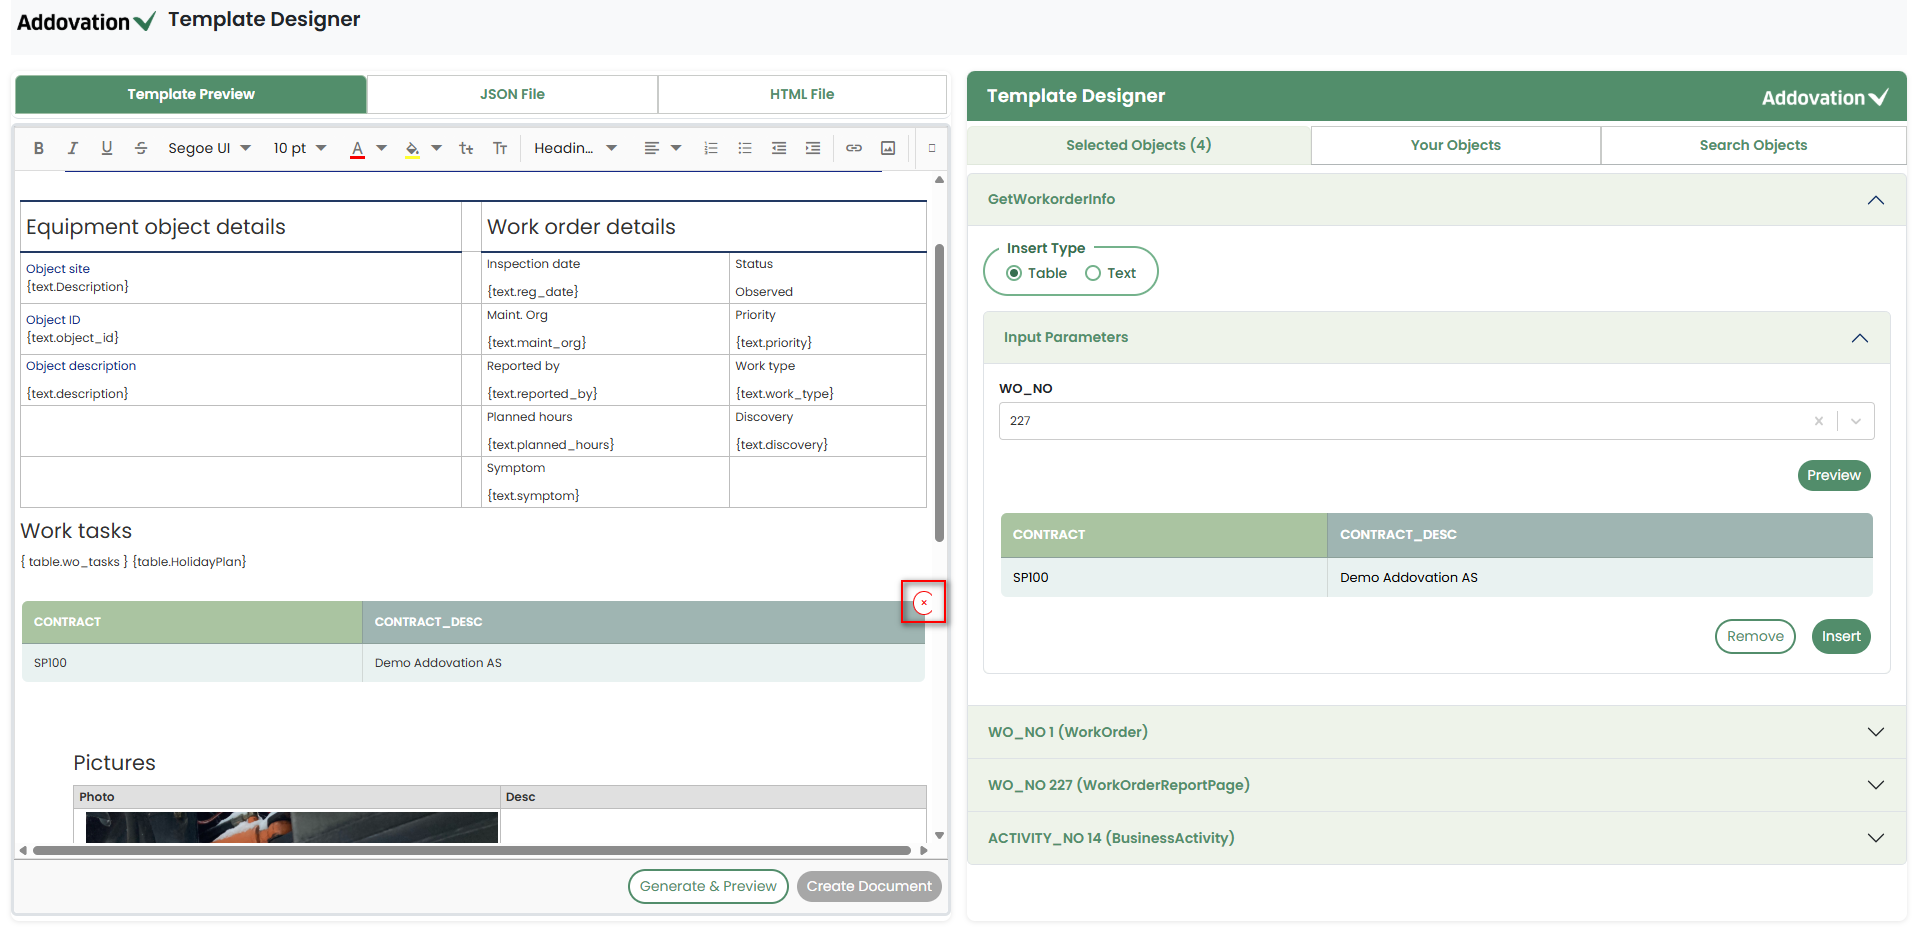
- When the user clicks the Remove option
red crossin preview, the table will be removed from the template.
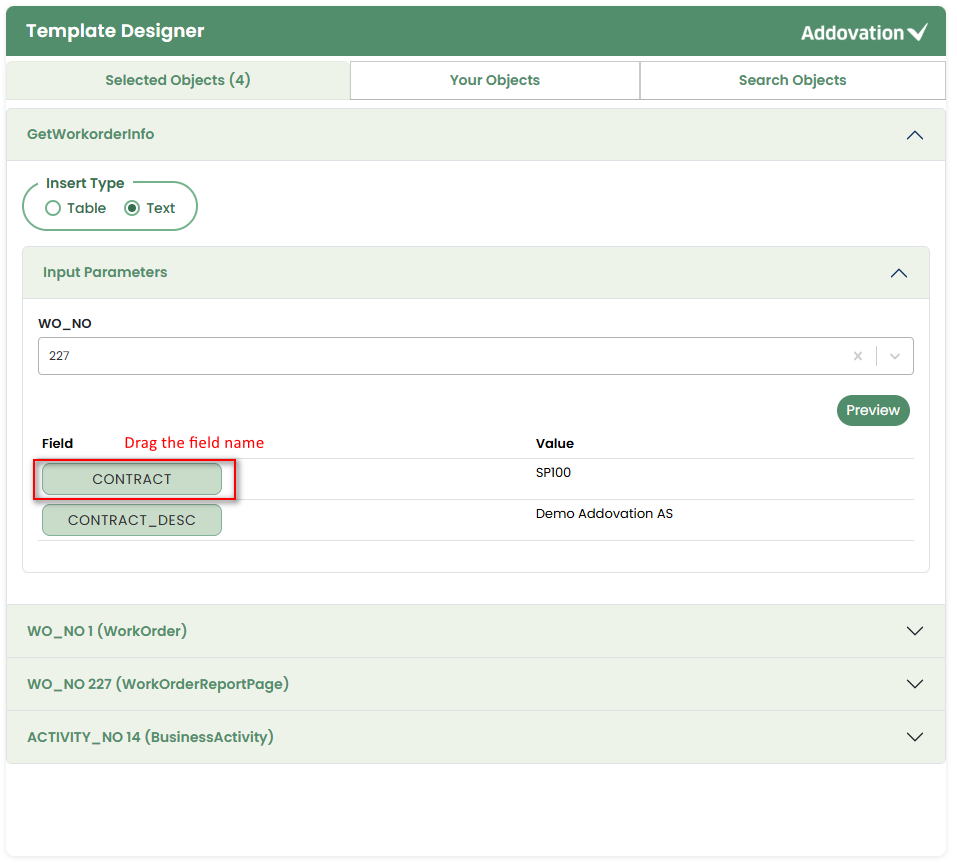
Insert as Text (Merge Fields)
If the user selects
Textinstead of Table, the Input Parameters section will remain available, similar to the table selection, as described previously.The fields and their corresponding values from the quick report will be listed. If multiple records exist in the quick report, the fields and values from the first record will be displayed.
The user may
dragthe required field name anddropit into the placeholder at the desired location in the Template Preview.
The user may drag and drop the same field into multiple locations within the template.
The inserted text will appear as a
tag. The user may remove it from the Template Preview by clicking the removexicon within the tag.
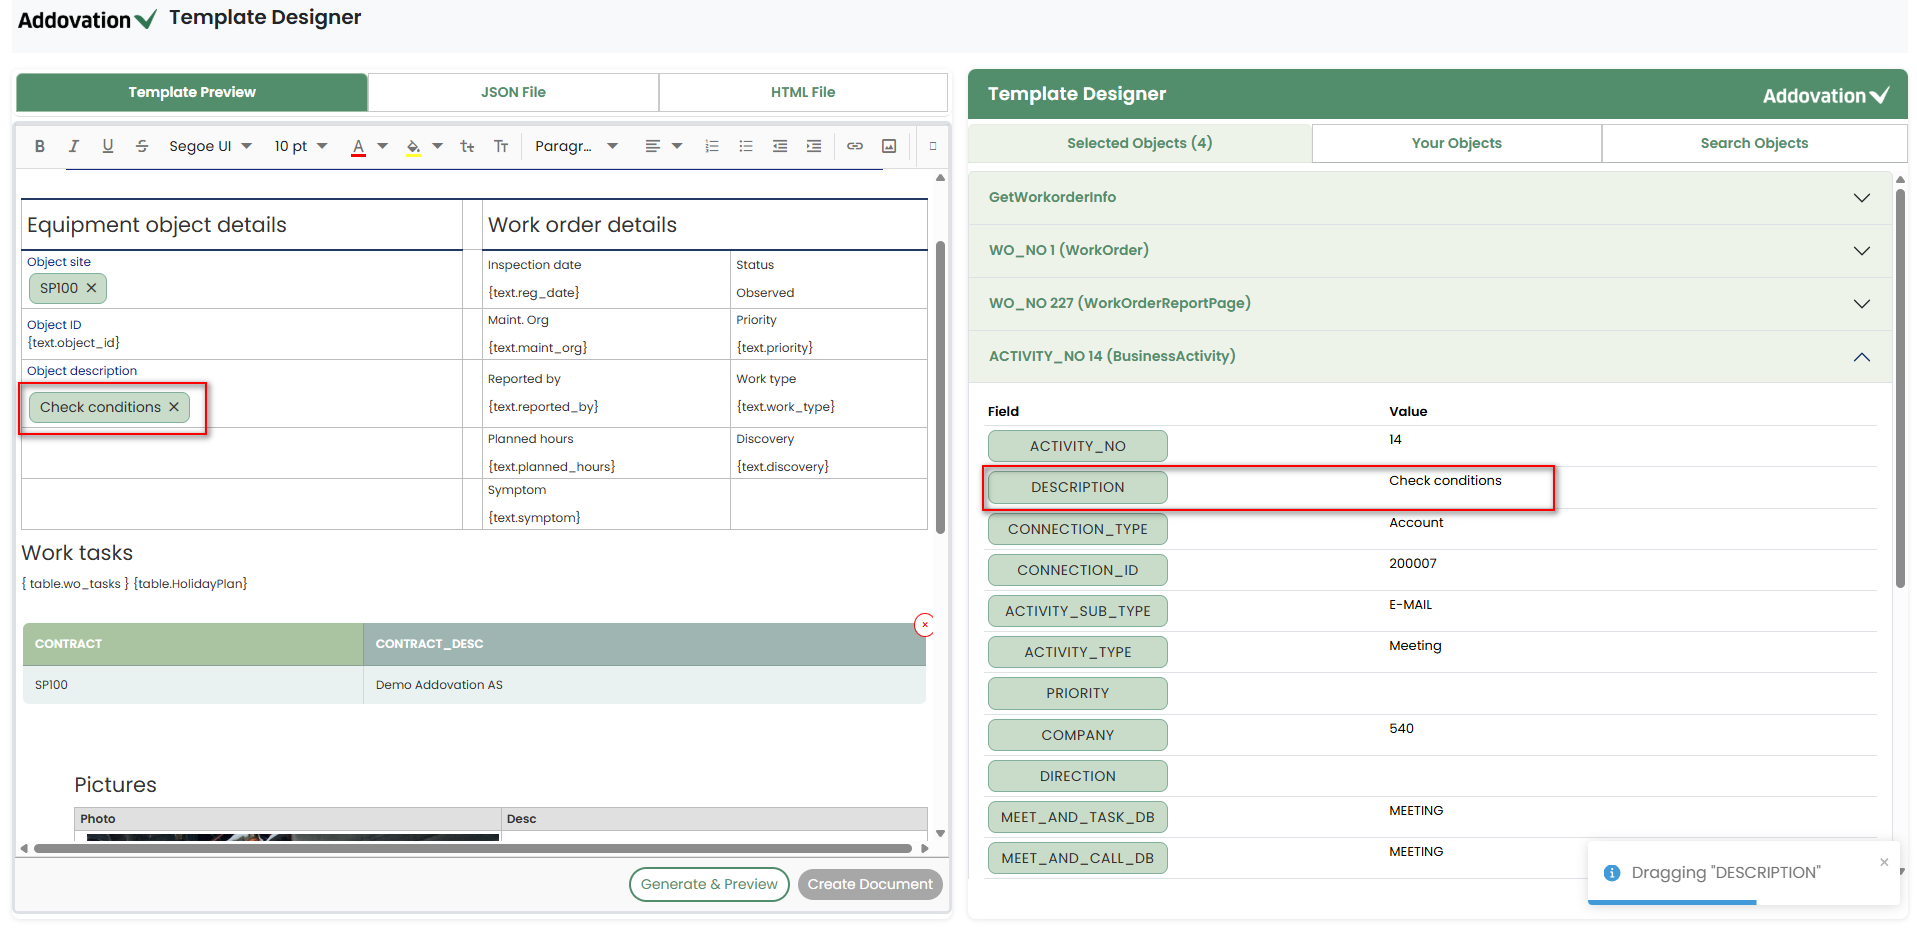
Inserting Entities
When the user is automatically directed to the Selected Objects tab after adding an object, the section for the newly selected object will be automatically expanded similar to quick reports.
Within this section, the user will see a list of fields from the object along with their corresponding values.
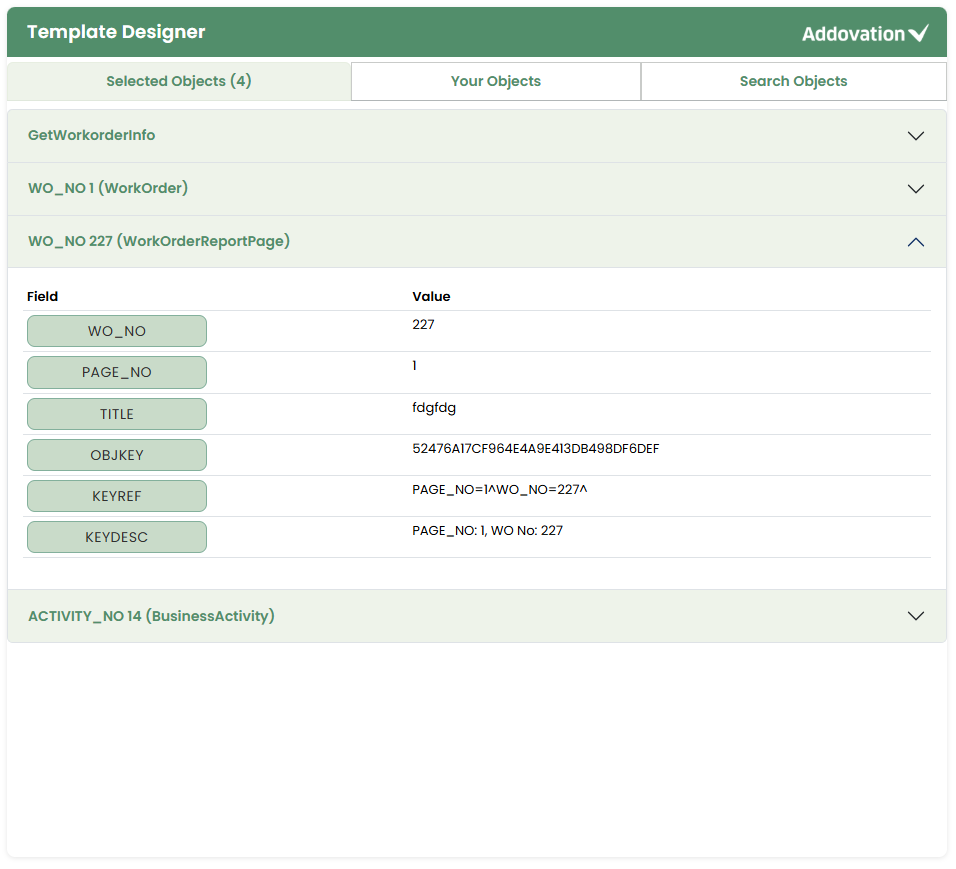
The user may drag the required field name and drop it into the placeholder at the desired location in the Template Preview.
The corresponding
valueof the dragged field will then be automatically inserted into the selected placeholder.The inserted text will appear as a
tag. The user may remove it from the Template Preview by clicking the removexicon within the tag.
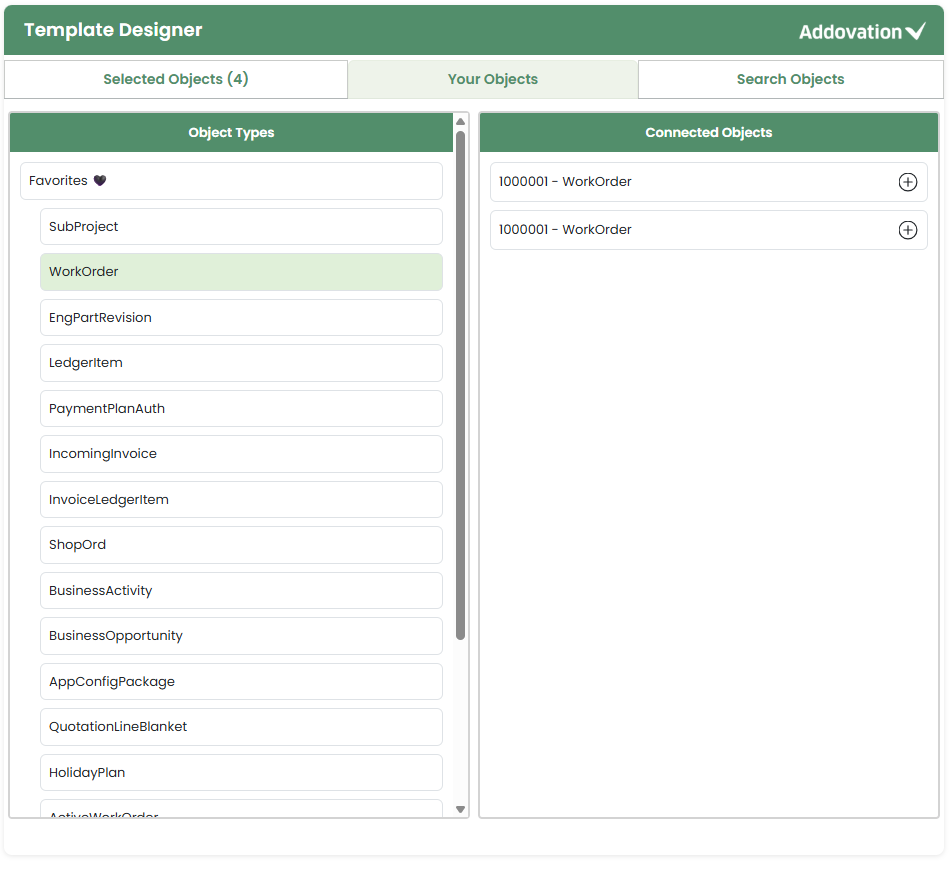
Your Objects
This tab combines
FavoritesandRecently Used ObjectTypes.On the left side, two sections are available: Favorites and Recently Used Object Types.
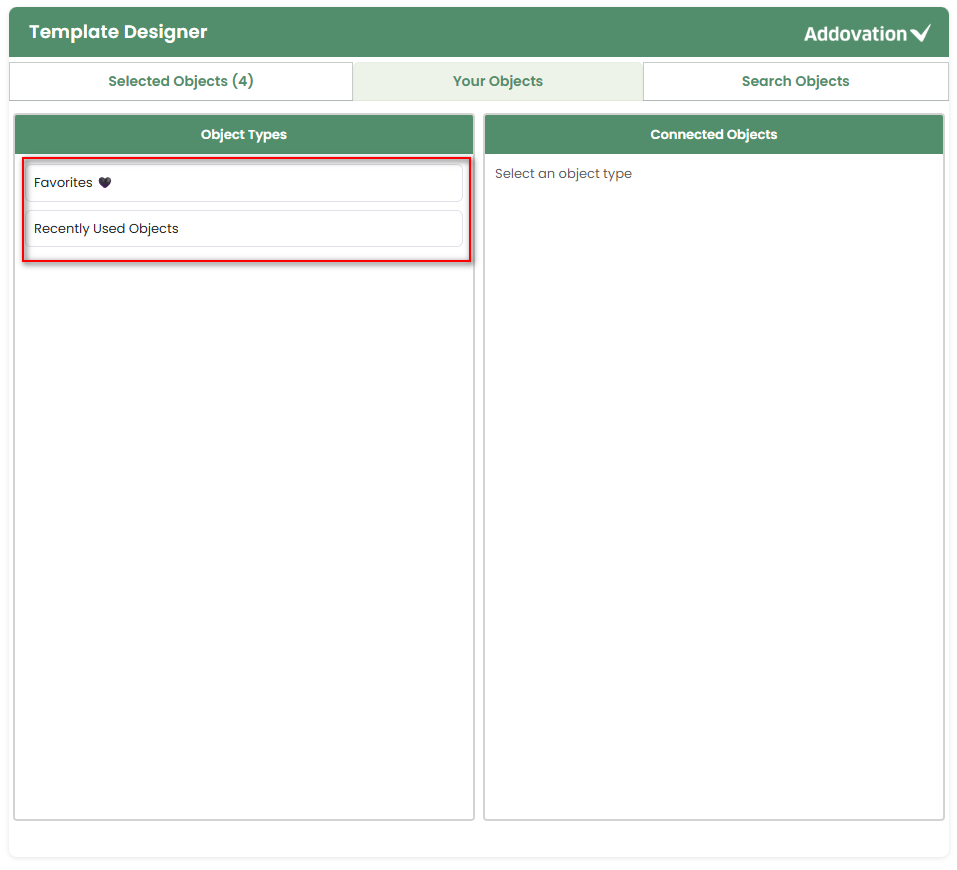
Clicking the Favorites section expands it to show the object types the user has marked as favorites.
Selecting an object type displays its connected objects in the right panel.
Similarly, clicking the Recently Used Object Types section expands a list of recently accessed object types.
Selecting a recently used object type shows its connected objects in the right panel.

The user may collapse the Favorites or Recently Used Object Types list by clicking the section again.
From the right panel, the user may select any object to move it to the Selected Objects tab.
Functionality of Buttons in Template Preview, JSON and HTML Tabs
Template Preview Tab
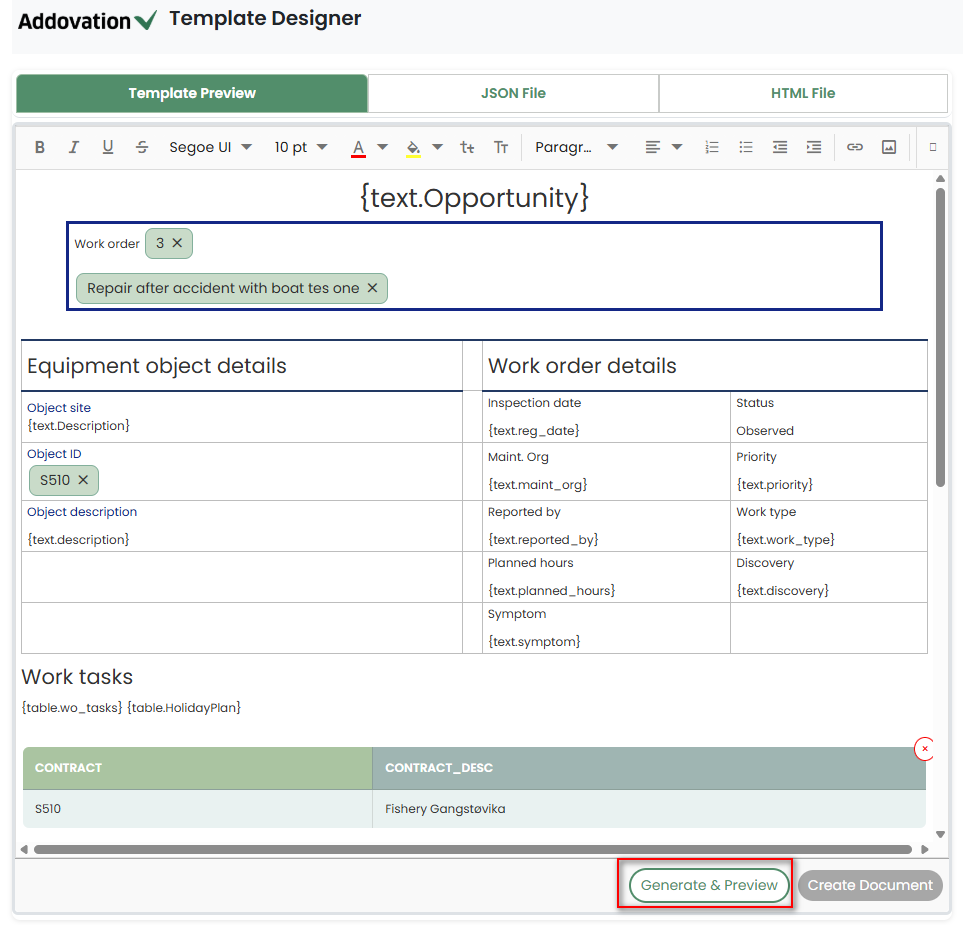
Generate and Preview:
When the user clicks this button, the JSON will be updated with the newly added values, and a preview will be generated.
Placeholders without values (either from the designer or from JSON) will be removed from the preview.
If the JSON already contains values for those placeholders, they will be replaced with newly added values from the Template Designer.
Before Selecting Generate & Preview
After Selecting Generate & Preview
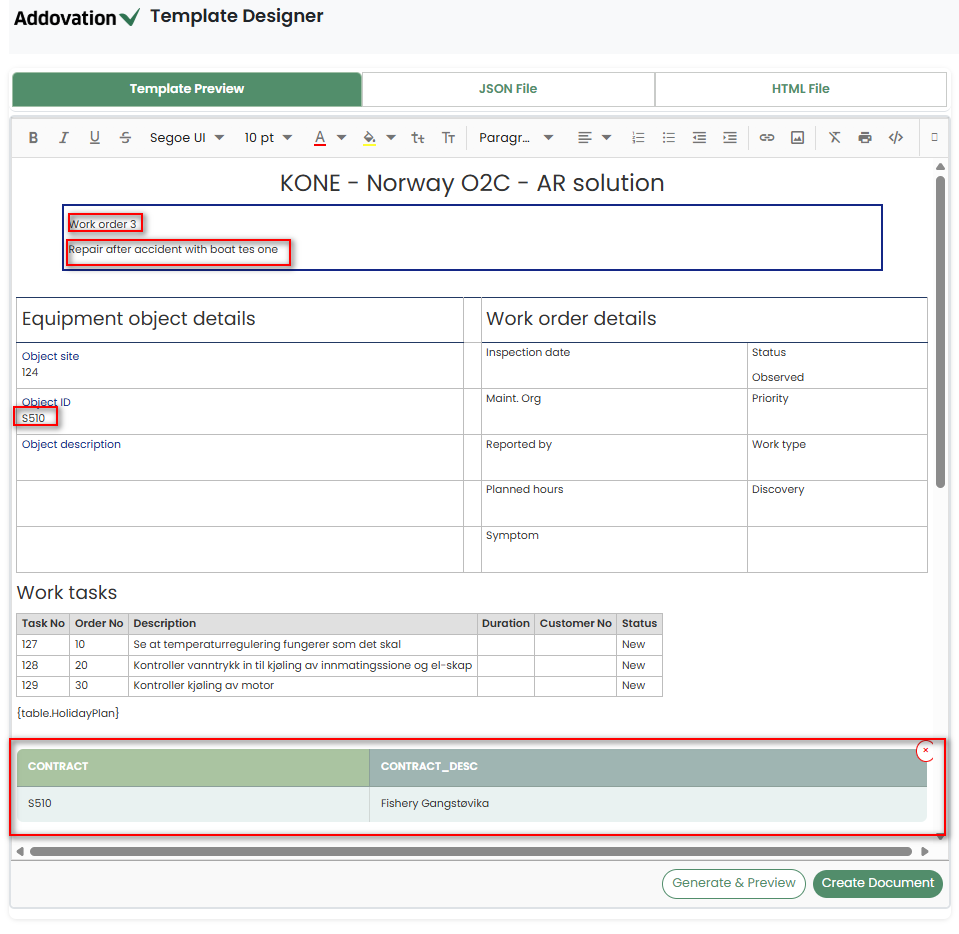
Create Document: Clicking this button will generate a PDF document, download it, and display the preview in the Template Preview tab.
JSON File Tab
Upload: Upload a new JSON file.
Save: The user will be prompted to provide a file name. The created HTML template will then be saved to the database.
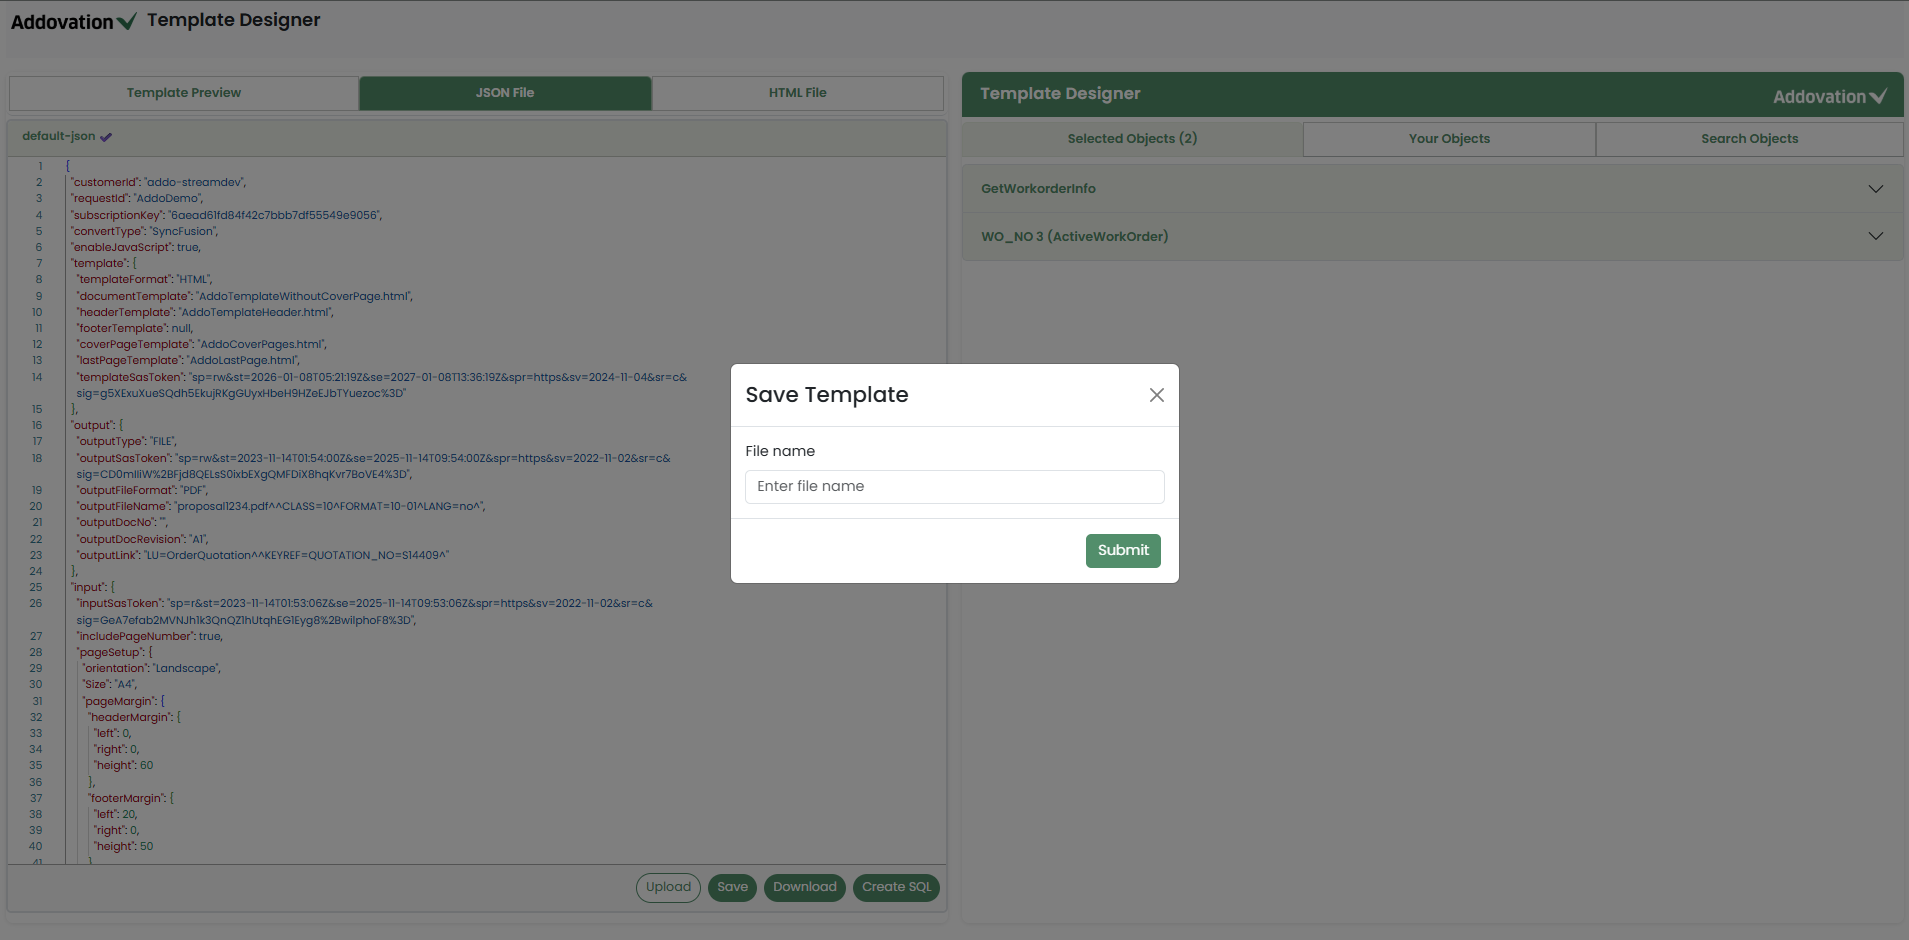
Download: Clicking this button downloads the JSON file to user’s local computer.
Create SQL:
Applicable only for Entity Sets.
This button generates a SQL query based on the dragged values and the user can copy the query by clicking on the copy icon.

HTML File Tab
Upload: Upload a new HTML file.
Download: Clicking this button downloads the HTML file to user’s local computer.