Addovation Sync - CRM - Setup Guide for Add-In (Customer)
Last Updated: 2024-11-15
Outlook add-in requirements
For Outlook add-ins to load and function properly, there are a number of requirements for both the servers and the clients.
Client requirements
The client must be one of the supported applications for Outlook add-ins. The following clients support add-ins.
- Outlook 2013 or later on Windows
- Outlook 2016 or later on Mac
- Outlook on iOS
- Outlook on Android
- Outlook on the web for Exchange 2016 or later
- Outlook on the web for Exchange 2013
- Outlook.com
The client must be connected to an Exchange server or Microsoft 365 using a direct connection. When configuring the client, the user must choose an Exchange, Office, or Outlook.com account type. If the client is configured to connect with POP3 or IMAP, add-ins will not load.
Mail server requirements
If the user is connected to Microsoft 365 or Outlook.com, mail server requirements are all taken care of already. However, for users connected to on-premises installations of Exchange Server, the following requirements apply.
- The server must be Exchange 2013 or later.
- Exchange Web Services (EWS) must be enabled and must be exposed to the Internet. Many add-ins require EWS to function properly.
- The server must have a valid authentication certificate in order for the server to issue valid identity tokens. New installations of Exchange Server include a default authentication certificate. For more information, see Digital certificates and encryption in Exchange 2016 and Set-AuthConfig.
- To access add-ins from AppSource, the client access servers must be able to communicate with AppSource.
Deploy add-ins in the admin center
As an admin, you can deploy Office add-ins for the users in your organization by using the Centralized Deployment feature in the Microsoft 365 admin center. Centralized Deployment is the recommended and most feature-rich way for most admins to deploy add-ins to users and groups within an organization.
- In the admin center, go to the Settings > Add-ins page. If you don't see the Add-in Page, go to the Settings > Integrated apps > Add-ins page.

- Select Deploy Add-in at the top of the page, and then select Next.

- Select Upload custom apps option.

- Select Choose File option and select the relevant manifest file
manifest.xmlfor the meeting.

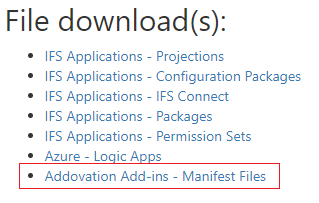
- You can get the manifest.xml files for both meeting and contact Add-ins, clicking on Addovation Add-ins - Manifest Files from the
File download(s).
- Check the customer Id is correct in taskpane url as below.For more information, contact KAM at Addovation.

- On the next page, select Everyone to specify who the add-in is deployed to.
Considerations when assigning an add-in to users and groups
Global admins and Exchange admins can assign an add-in to everyone or to specific users and groups. Each option has implications:
- Everyone This option assigns the add-in to every user in the organization. Use this option sparingly and only for add-ins that are truly universal to your organization.
- Users If you assign an add-in to an individual user, and then deploy the add-in to a new user, you must first add the new user.
- Groups If you assign an add-in to a group, users who are added to the group are automatically assigned the add-in. When a user is removed from a group, the user loses access to the add-in. In either case, no additional action is required from the admin.
- Just me If you assign an add-in to just yourself, the add-in is assigned to only your account, which is ideal for testing the add-in.
Select Available as the ‘Deployment Method’.

Select Deploy.
A green tick appears when the add-in is deployed.
Important
Users might need to relaunch Office to view the add-in icon on the app ribbon. Outlook add-ins can take up to 24 hours to appear on app ribbons.

- Follow the same steps for both contact and meeting add-ins.
Update add-in
- In the admin center, go to the Settings > Integrated apps page.
- Select the deployed add-in and then select the Configuration tab.
- In the Overview pane, go to Update add-in.

- Select the updated manifest.xml from Choose File and click Next.

- Manifest file will validate when Id is same for the previous version of manifest.xml, and you can update the version in the manifest file as below.

- Click on Next.

- Click on Accept and update.

Edit add-in access
Post deployment, admins can also manage user access to add-ins.
- In the admin center, go to the settings > Integrated apps page.
- Select the deployed add-in.
- Click on Edit under Assign user and/or Deployment Method.
- Save the changes.

Delete an add-in
You can also delete an add-in that was deployed.
- In the admin center, go to the Settings > Integrated apps page.
- Select the deployed add-in and then select the Configuration tab.
- In the Overview pane, go to Remove app.

- Click on Yes, I’m sure I want to remove the app and associated data. And click on Remove button.

Meeting Add-in
- After deploying the meeting add-in, go to calendar and when you are going to create an event, in the More options -> Get Add-ins.


- When go to Admin-managed and you can see the deployed add-in, Click on ‘Add’ , then it will added to the My add-ins and available to use.


Contact Add-in
- Go to email and select a mail, when click on More options, Get Add-ins appears in the list.


- When go to Admin-managed and you can see the deployed add-in, click on ‘Add’, then it will add to the My add-ins and available to use.