Addovation Sync - CRM - IFS Environment Setup Guide
Last Updated: 2025-02-13
Overview
To work with Addovation Sync - CRM service, following configurations are needed to be done in IFS Applications.
Deploy Addo_M365_Crm_Sync_Util_API on database.
Import and publish Application Configuration Package "CRMIntegration_General.zip" before deploying the Addo_M365_Crm_Sync_Util_API. Follow instructions stated in the Import Application configuration package.
1.Getting the file
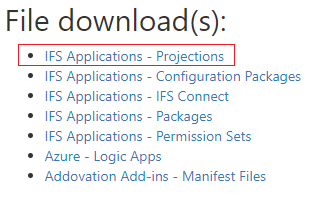
Get IFS Applications - Packages from the
File download(s).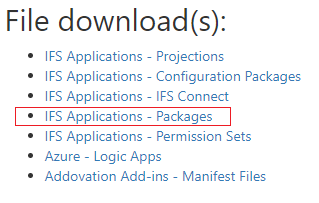
Get Addo_M365_Crm_Sync_Util_API
2.Grant privileges to the new packages by running following script.
DECLARE
BEGIN
Installation_SYS.Grant_Privileged_Grantee('IFSSYS', TRUE);
END;
Create Queue “ADDO_M365_CRM_SYNC_OUT“ in IFS Connect.
- Go to Message Queues -> Click on +
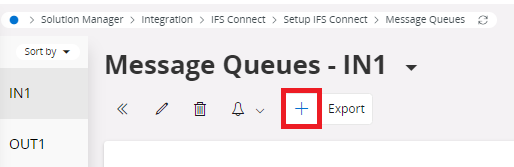
- Provide the Instance name continue.

- Provide a description and select Insequence as the Execution Mode.

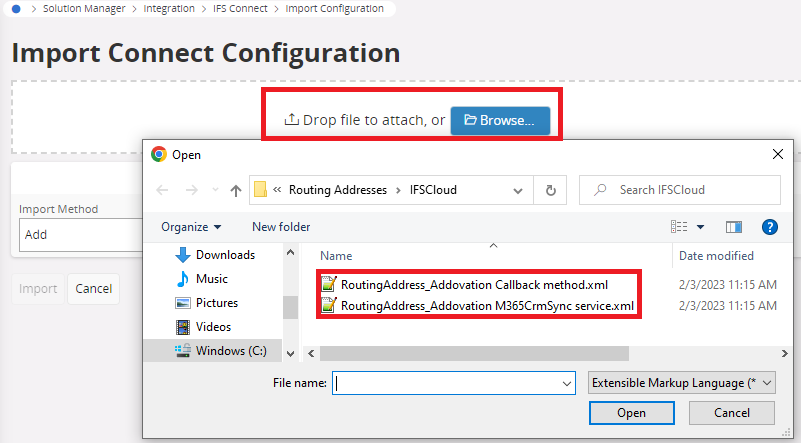
Import Routing addresses
- Go to IFS Applications - IFS Connect from the
File download(s).
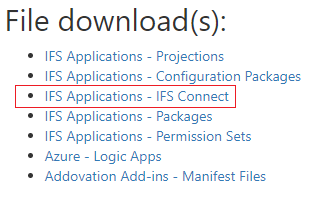
- Select Routing Addresses

- Go to Solution manager-> Integration -> IFS Connect -> Import Configuration.
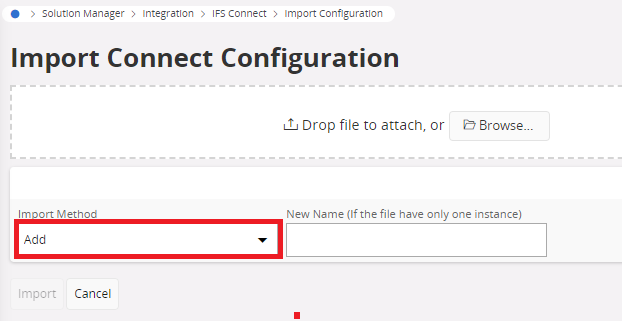
- Import one file at a time
- Go to the routing address Addovation M365crmSync service and replace the
Ocp-Apim-Subscription-Keywith provided key andCustomer IDinAdditional Header Parameters.
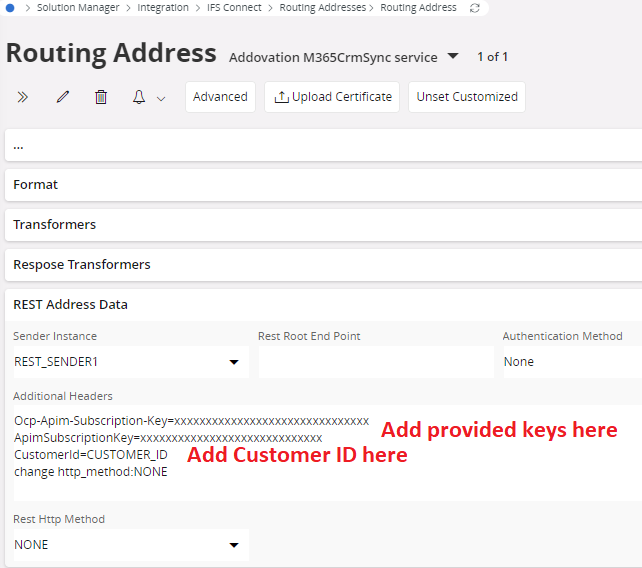
Ocp-Apim-Subscription-Keyis a primary key retrieved from Addovation Cloud platform. Please contact the consultant KAM for more information on this.CustomerIdis unique to each and every IFS intance. Please contact the consultant KAM for more information on this.
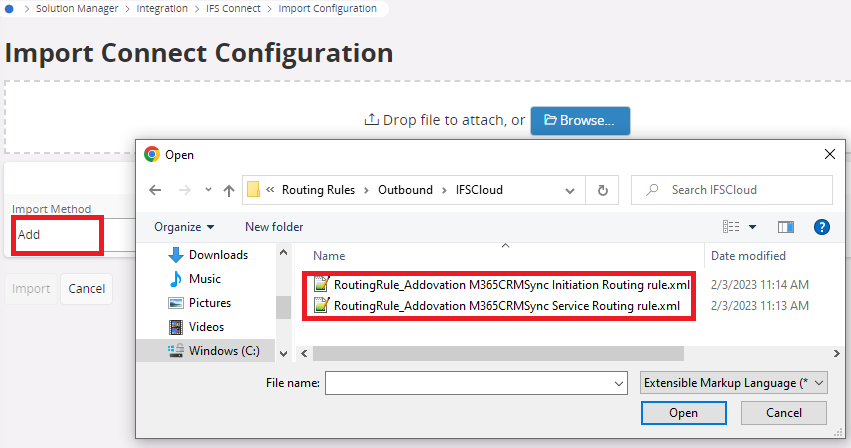
Import Routing Rules
- Go to IFS Applications - IFS Connect from the
File download(s).
- Select Routing Rules

Outbound Rules
- RoutingRule_Addovation M365CRMSync Initiation Routing rule

- RoutingRule_Addovation M365CRMSync Service Routing rule
Go to Solution manager-> Integration -> IFS Connect -> Import Configuration.
- Import one file at a time
Import Application configuration package
Four different application configuration packages can be found in following location. Import and deploy those according to customer's requirements.
- Go to IFS Applications - Configuration Packages from the
File download(s).
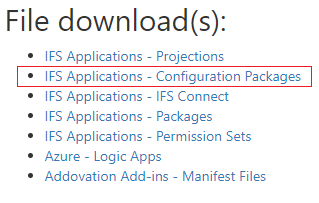
- Select an Application Configuration Packages
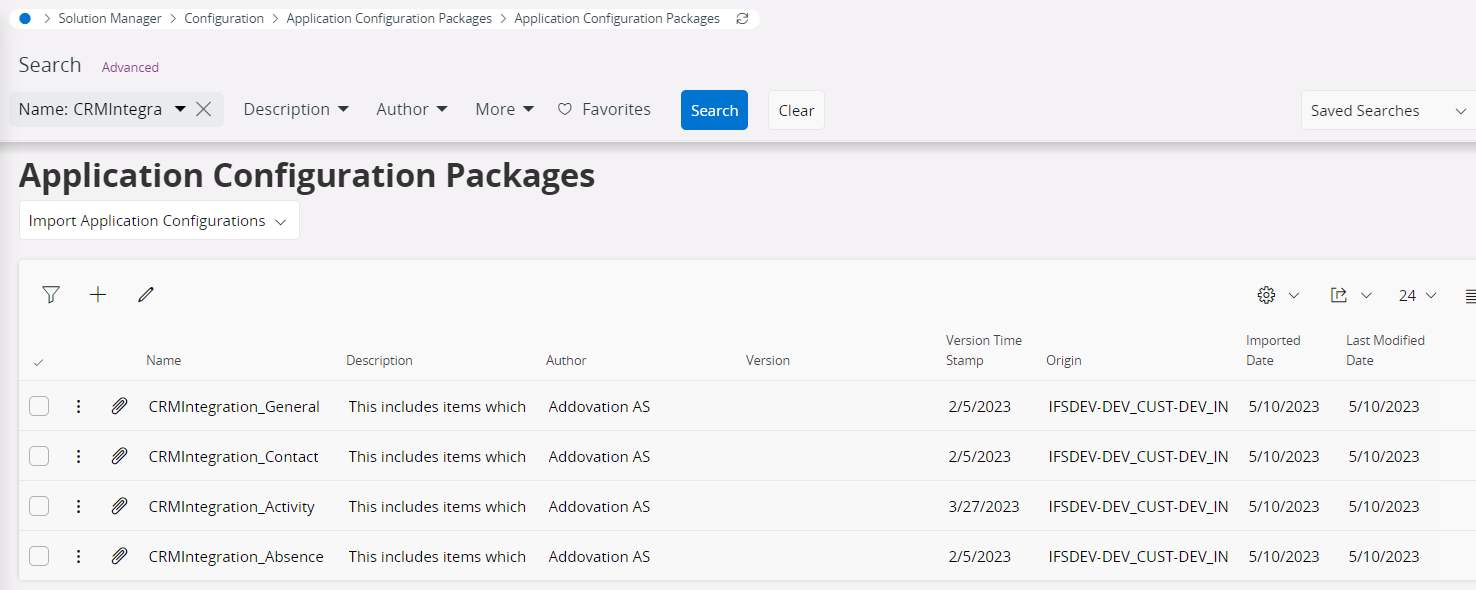
Application Configuration Packages:
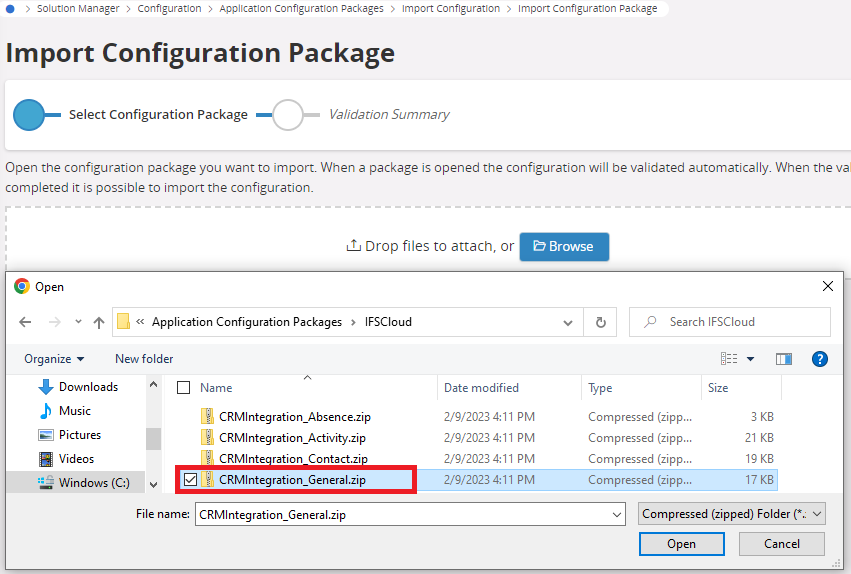
CRMIntegration_General.zip : Must be imported and deployed.
CRMIntegration_Absence.zip : Should be imported and deployed if and only Absence synchronization is used.
CRMIntegration_Activity.zip : Should be imported and deployed if and only Activity/Event synchronization is used.
CRMIntegration_Contact.zip : Should be imported and deployed if and only Contact synchronization is used.
Go to Go to Solution Manager-> Configuration -> Application Configuration Packages -> Import Configuration -> Import Configuration Package.
Provide the package file as below.
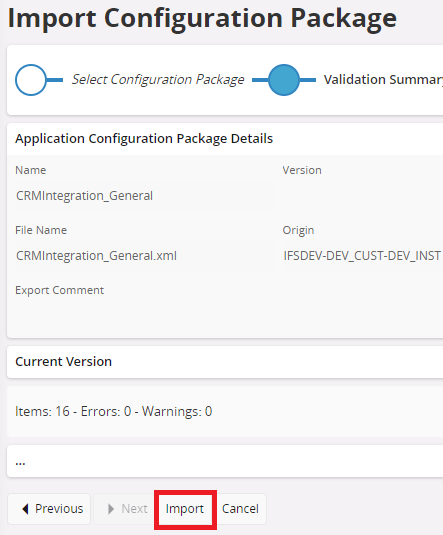
- Then go to Application Configuration Package and if items are not published and then publish each and every item.
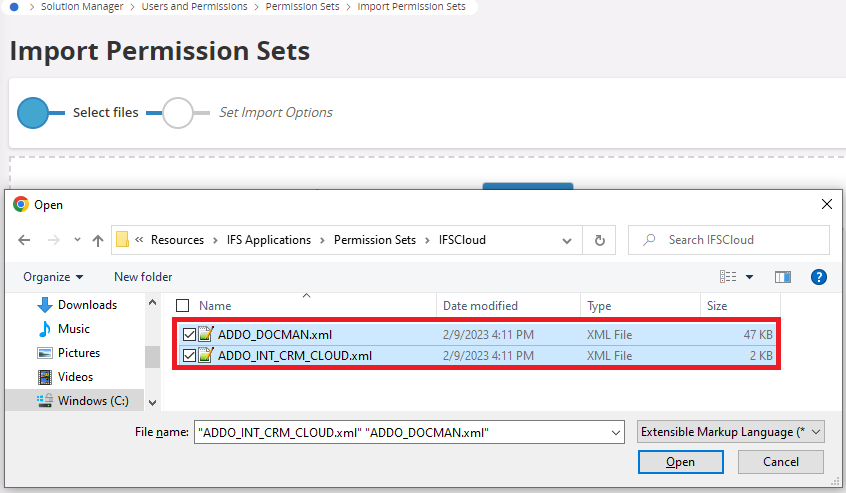
Import Permission Set
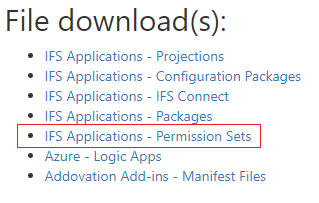
- Go to IFS Applications - Permission Sets from the
File download(s).
ADDO_INT_CRM_10: This permission set is required for integrations user.
i. File Name: ADDO_INT_CRM_10.xml
ADDO_DOCMAN : This permission set is optional and required only if sync attachment functionality is used.
i. File Name: ADDO_DOCMAN.xml
DOCMAN_ADMINISTRATOR : This is a default permission set resides in IFS Applications. This permission set is optional and required only if sync attachment functionality is used.
Go to Solution Manager-> Users and Permissions -> Permission Sets -> Import Permission Sets.
Provide files.
IAM Client Configuration
Overview
To enable Sync - CRM functionality in IFS Cloud, service users must be configured for authentication and transaction authorization.
This involves registering the service user, issuing a secret for token generation, and granting the necessary permissions for accessing specific projections and resources.
Service users differ from regular users as they are identified by a username and do not require a password. The IAM Client provides a Client ID and a secret token, which the service user uses to generate access tokens. When a token is utilized, IFS validates its authenticity. If the service user lacks the required permissions, a 403 Forbidden error is returned.
Below are the key steps involved in setting up IAM Client Configuration:
- Creating a Service User and Granting Permissions
- Creating an IAM Client
Each service user is tied to a single IAM Client and is configured for a specific channel, such as Sync - CRM. The following sections provide a step-by-step guide on how to complete this setup.
Creating a Service User and Granting Permissions
- Navigate to IFS Cloud, -> Solution Manager -> Users and Permissions -> Users -> User.
- Now Click the
+icon to create a new service user.
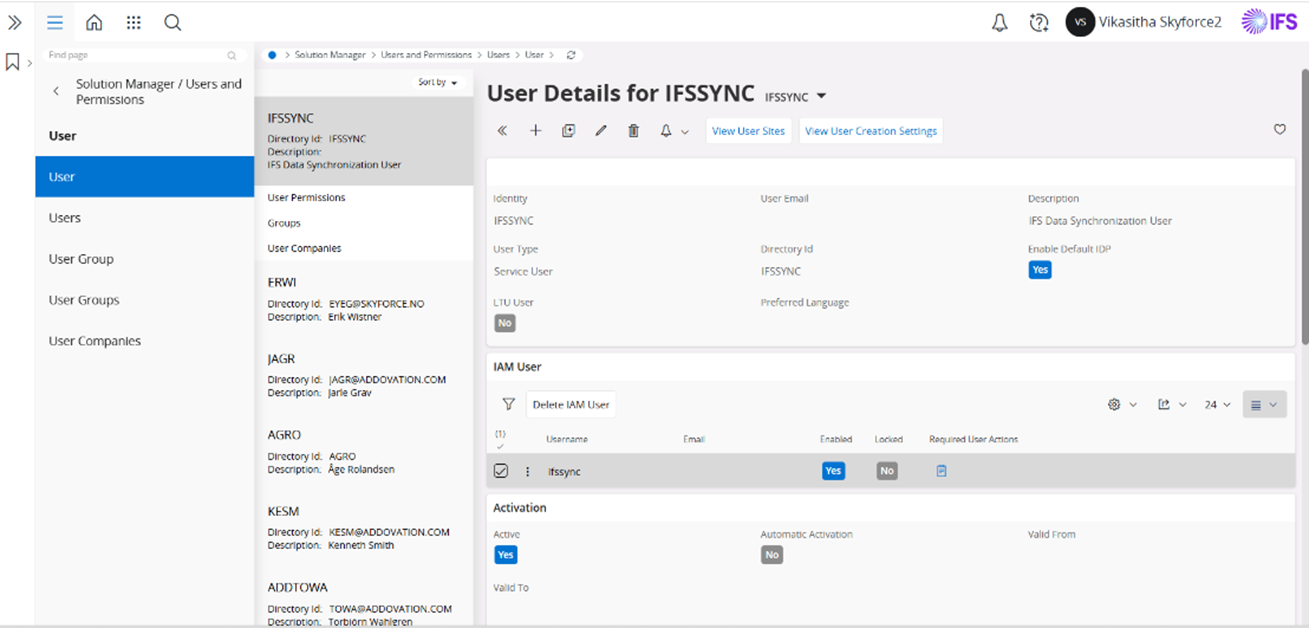
Provide the following details:
  - Identity: Enter a unique identity for the Service User.

  - Email: Enter the user’s email address.

  - Description: Add a brief description for the user.

  - User Type: Select “Service User” from the available options.

  - Activation Status: Set the status to “Active”.
Save the new user.
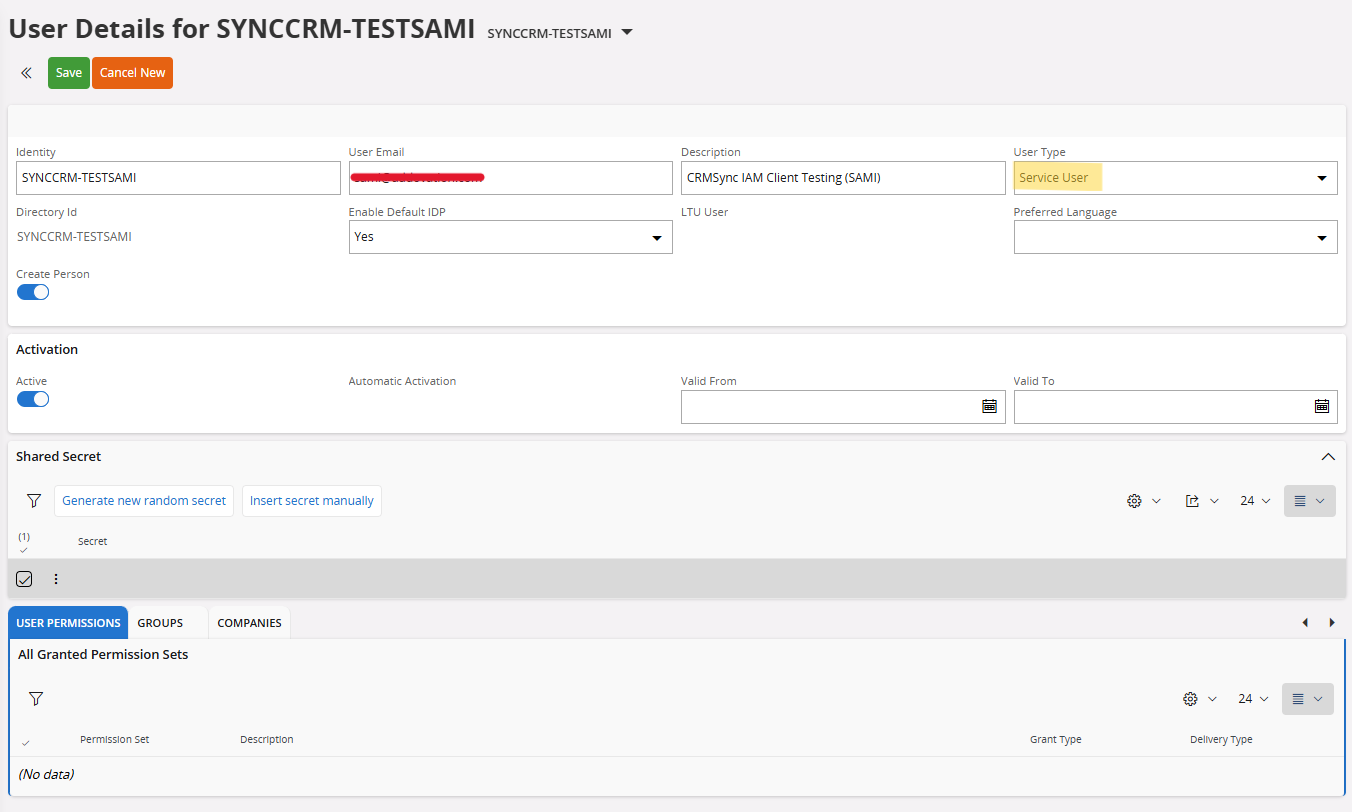
- Navigate to
User Permissionsand selectGrant Permission Setto grant permissions to the service user. - Assign the required permissions associated with Sync - CRM, as shown in the screenshot below.
- Click
Okto confirm the permissions.
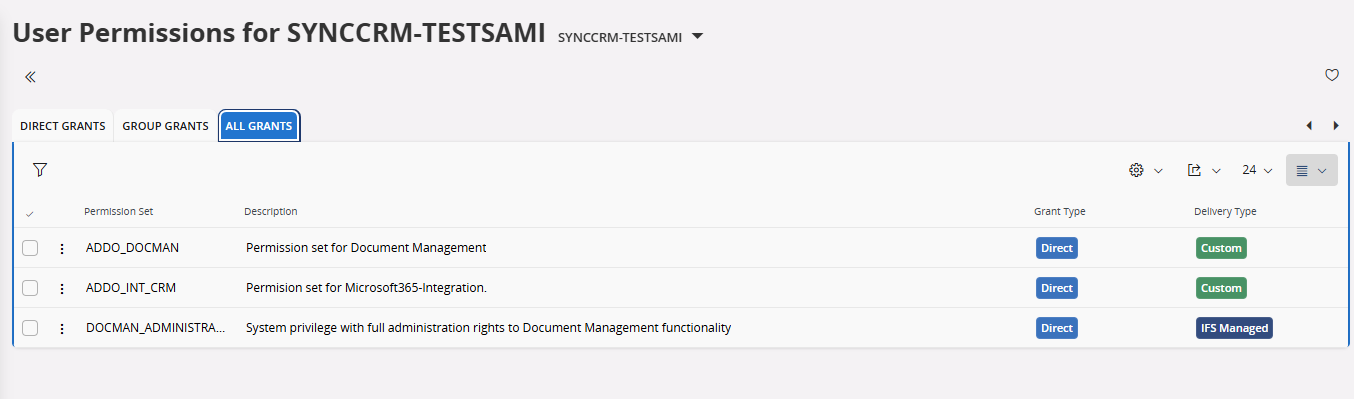
- The Service User is now successfully created, and the required permissions have been granted.
- Proceed to create an
IAM Clientto complete the configuration process.
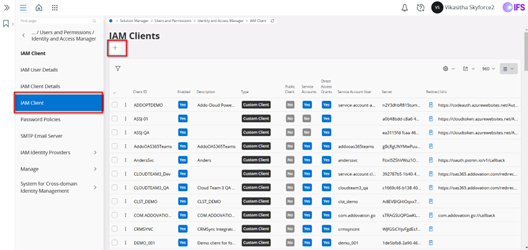
Creating an IAM Client
- To create an IAM Client, navigate to IFS Cloud > IAM Client and click on the
+option.
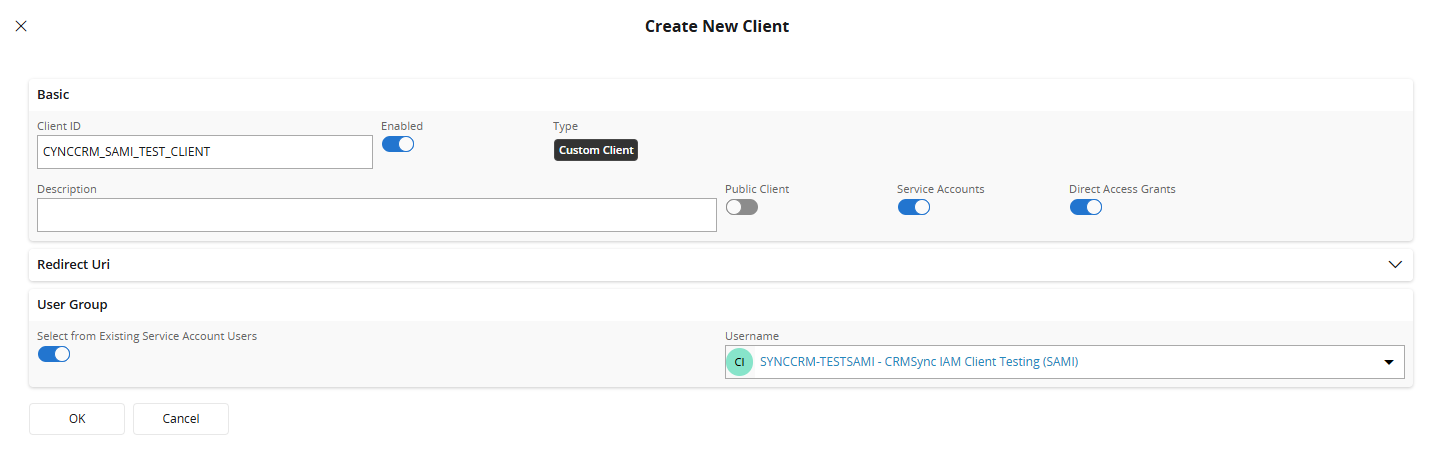
- Enter a unique
Client IDand ensure theEnabledoption next to the Client ID is selected. - Enable the options for
Service AccountsandDirect Access Grants. - From the dropdown menu, select the service user you created earlier as the username, then click
Ok.
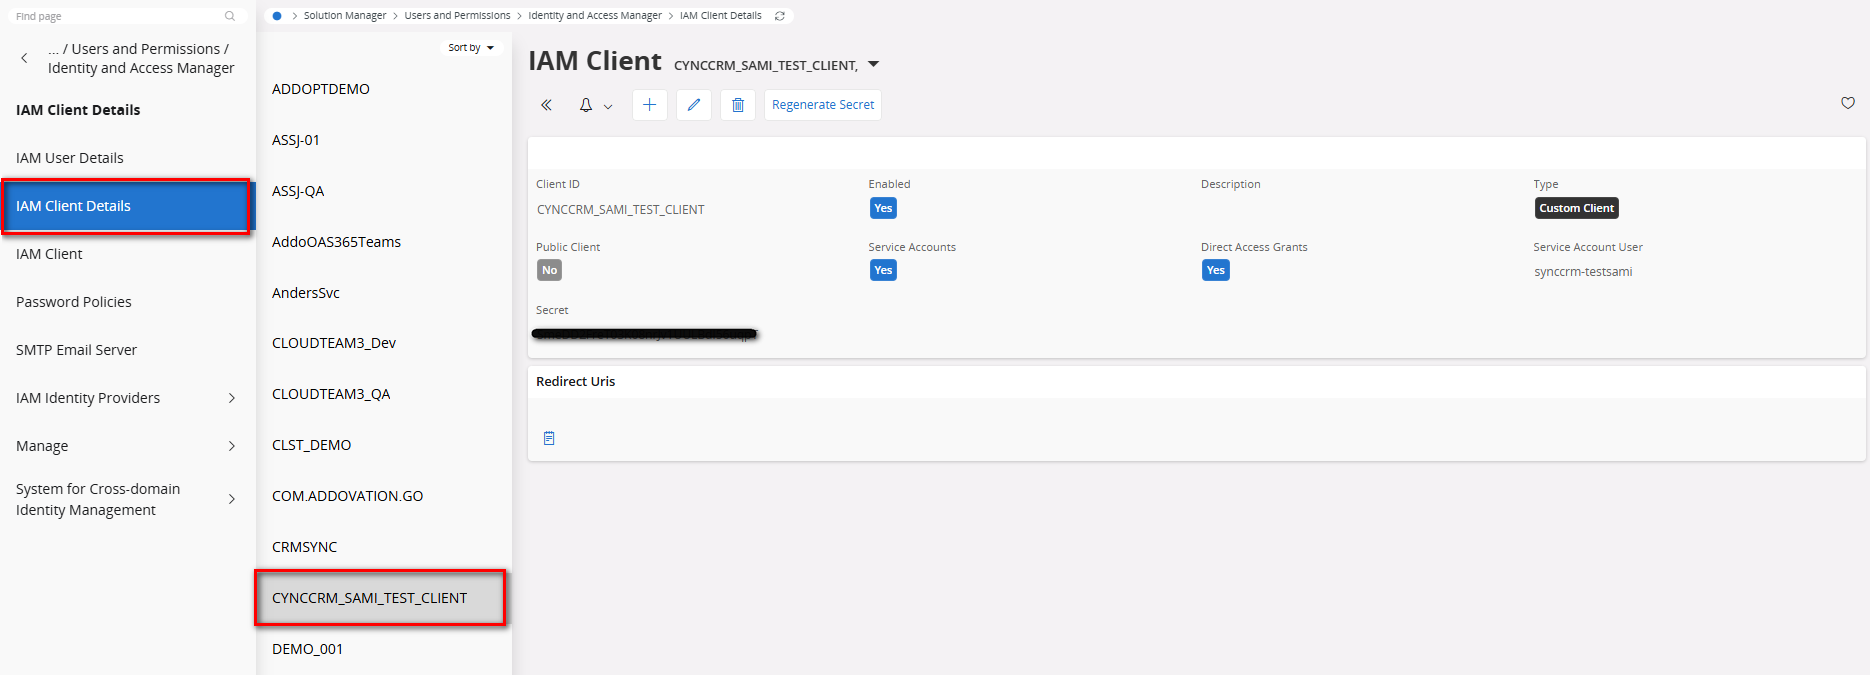
- Next, go to
IAM Client Detailsfrom the left navigation menu, select the newly created IAM Client, and copy the secret. - Note: You have the option to regenerate the secret if required. However, avoid regenerating the secret when the application is already running.
Deploy Projections
There are two projections which should be deployed in order to support Addovation Sync - CRM Service.
- Go to IFS Applications - Projections from the
File download(s).
AddoM365CrmSyncHandling: Is required and must be deployed.
i. Folder Name: AddoM365CrmSync
AddoDocManagement : Optional and required only if sync attachment functionality is used.
i. Folder Name: AddoDocManagement
Allow access from IFS to App services
There are three services on Addovation accessing the customer�s IFS environment.
- CRM Sync Service: The Main Sync Service
- Add-in Service: Which is used in Addovation M365 add-in
- Document Management Service: which is used in attachment sync in events
Customer should allow access from above mentioned services to their IFS instances.
- CRM Sync Service:
Name: waws-prod-osl-005-e622.norwayeast.cloudapp.azure.com
URL: https://m365crmsync-prod-api.azurewebsites.net
Address: 51.120.98.194
Aliases: m365crmsync-prod-api.azurewebsites.net
waws-prod-osl-005.sip.azurewebsites.windows.net
- Addin-Service
Name: waws-prod-osl-005-e622.norwayeast.cloudapp.azure.com
URL: https://m365addin-prod-api.azurewebsites.net
Address: 51.120.98.194
Aliases: m365addin-prod-api.azurewebsites.net
waws-prod-osl-005.sip.azurewebsites.windows.net
- Document Management Service
Name: waws-prod-osl-005-e622.norwayeast.cloudapp.azure.com
URL: https://documentmanagementservice-v2.azurewebsites.net
Address: 51.120.98.194
Aliases: documentmanagementservice-v2.azurewebsites.net
waws-prod-osl-005.sip.azurewebsites.windows.net