Addovation Sync - Case - Setup Guide (Customer)
Last Updated: 2026-03-17
Overview
This setup guide provides detailed instructions for configuring the Addovation Sync - Case service from the customer's end. The process includes setting up OAuth2 email account access in Azure AD, configuring IFS data, and configuring projections. Additionally, it outlines the steps required to enable Multi-Factor Authentication (MFA) for email account access in Azure AD, if the organization chooses to set it up. Each step is thoroughly explained to ensure a smooth setup process.
IFS Data Configuration
Integration User
An integration user should be created with all required permissions to work with the service.
Permission should be available for;
- IFS Projections and methods
- IFS Call center module
Basic Data
Required file extension/s (‘MSG’ or ‘EML’) should be registered under EDM basic and as the ‘VIEW’ or 'ORIGINAL' document type.
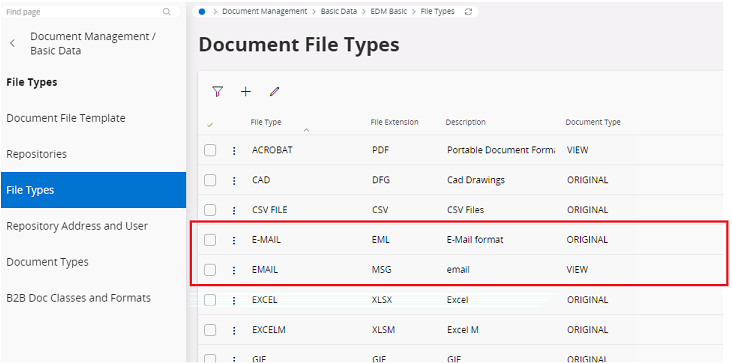
A class and format should be defined under EDM Basic data ,to use as default class and format which is configured in the config. If no valid class and format are defined, an error will be occurred.

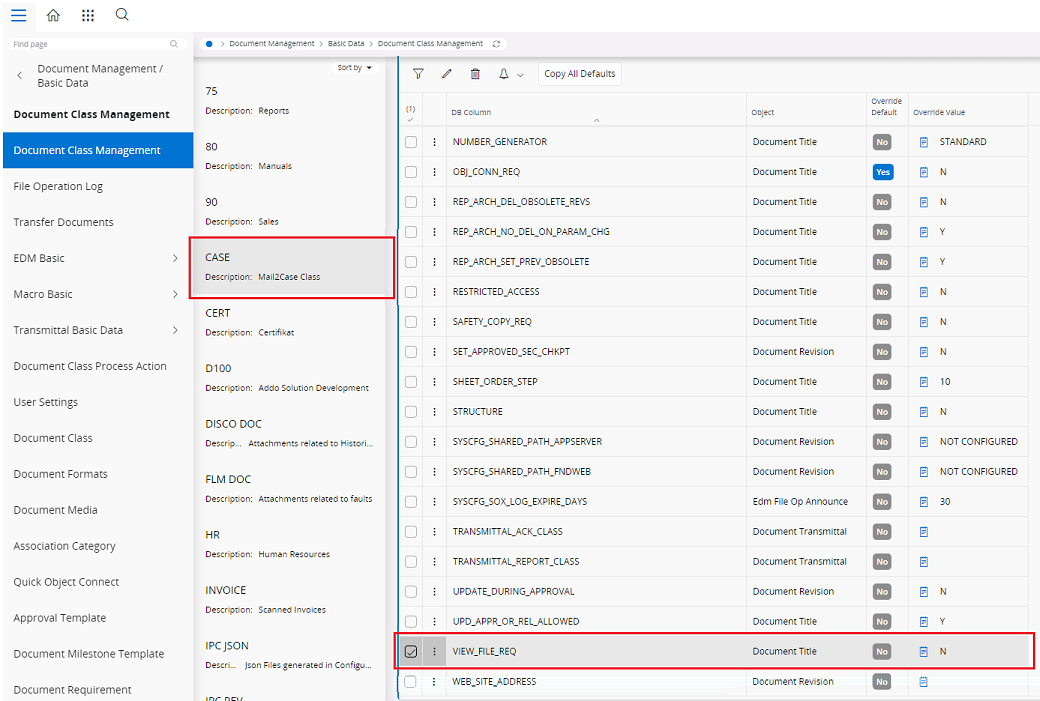
In EDM basic data, select the class that uses as the default class in the Mail2Case service config, If VIEW_FILE_REQ is set to ‘N’ and ‘Override default’ is checked, only the original file will be checked in.
If VIEW_FILE_REQ is set to ‘Y’ and 'Override default' is checked, then the view copy should be in the same folder which original file resides , and both original file and view file will be checked in.
Projection Configuration
Deploy Projection using Build Place
Refer Technical Documentation For IFS Cloud - Build Place Deliveries
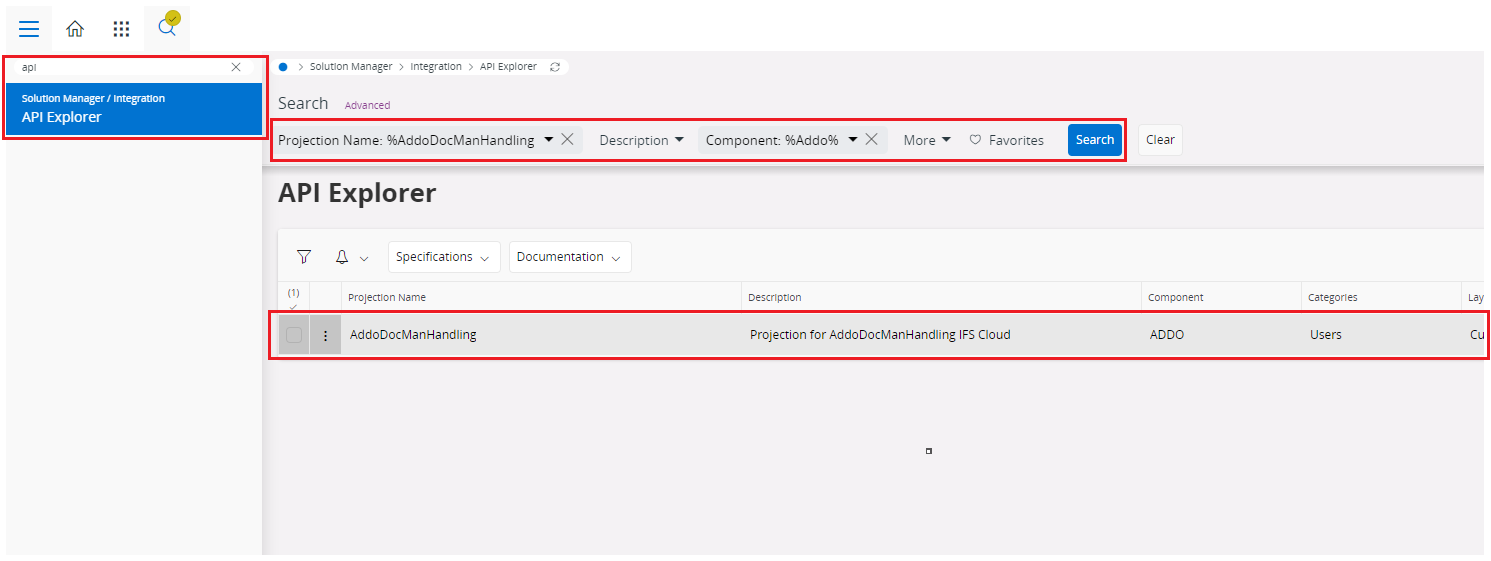
Test/Verify Projection Endpoints
- Sign in to
IFS Cloud - Go to API Explorer
- Search
AddoMail2CaseHandlingusing filter Panel and go toProjection Name
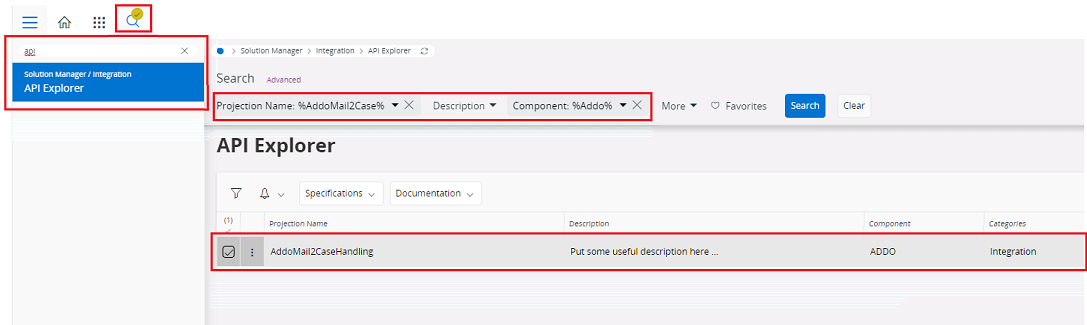
- Select
AddoMail2CaseHandlingprojection ->Specification->OpenAPI v3

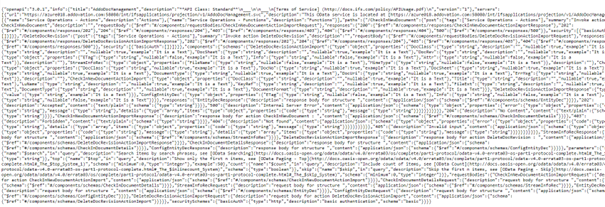
- A file will be opened as below depicted and copy the whole
json textfrom that file.
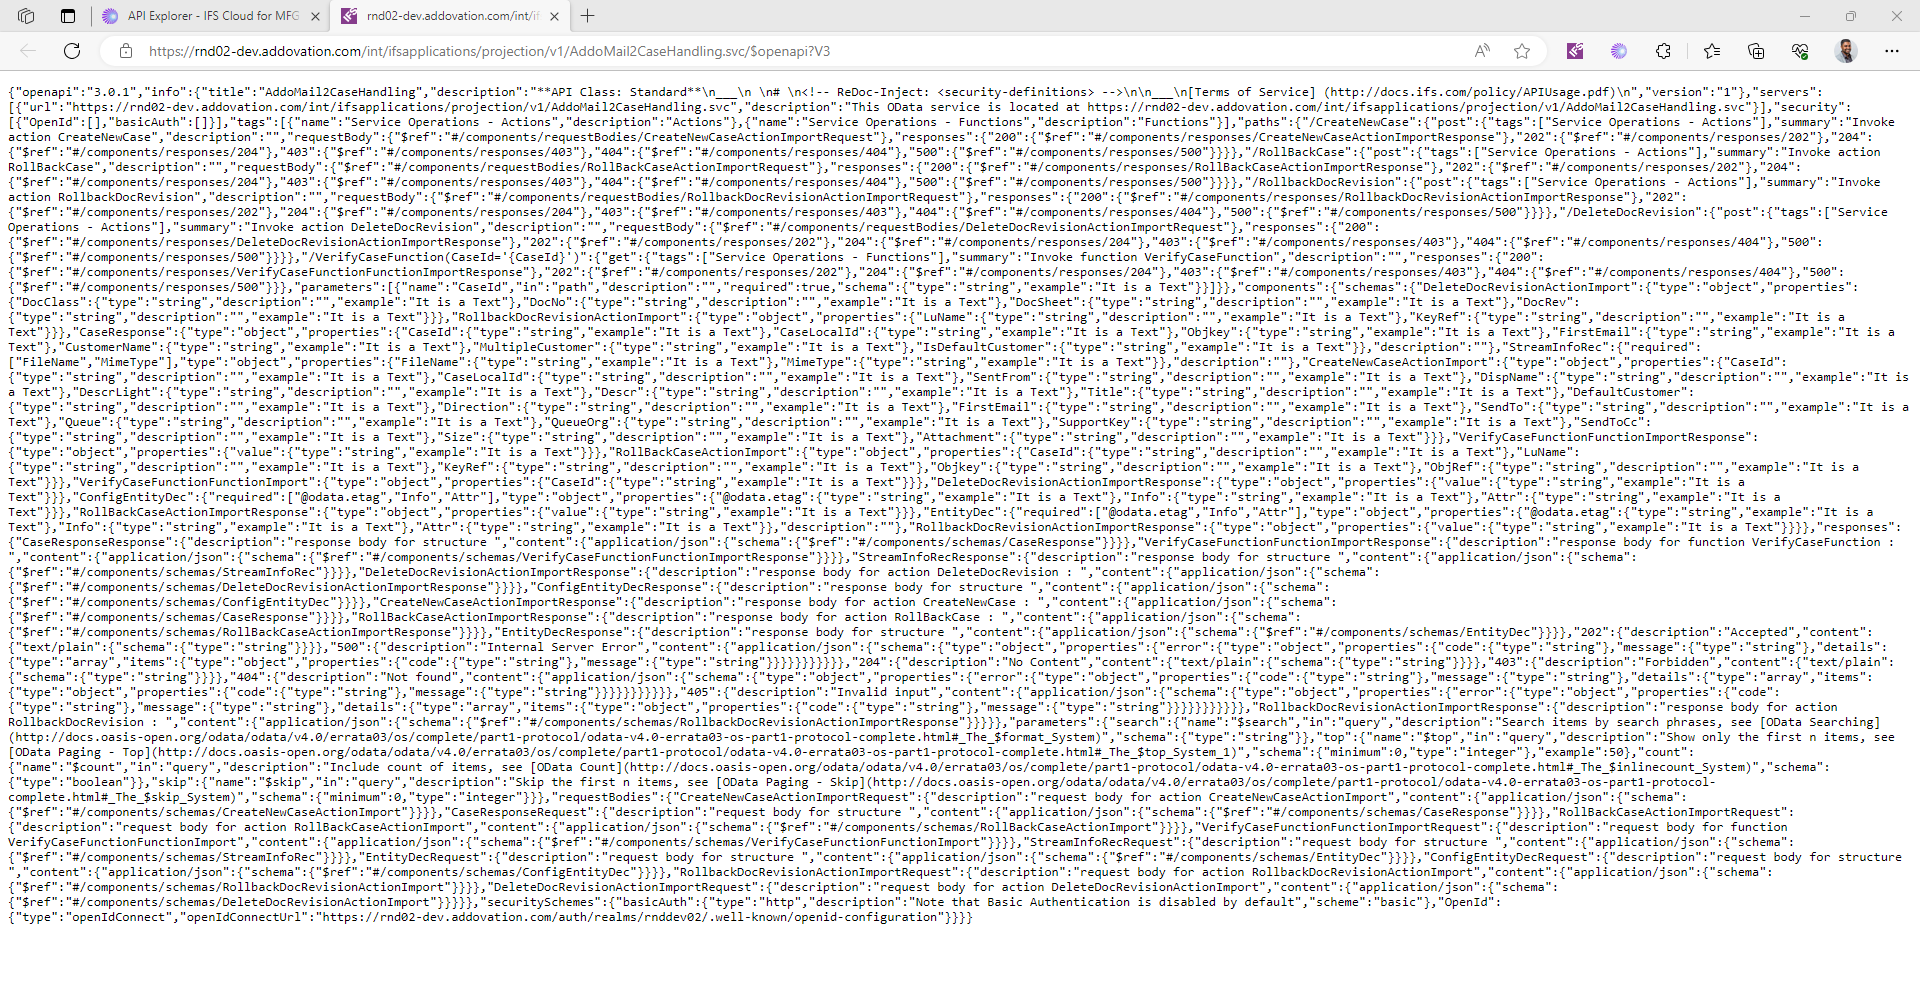
- Open
Postman - select
Import - Then paste the copied
Row texton it
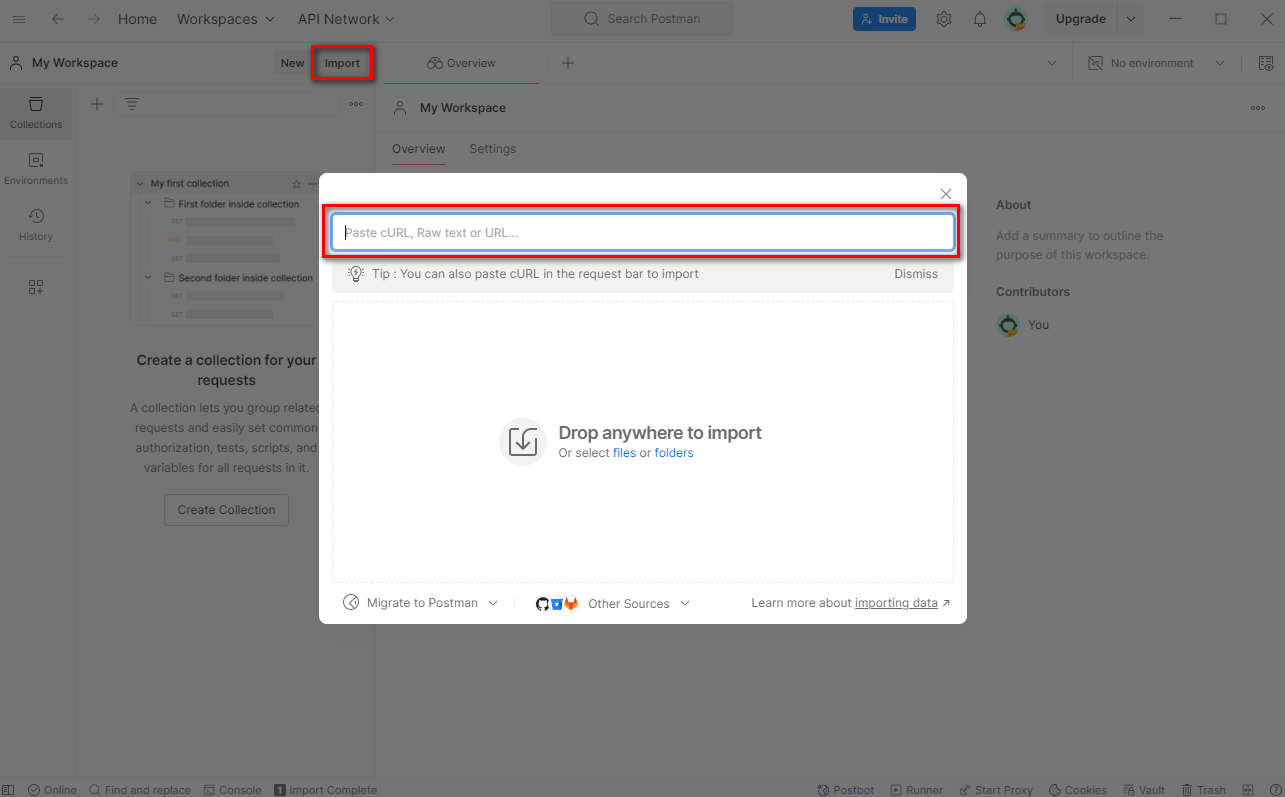
- Now click on
Importbutton
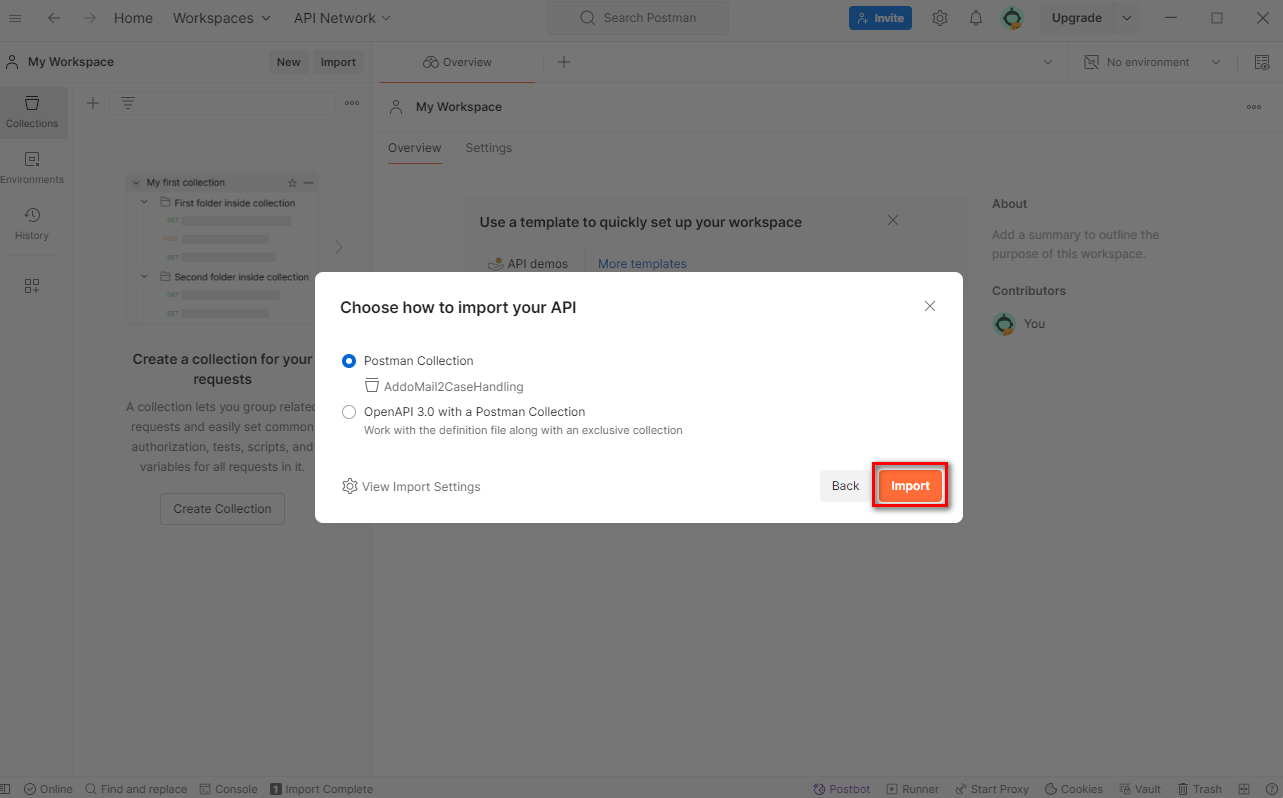
- Go to Collections in Postman and expand
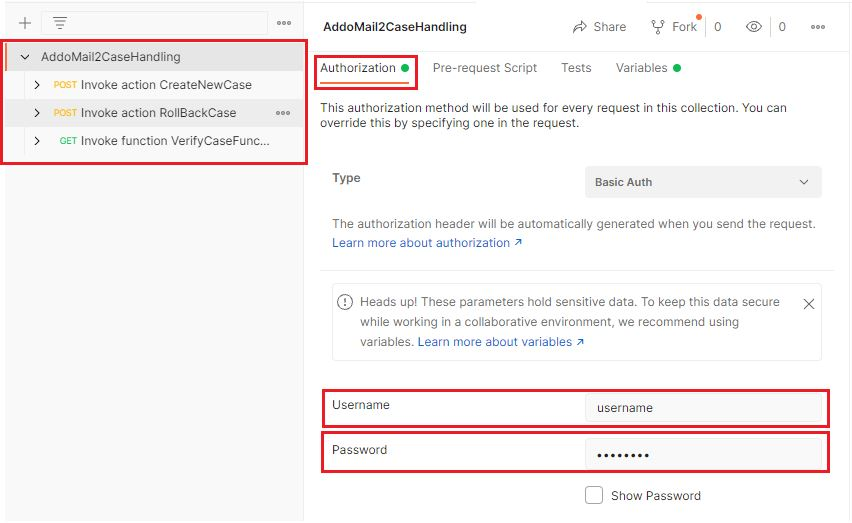
AddoMail2CaseHandling, you will be able to see all the endpoints related to the project. - Choose AddoMail2CaseHandling.
- Go to Authorization tab
- Select Basic Auth from Auth Type combo box
- Provide Username and Password
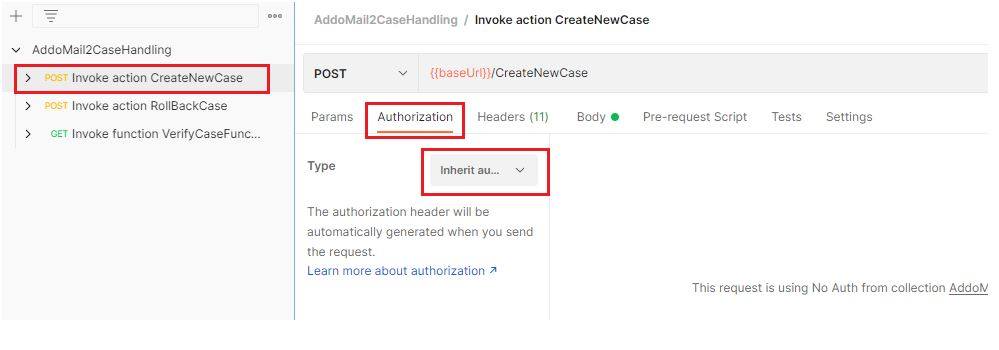
- Select the method you want to test
- Select the Authorization tab and select Inherit auth from parent.
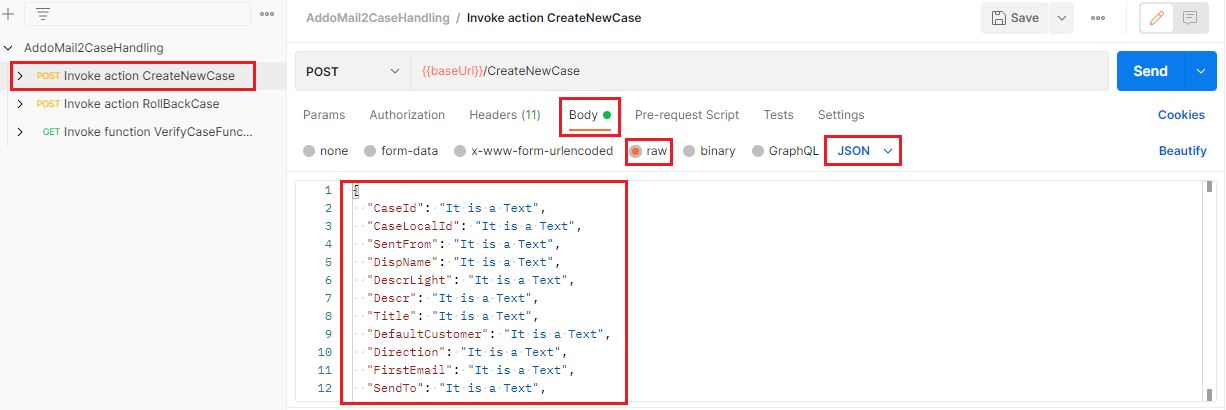
- Go to Body Tab
- Enter required values
- Click Send button then you can see the result.
How to configure projection endpoints in Addovation Sync - Case
All the projection endpoints used in Addovation Sync - Case need to configure in Addovation Portal. This will allow customer to use their own customize projection endpoints. However there are few configuration information we need to setup to support projection endpoints.
- ProjectionEndpoint
- FieldNames
How to configure projection endpoint
- Go to
Postmanand select the collection - Go to Variables tab
- Get the baseUrl current value
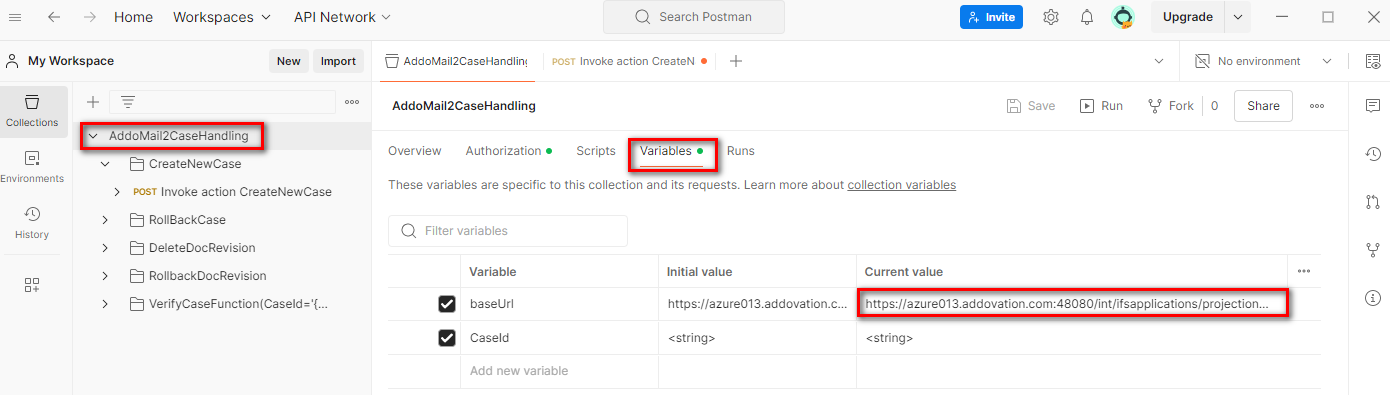
- Go to method you want to configure
- Get the method name

- Now concatenate base url and method name
- Remove IFS extension server url and update rest of the url in to Addovation Sync - Case configuration.
Ex: main/ifsapplications/projection/v1/AddoMail2CaseHandling.svc/CreateNewCase
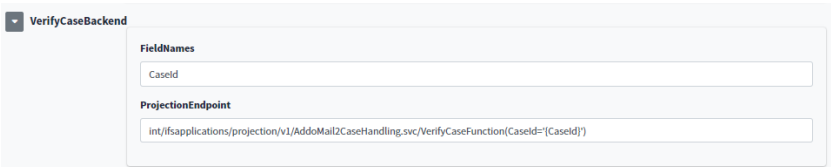
How to configure FieldNames
- Go to
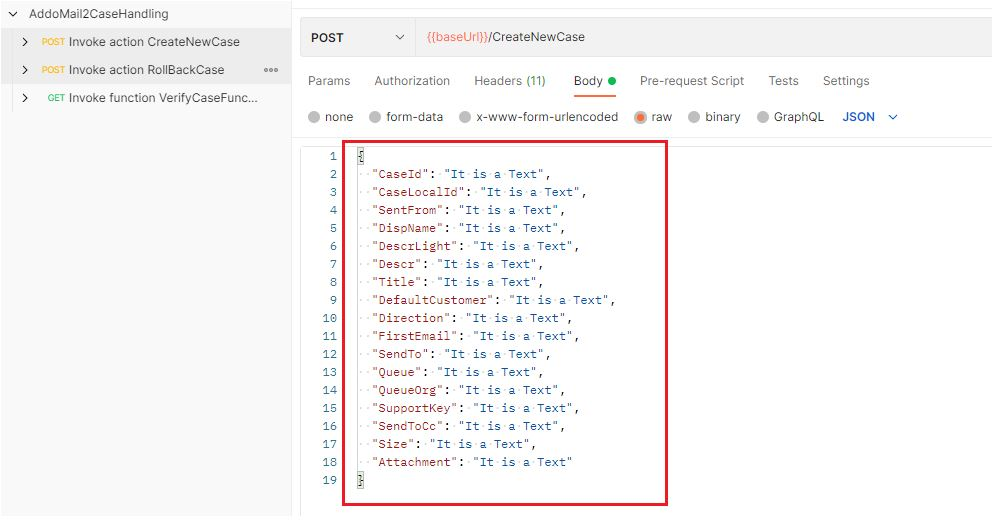
Postmanand select the method you want to configure - Go to Body tab
- Get all the required field names and join them with comma (,) separator
Ex:
CaseId, CaseLocalId, SentFrom, DispName, DescrLight, Descr, Title, DefaultCustomer, Direction, FirstEmail, SendTo, Queue, QueueOrg, SupportKey, SendToCc, Size, Attachment
An example of final configuration in Addovation Cloud Portal
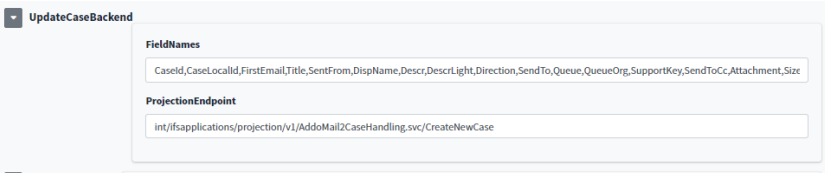
Get methods use entire URL with parameters and place the parameters in field names

Deployed projections are ready to use. The projection endpoints will be used to configure the Addovation Sync - Case service in the next phase.
Test/Verify Document Management Projection Endpoints
- Log in to
IFS Cloud - Go to
API Explorer - Search AddoDocManagement using
Filter Panel->Projection Name
- Select AddoDocManagement projection ->
Specification->OpenAPI v3
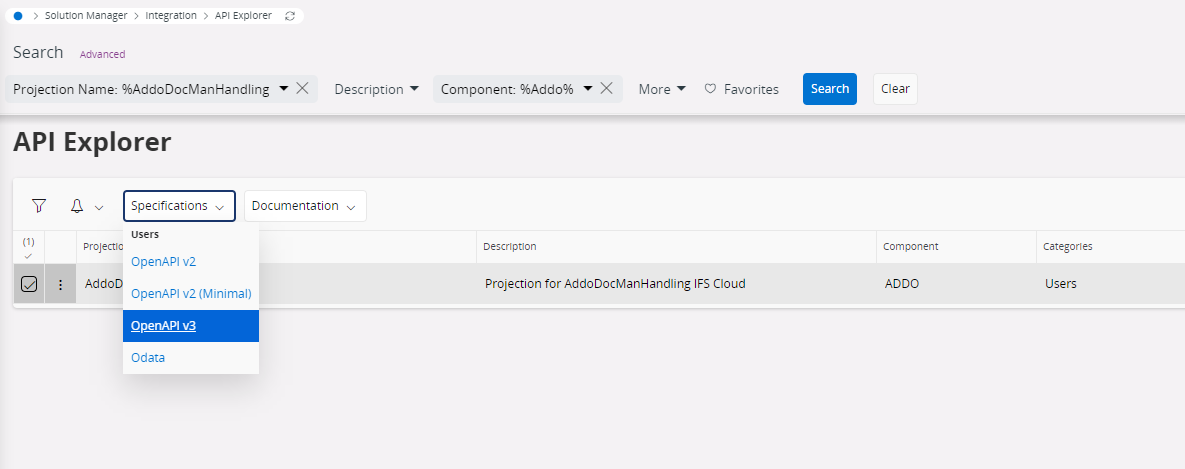
- A file will be opened as below depicted and copy the whole json text you get in that file.
- Open
Postmanand selectImport - Then paste the copied
Raw texton it
- Now click on
Importbutton
- Go to Collections in Postman and expand
AddoMail2CaseHandling, you will be able to see all the endpoints related to the project. - Choose AddoMail2CaseHandling.
- Go to Authorization tab
- Select Basic Auth from Auth Type combo box
- Provide Username and Password
Select the method you want to test
Select the
Authorizationtab and select Inherit auth from parent.
- Go to Body Tab
- Enter required values
- Click Send button then you can see the result.
How to configure projection endpoints in Document Management
All the projection endpoints used in Document Management need to be configured in Addovation Portal. This will allow customer to use their own customize projection endpoints. However, there are few configurations information we need to setup to support projection endpoints.
- ProjectionEndpoint
- FieldNames
How to configure projection endpoint
- Go to
Postmanand select the collection - Go to
Variablestab - Get the baseUrl current value
- Go to method you want to configure
- Get the method name
Now concatenate base url and method name
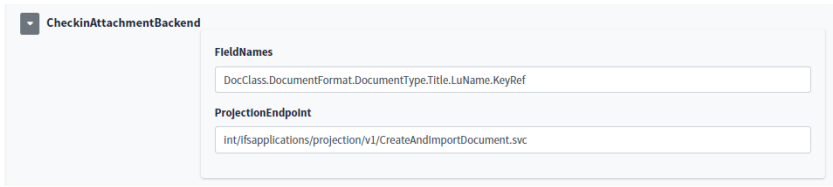
Remove IFS extension server url and update rest of the url into Document Management configuration.
Ex:
int/ifsapplications/projection/v1/AddoDocManagement.svc/CheckInNewDocument
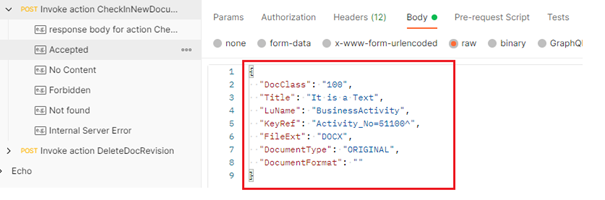
How to configure FieldNames
Go to Postman and select the method you want to configure
Go to Body tab
Get all the required field names and join them with comma (,) separator
Ex:
DocClass,Title,LuName,KeyRef,FileExt,DocumentType,DocumentFormat
The final configuration in Addovation Cloud Portal
Get methods use entire URL with parameters and place the parameters in field names
Deployed projections are ready to use. The projection endpoints will be used to configure the Document Management service in next phase.
IAM Client Configuration
Overview
To enable Sync - Case functionality in IFS Cloud, service users must be configured for authentication and transaction authorization.
This involves registering the service user, issuing a secret for token generation, and granting the necessary permissions for accessing specific projections and resources.
Service users differ from regular users as they are identified by a username and do not require a password. The IAM Client provides a Client ID and a secret token, which the service user uses to generate access tokens. When a token is utilized, IFS validates its authenticity. If the service user lacks the required permissions, a 403 Forbidden error is returned.
Below are the key steps involved in setting up IAM Client Configuration:
- Creating a Service User and Granting Permissions
- Creating an IAM Client
Each service user is tied to a single IAM Client and is configured for a specific channel, such as Sync - Case. The following sections provide a step-by-step guide on how to complete this setup.
Creating a Service User and Granting Permissions
- Navigate to IFS Cloud, -> Solution Manager -> Users and Permissions -> Users -> User.
- Now Click the
+icon to create a new service user.
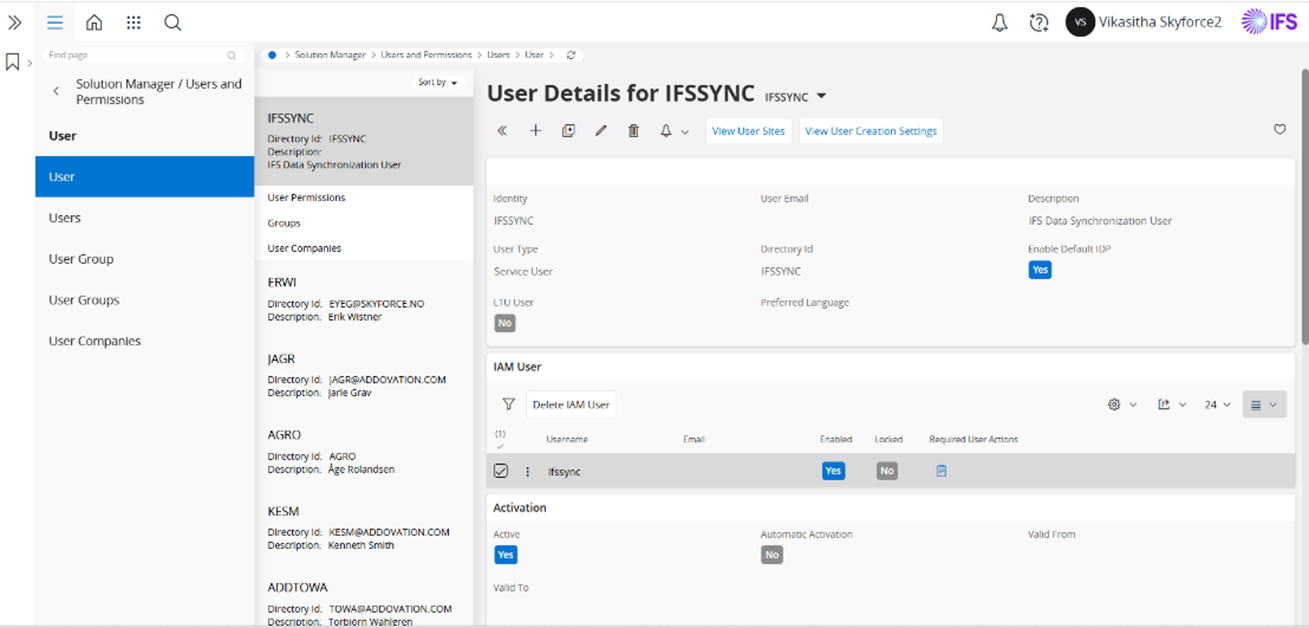
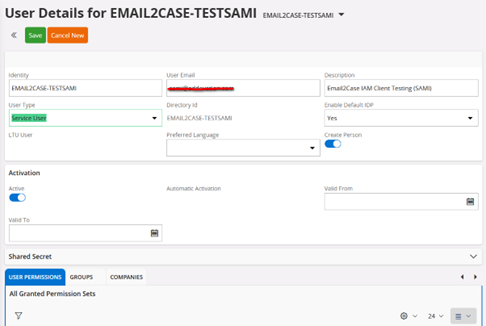
Provide the following details:
  - Identity: Enter a unique identity for the Service User.

  - Email: Enter the user’s email address.

  - Description: Add a brief description for the user.

  - User Type: Select “Service User” from the available options.

  - Activation Status: Set the status to “Active”.
Save the new user.
- Navigate to
User Permissionsand selectGrant Permission Setto grant permissions to the service user. - Assign the required permissions associated with Sync - Case, as shown in the screenshot below.
- Click
Okto confirm the permissions.
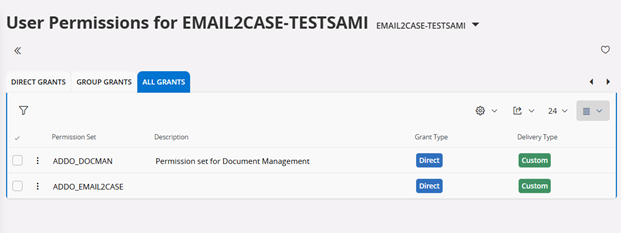
- The Service User is now successfully created, and the required permissions have been granted.
- Proceed to create an
IAM Clientto complete the configuration process.
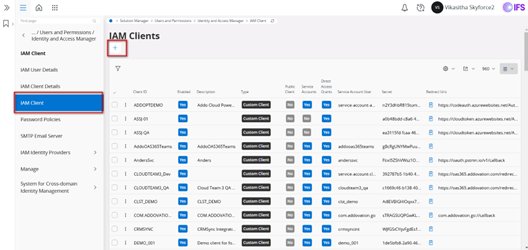
Creating an IAM Client
- To create an IAM Client, navigate to IFS Cloud > IAM Client and click on the
+option.
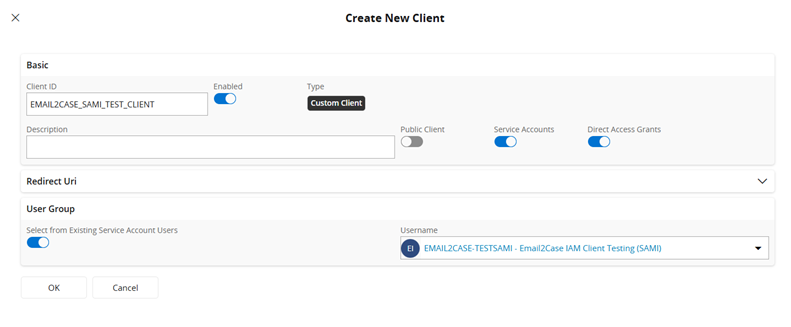
- Enter a unique
Client IDand ensure theEnabledoption next to the Client ID is selected. - Enable the options for
Service AccountsandDirect Access Grants. - From the dropdown menu, select the service user you created earlier as the username, then click
Ok.
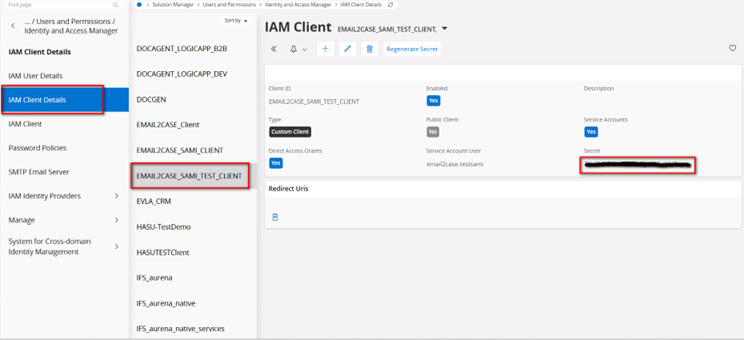
- Next, go to
IAM Client Detailsfrom the left navigation menu, select the newly created IAM Client, and copy the secret. - Note: You have the option to regenerate the secret if required. However, avoid regenerating the secret when the application is already running.
Allow Email Account Access
There are two ways to configure Azure App Registration to allow email account access from a Function App:
- OAuth2 Email Account Access Setup in Azure AD – Uses token-based authentication and retrieves emails via POP3 or IMAP.
- Multi-Factor Authentication (MFA) Setup for Email Account Access in Azure AD – Uses certificate-based authentication and retrieves emails via Graph API.
NOTE: You only need to set up one type of Azure App Registration based on the specific requirement.
Oauth2 e-mail account access setup in Azure AD
Azure Active Directory (Azure AD) is a cloud-based identity and access management service. Azure AD enables your employees access external resources, such as Microsoft 365, the Azure portal, and thousands of other SaaS applications.
Create new app registration
- Go to Azure Portal
- Search for
Azure Active Directory
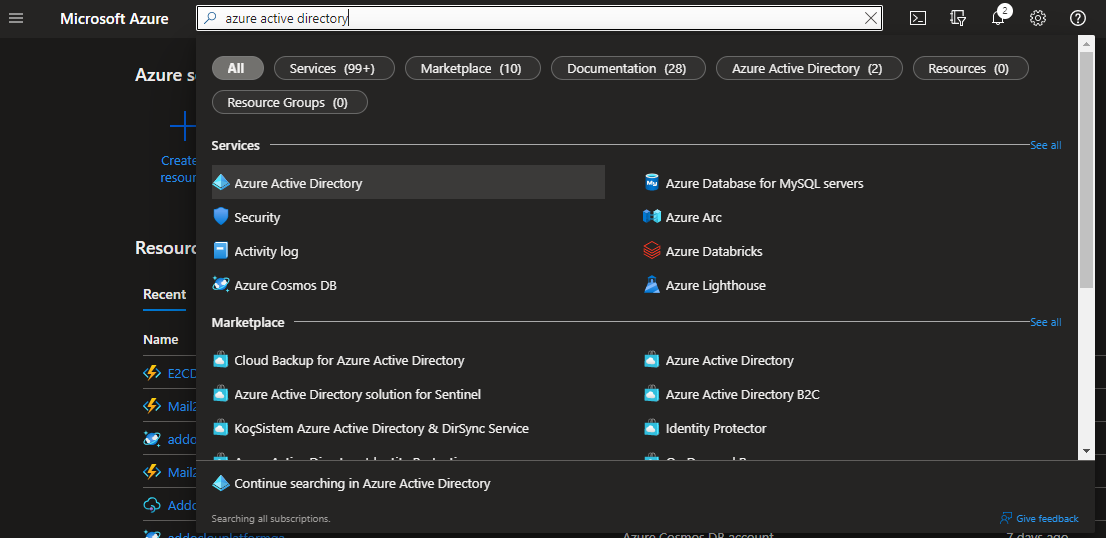
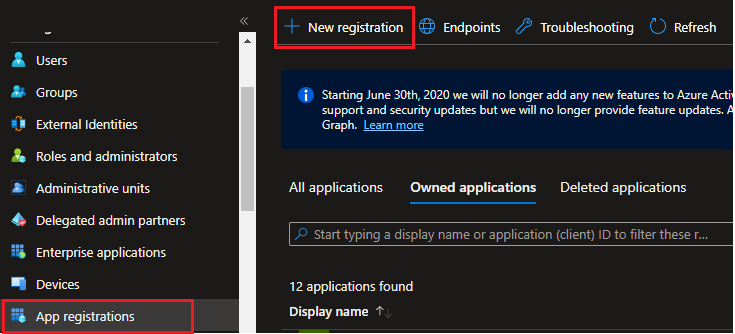
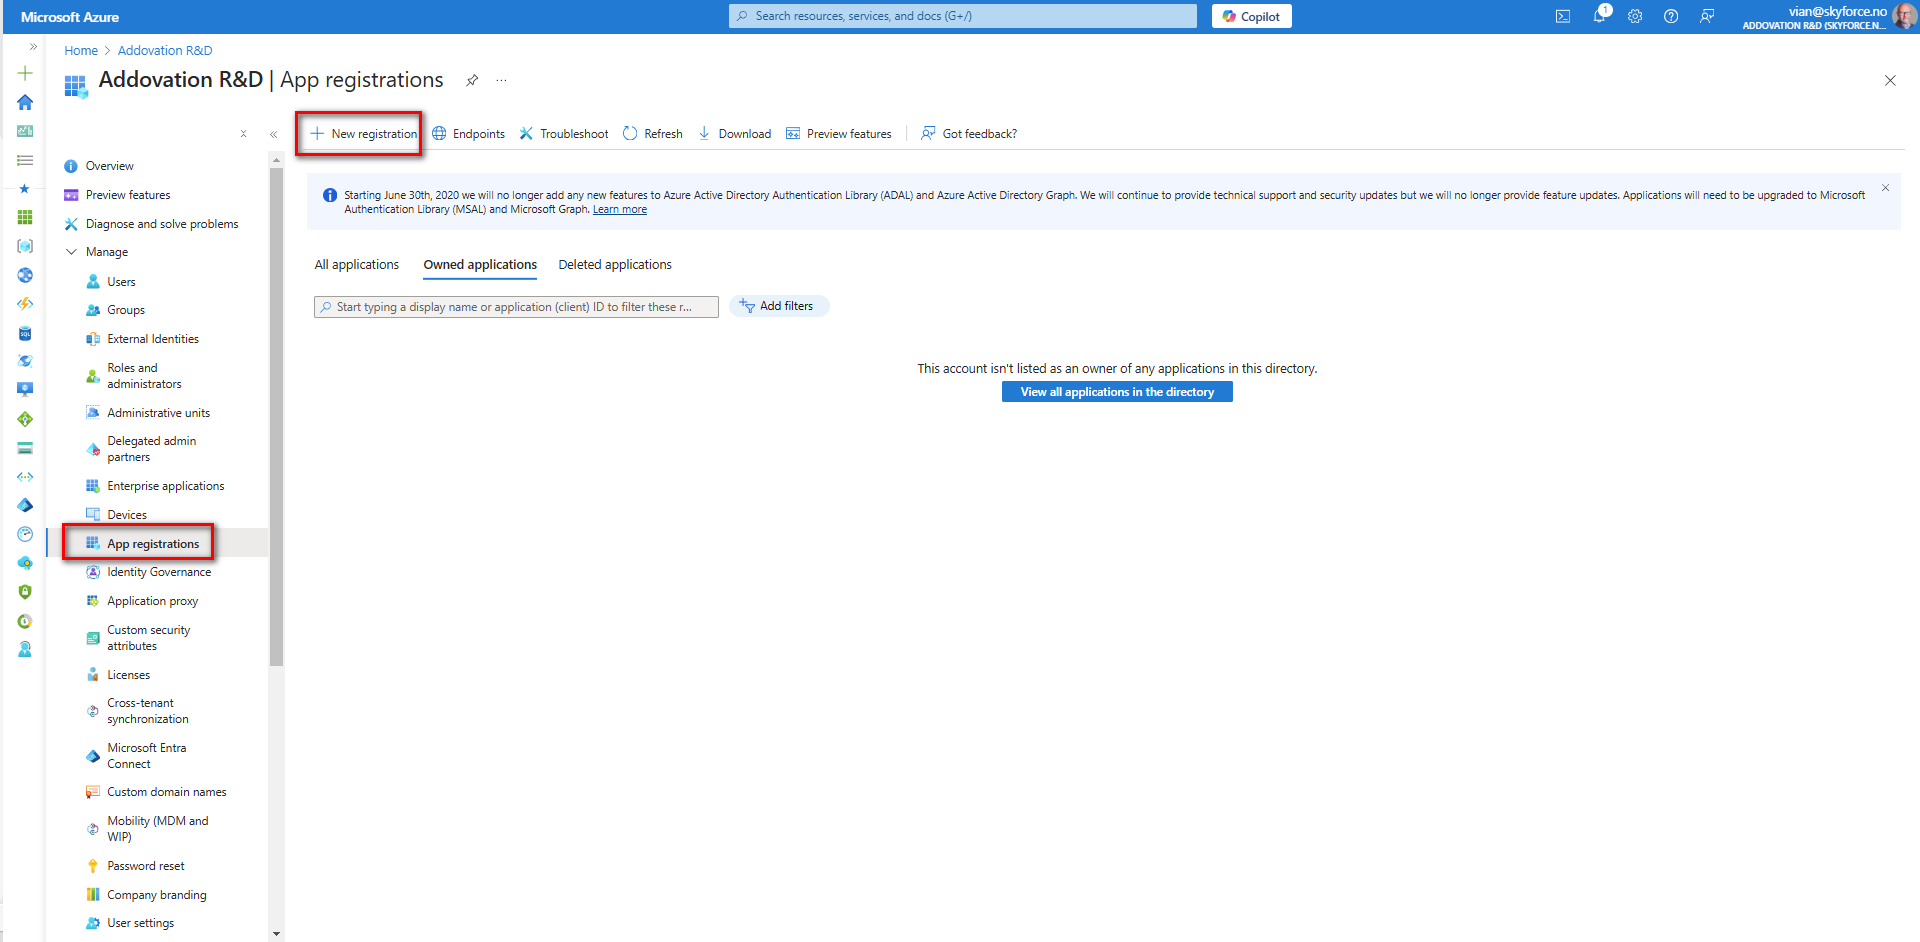
- Select App Registration from left side menu and select
New Registration
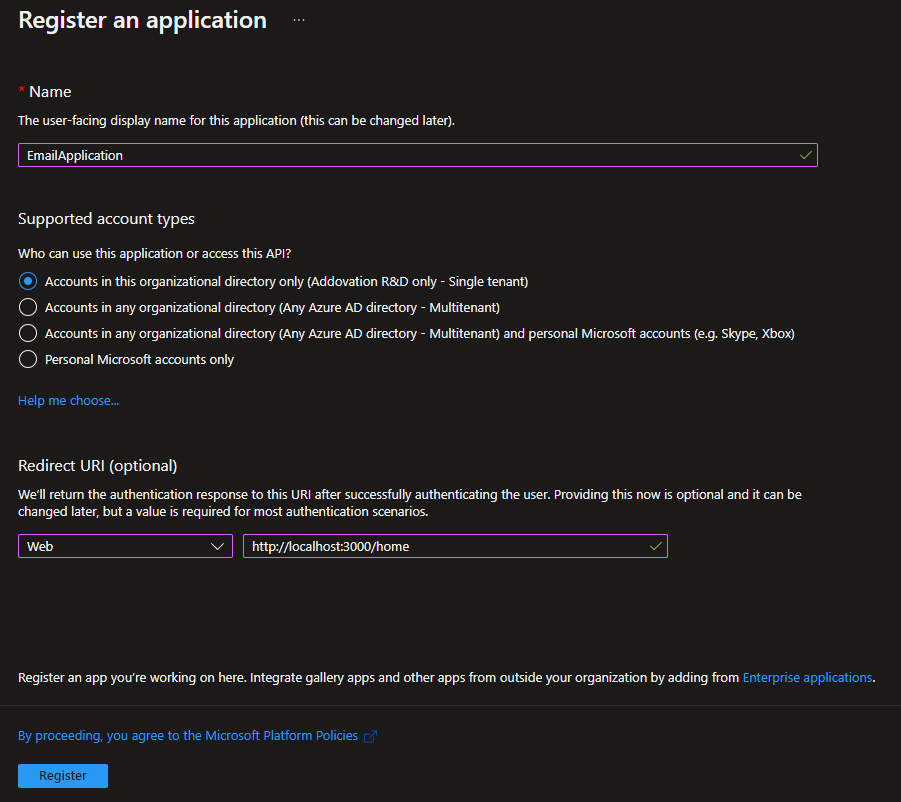
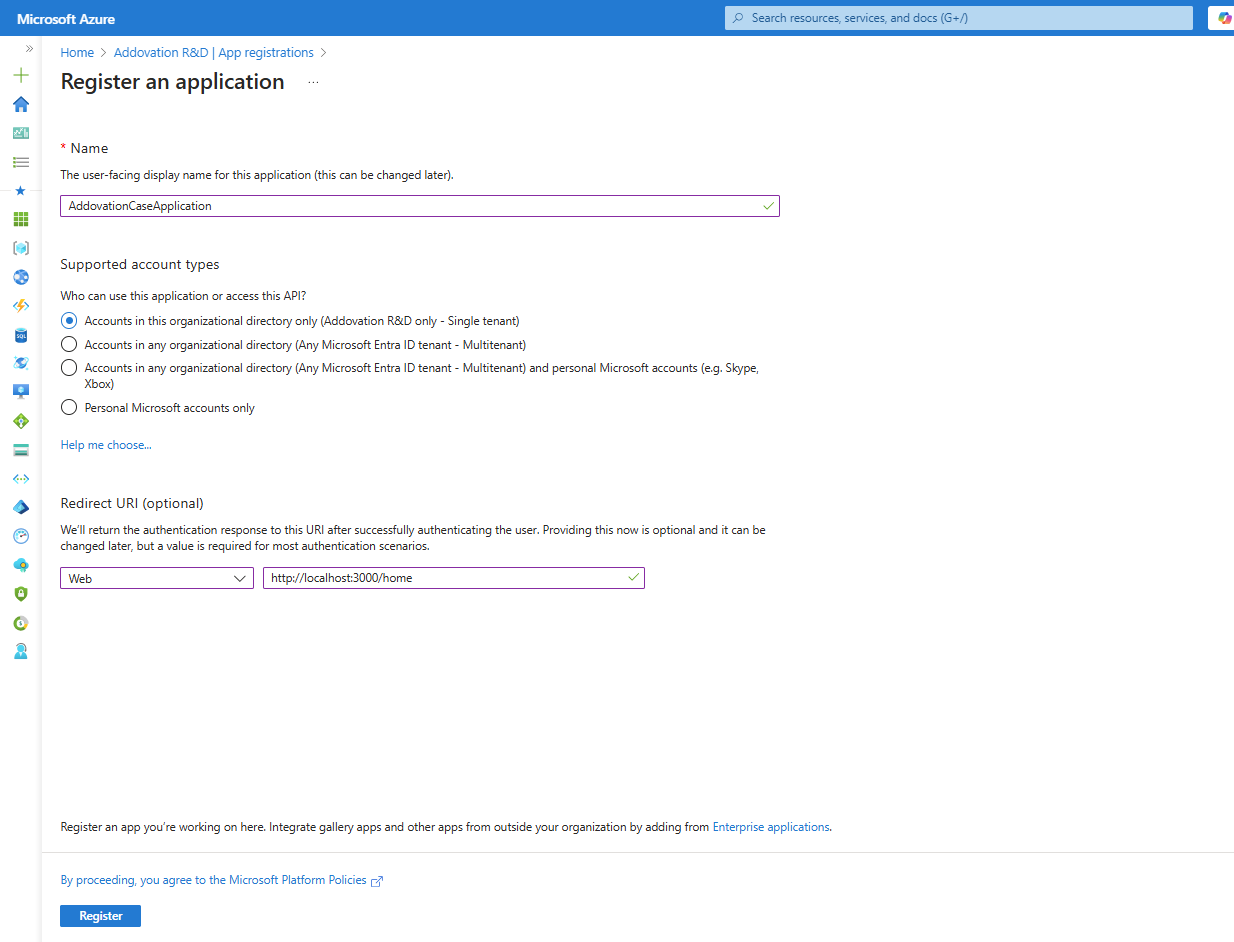
- Provide a unique
Namefor the app - Select
Account typesbased on the access requirement - Select a platform as
Weband provide the default urlhttp://localhost:3000/home - Select
Register
- After few seconds, you will be redirected to the newly created application overview
Request Token
Addovation Sync - Case requires token to authenticate email account. Following steps allow pass the token to Addovation Sync - Case at the account authentication.
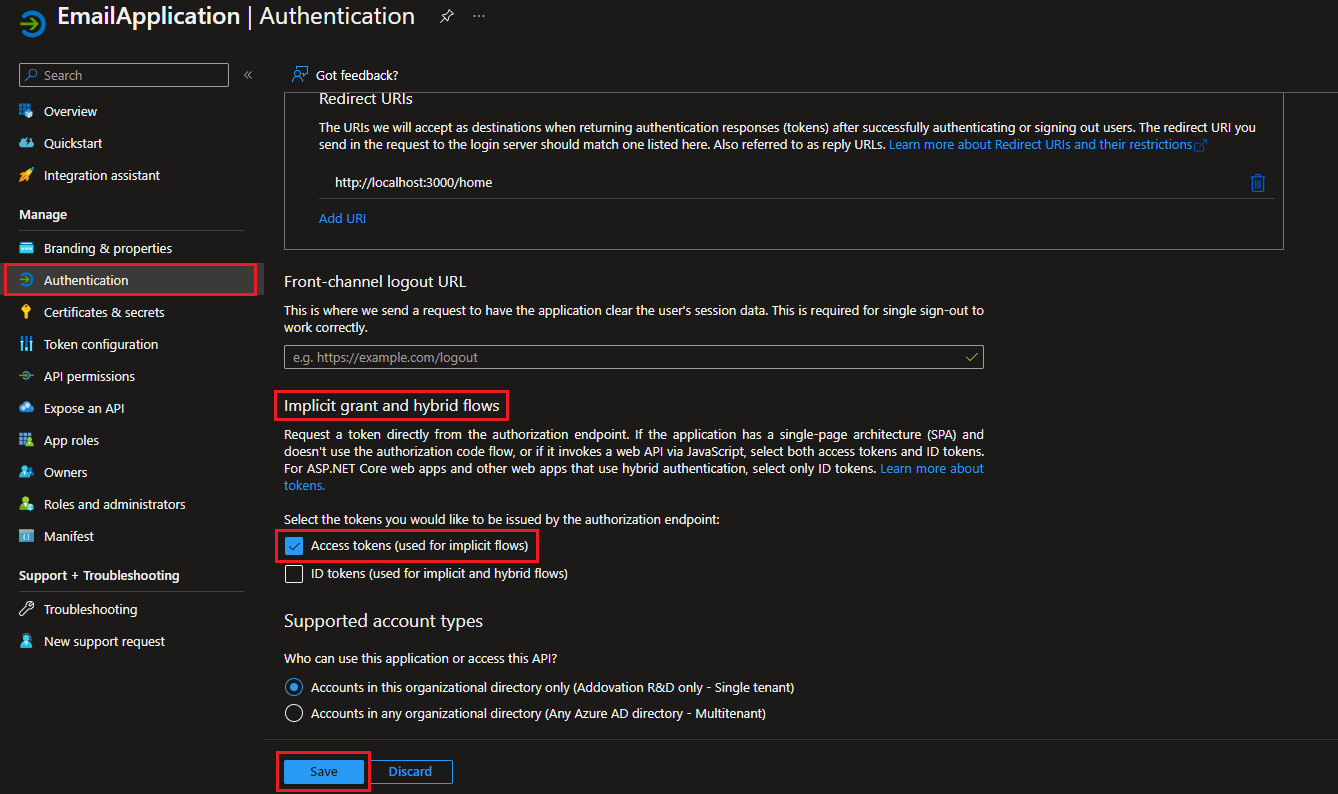
- Go to the Registered Application
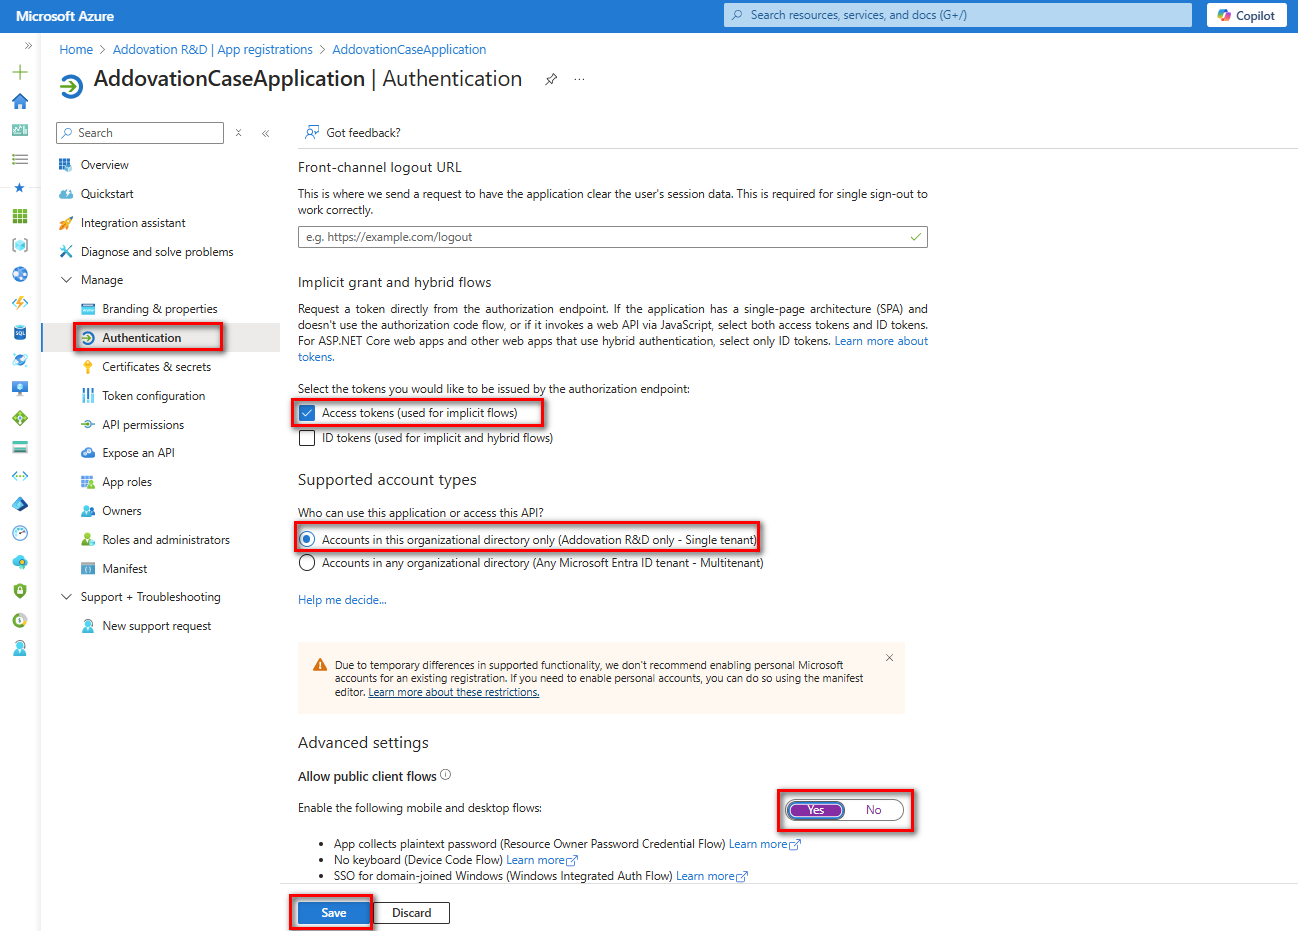
- Select
Authentication - Scroll down to
Implicit grant and hybrid flows - Select
Access Tokenfrom given options - Select
Savebutton
Add API Permissions
Application needs to permit following scopes with the aim of authenticating resources to email account/s.
- https://outlook.office.com/IMAP.AccessAsUser.All
- https://outlook.office.com/POP.AccessAsUser.All
- https://outlook.office.com/SMTP.Send
Follow the steps to add above scopes to application permissions
- Go to the Registered Application
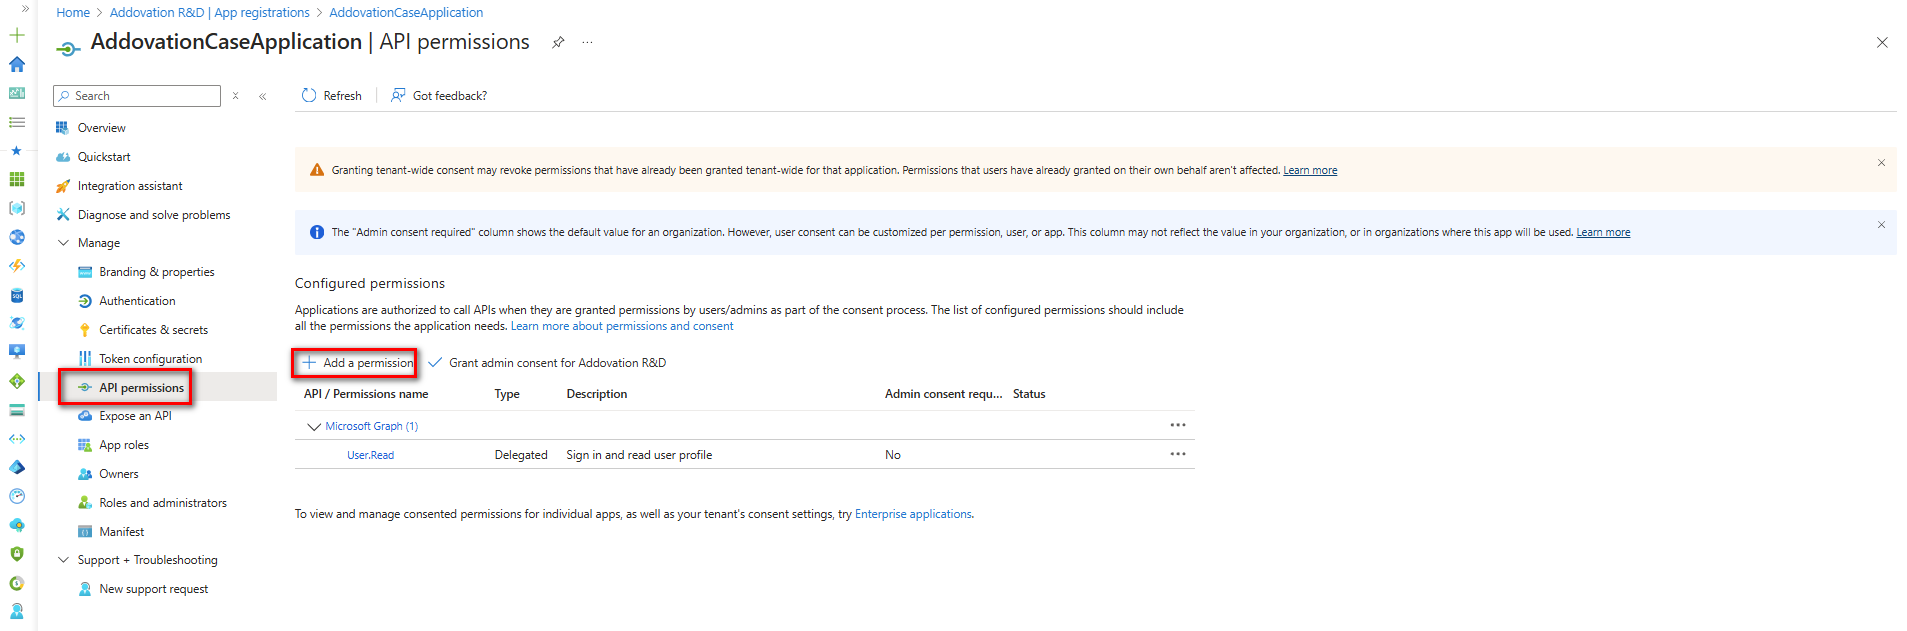
- Select
API Permissions - Select
Add a Permission
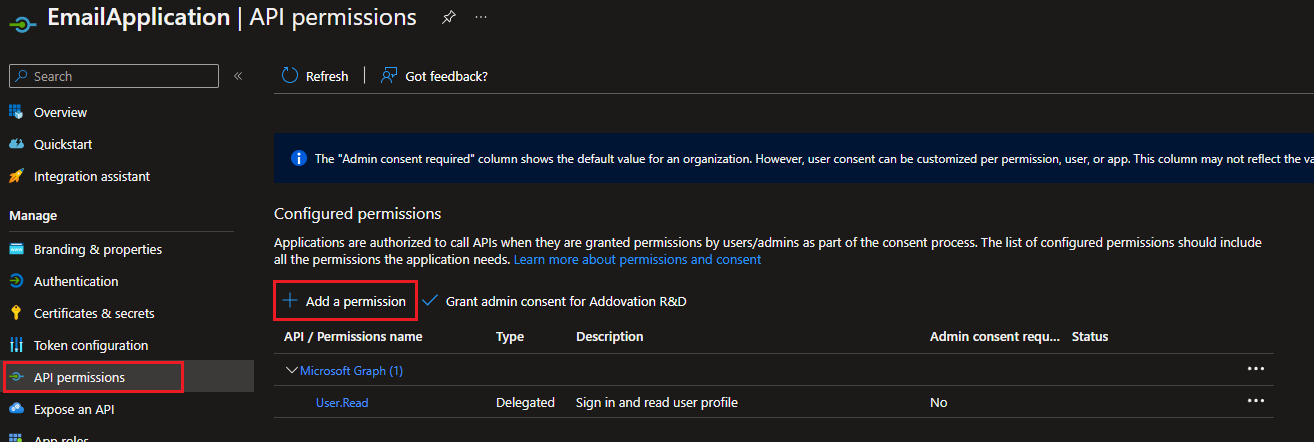
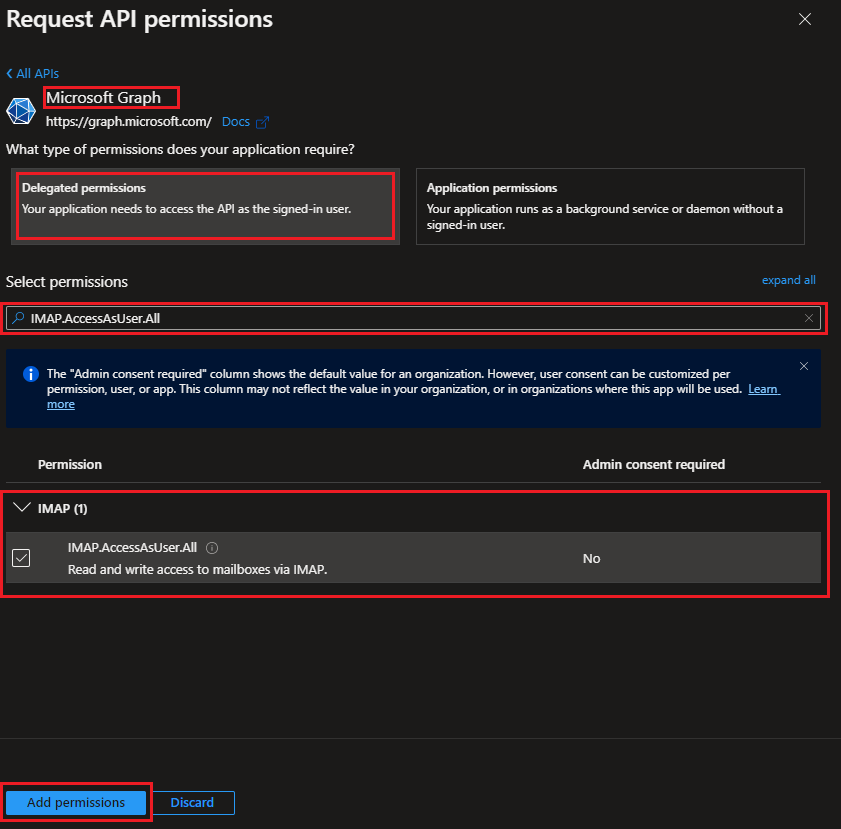
- Go to Microsoft APIs -> Microsoft Graph -> Delegated permissions
- Search for
IMAP.AccessAsUser.All - Expand ‘IMAP’ and select
IMAP.AccessAsUser.All - Select
Add permissions
- Repeat the same steps for
POP.AccessAsUser.AllandSMTP.Send
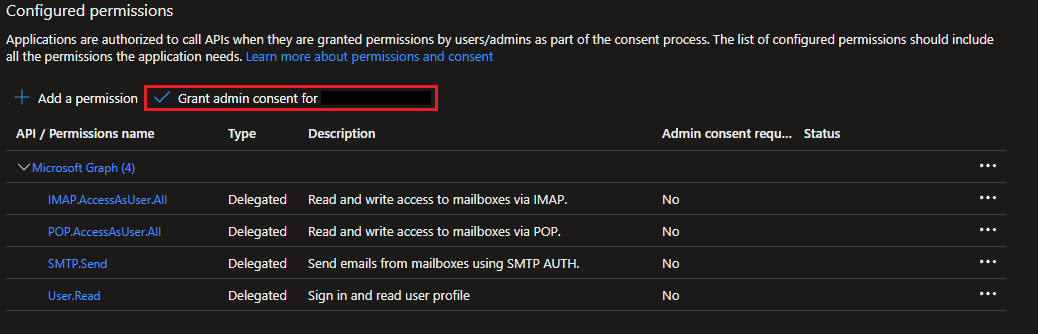
- Select
Grand admin consent for [Tenant]and selectYes
Required information to configure email account/s
- Tenant ID
- Client ID
Above information is required from registered Azure AD Application. Follow these steps to obtain them
- Go to the Registered Application
- Select
Overview
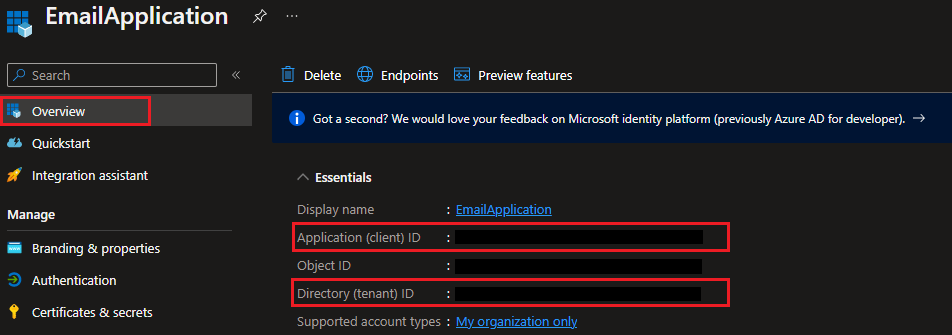
Provide the following information to your representative at Addovation
- Directory (tenant) ID
- Application (client) ID
Setting Up Multi-Factor Authentication for Email Account Access in Azure AD
This section applies to organizations that require multi-factor authentication for accessing email accounts in Azure AD.
Creating a New App Registration in Azure
To create a new app registration, go to
Microsoft Entra IDin the Azure Portal.From the left navigation menu, select
App Registrationsand then click onNew Registration.
Provide a unique name for the application and select the
Account typebased on the access requirements.Choose the
PlatformasWeband enter the default URL:http://localhost:3000/home.Once all details are filled in, click
Register.
- After a few seconds, you will be redirected to the overview page of the newly created application. This completes the app registration process.
Requesting a Token
To request a token, navigate to the Registered Application in the Azure Portal and select
Authenticationfrom the left navigation pane.Scroll down to the
Implicit Grant and Hybrid Flowssection and enable theAccess Tokenoption.Ensure that under Advanced Settings, the option
Allow public client flowsis set toYes. Once these settings are configured, clickSave.
Adding API Permissions
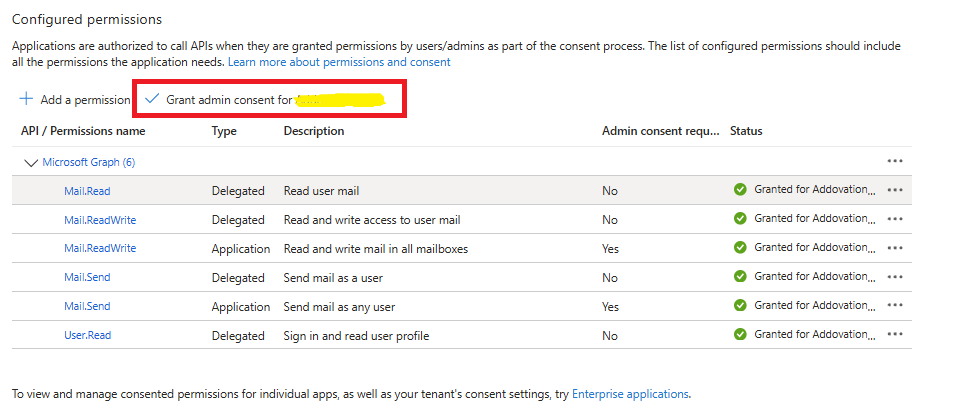
To configure API permissions for the application, you need to grant the required scopes. The application requires the following permissions:
- Mail.Read – Read user mail
- Mail.ReadWrite – Read and write access to user mail
- Mail.ReadWrite – Read and write mail in all mailboxes
- Mail.Send – Send mail as a user
- Mail.Send – Send mail as any user
- User.Read – Sign in and read user profile
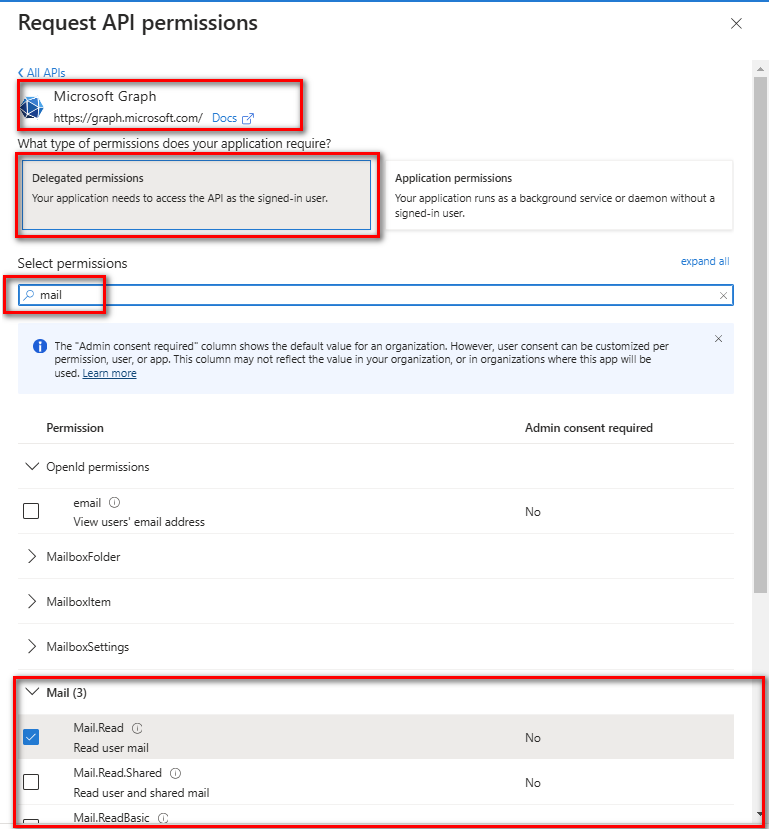
To add these permissions, go to the Registered Application in the Azure Portal and select
API Permissionsfrom the left navigation pane.Then click
Add a Permission.
Navigate to
Microsoft APIs->Microsoft Graph->Delegated Permissions.Search for
mail, expand the Mail section, and selectMail.Read,Mail.ReadWrite, andMail.Send.
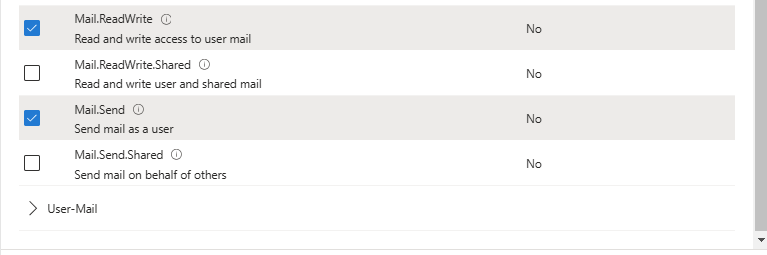
Next, switch to
Application Permissions, search formail, and selectMail.ReadWriteandMail.Send.Click
Add Permissionsto finalize the changes.

- Then, select
Grant admin consentfor [Tenant] and confirm by clickingYes.
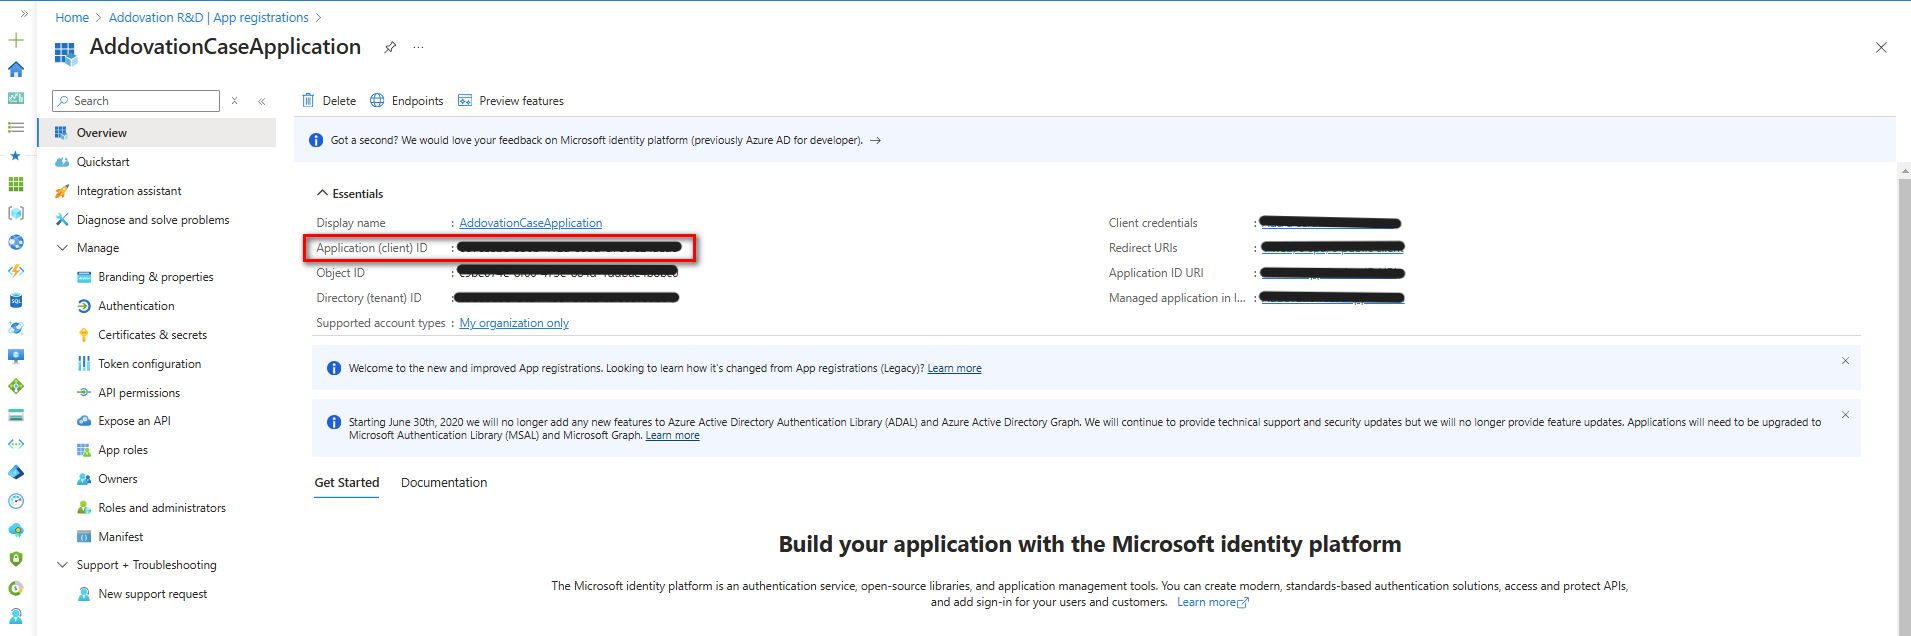
- Now share the
Client IDof the created application with Addovation to complete the setup.
Generate a Certificate
Generate a certificate and upload the public key to your Application Registration. You can create a certificate using Azure Key Vault or self-signed.
Using Azure Key Vault is recommended for production. This is the most secure option. The private key is generated inside Key Vault and never exists outside it. If you choose this option create a certificate and download the public key only in CER format.
A script example for using self-signing:
$cert = New-SelfSignedCertificate `
  -Subject "CN=AddovationSync-Prod" `
  -CertStoreLocation "Cert:\LocalMachine\My" `
  -KeyExportPolicy NonExportable `
  -KeySpec Signature `
  -KeyLength 2048 `
  -HashAlgorithm SHA256 `
  -NotAfter (Get-Date).AddYears(2)
Export the public key only:
Export-Certificate `
  -Cert $cert `
  -FilePath "C:\Certs\AddovationSync-Prod.cer"
Please, provide the public key securely to Addovation.
Uploading a Certificate
To upload a certificate, navigate to
Certificates & Secretsin the left navigation pane of the Azure Portal.Under the Certificates section, click on
Upload Certificate.
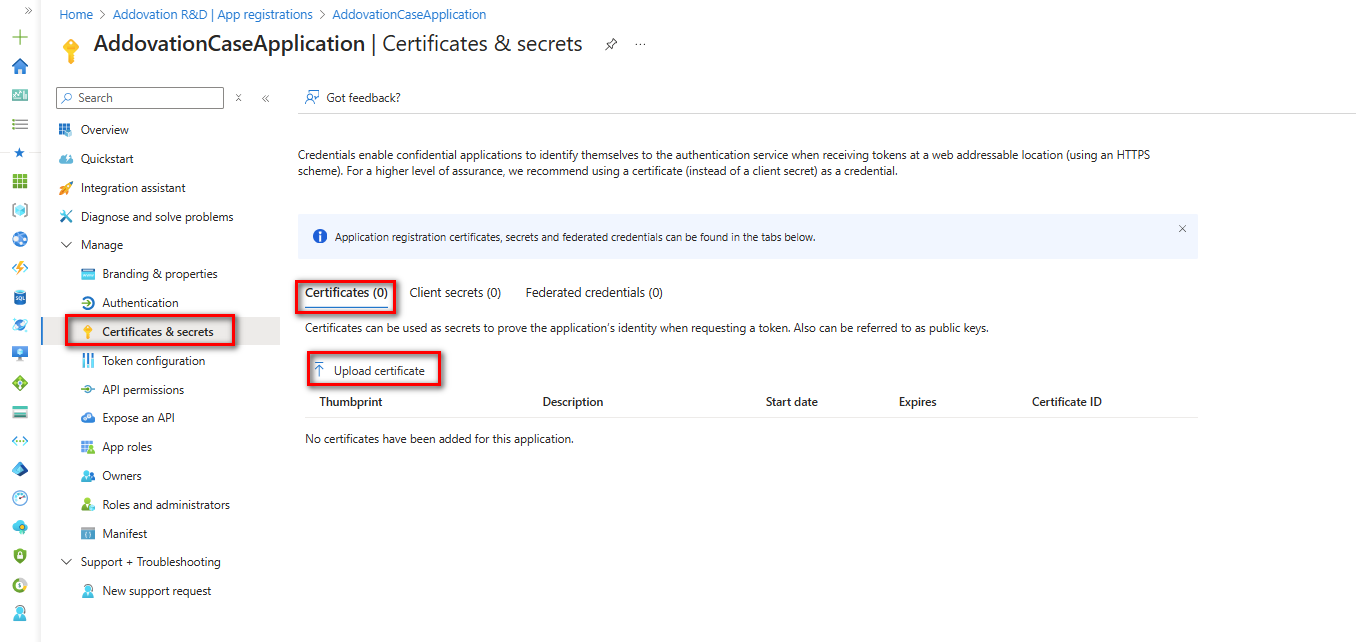
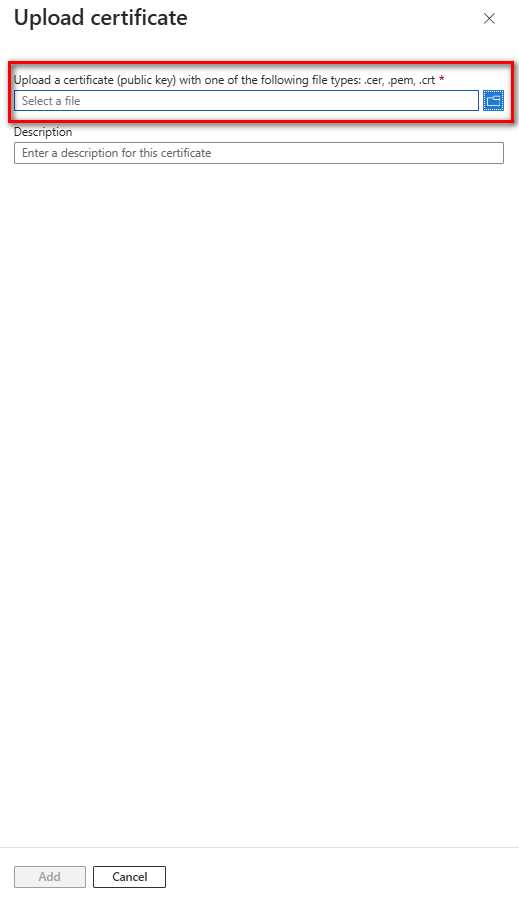
- Select the certificate and upload it in (using one of the supported formats:
.cer, .pem, or .crt).
- Please, note that as the App Registration, Key Vault, and Certificate are set up within your Azure portal, you have the ability to manage and control the level of access to the specific email account as needed.
Restricting Certificate-Based Authentication to Specific Email Addresses
To ensure that only specific email addresses have exclusive access while restricting access for other domain email addresses, follow these steps:
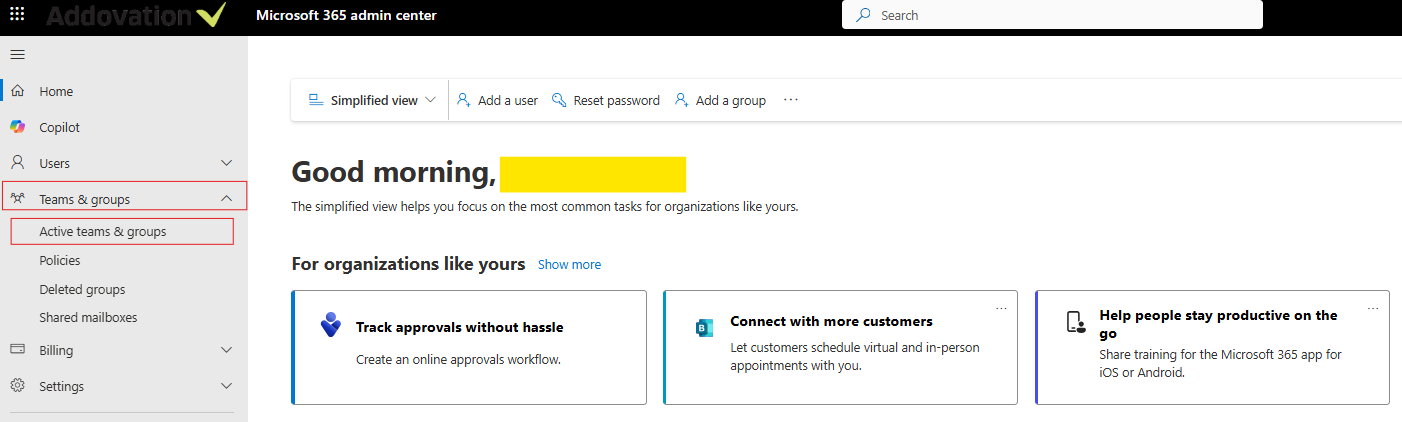
- Navigate to the Microsoft 365 Admin Center portal.
- Go to
Teams & Groups > Active teams & groups.
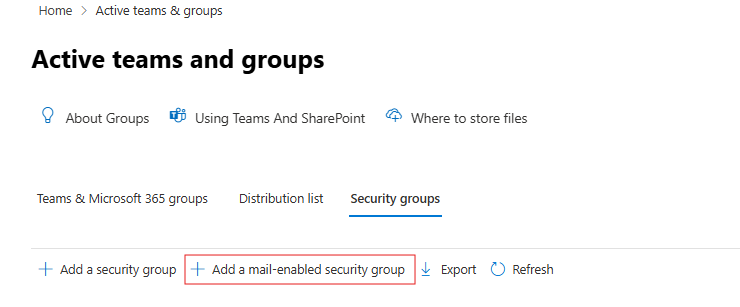
- Go to
Security groupstab and click onAdd a mail-enabled security group
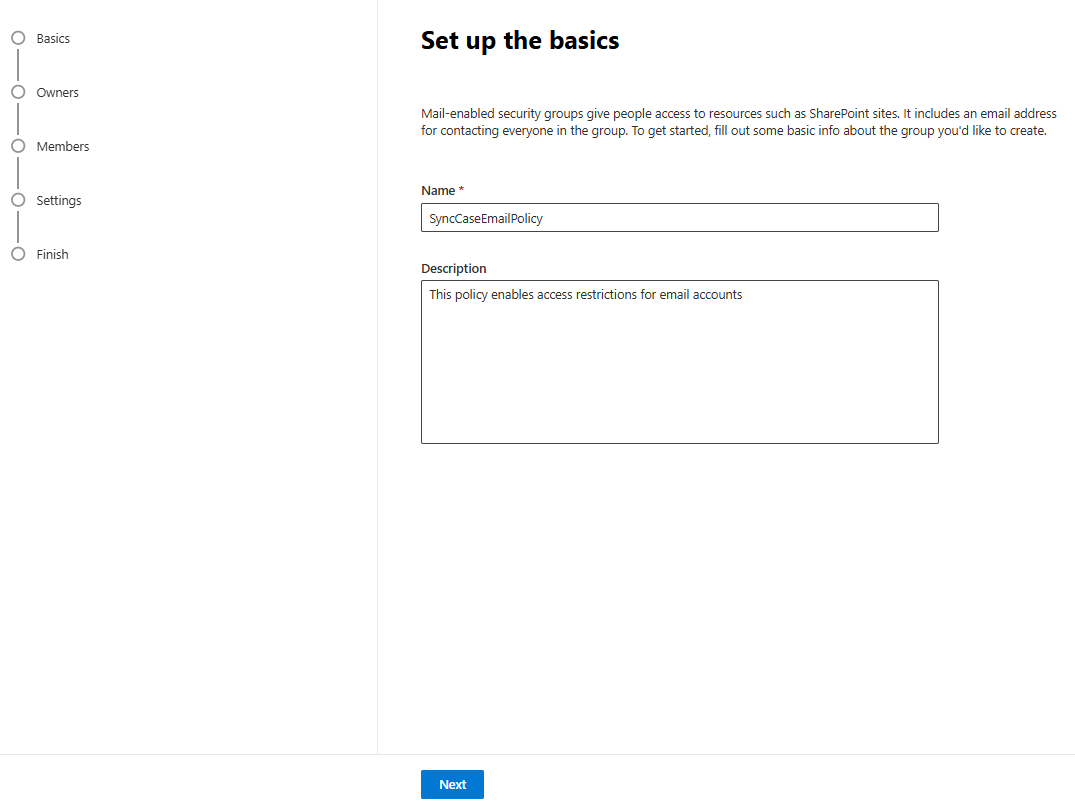
- Provide a
unique nameand an optionaldescriptionfor the group. - Click
Next.
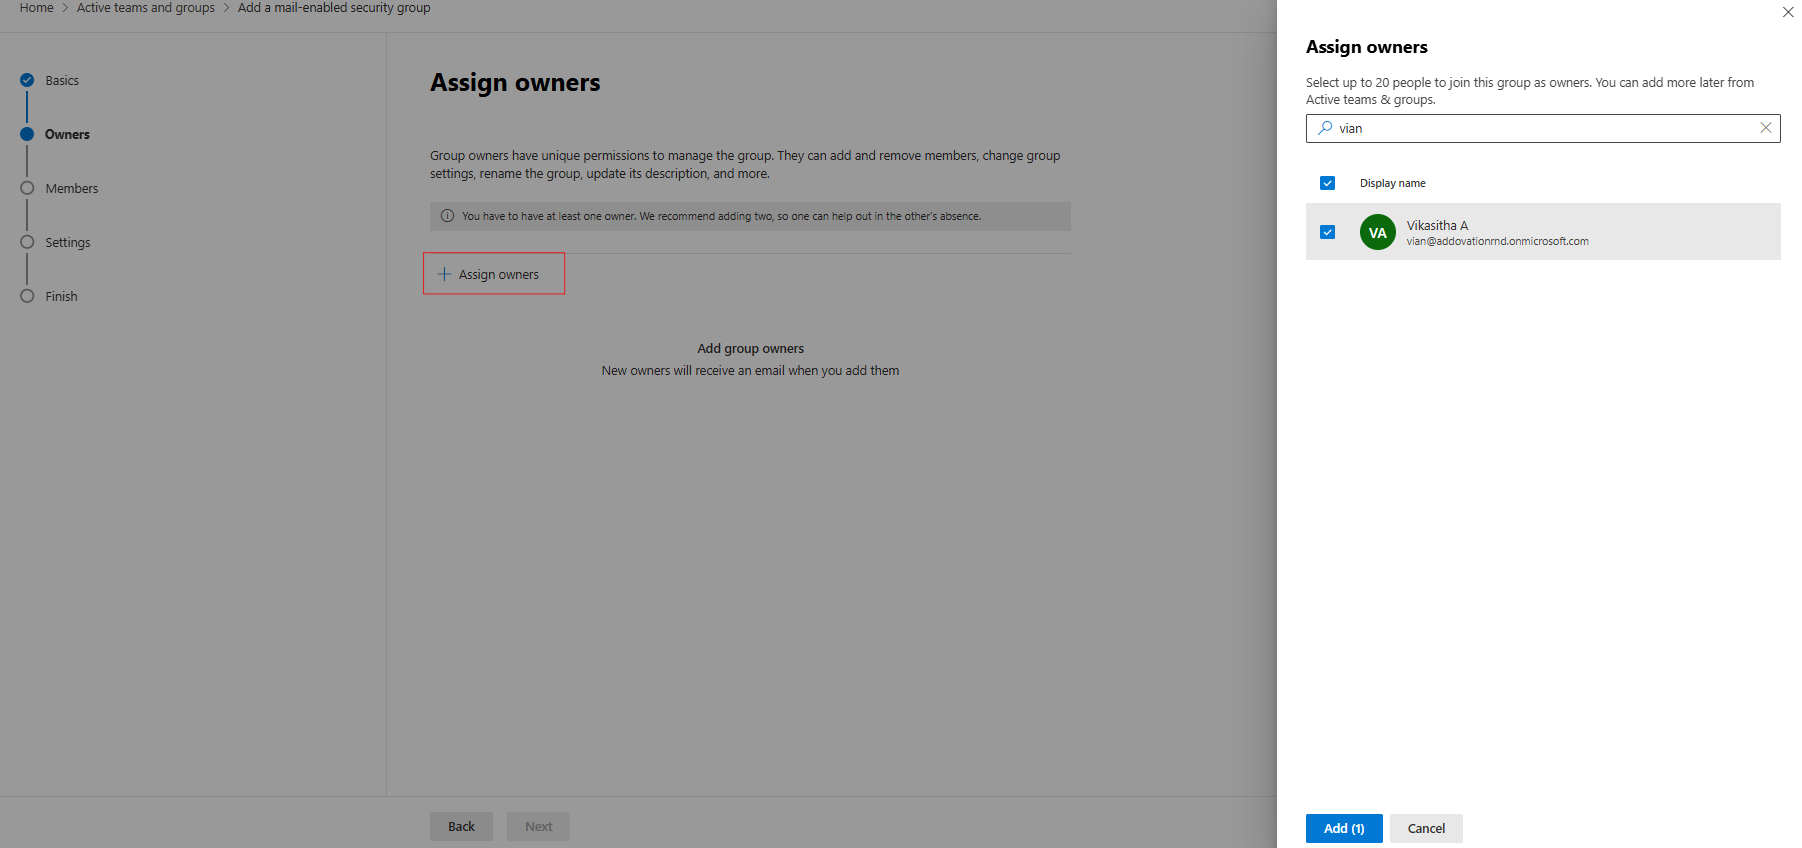
- Click on
Assign owners. - Search for the owner, select them, and click
Add. - Click
Next.
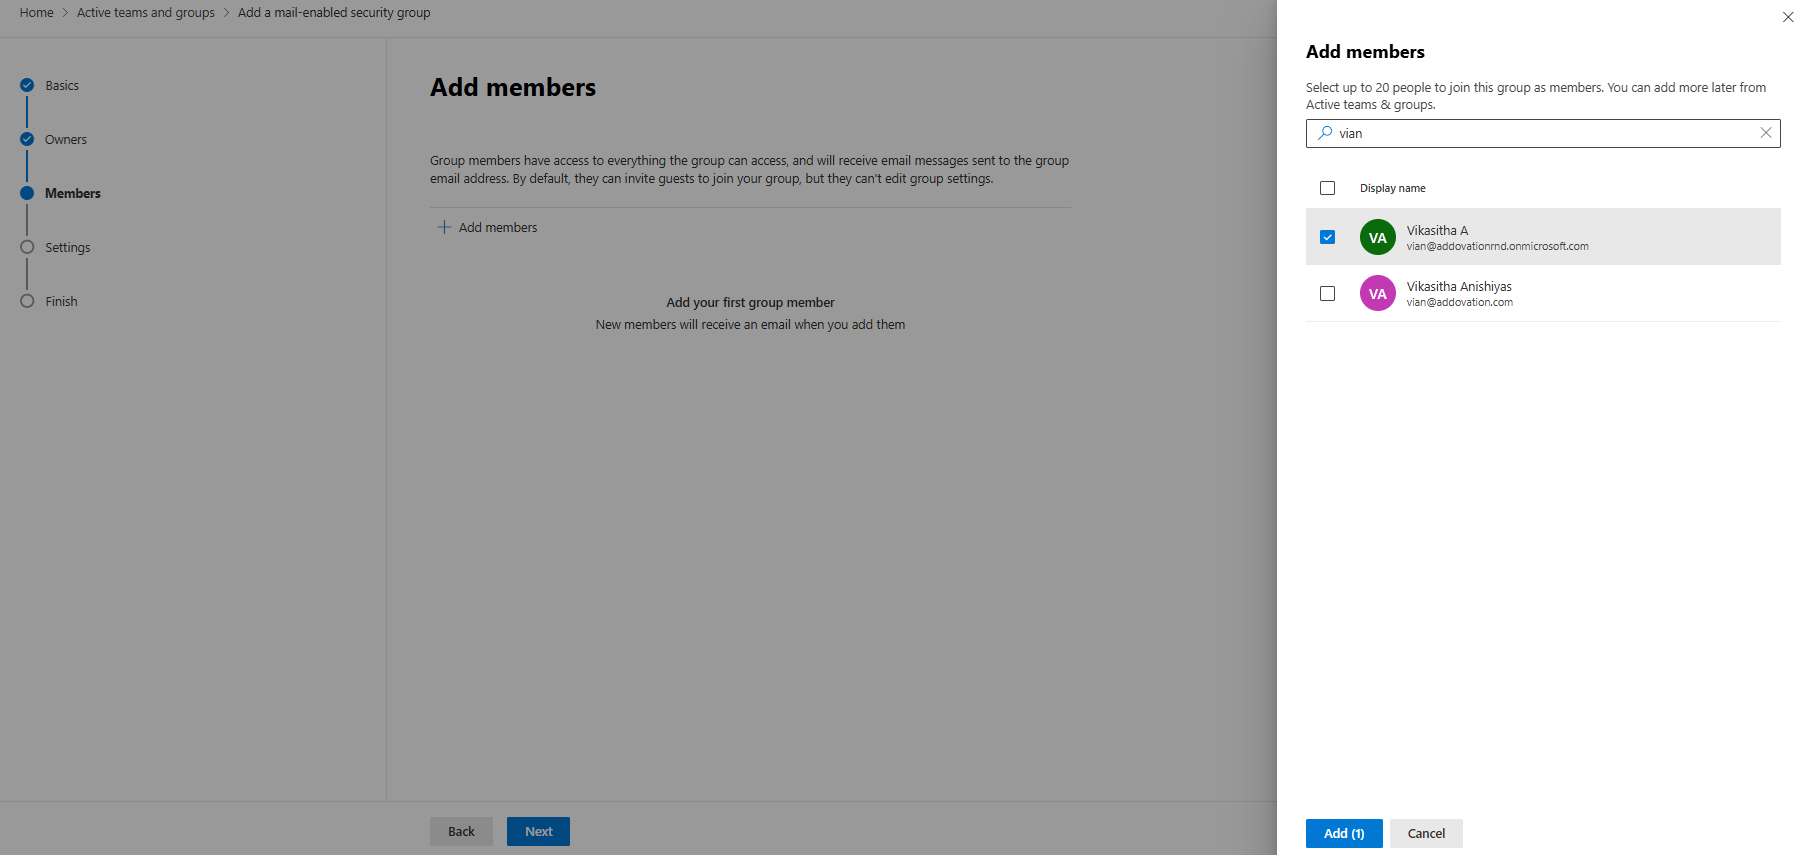
- Click on
Assign members. - Search for the required members, select them, and click
Add. - Click
Next.
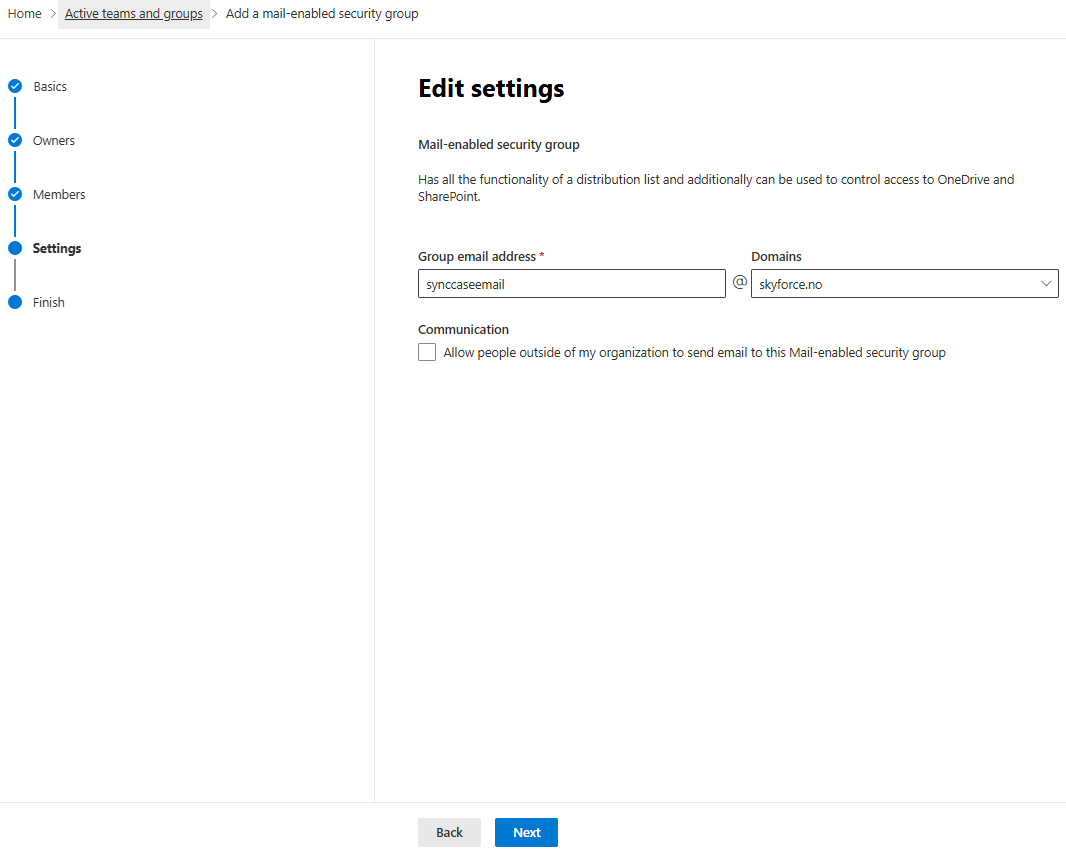
- Provide a
group email address. - Click
Next.
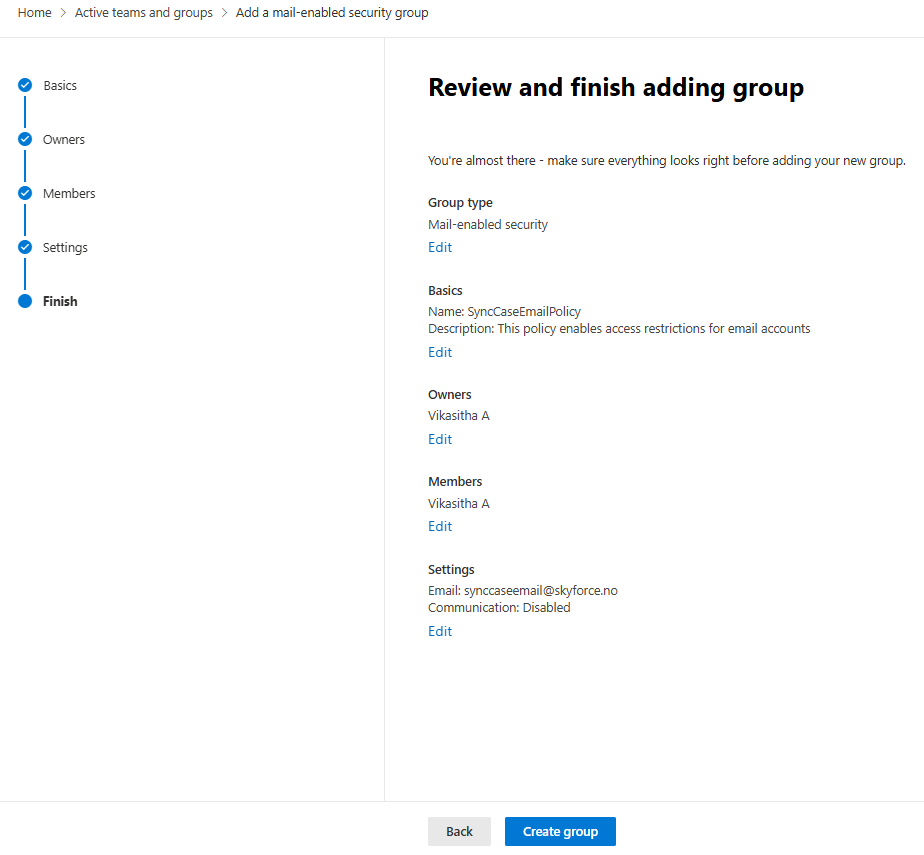
- Review the group details and click
Create group.
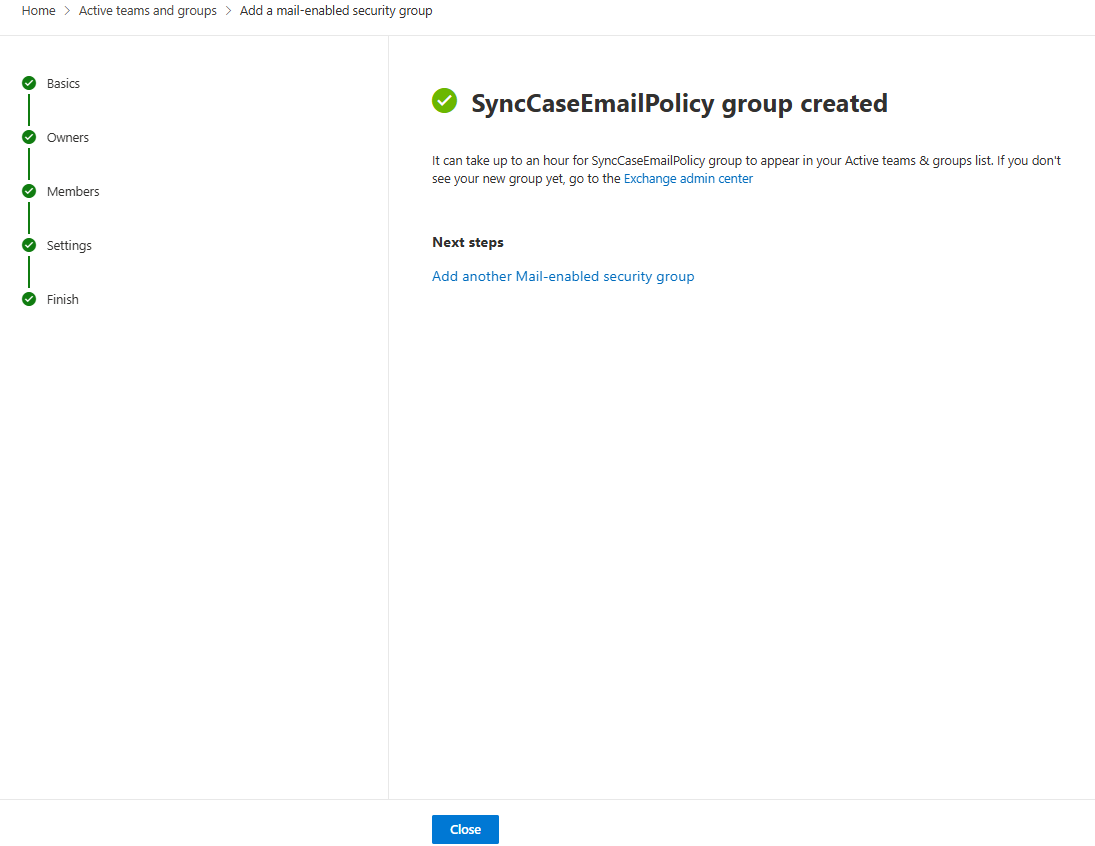
- Once the security group is created, click
Closeto exit.
Apply the Created Group Policy to the App Registration
- Open PowerShell as Administrator.
Connect to Exchange Onlineby running the following command:
Connect-ExchangeOnline -UserPrincipalName [admin email account]

- Create the Application Access Policy using the command below:
New-ApplicationAccessPolicy -AppId [AppID] -PolicyScopeGroupId [Policy Group Email ID] -AccessRight RestrictAccess -Description "Restrict this app to members of the distribution group EvenUsers."

- Verify user access by executing the following command:
Test-ApplicationAccessPolicy -AppId [AppID] -Identity [user@domain.com]


Network Configurations
Click here to read details about network configurations.
Checklist
- Create the App Registration
- Add Microsoft Graph API Permissions
- Restrict to One Mailbox via Exchange Application Access Policy
- Configure Certificate Authentication
- Note the App (client) ID and Directory (tenant) ID, and public key, send these to Addovation