Addovation Sync - Case - User Guide
Last Updated: 2024-11-29
Overview
Customers can fully automate email handling and object flow in IFS Cloud using the Addovation Sync - Case solution. The solution will monitor any email account specified by the customer and automatically check for new messages, attempt to detect existing customers/contacts, and create a case in IFS Cloud.
The email message will be checked in to IFS Cloud and attached to the case. Documents attached to the email can be checked in as document revisions in IFS attached to the case.
Once the case is picked up by the customer’s support team, all correspondence can be handled directly from IFS. The solution will send out automatic replies, based on templates, which can be tailored and personalized.
Following are the steps should follow to complete full flow of IFS call center case scenario.
Create new case as a customer
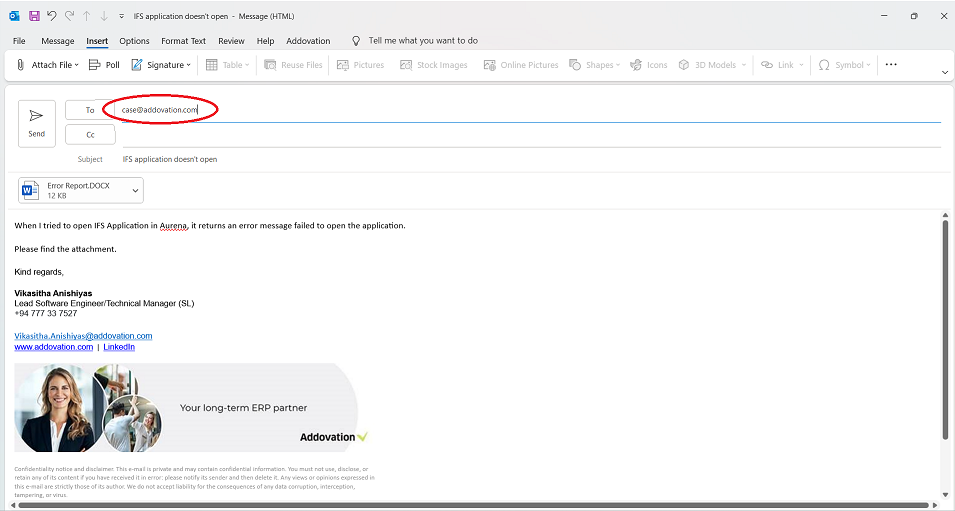
- Open any e-mail client (Ex: Office 365 client).
- Provide an existing e-mail account of a channel which is already configured, in the
Toe-mail address field - Set
CC or BCCe-mail addresses if needed. - Subject is mandatory.
- Attach any document if necessary.
- Type body content if necessary.
- Send e-mail.
- In a few minutes
(approximately less than 2 minutes)you will receive anauto reply messagewith case id for future reference
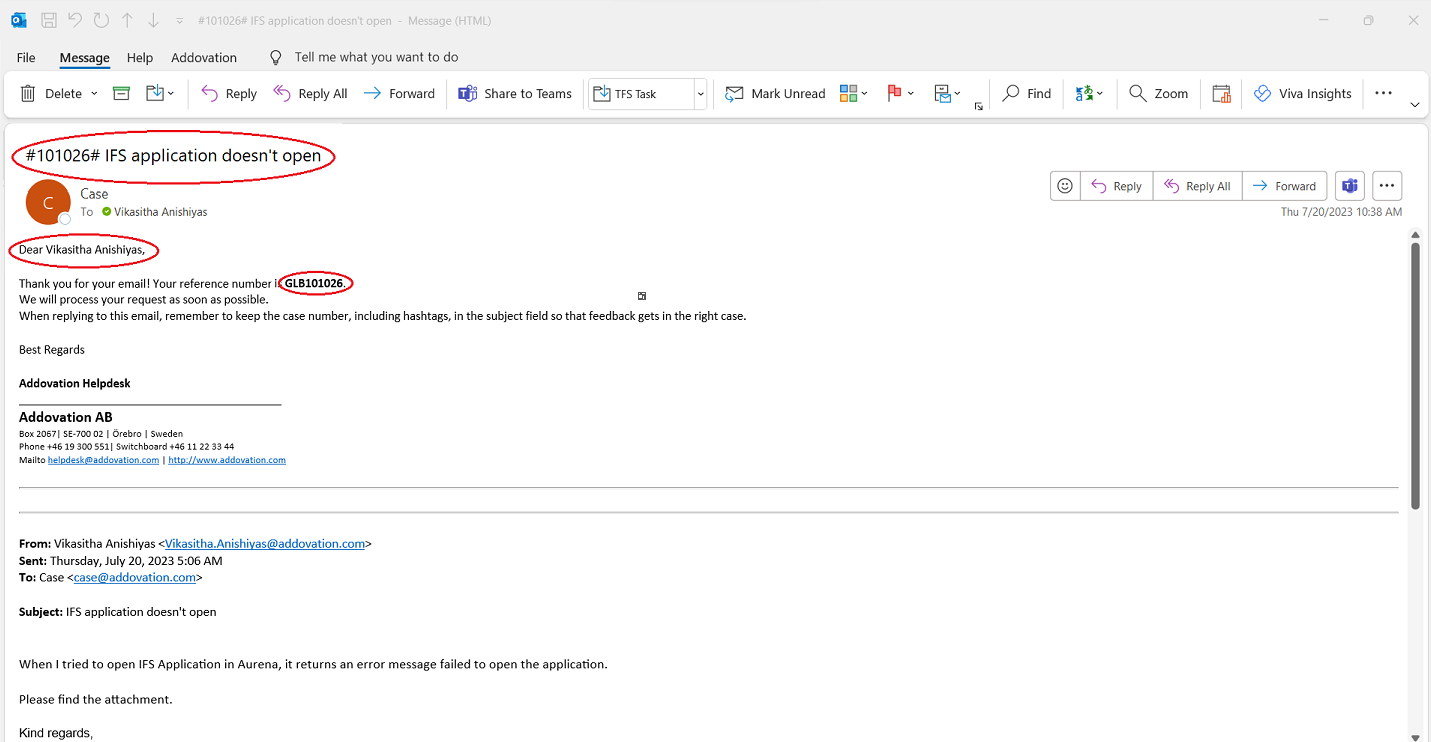
Important
Auto reply e-mail contains case id in subject within ‘#’. Make sure you don't change the case id in subject if you intend to reply for the email message.
Process created IFS call center case
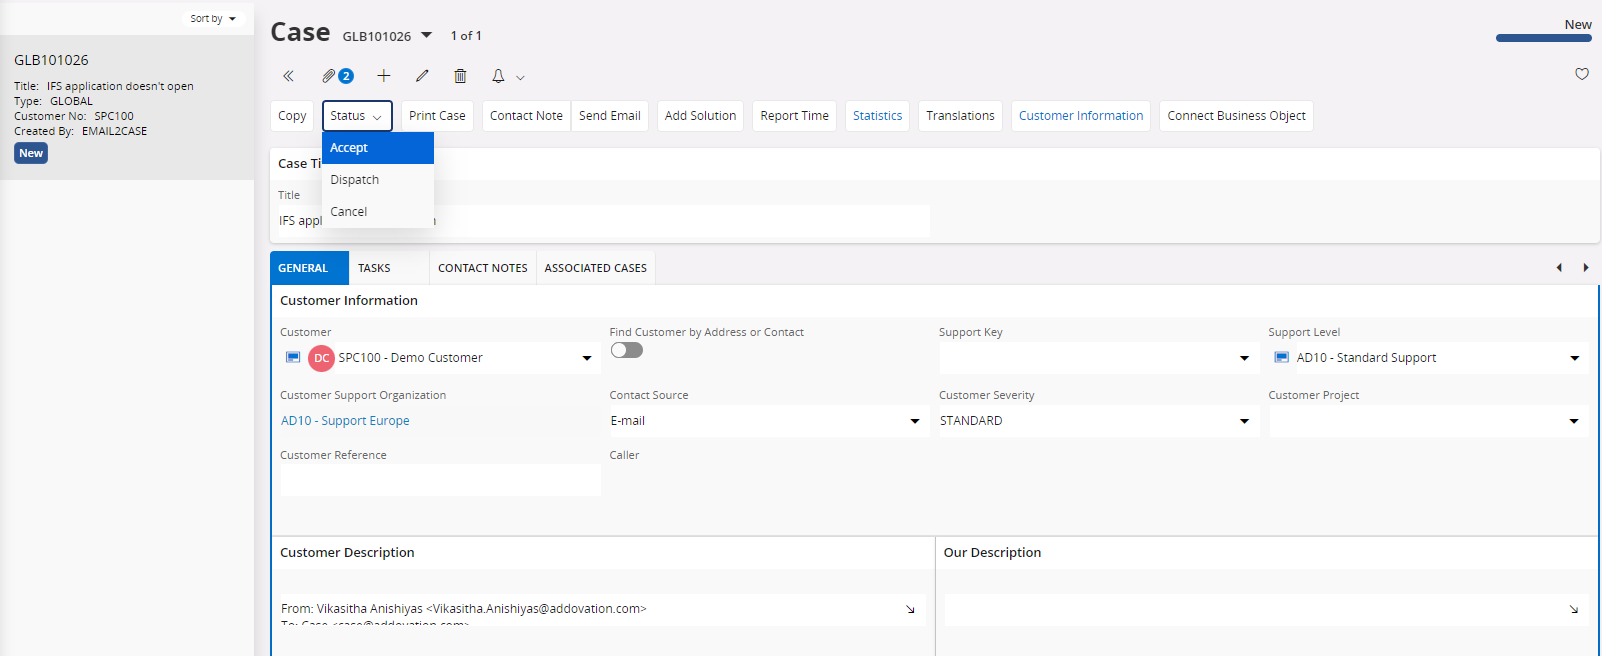
Open case from IFS as customer’s support team
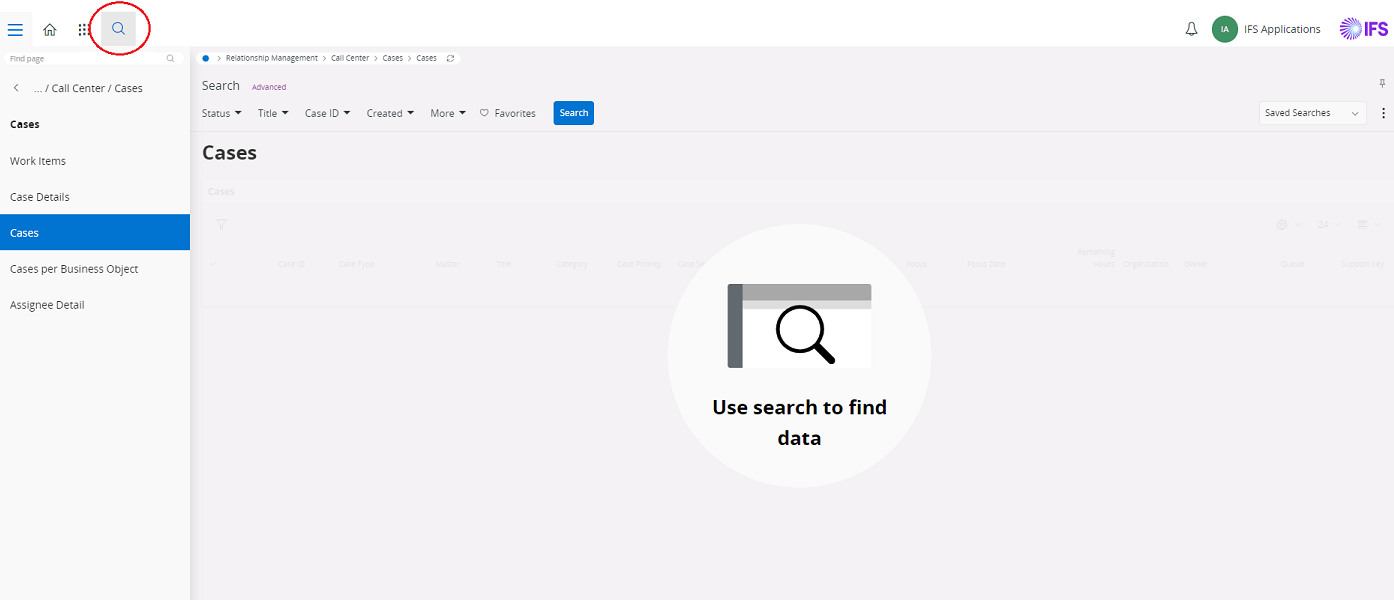
- Once you sign into IFS search
Casein navigator bar or click Relationship Management -> Call Center -> Case
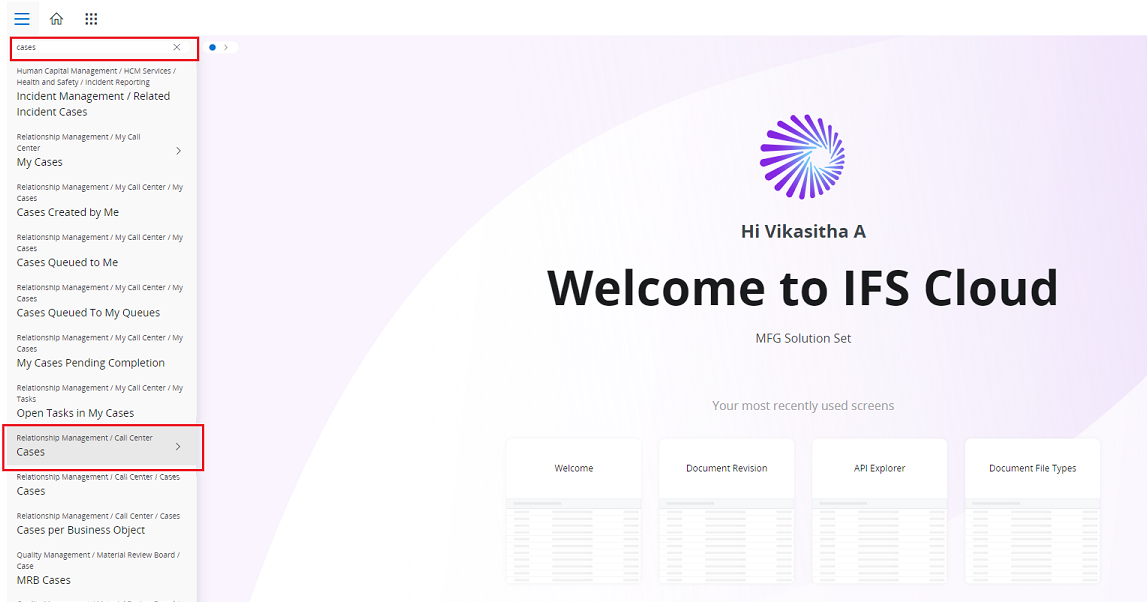
- Click Case from search results
- Click search button icon
- Search required case using any search criteria
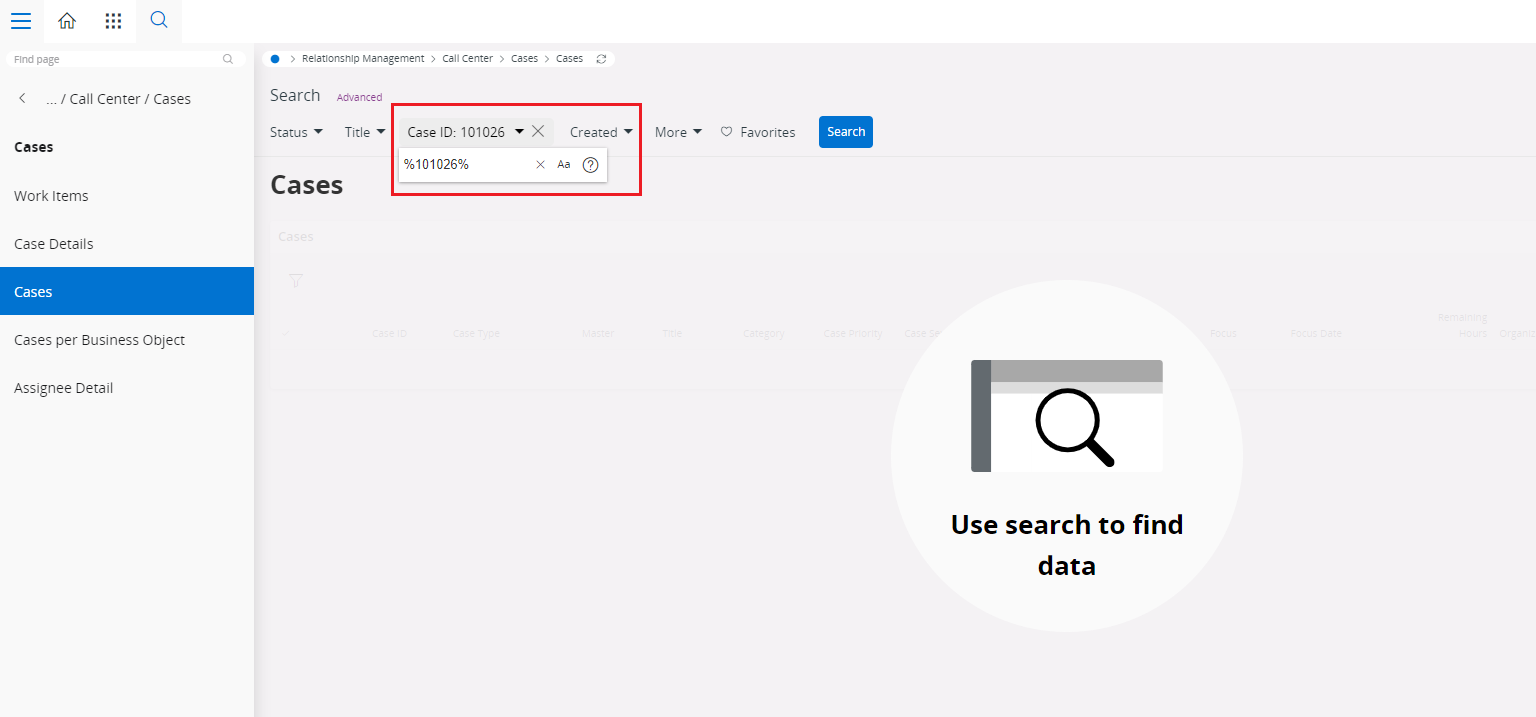
- Click search button once you enter necessary search filters
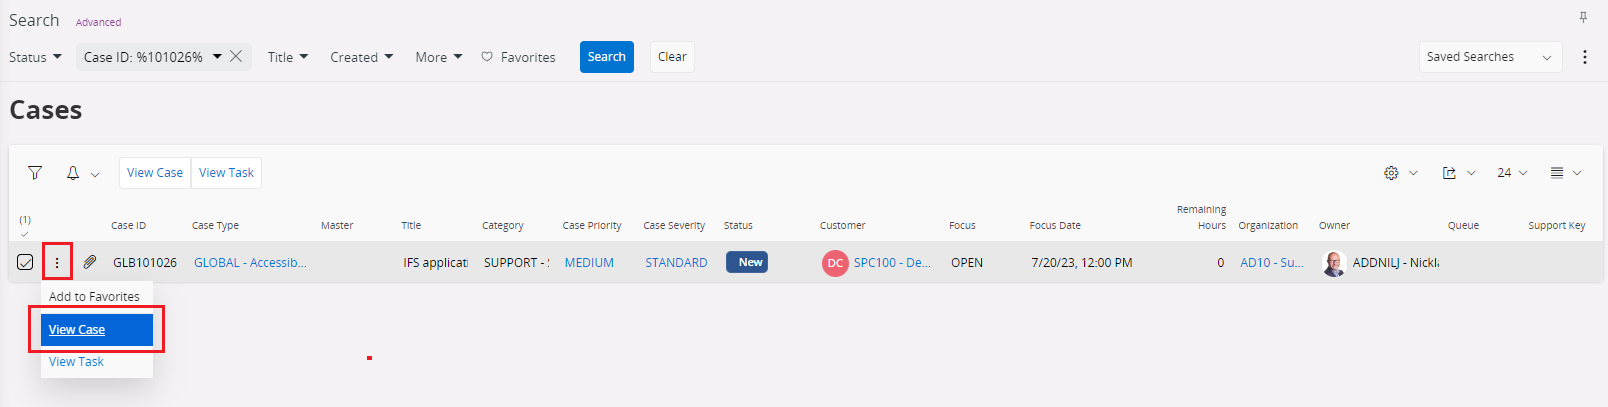
- Click
More Detailsbutton and selectView Case
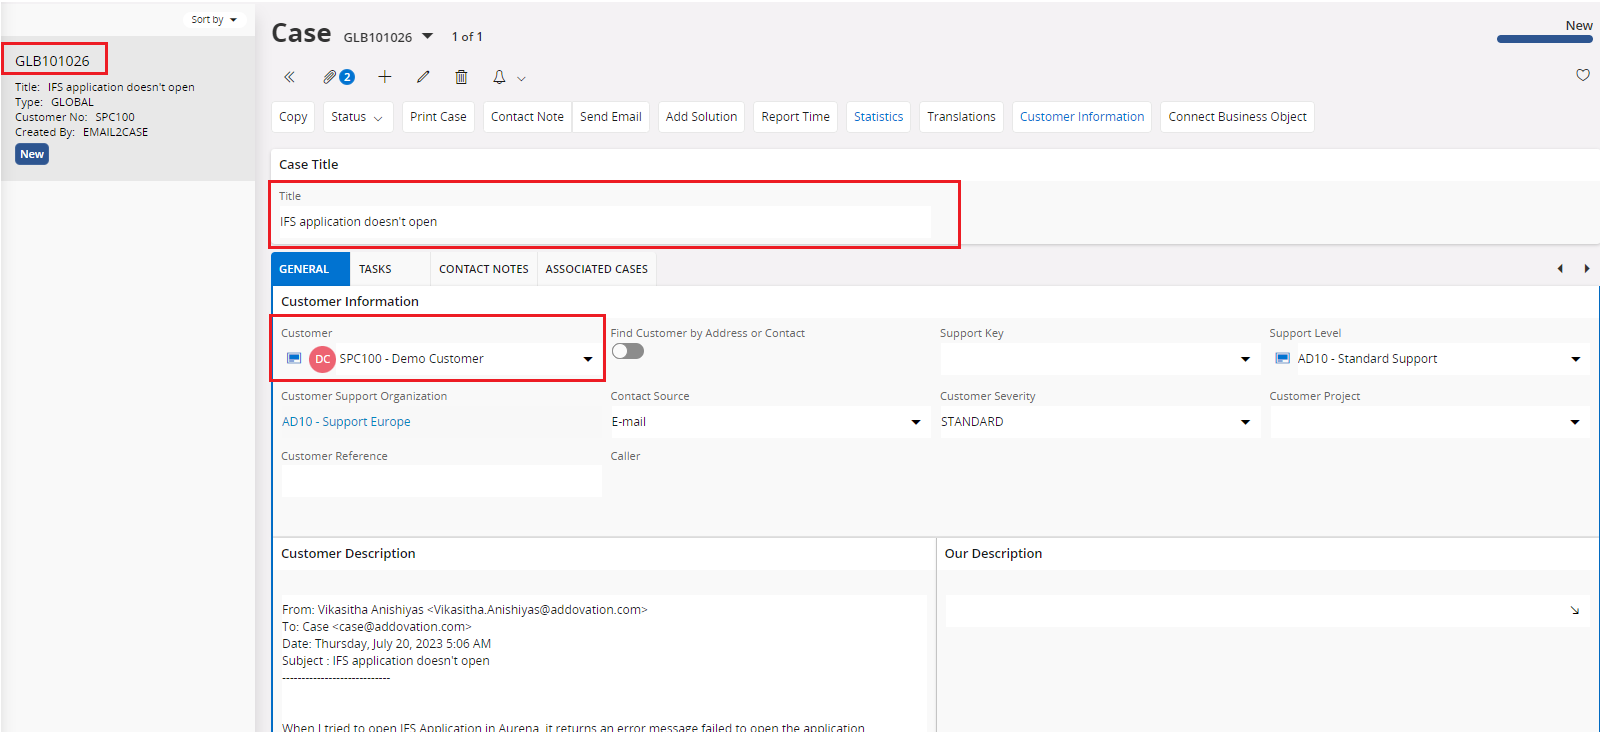
- The e-mail subject should be the
title of the case. - If e-mail is not registered on any customer as a contact, the
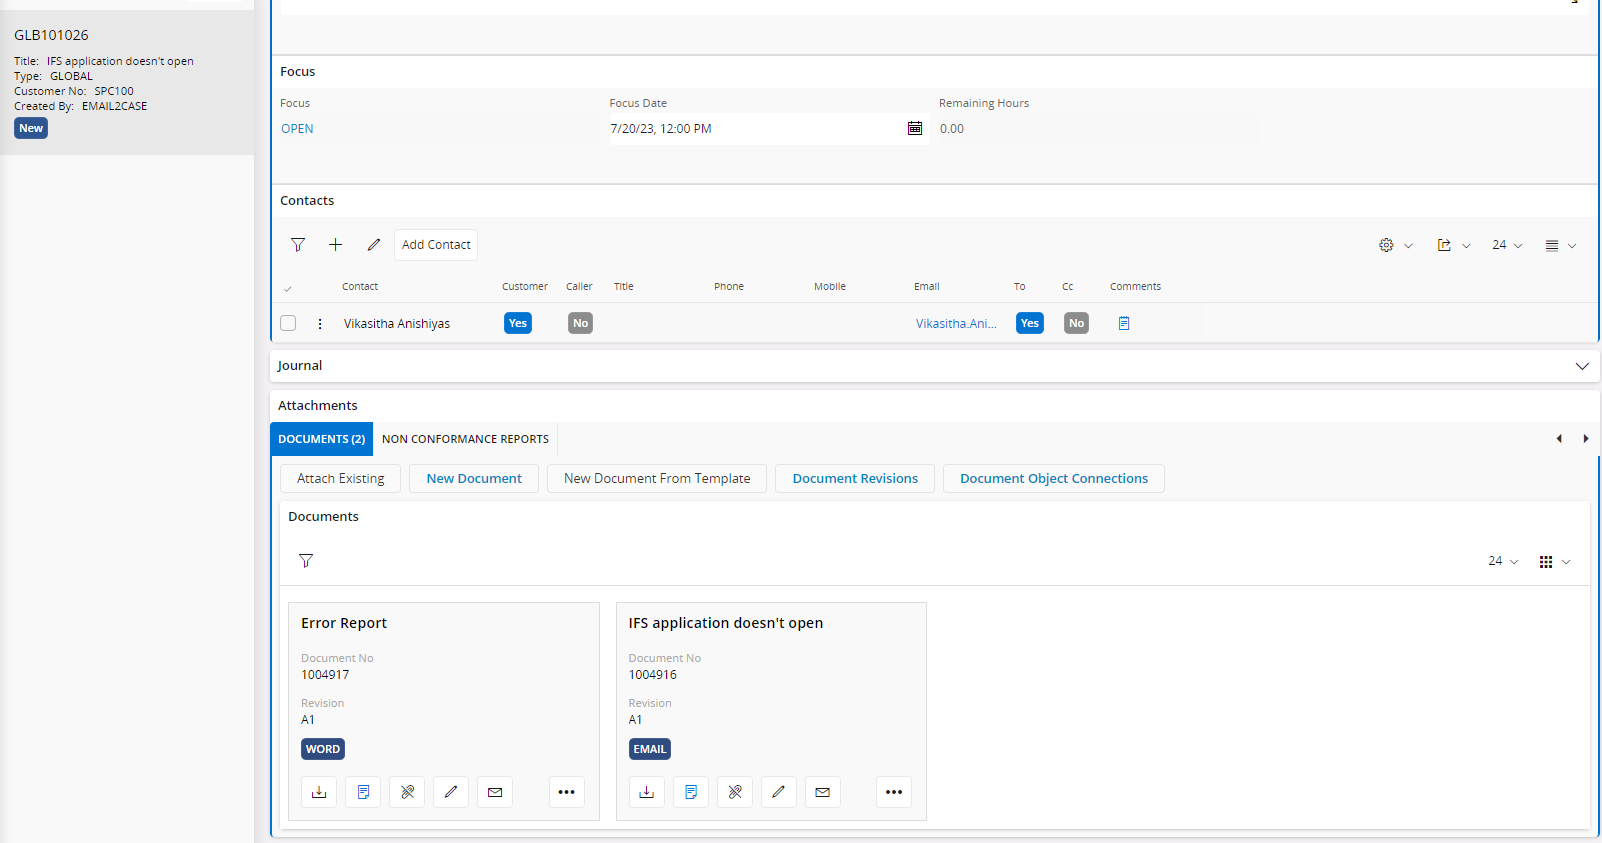
default customerdefined in the configuration will be used. - When you search and find the case created you can see the attached files in it by clicking on ‘Attachments’ below.
- Once you could verify the case data, click
Statusmenu on the top and click ‘Accept’ to open the case
- Enter required details on following form and click ‘Ok’
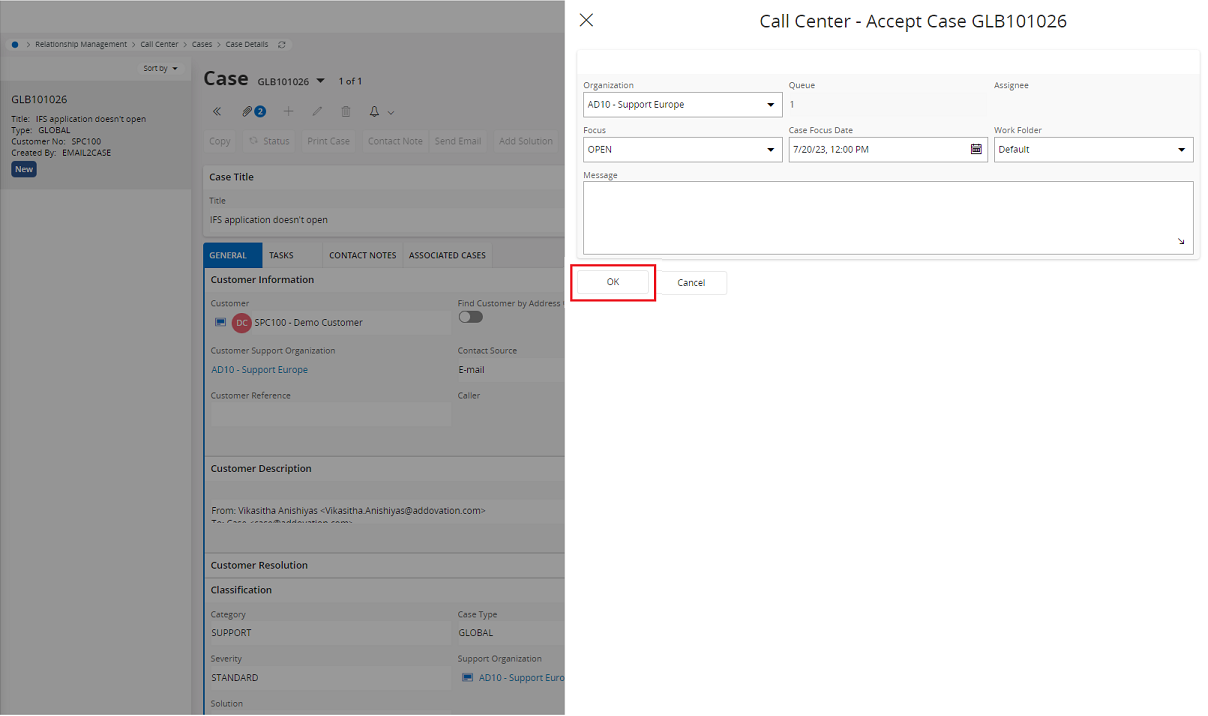
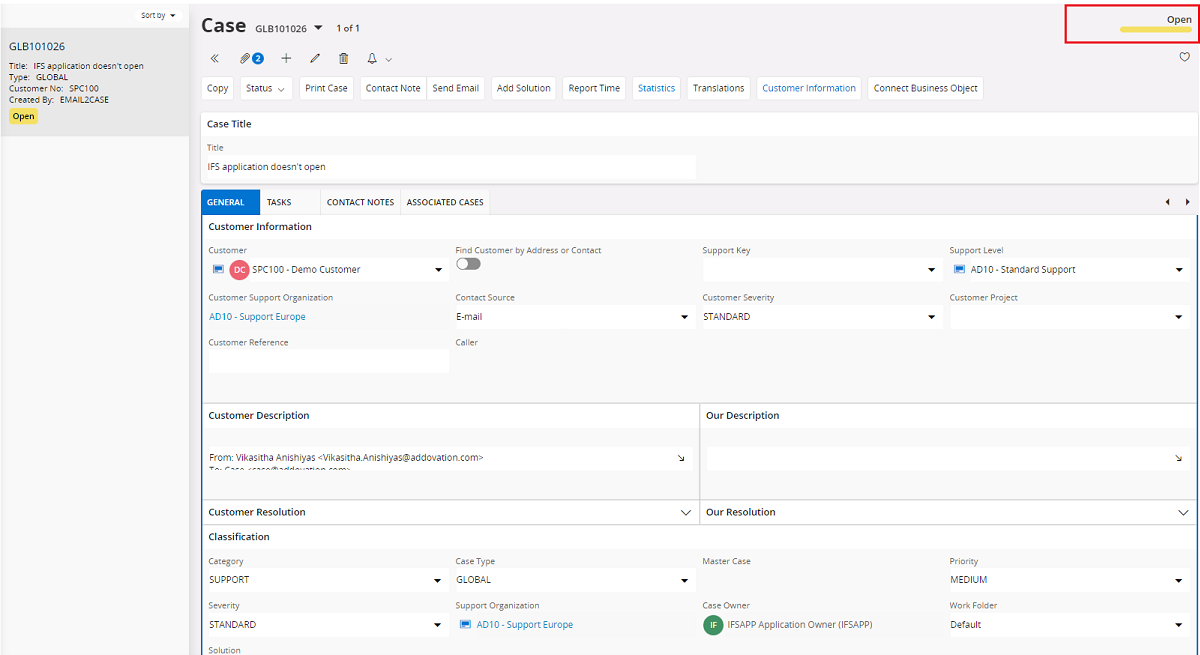
- Now support case is
openedto process with further customer support.
Reply to customer as customer’s support team
Once you open the relevant case, click Attachment panel as below depicted.
Select the first e-mail record.
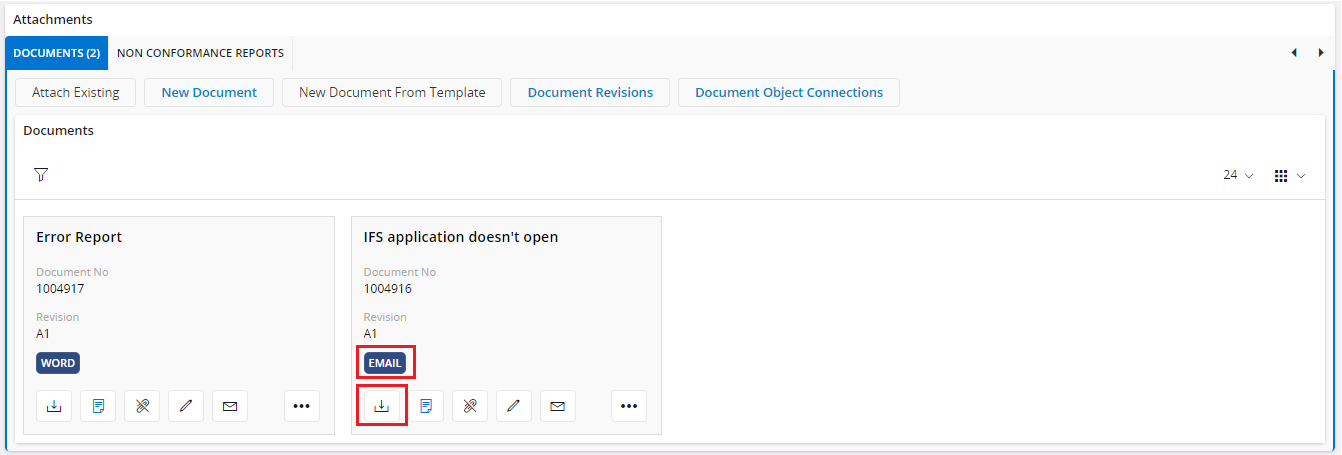
Click Download button
These steps will lead you to open the e-mail received from the customer.
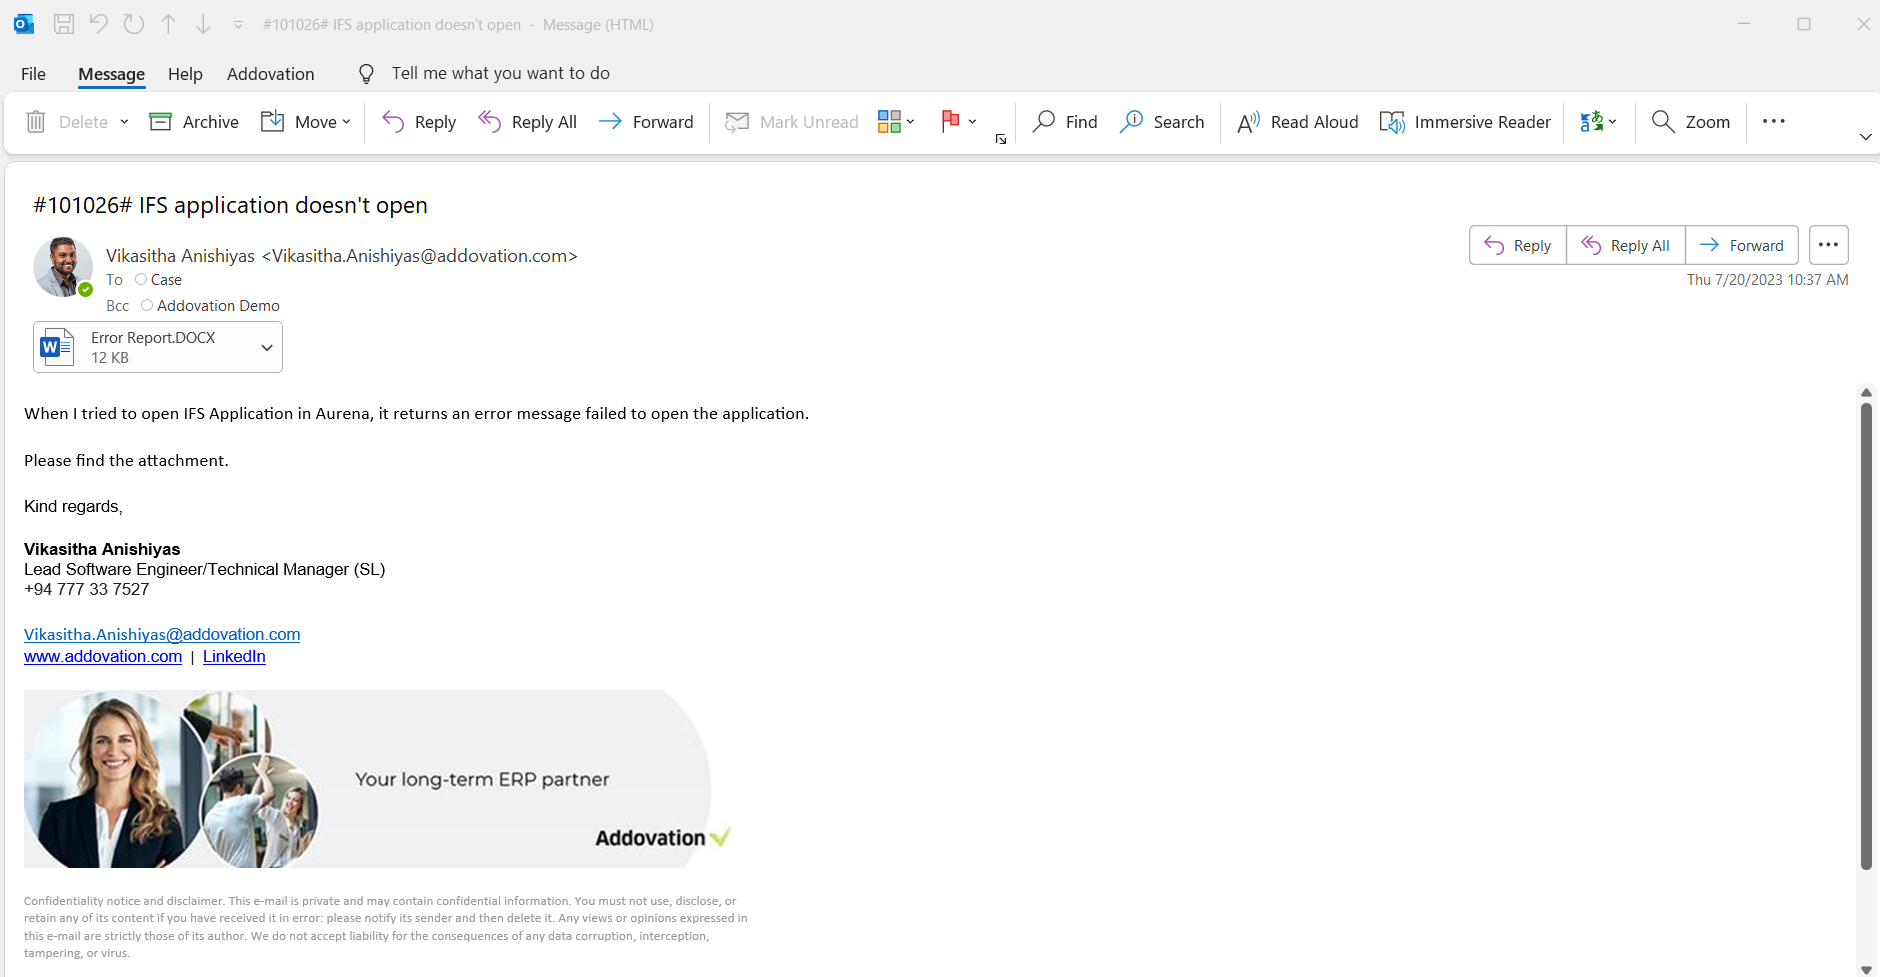
- Click Reply or Reply All button within e-mail client.
Important
Make sure to BCC support e-mail address you use when you reply to the e-mail.
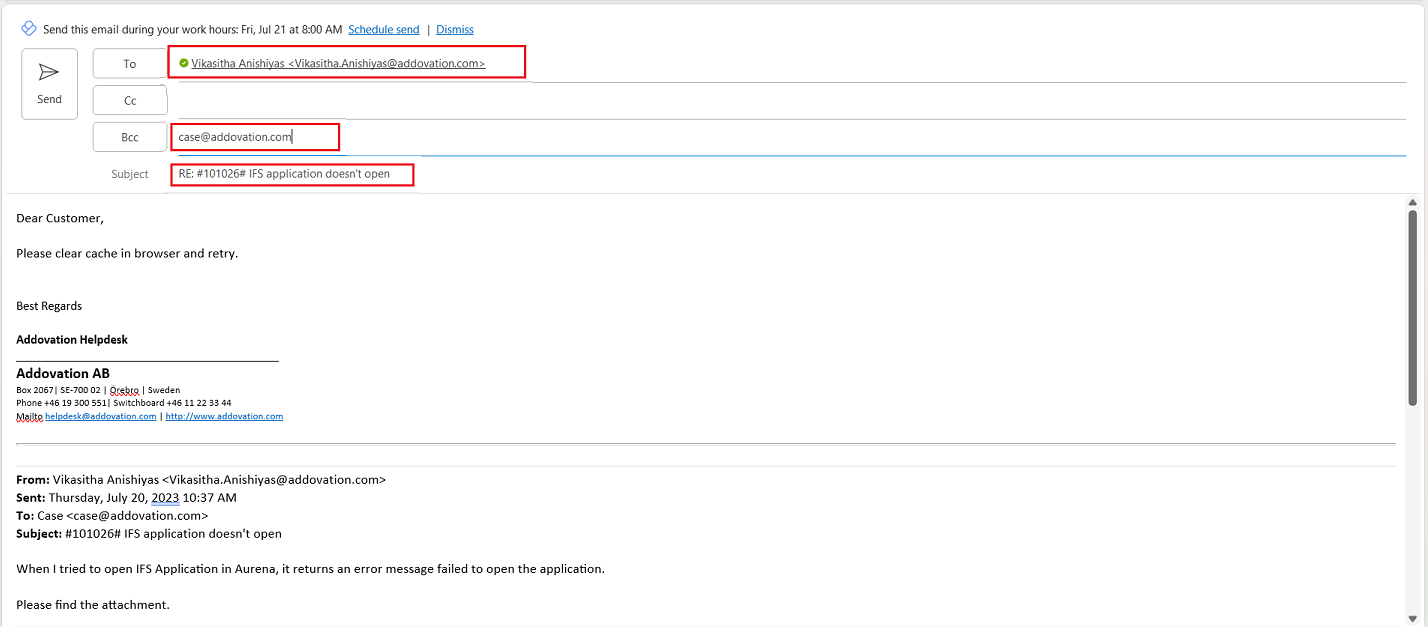
Important
Please do not change case id in the subject which resides within the hashtags.
- Click Send button.
- In a few minutes (approximately less than 2 minutes) your reply will be visible in IFS case.
Close an existing case
- Go to exiting case
- Click right mouse button and select Close
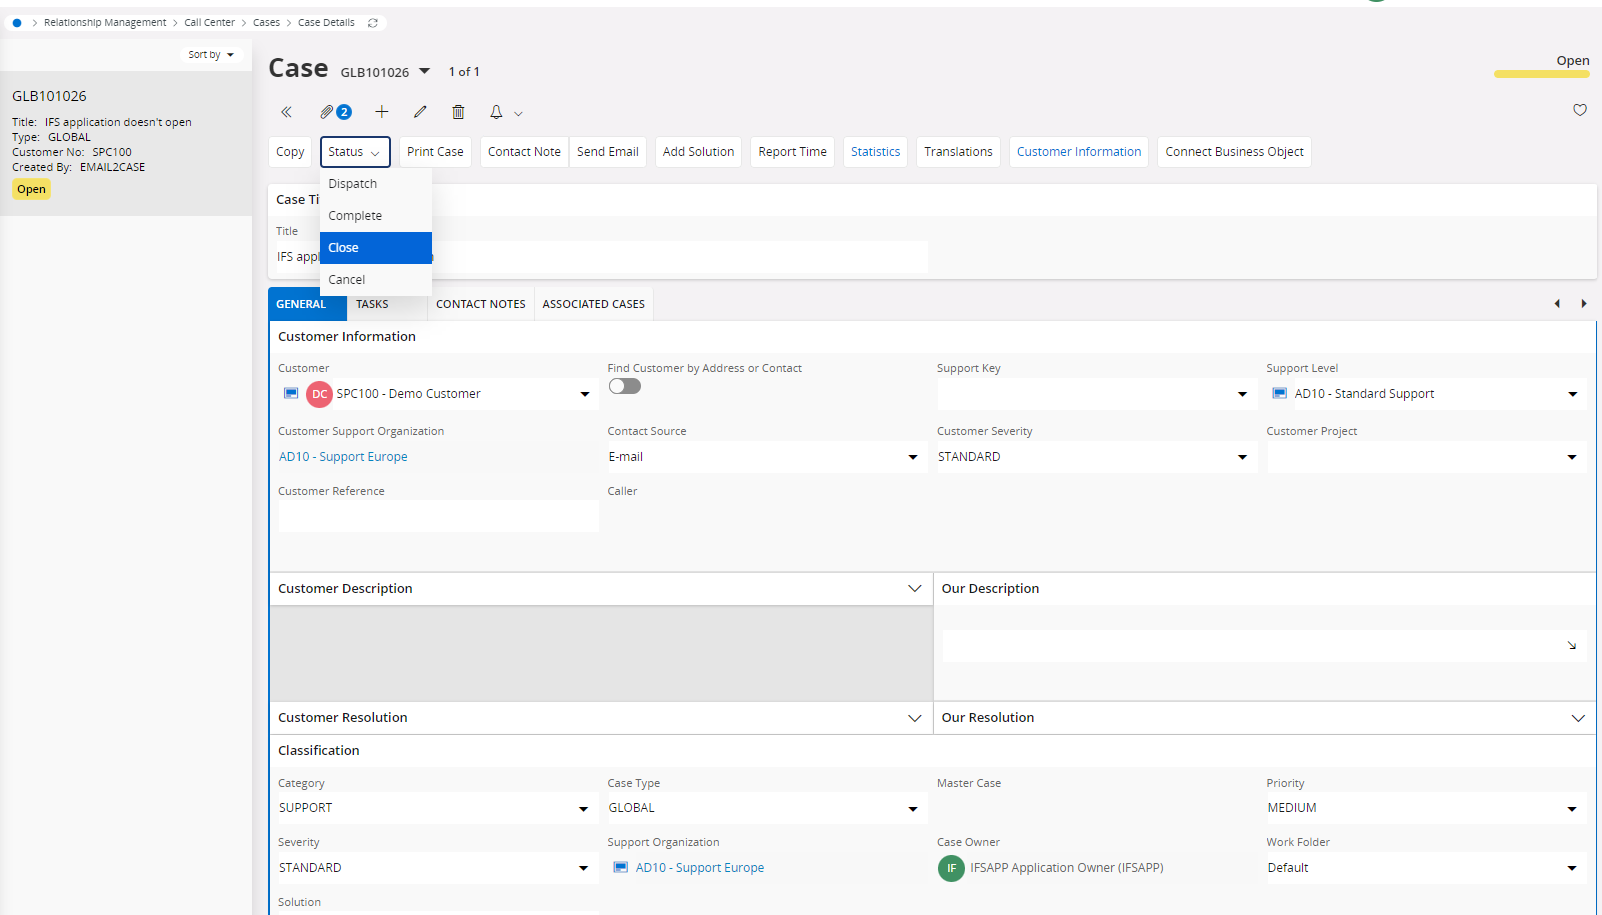
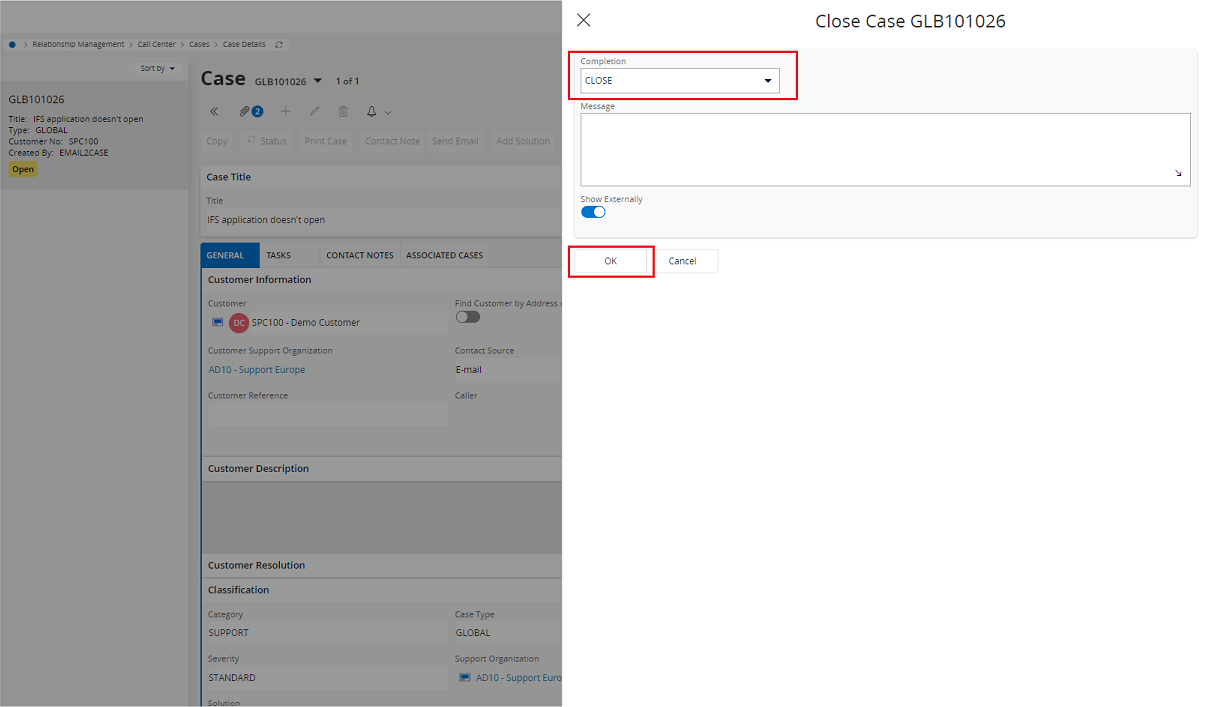
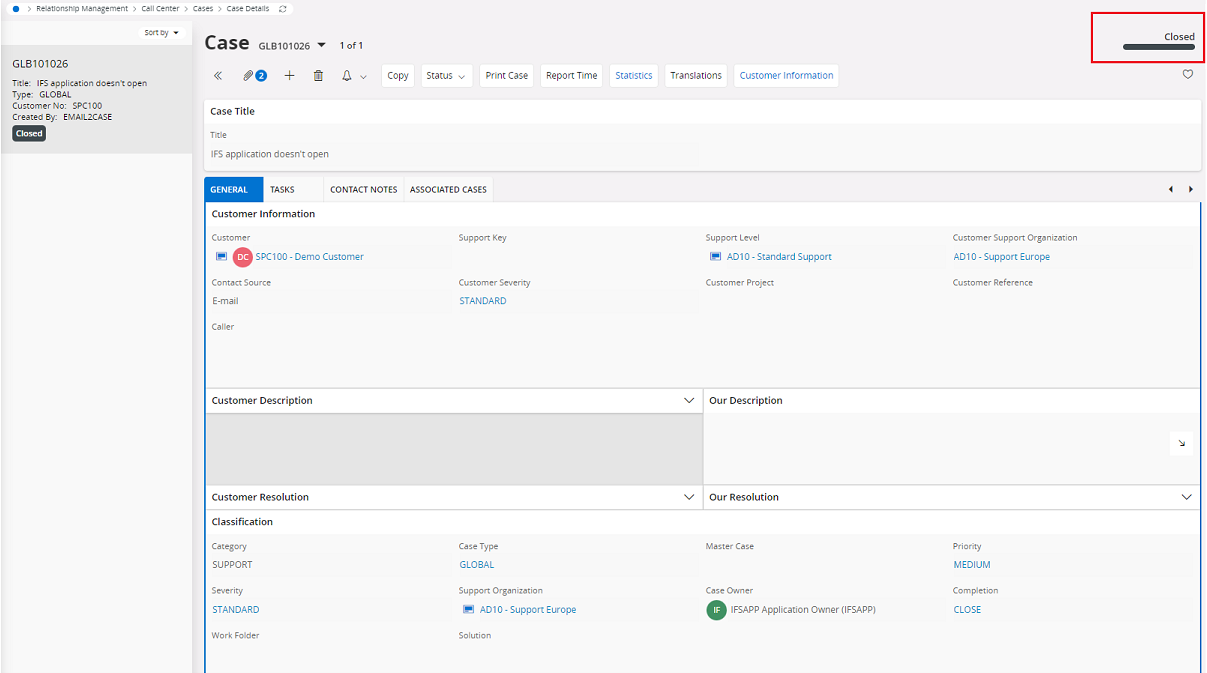
Fill out the required information and Click ‘OK’ button
Status will be changed to Closed in case
View E-mail attachments
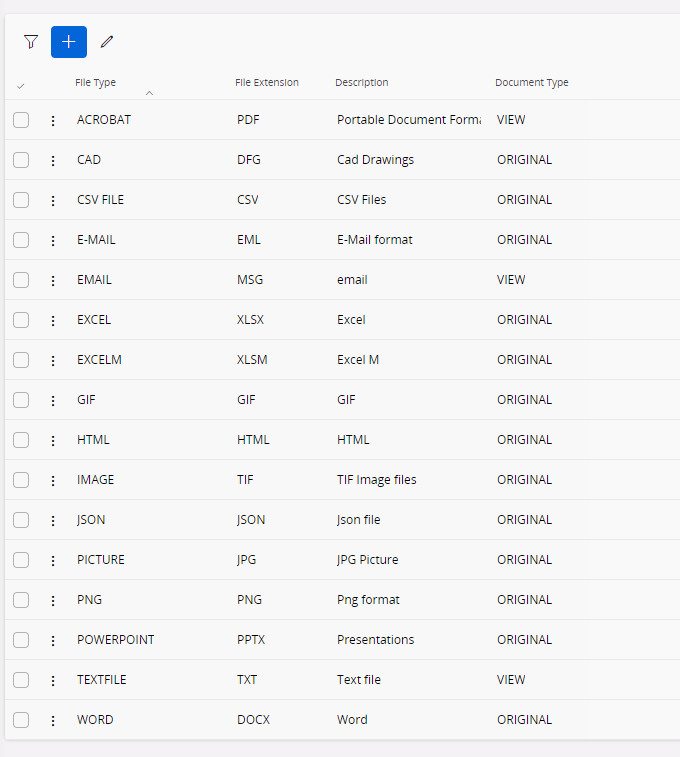
If you need to check-in attachments from Addovation Sync - Case, make sure check-in attachment is enabled in configuration and to attach document without any issue IFS application must support file types in EDM basic data.
How to add new document type
- Once you sign into IFS search ‘EDM Basic’ in navigator bar or go to Document Management -> Basic Data -> EDM Basic.
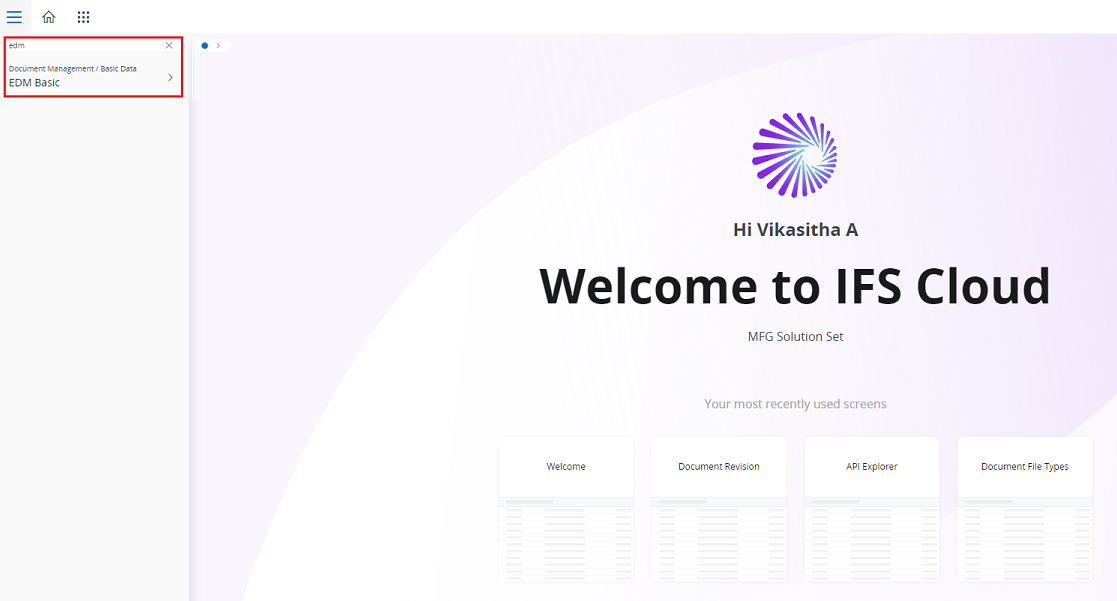
- Select EDM Basic from results.
- Go to File Type.
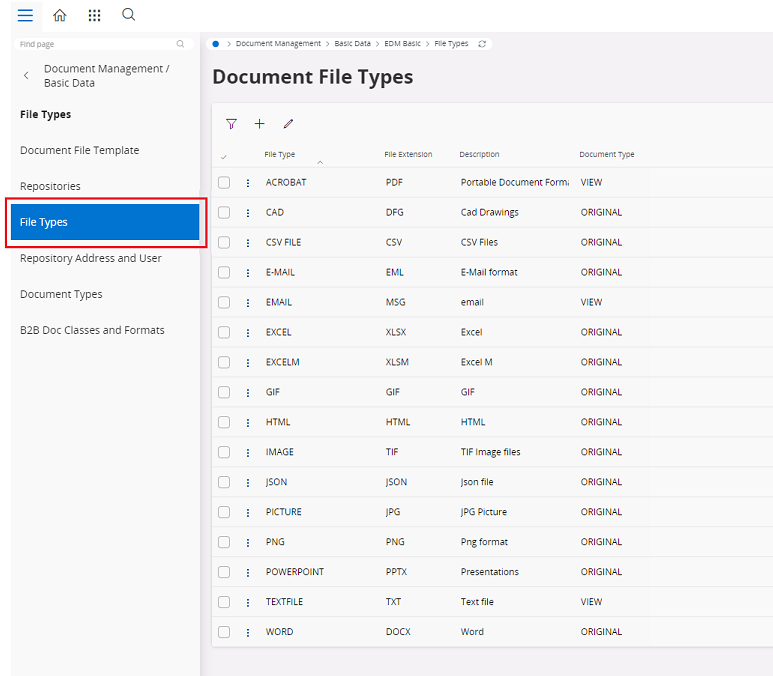
- Click Add button on left side.
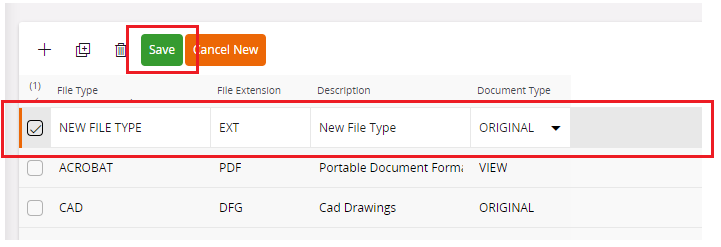
- Click Save button on left side.
Download attachment in IFS call center case
- Go to exiting case
- Go to attachment panel.
- Select the attachment.
- Click Download button.
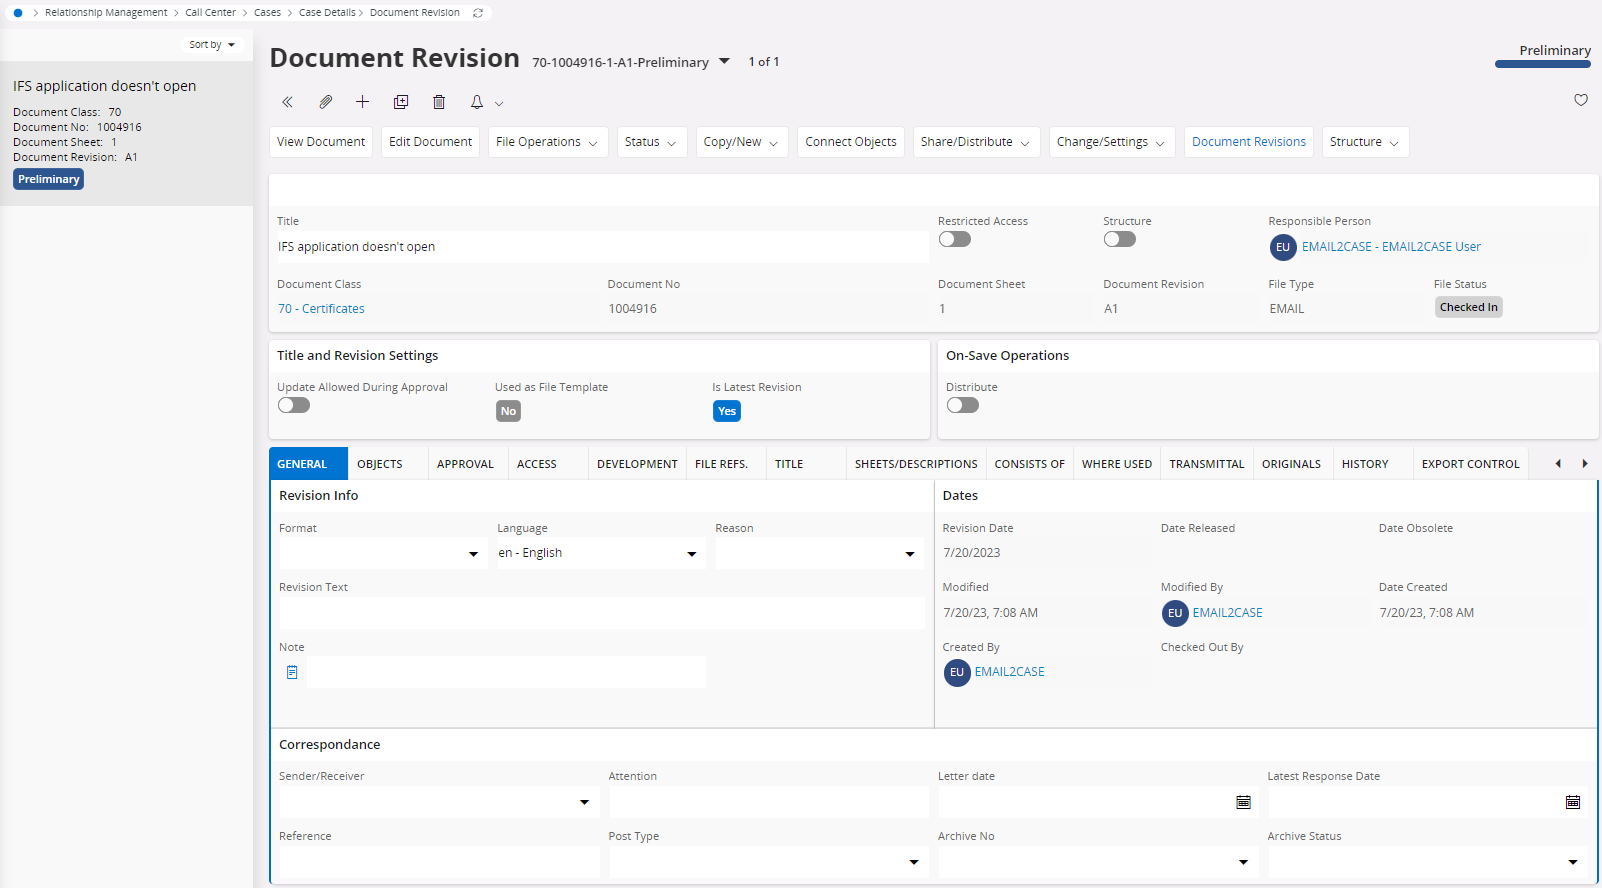
Open attachments in Document Revision
- Right click selected attachment.
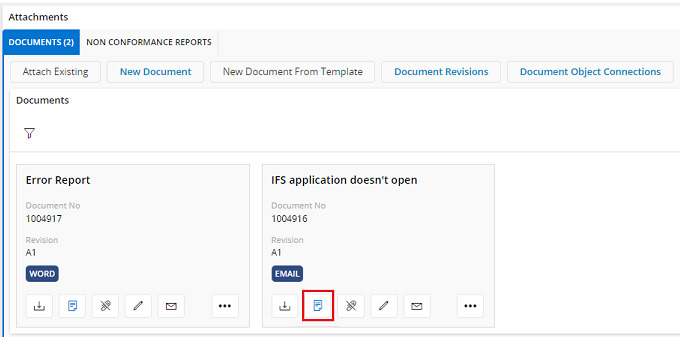
- Click Document Revision.
- It will lead you to Document Revision.