Addovation DocAgent - Setup Guide (Customer)
Last Updated: 2026-08-25
Overview
This setup guide provides detailed instructions for configuring the Addovation DocAgent service from the customer's end. This document outlines the steps required to enable Multi-Factor Authentication (MFA) for email account access in Azure AD, if the organization chooses to set it up. Each step is thoroughly explained to ensure a smooth setup process.
Allow Email Account Access
DocAgent is able to access email accounts using Multi Factor Authentication from a Function App:
- Multi-Factor Authentication (MFA) Setup for Email Account Access in Azure AD – Uses certificate-based authentication and retrieves emails via Graph API.
Setting Up Multi-Factor Authentication for Email Account Access in Azure AD
This section applies to organizations that require multi-factor authentication for accessing email accounts in Azure AD.
Creating a New App Registration in Azure
To create a new app registration, go to
Microsoft Entra IDin the Azure Portal.From the left navigation menu, select
App Registrationsand then click onNew Registration.
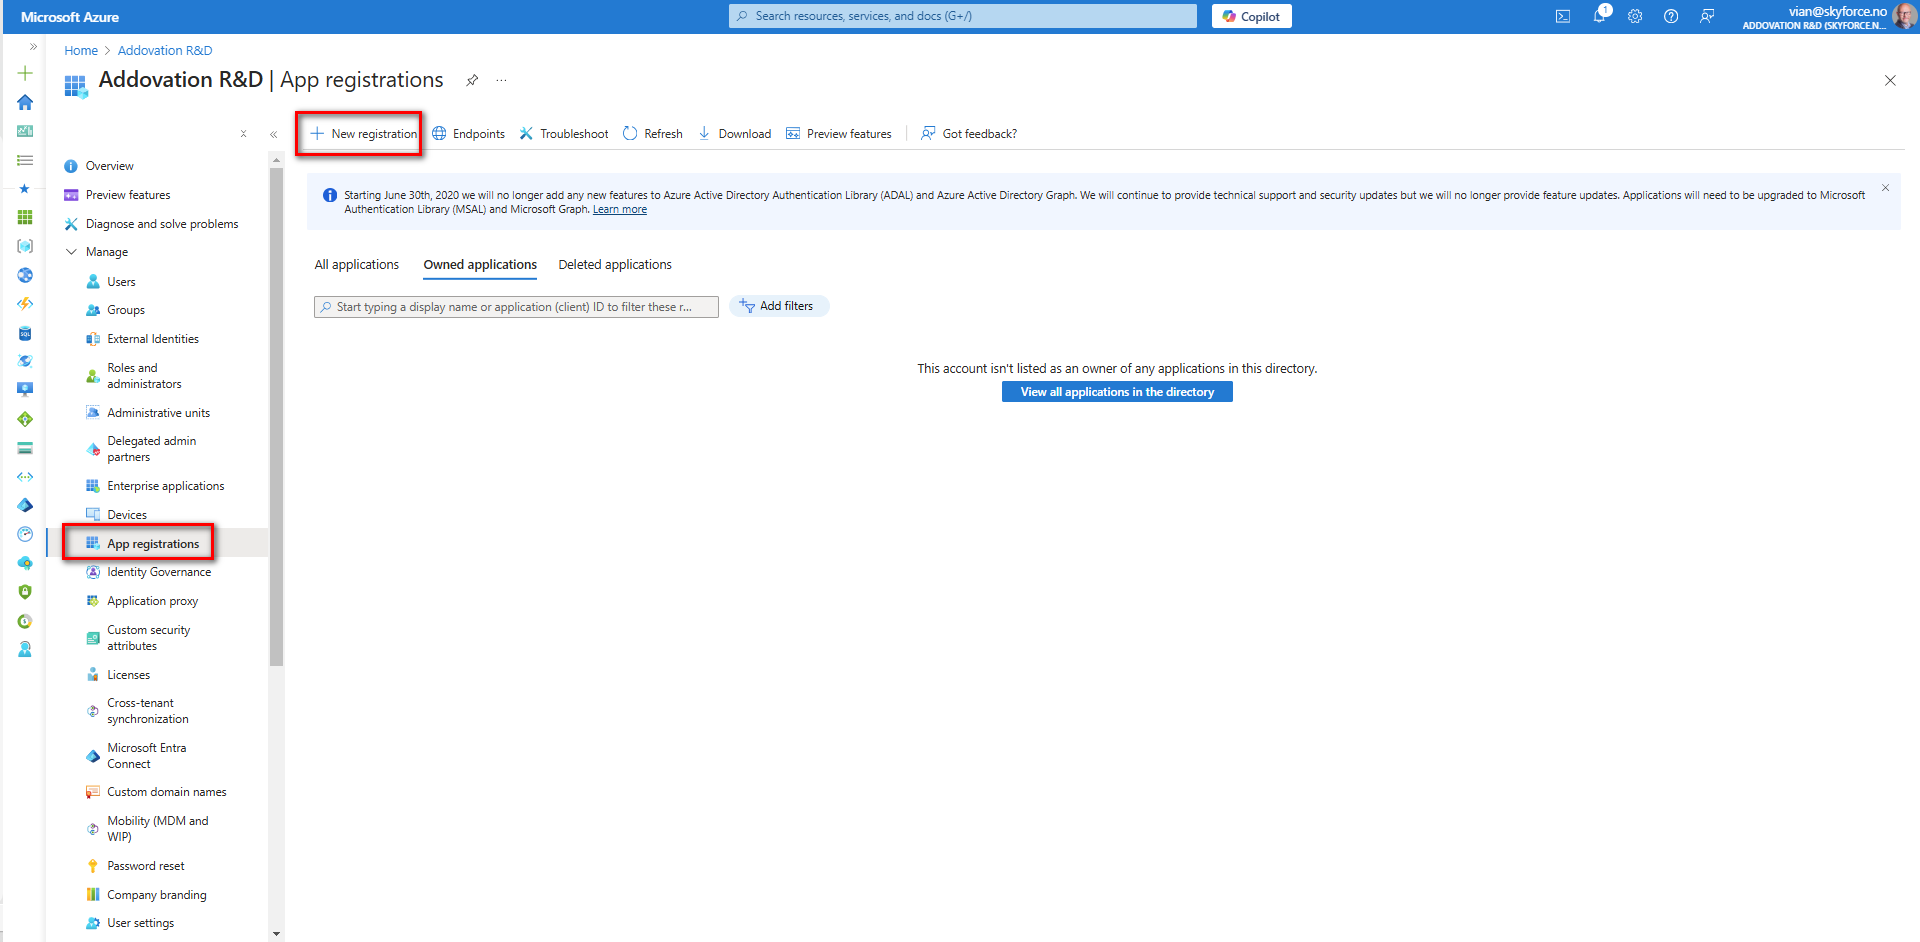
Provide a unique name for the application and select the
Account typebased on the access requirements.Choose the
PlatformasWeband enter the default URL:http://localhost:3000/home.Once all details are filled in, click
Register.
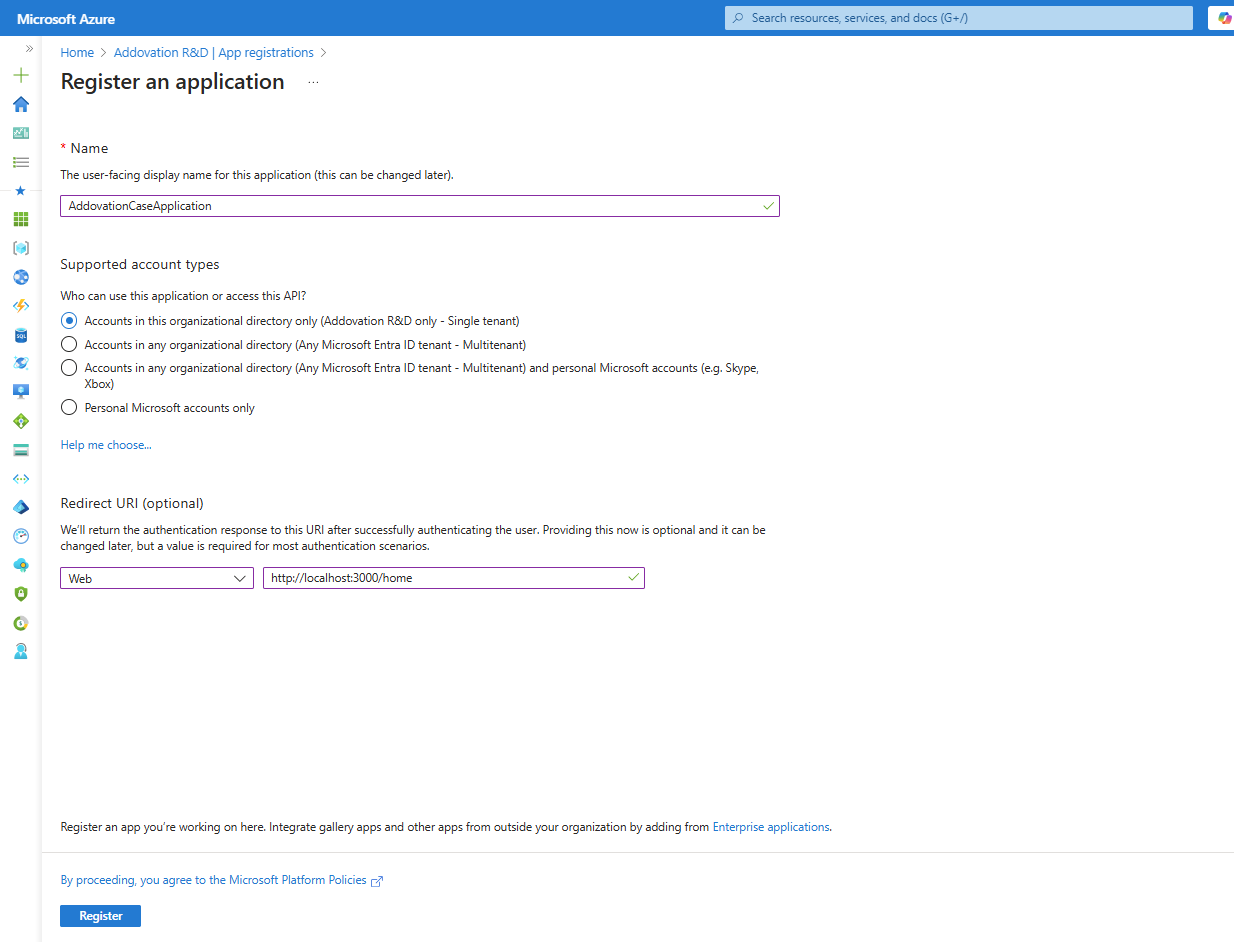
- After a few seconds, you will be redirected to the overview page of the newly created application. This completes the app registration process.
Requesting a Token
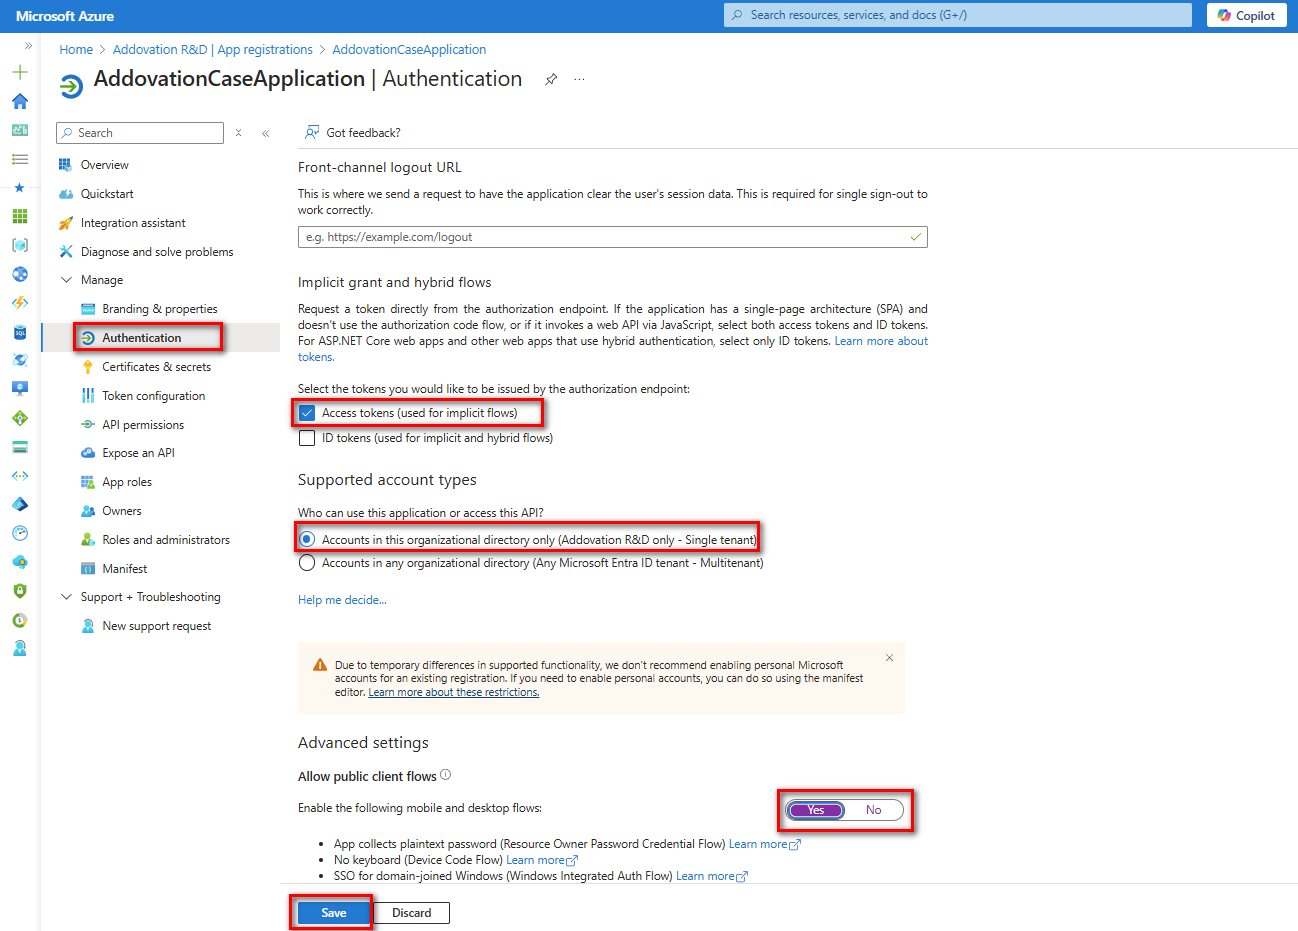
To request a token, navigate to the Registered Application in the Azure Portal and select
Authenticationfrom the left navigation pane.Scroll down to the
Implicit Grant and Hybrid Flowssection and enable theAccess Tokenoption.Ensure that under Advanced Settings, the option
Allow public client flowsis set toYes. Once these settings are configured, clickSave.
Adding API Permissions
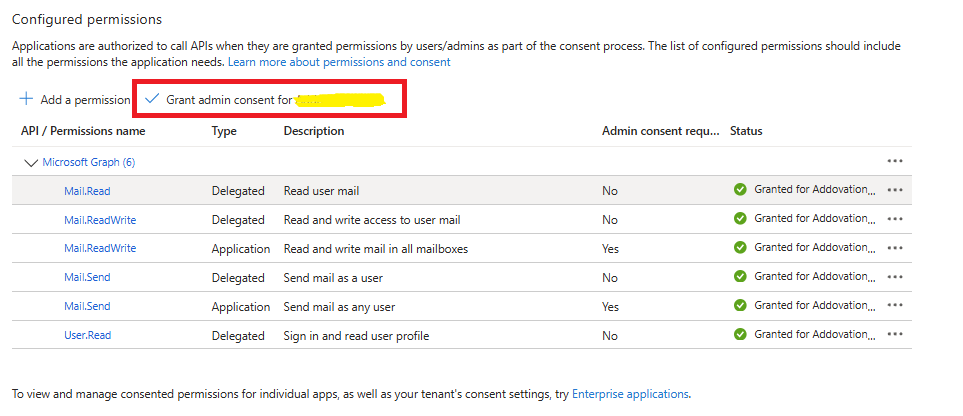
To configure API permissions for the application, you need to grant the required scopes. The application requires the following permissions:
- Mail.Read: Read user mail
- Mail.ReadWrite: Read and write access to user mail
- Mail.ReadWrite: Read and write mail in all mailboxes
- Mail.Send: Send mail as a user
- Mail.Send: Send mail as any user
- User.Read: Sign in and read user profile
To add these permissions, go to the Registered Application in the Azure Portal and select
API Permissionsfrom the left navigation pane.Then click
Add a Permission.
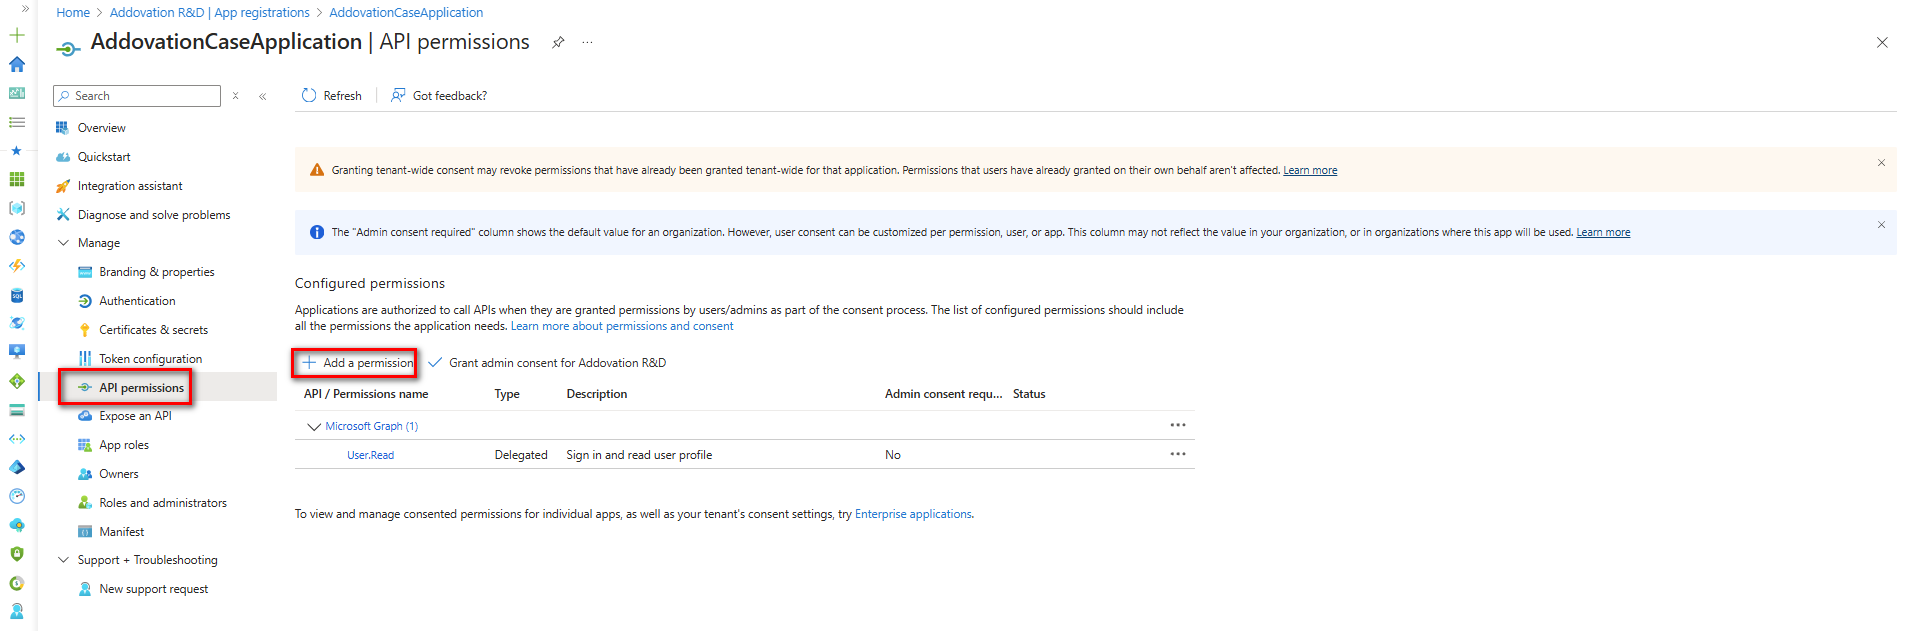
Navigate to
Microsoft APIs->Microsoft Graph->Delegated Permissions.Search for
mail, expand the Mail section, and selectMail.Read,Mail.ReadWrite, andMail.Send.
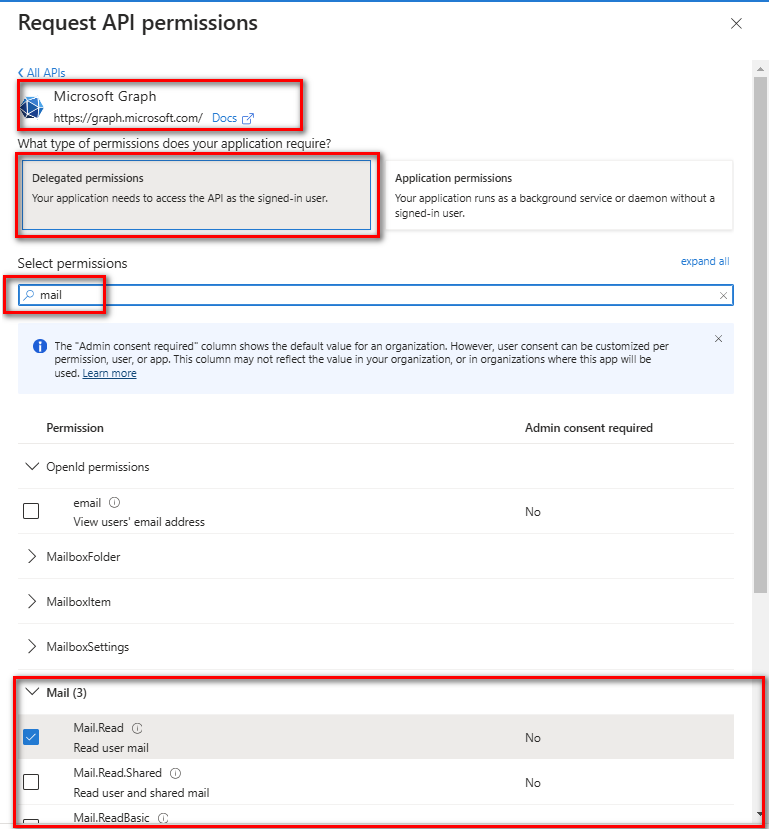
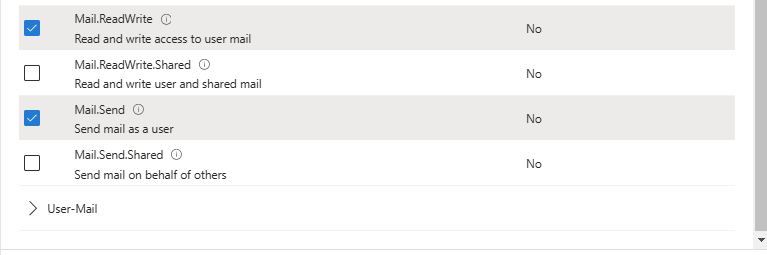
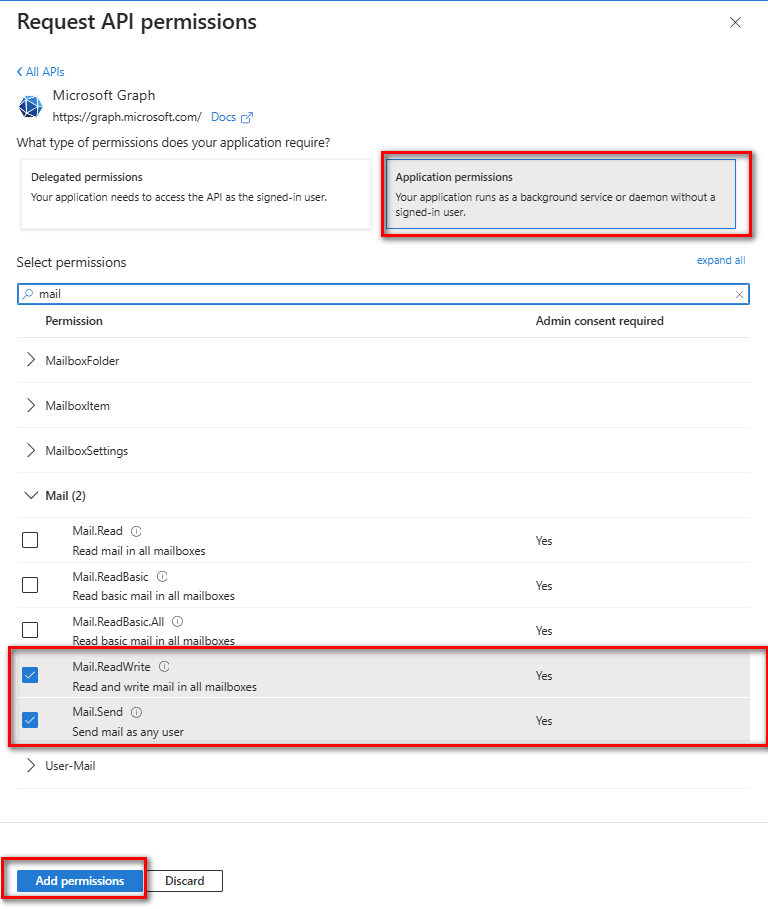
Next, switch to
Application Permissions, search formail, and selectMail.ReadWriteandMail.Send.Click
Add Permissionsto finalize the changes.
- Then, select
Grant admin consentfor [Tenant] and confirm by clickingYes.
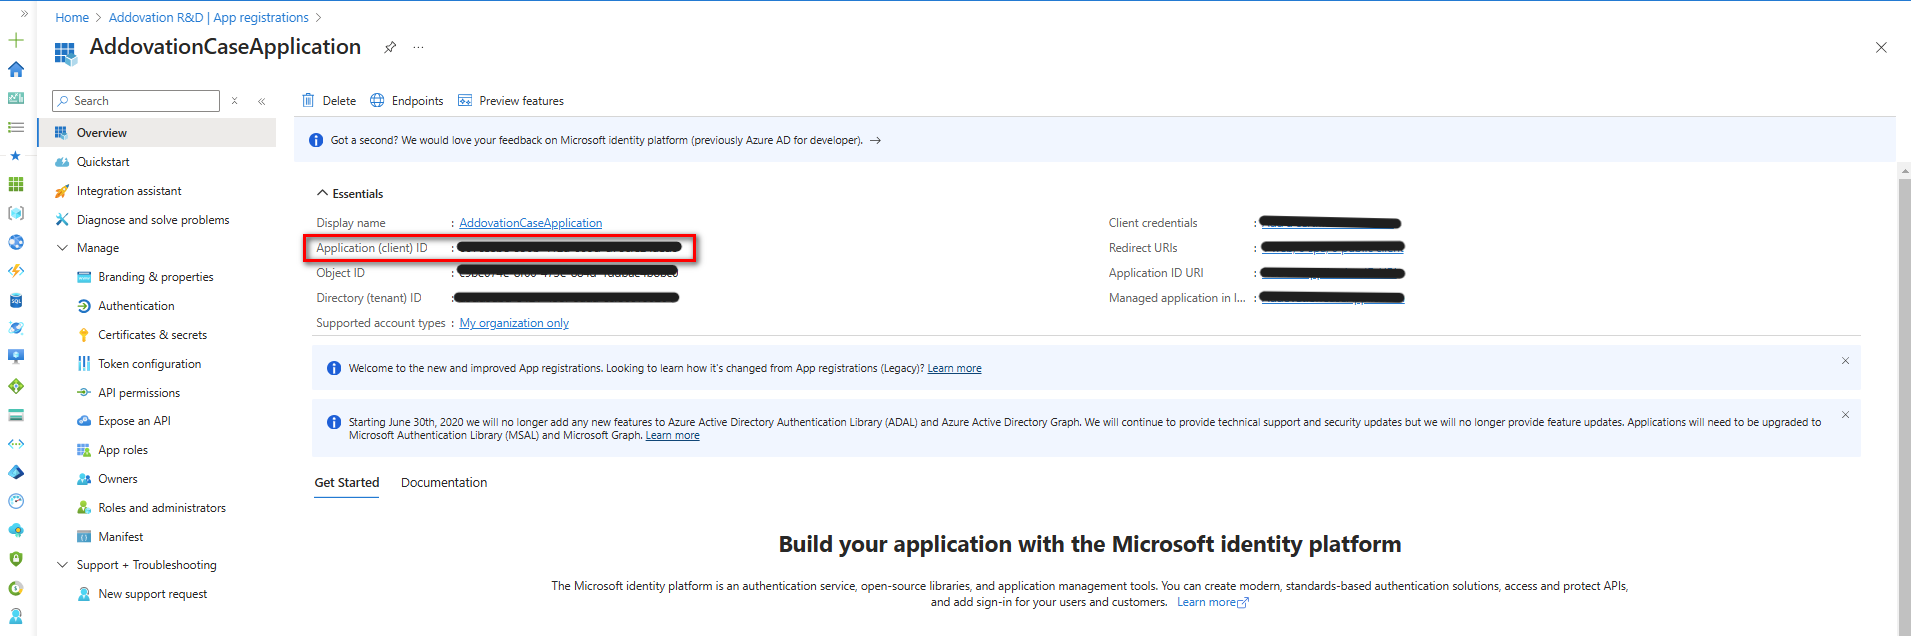
- Now share the
Client IDof the created application with Addovation to complete the setup.
Generate a Certificate
Generate a certificate and upload the public key to your Application Registration. You can create a certificate using Azure Key Vault or self-signed.
Using Azure Key Vault is recommended for production. This is the most secure option. The private key is generated inside Key Vault and never exists outside it. If you choose this option create a certificate and download the public key only in CER format.
A script example for using self-signing:
# 1. Generate a NEW self-signed cert with an EXPORTABLE private key.
#    (NonExportable, as in the original script, blocks Export-PfxCertificate entirely —
#    the key material can't leave the machine's key store in that mode.)
$cert = New-SelfSignedCertificate `
  -Subject "CN=AddovationDocAgent-Prod" `
  -CertStoreLocation "Cert:\LocalMachine\My" `
  -KeyExportPolicy Exportable `
  -KeySpec Signature `
  -KeyLength 2048 `
  -HashAlgorithm SHA256 `
  -NotAfter (Get-Date).AddYears(2)
Export the public key only:
# 2. Export the public key only (.cer) - for uploading to Azure App Registration
Export-Certificate `
  -Cert $cert `
  -FilePath "C:\Certs\AddovationDocAgent-Prod.cer"

# 3. Export the full certificate + private key (.pfx) - for backup / installing elsewhere
$pfxPassword = Read-Host -Prompt "Enter password to protect the .pfx" -AsSecureString

Export-PfxCertificate `
  -Cert $cert `
  -FilePath "C:\Certs\AddovationDocAgent-Prod.pfx" `
  -Password $pfxPassword
Please, provide the public key (.pfx) securely to Addovation.
Uploading a Certificate
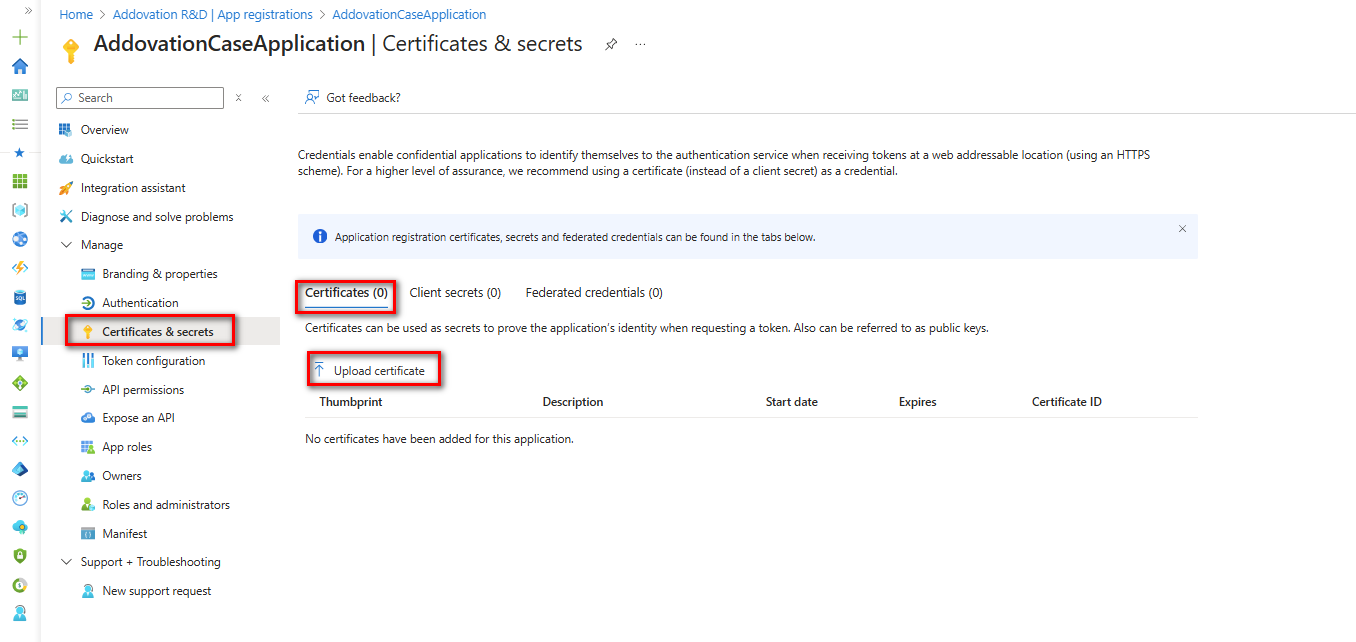
To upload a certificate, navigate to
Certificates & Secretsin the left navigation pane of the Azure Portal.Under the Certificates section, click on
Upload Certificate.
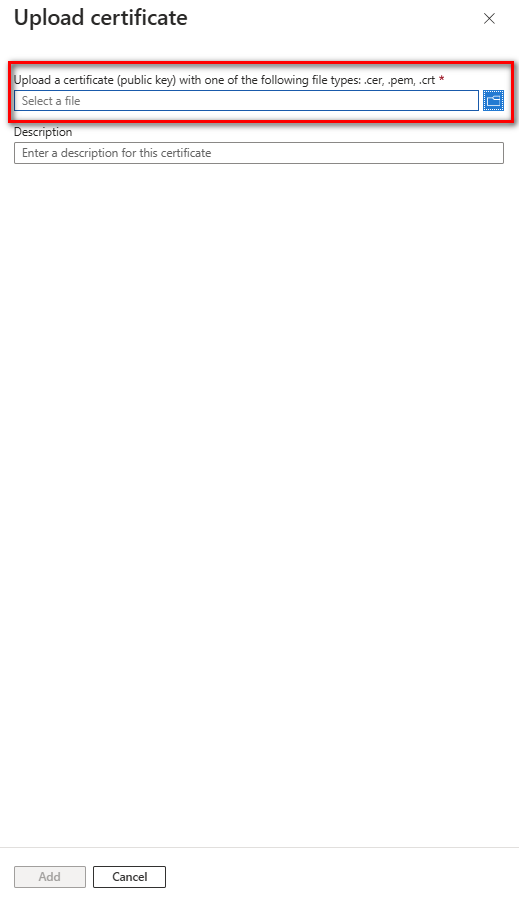
- Select the certificate and upload it in (using one of the supported formats:
.cer, .pem, or .crt).
- Please, note that as the App Registration, Key Vault, and Certificate are set up within your Azure portal, you have the ability to manage and control the level of access to the specific email account as needed.
Restricting Certificate-Based Authentication to Specific Email Addresses
To ensure that only specific email addresses have exclusive access while restricting access for other domain email addresses, follow these steps:
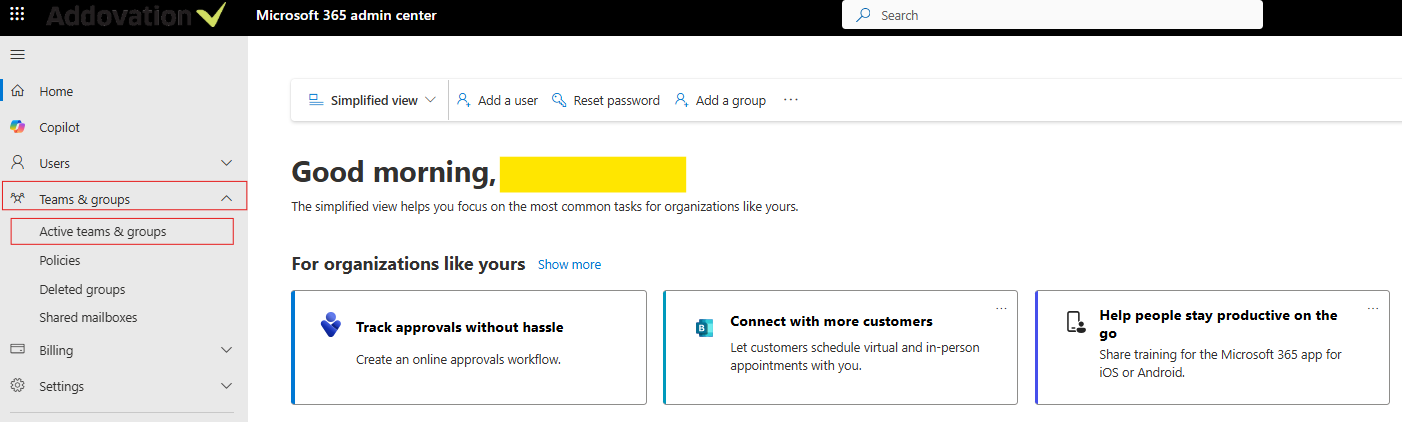
- Navigate to the Microsoft 365 Admin Center portal.
- Go to
Teams & Groups > Active teams & groups.
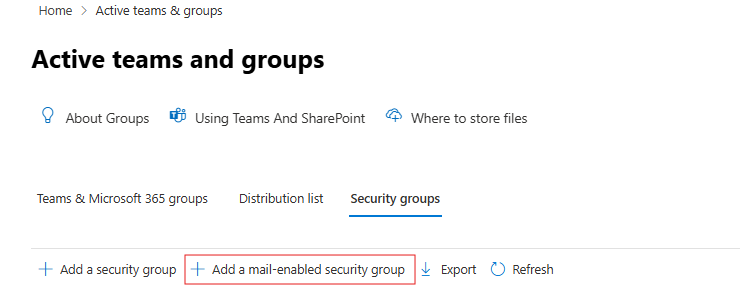
- Go to
Security groupstab and click onAdd a mail-enabled security group
- Provide a
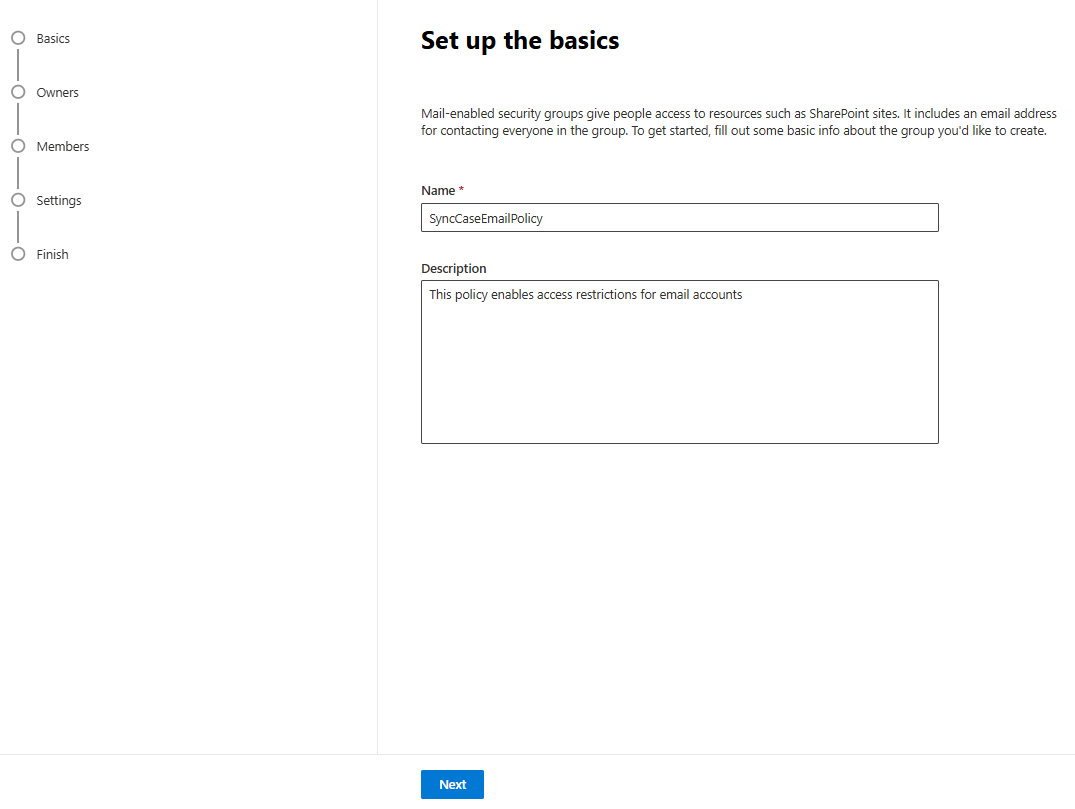
unique nameand an optionaldescriptionfor the group. - Click
Next.
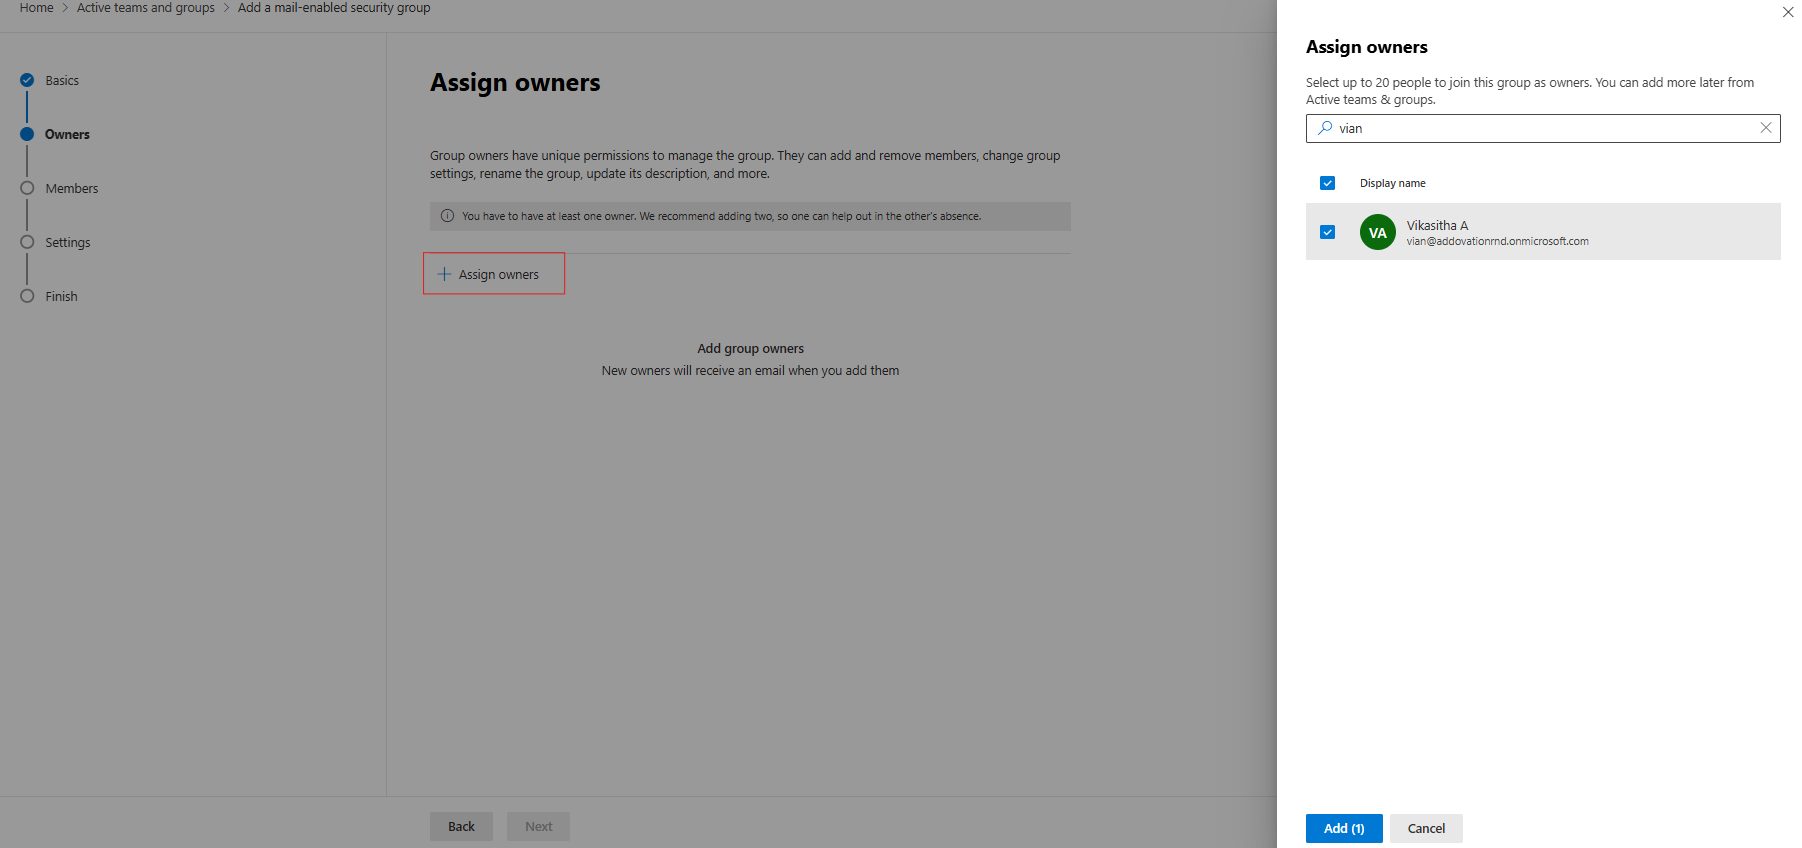
- Click on
Assign owners. - Search for the owner, select them, and click
Add. - Click
Next.
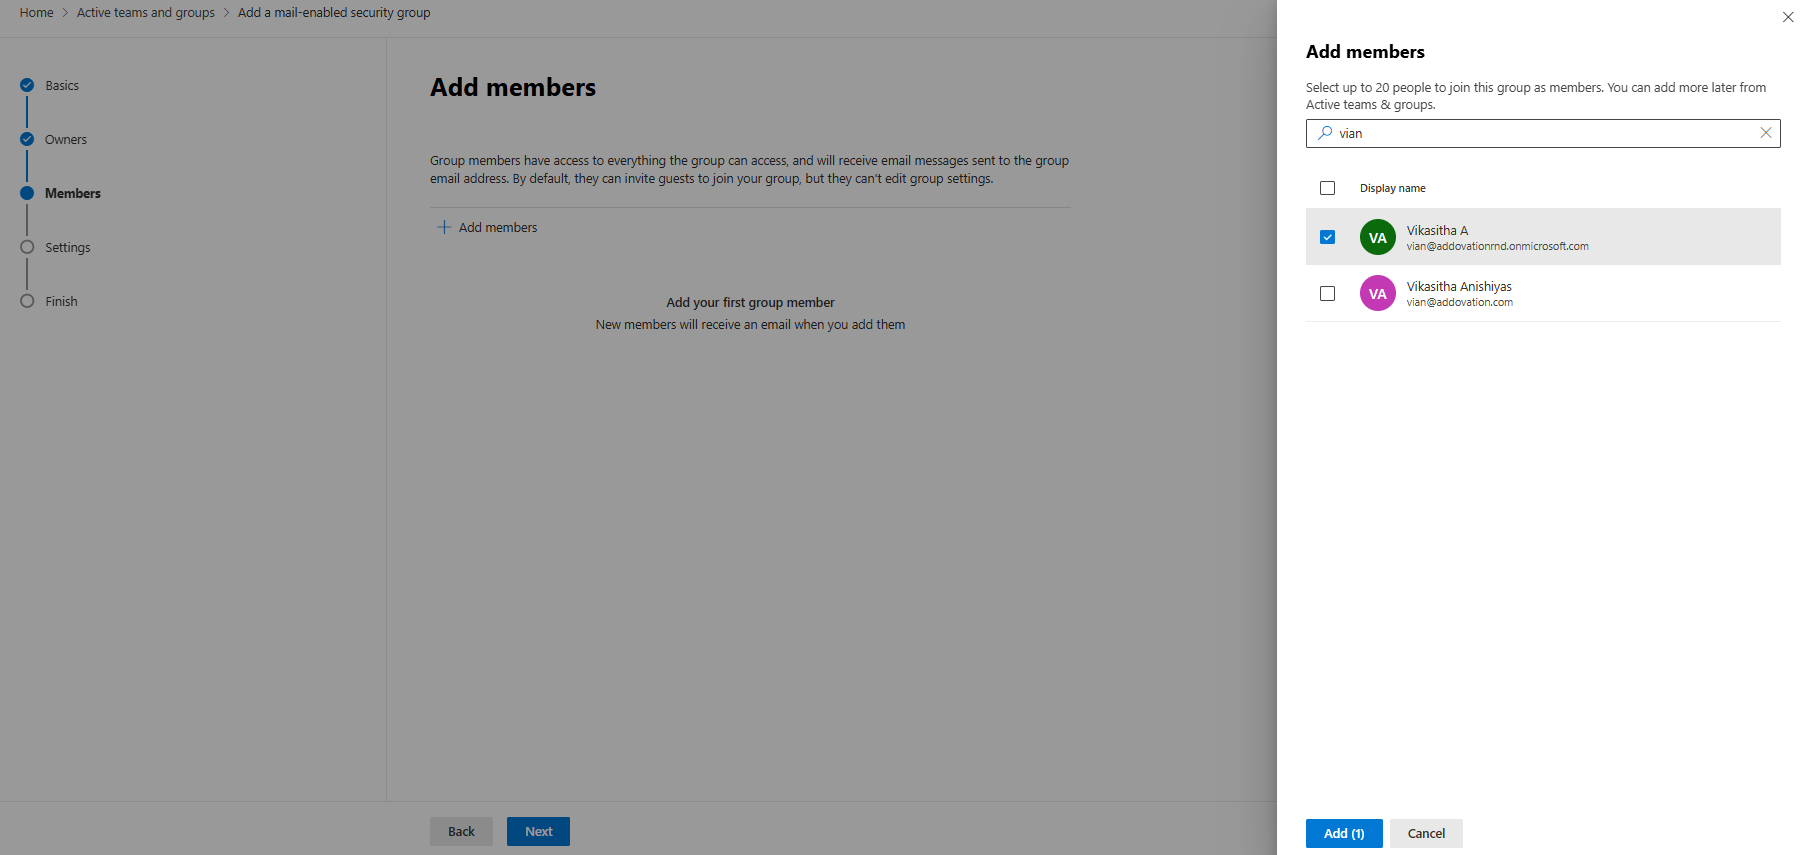
- Click on
Assign members. - Search for the required members, select them, and click
Add. - Click
Next.
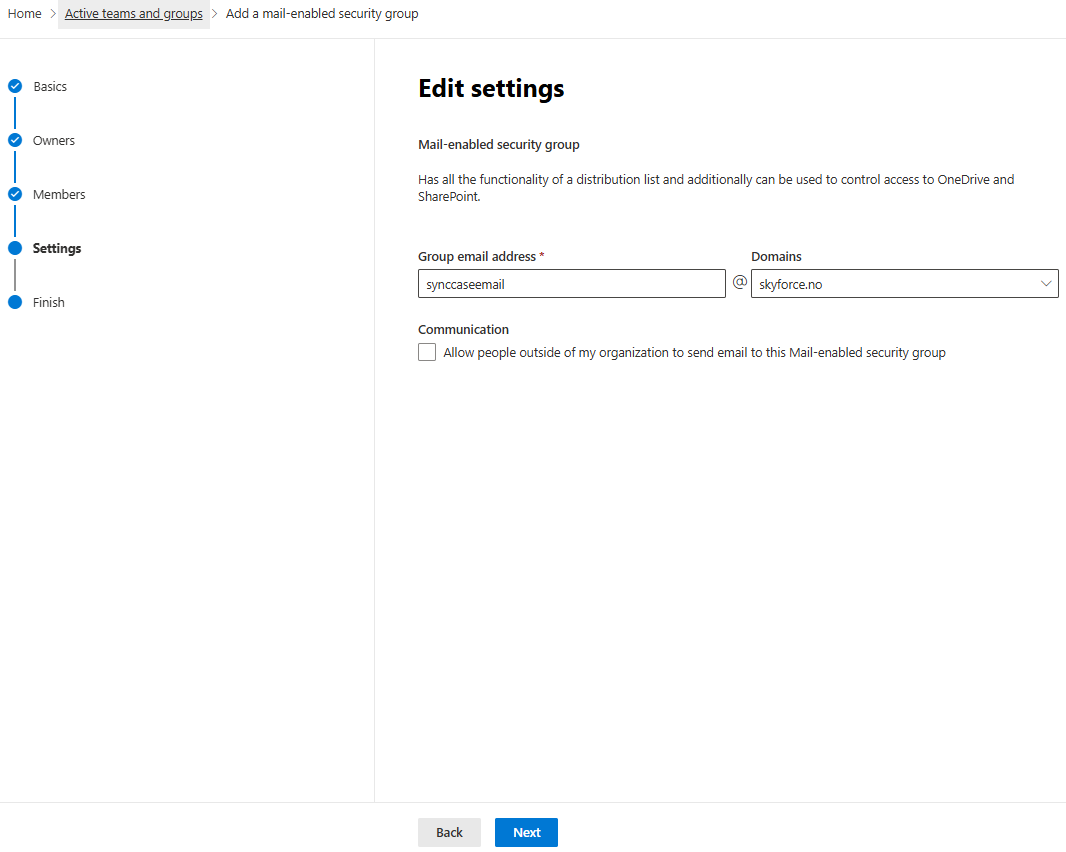
- Provide a
group email address. - Click
Next.
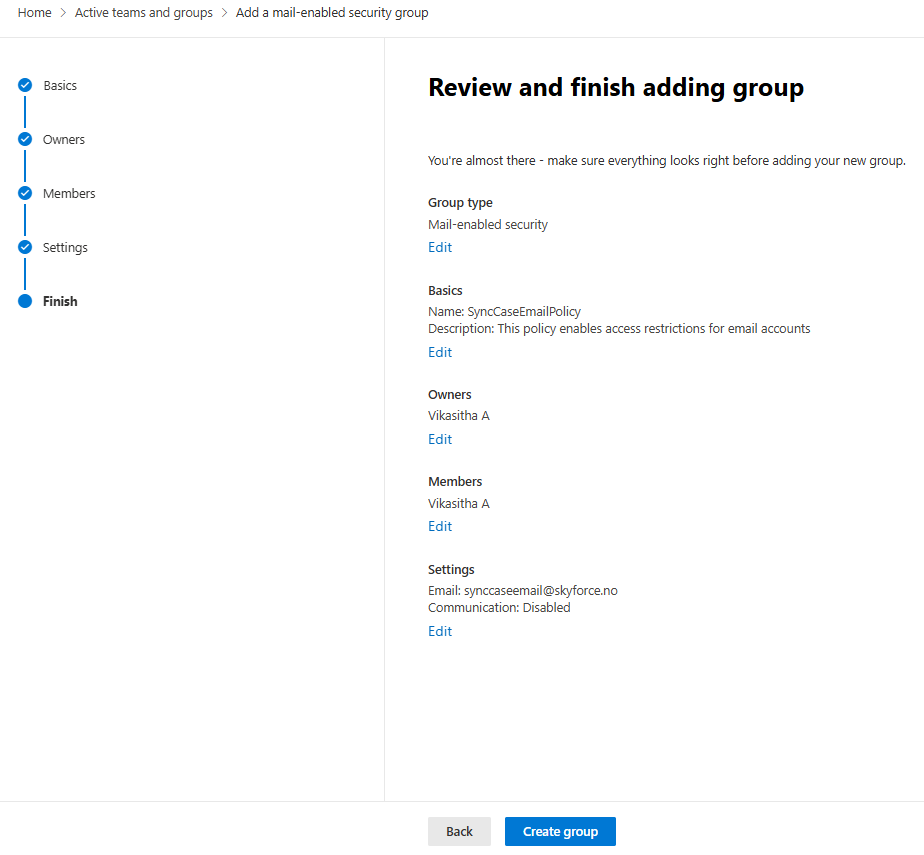
- Review the group details and click
Create group.
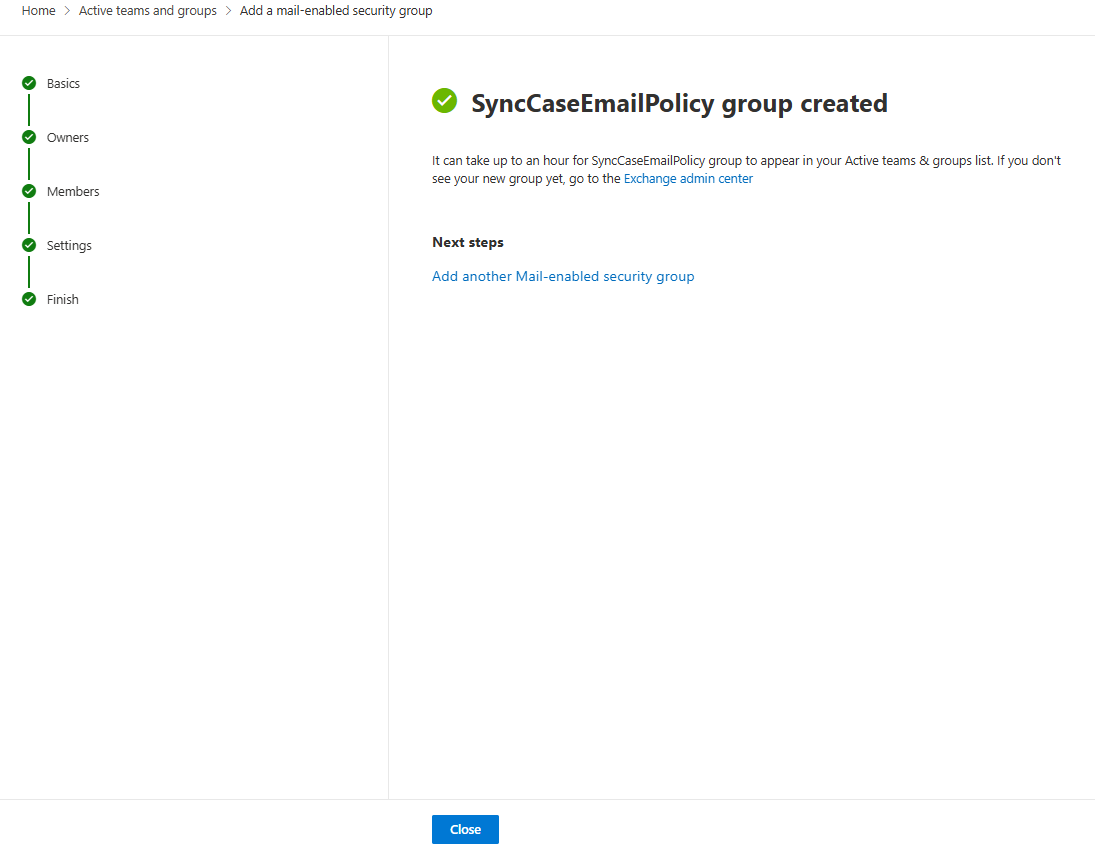
- Once the security group is created, click
Closeto exit.
Apply the Created Group Policy to the App Registration
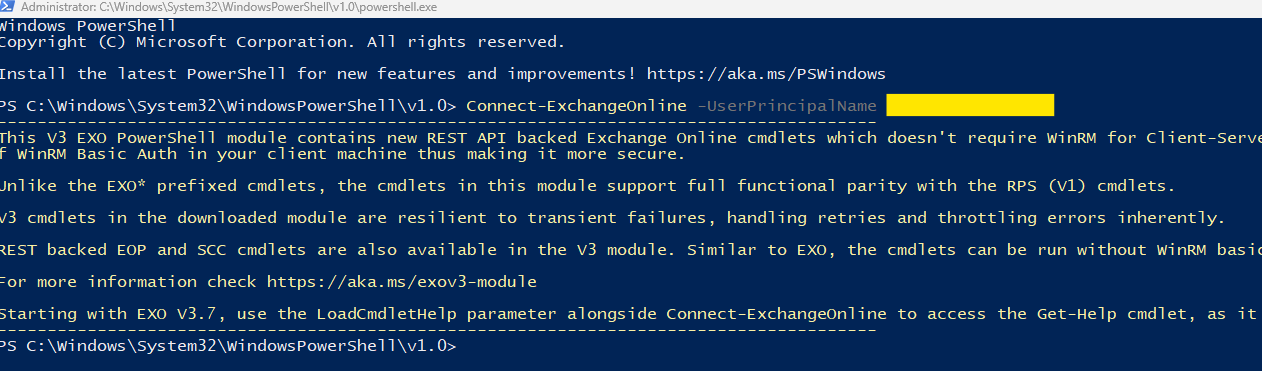
- Open PowerShell as Administrator.
Connect to Exchange Onlineby running the following command:
Connect-ExchangeOnline -UserPrincipalName [admin email account]
- Create the Application Access Policy using the command below:
New-ApplicationAccessPolicy -AppId [AppID] -PolicyScopeGroupId [Policy Group Email ID] -AccessRight RestrictAccess -Description "Restrict this app to members of the distribution group EvenUsers."

- Verify user access by executing the following command:
Test-ApplicationAccessPolicy -AppId [AppID] -Identity [user@domain.com]


Network Configurations
Click here to read details about network configurations.
Checklist
- Create the App Registration
- Add Microsoft Graph API Permissions
- Restrict to One Mailbox via Exchange Application Access Policy
- Configure Certificate Authentication
- Note the App (client) ID and Directory (tenant) ID, and public key, send these to Addovation