Addovation Share for Office - Setup Guide
Last Updated: 2025-11-27
IFS Environment Setup
Import Permission Set
Permission Sets are the foundation for managing user authorities in IFS Applications. A Permission Set is a collection of permissions that can be granted to users, enabling them to perform specific tasks. In Aurena, permission sets control access to Projections, Lobby Pages, Reports, and System Privileges. The structure also allows one permission set to be granted to another, simplifying administration.
To configure the necessary permissions;
- Download the file
IFS Applications - Permission Setsfrom the Download(s) section.

This file includes all permissions required for add-in operations, such as object connections, advanced search, and access to the Addovation Document Management service. File Name: ADDO_OAS365_SHARE.xml
Import the Permission Sets
Navigate to:Solution Manager → Users and Permissions → Permission Sets → Import Permission SetsProvide the file
Select and upload the downloadedADDO_OAS365_SHARE.xmlfile to complete the import.

Azure Configuration
Resource group
A resource group is a container that holds related resources for an Azure solution. The resource group can include all the resources for the solution, or only those resources that you want to manage as a group.
Note
If you already have a resource group, you could use the existing group.
- Sign into the Azure portal with your Azure account.
- Select
Resource groupsand then selectCreate.
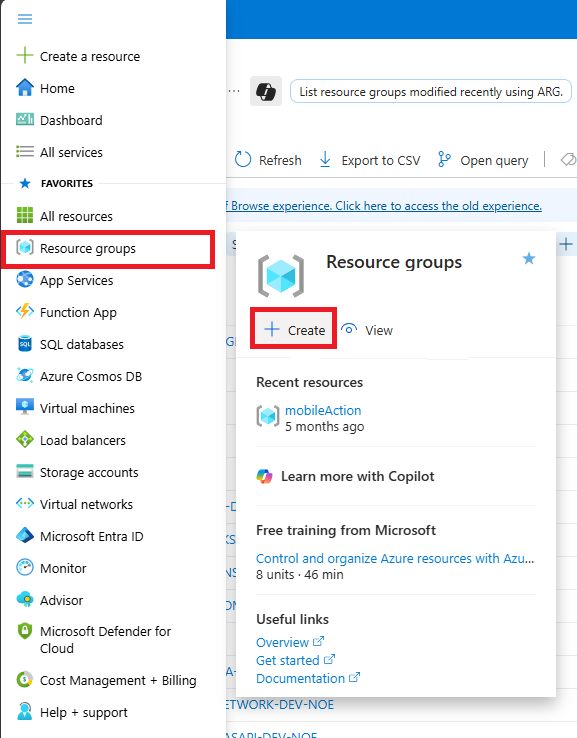
Enter the following values:
Subscription: Select your Azure subscription.Resource group: Enter a new resource group name.Region: Select an Azure location, such as Norway East.
Select
Review+CreateSelect
Create. It takes a few seconds to create a resource group.Select
Refreshfrom the top menu to refresh the resource group list, and then click the newly created resource group to open or select Notification (the bell icon) from the top and selectGo to resource groupto see the newly created resource group.
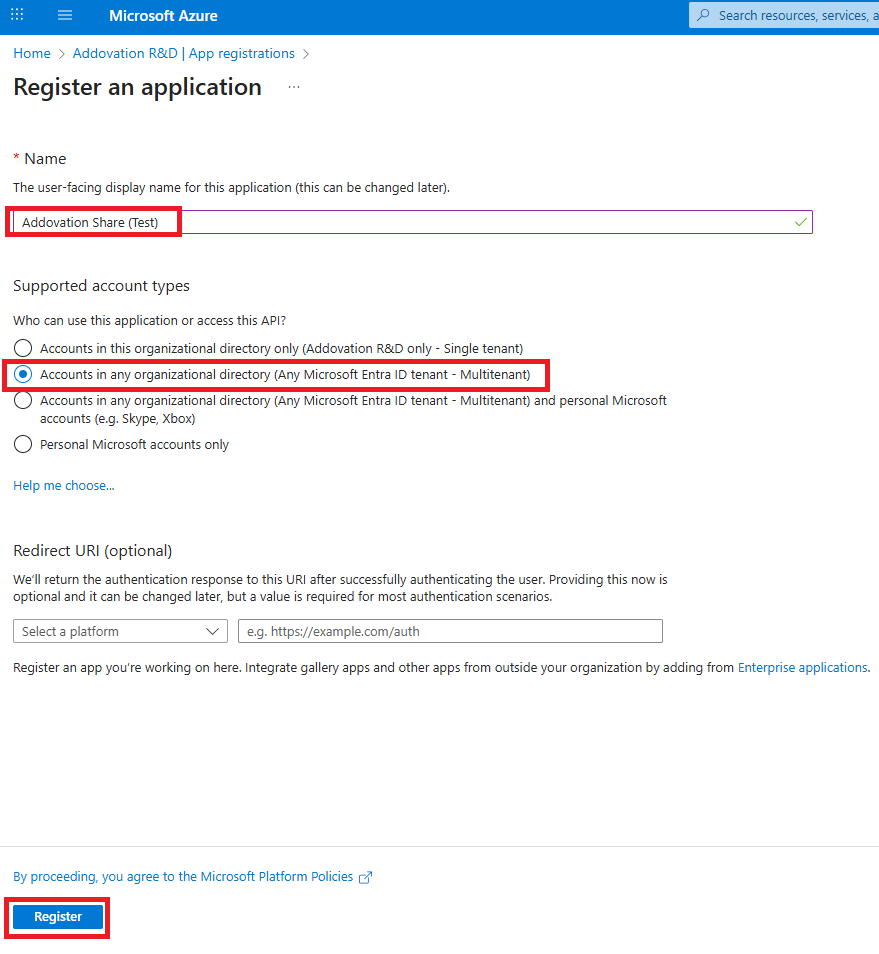
Register New Application in Azure
The Microsoft identity platform performs identity and access management (IAM) only for registered applications. Whether it's a client application like a web or mobile app, or it's a web API that backs a client app, registering it establishes a trust relationship between your application and the identity provider, the Microsoft identity platform.
To register an application,
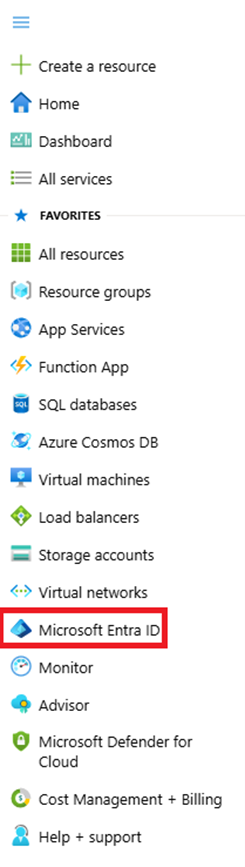
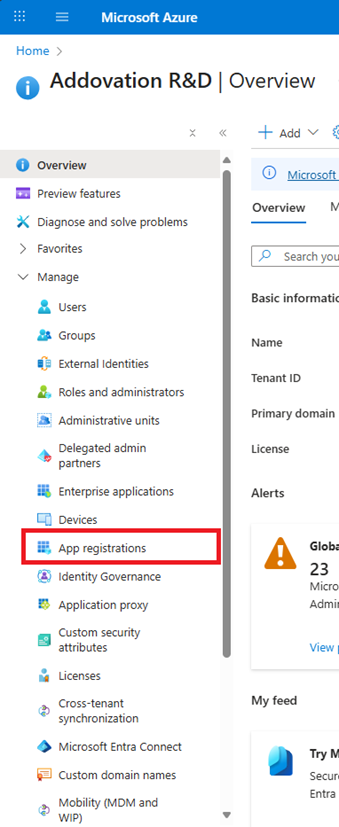
- Select
Microsoft Entra IDand selectApp registrations
- Select
New registrationto add new application

- Provide a unique name to the application.
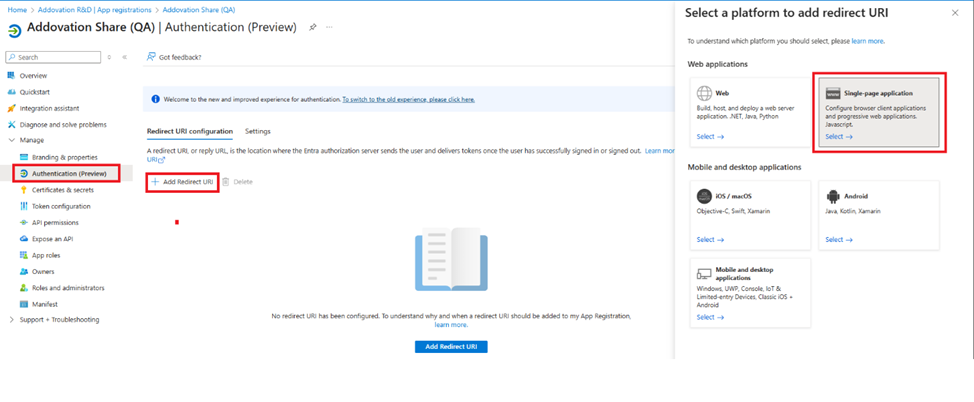
Once the web app is registered, the next step is to register the single-page application.
- Select
Authentication->Add a platform->Single-page application
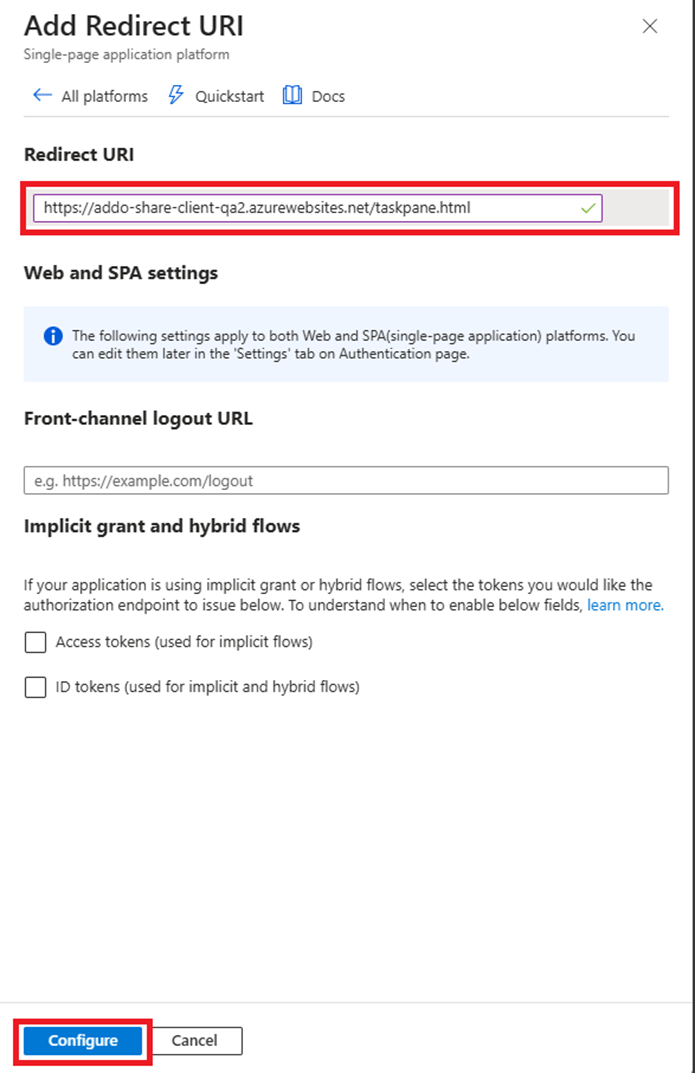
- Configure the redirect URL provided by Addovation and click
Configurebutton.
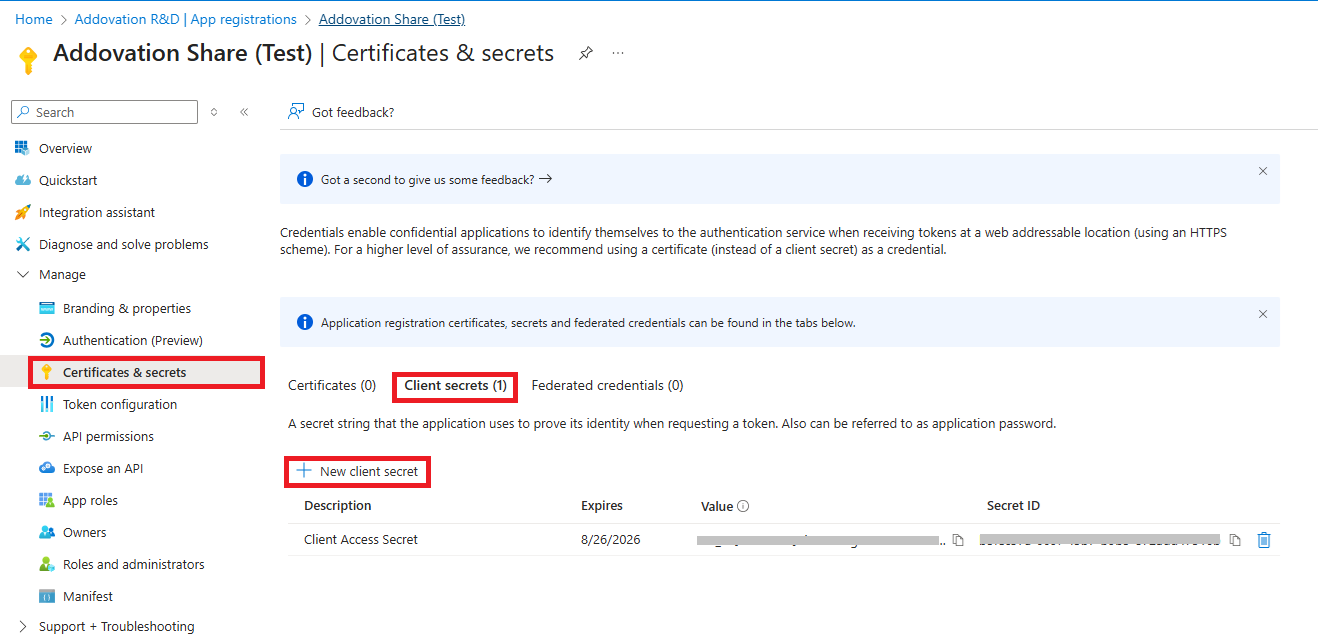
Add Client Secret
- Go to
Certification & Secret--> SelectClient secretstab --> ClickNew client secret
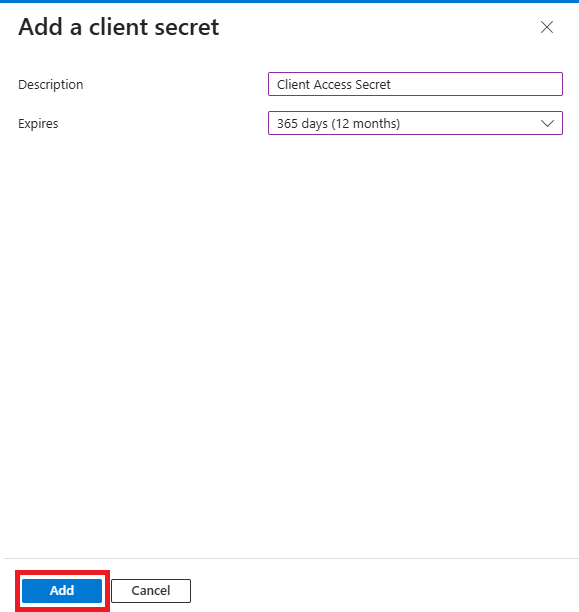
- Provide a secret name
- Set expires in
- Click on
Savebutton
Note
Client Secret is required to configure the Share Add-in in Addovation Cloud Portal.
Important
Once you created the client secret, save it for future use. The secret has one time access

Add API Permissions
API Permissions are required to define the level of access to the user, provided through registered App in Azure AD.
- Go to
API Permission-> Add a permission
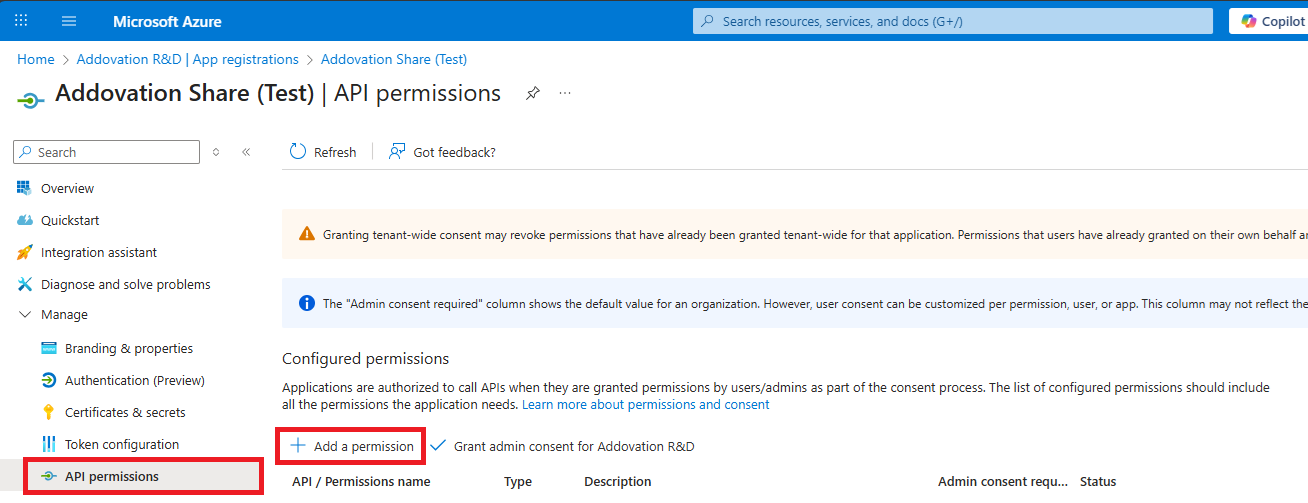
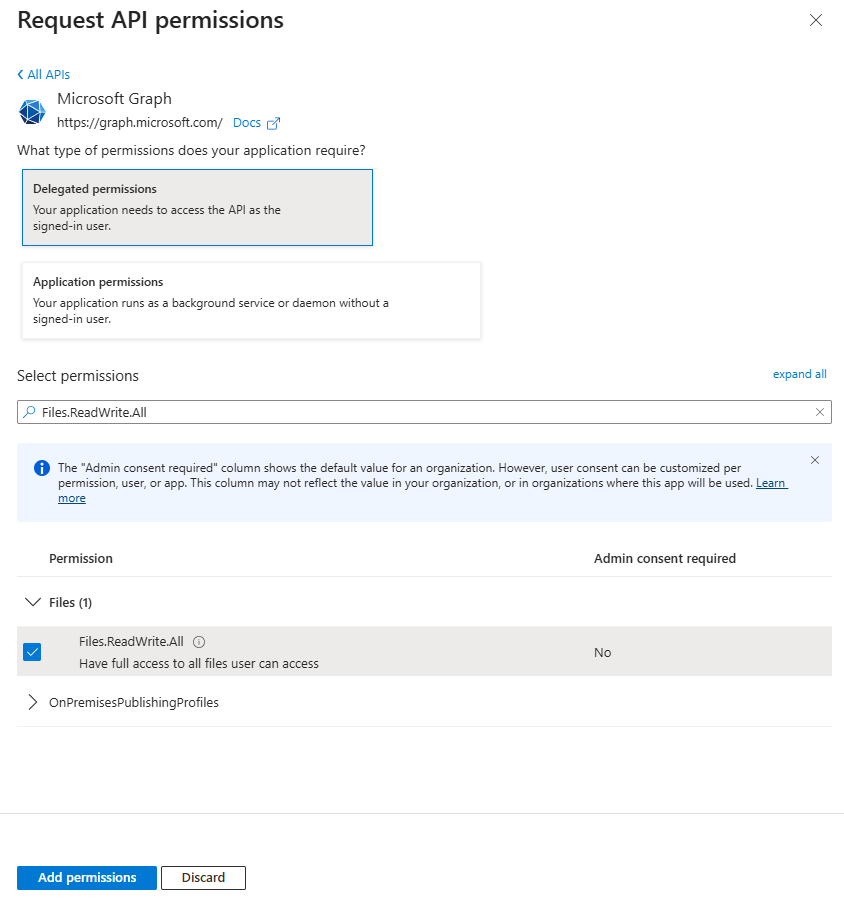
- Select
Microsoft Graph

- Select
Delegated permissions - Search required permission name
- Select the permission name(s)
- Click
Add permissions
For an app to access data in Microsoft Graph, the user or administrator must grant it the permissions it needs. This topic lists the delegated and application permissions exposed by Microsoft Graph.
Refer Microsoft Graph permissions for more details.
- Add following API permissions to the Application and grant admin consent for tenant.
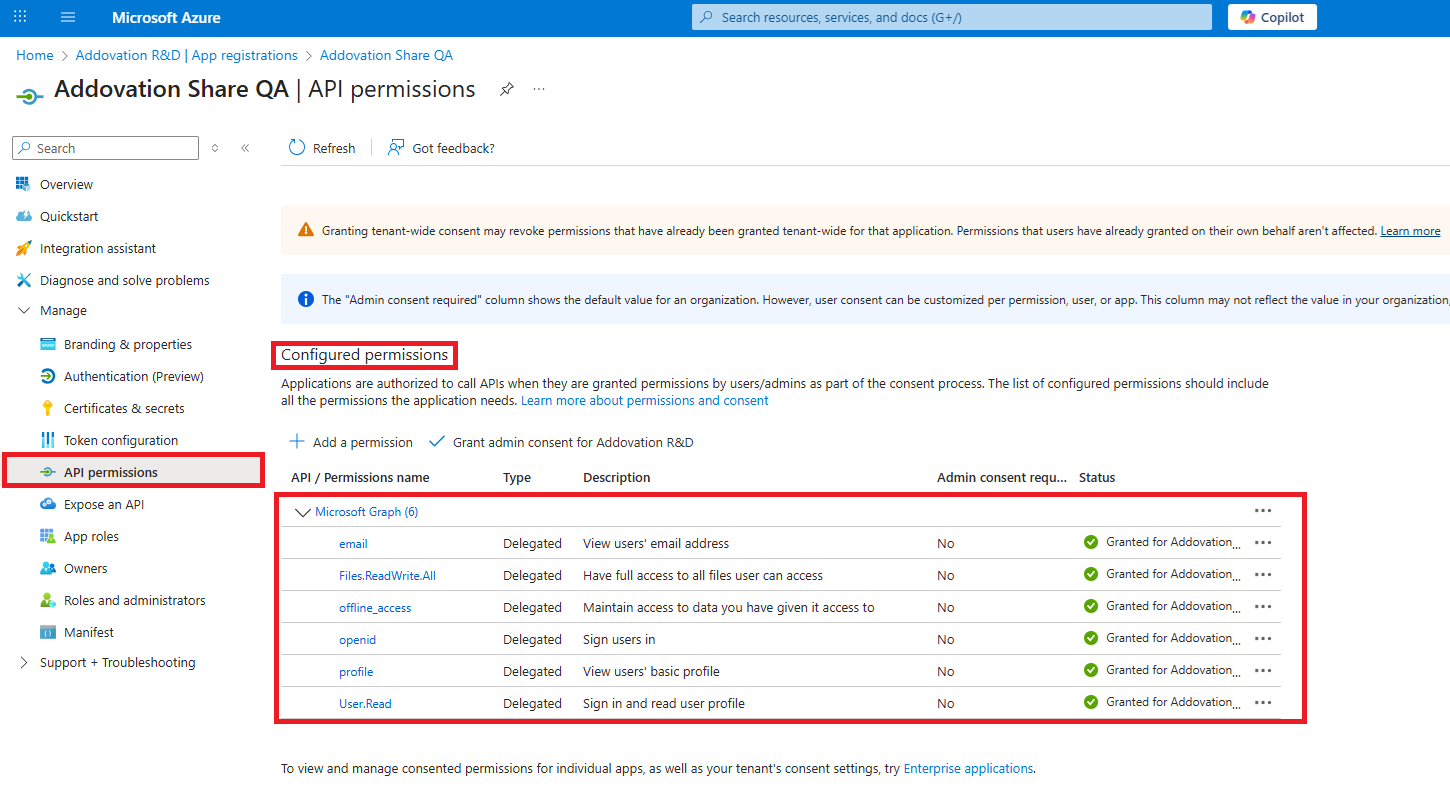
User Permissions
Delegated Permissions
| Permissions | Display String | Description | Admin Consent Required | Microsoft Account Supported |
|---|---|---|---|---|
| View users' email address | Allows the app to read your users' primary email address | No | ||
| Files.ReadWrite.All | Have full access to all files users can access | Allows the app to read, create, update and delete all files in all site collections without a signed in user | Yes | No |
| Offline_access | Maintain access to data you have given it access to | Allows the app to see and update the data you gave it access to, even when users are not currently using the app. This does not give the app any additional permissions | No | |
| openid | Sign users in | Allows users to sign in to the app with their work or school accounts and allows the app to see basic user profile information | No | |
| profile | Sign users in | Allows users to sign in to the app with their work or school accounts and allows the app to see basic user profile information | No | |
| User.Read | Sign in and read user profile | Allows users to sign-in to the app and allows the app to read the profile of signed-in users. It also allows the app to read basic company information of signed-in users | No |
Deploy add-ins in the admin center
As an admin, you can deploy Office add-ins for the users in your organization by using the Centralized Deployment feature in the Microsoft 365 admin center. Centralized Deployment is the recommended and most feature-rich way for most admins to deploy add-ins to users and groups within an organization.
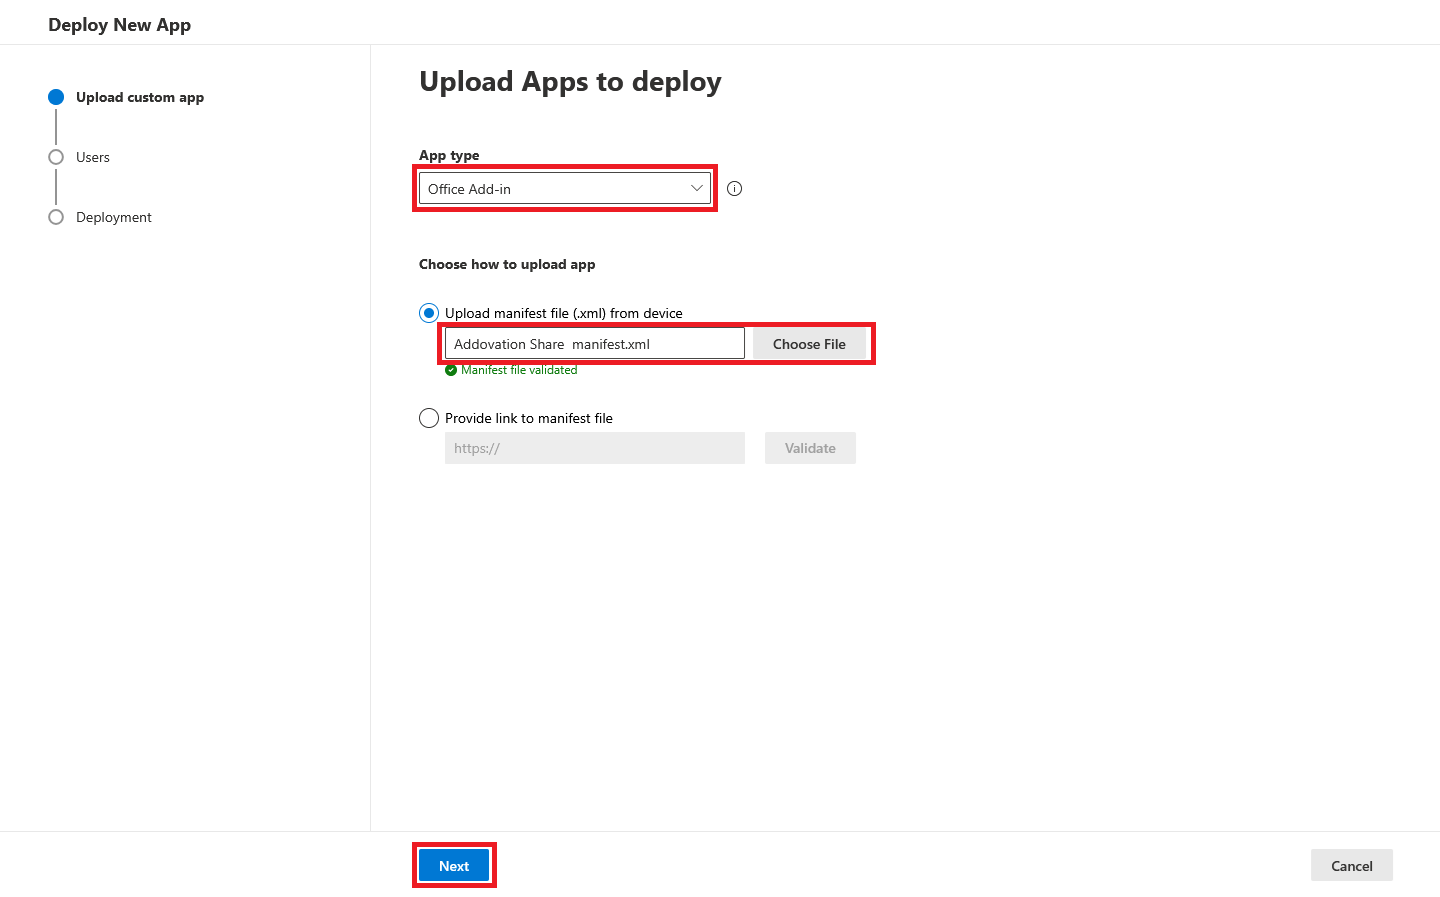
- In the admin center, go to the Settings > Add-ins page. If you don't see the Add-in Page, go to the Settings > Integrated apps > Upload custom apps.
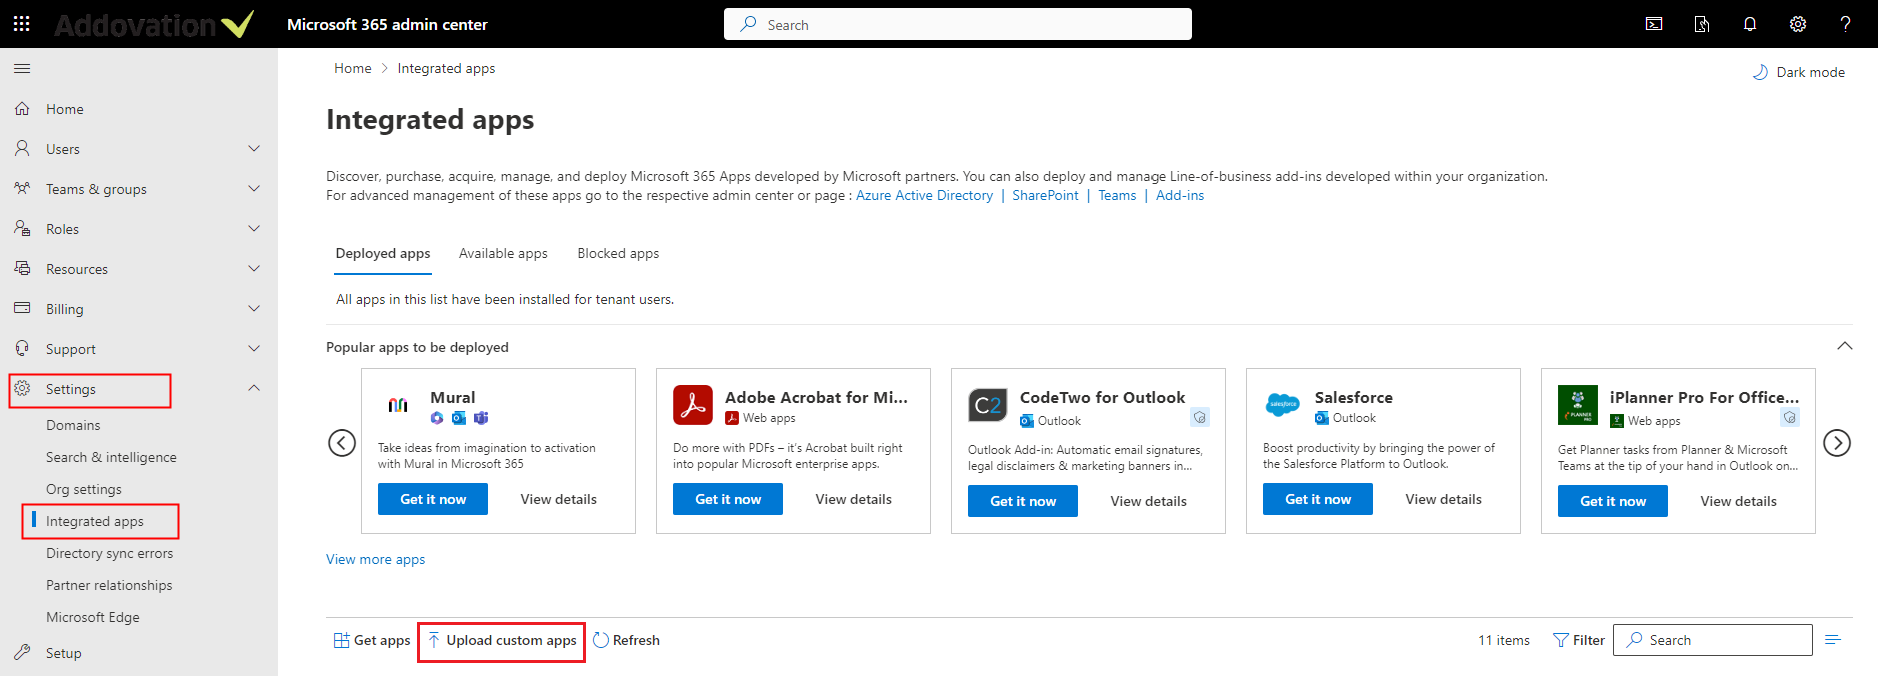
- Select App type as
Office Add-inthen choose manifest file and click Next.
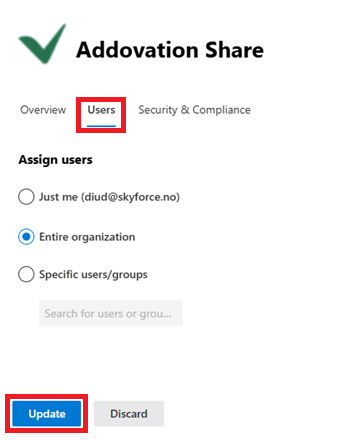
Select Entire organization from
Assign usersand click Next.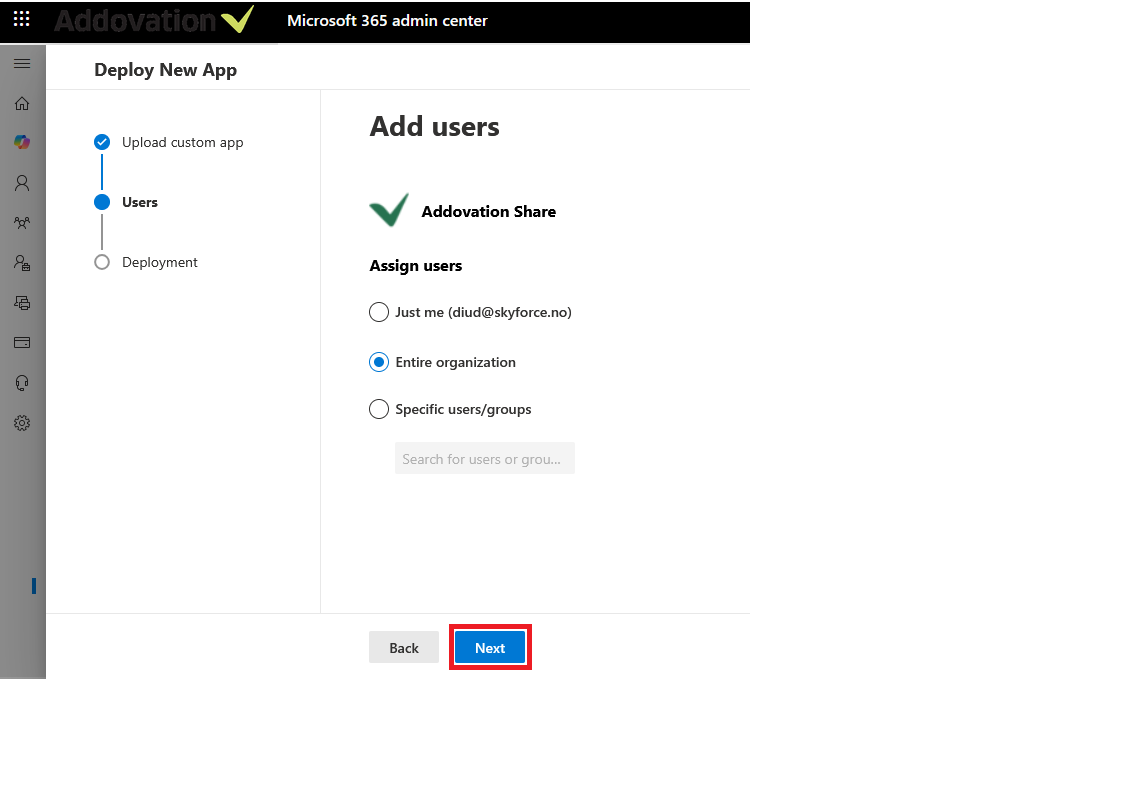
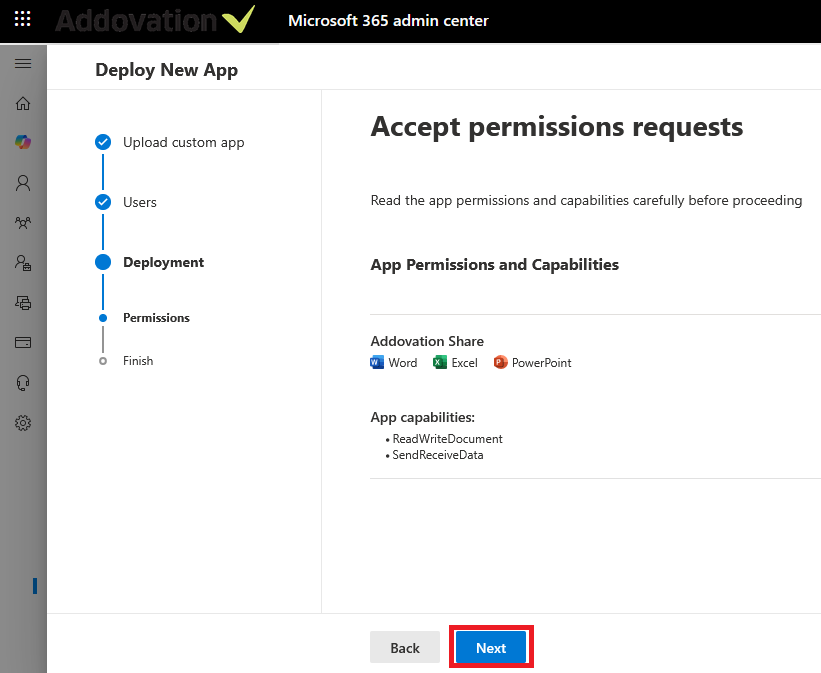
Read the App Permissions and Capabilities and then click Next.
Click Finish deployment and wait till the progress is completed.
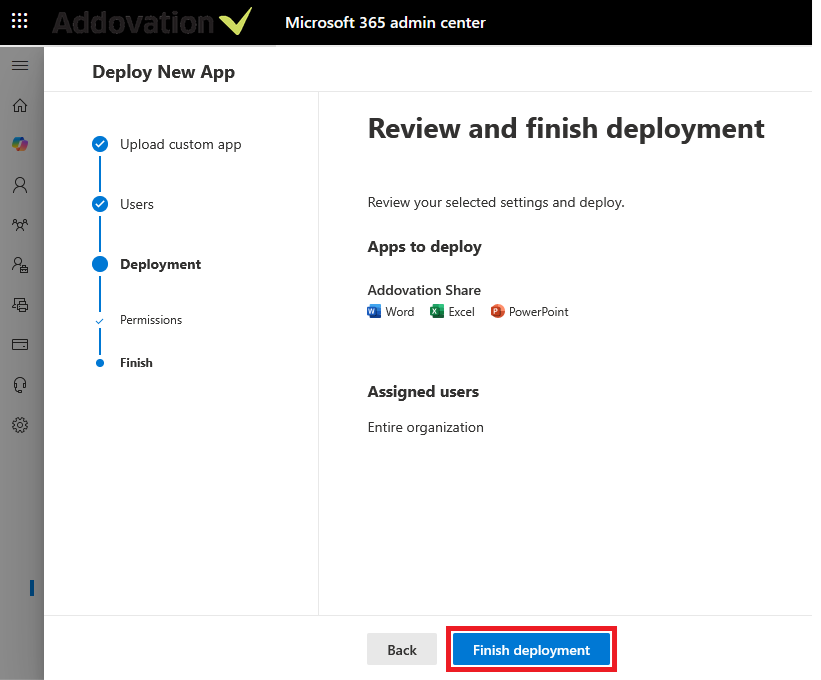
Finally click Done.
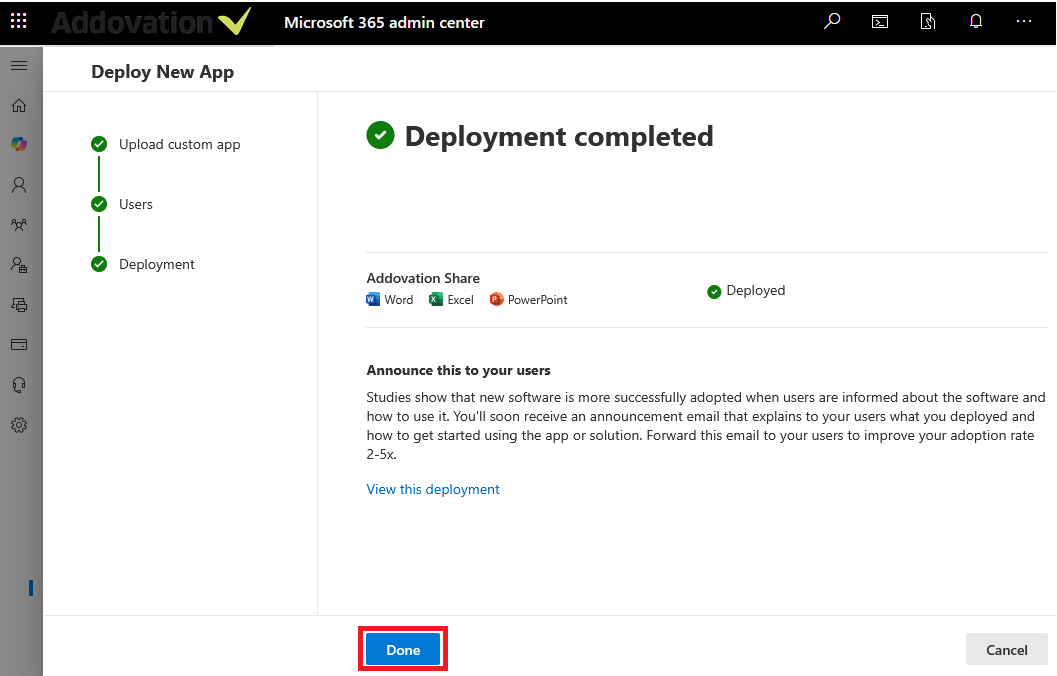
Your new Add-in will be available as below.
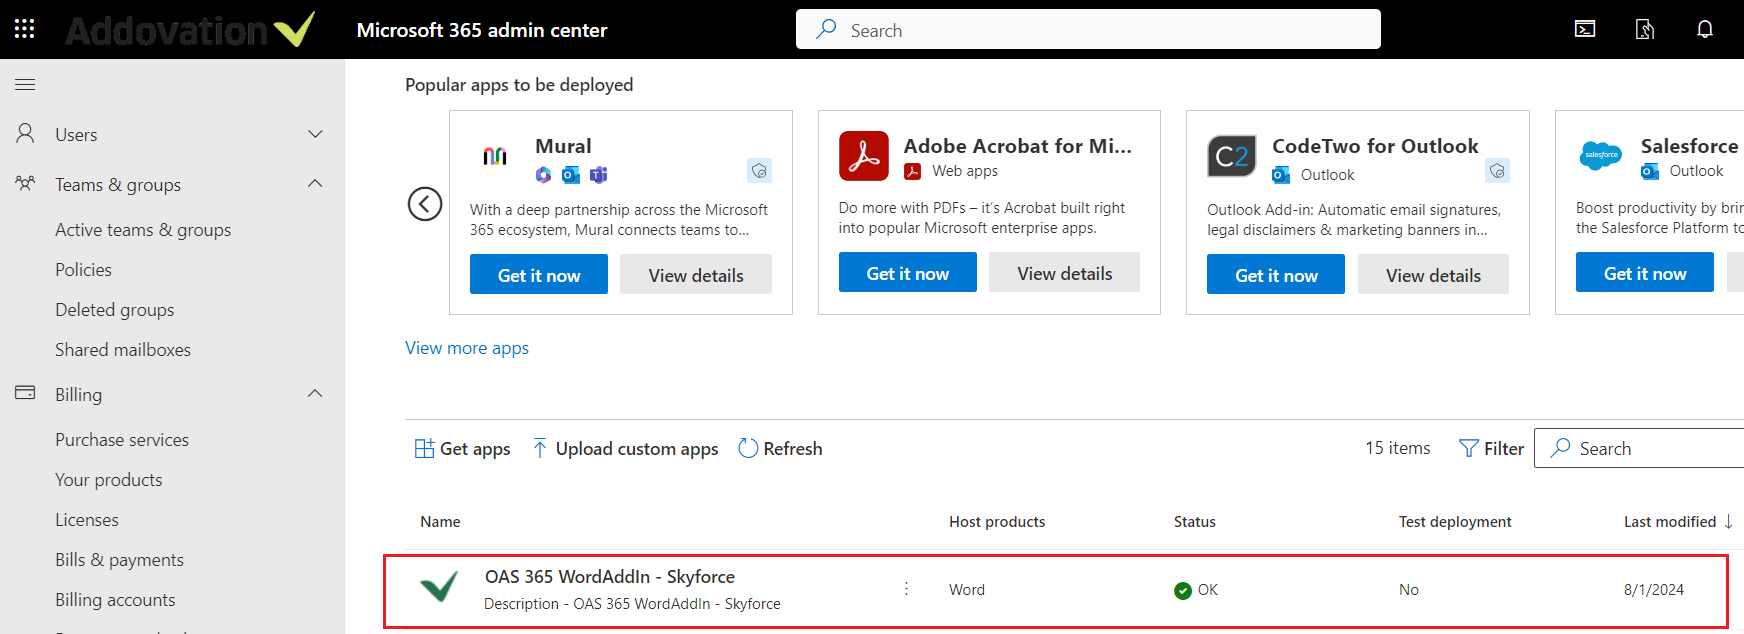
- You can get the manifest.xml file for the Share Add-in by clicking on Addovation Add-ins - Manifest File from the Download(s) section..

Please verify that the customer ID in the taskpane url is correct. If you need further assistance, contact your KAM at Addovation.

Important
Users might need to relaunch Office to view the add-in icon on the app ribbon. Add-ins can take up to 24 hours to appear on app ribbons.
Update add-in
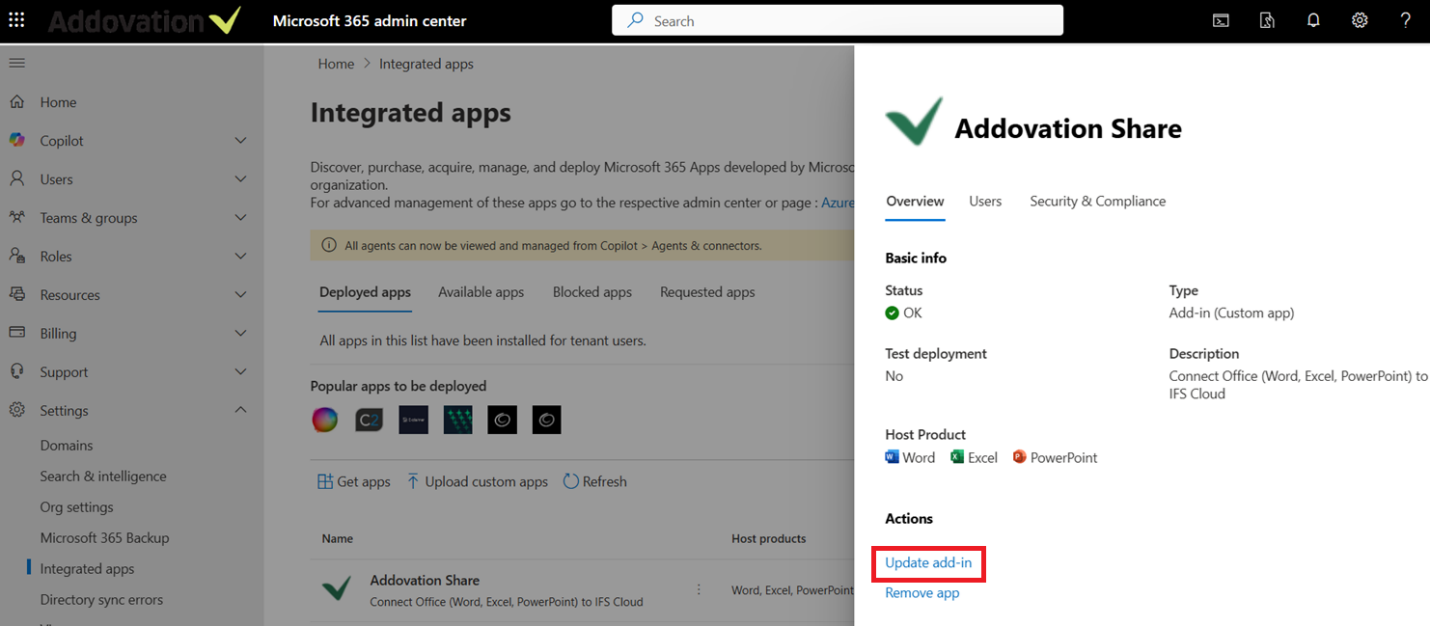
- In the admin center, go to the Settings > Integrated apps page.
- Select the deployed add-in and then select the Configuration tab.
- In the Overview pane, go to Update add-in.
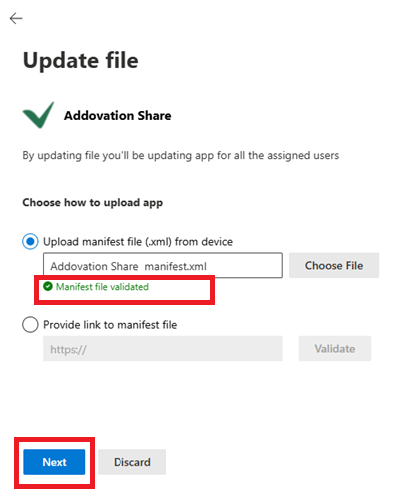
- Select the updated manifest.xml from Choose File and click Next.
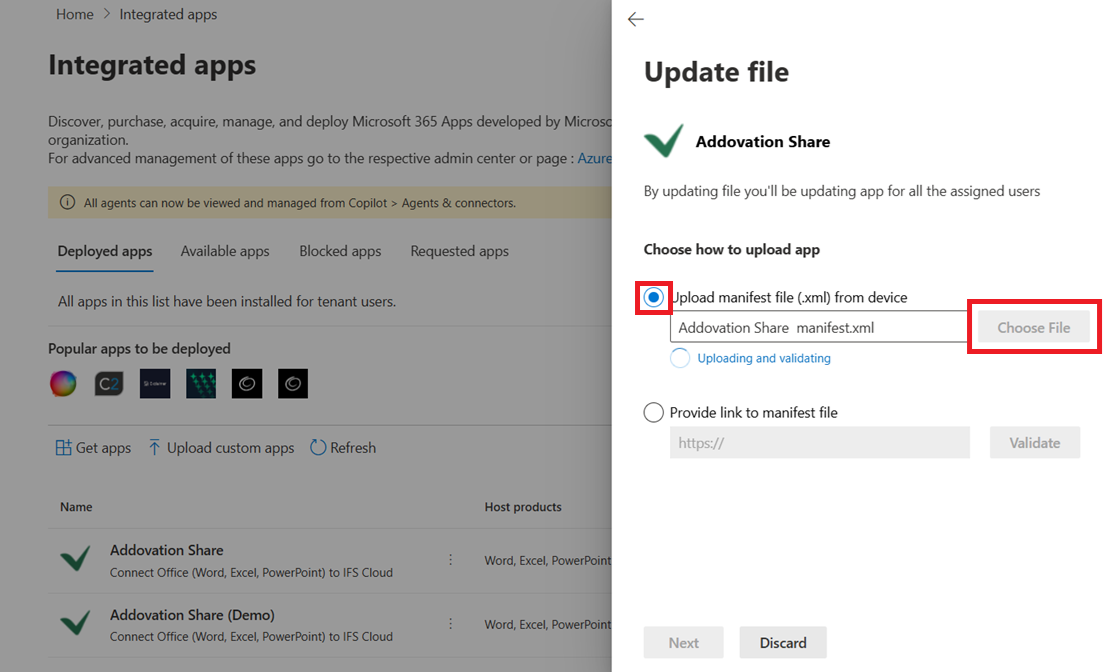
- Manifest file will validate when Id is same for the previous version of manifest.xml, and you can update the version in the manifest file as below.

- Click on Next.
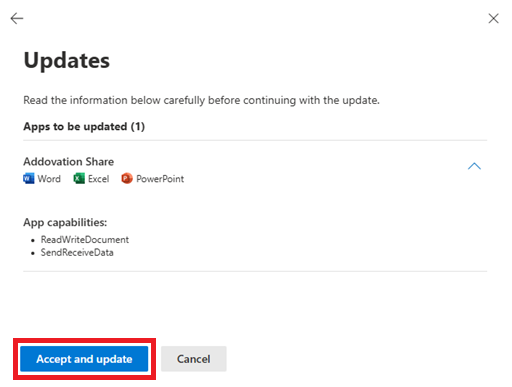
- Click on Accept and update.
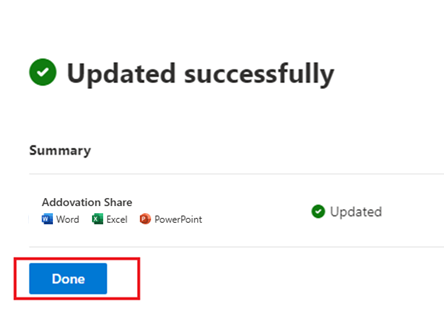
- Click on Done.
Edit add-in access
Post deployment, admins can also manage user access to add-ins.
- In the admin center, go to the settings > Integrated apps > Add-Ins.
- Select the deployed add-in.
- Click on Edit under Assign user and/or Deployment Method.
- Save the changes.
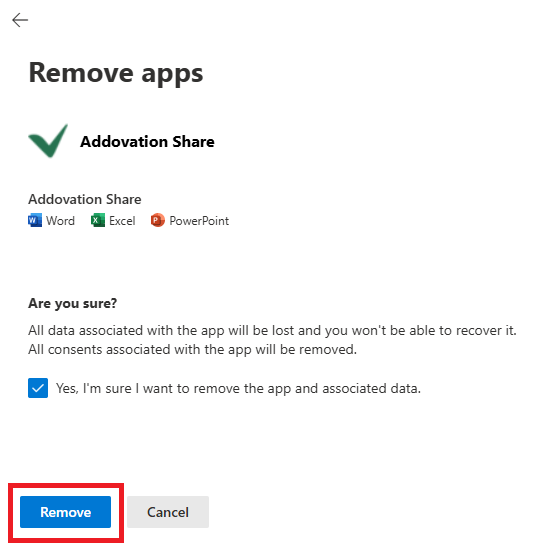
Delete an add-in
You can also delete an add-in that was deployed.
- In the admin center, go to the Settings > Integrated apps page.
- Select the deployed add-in and then select the Configuration tab.
- In the Overview pane, go to Remove app.
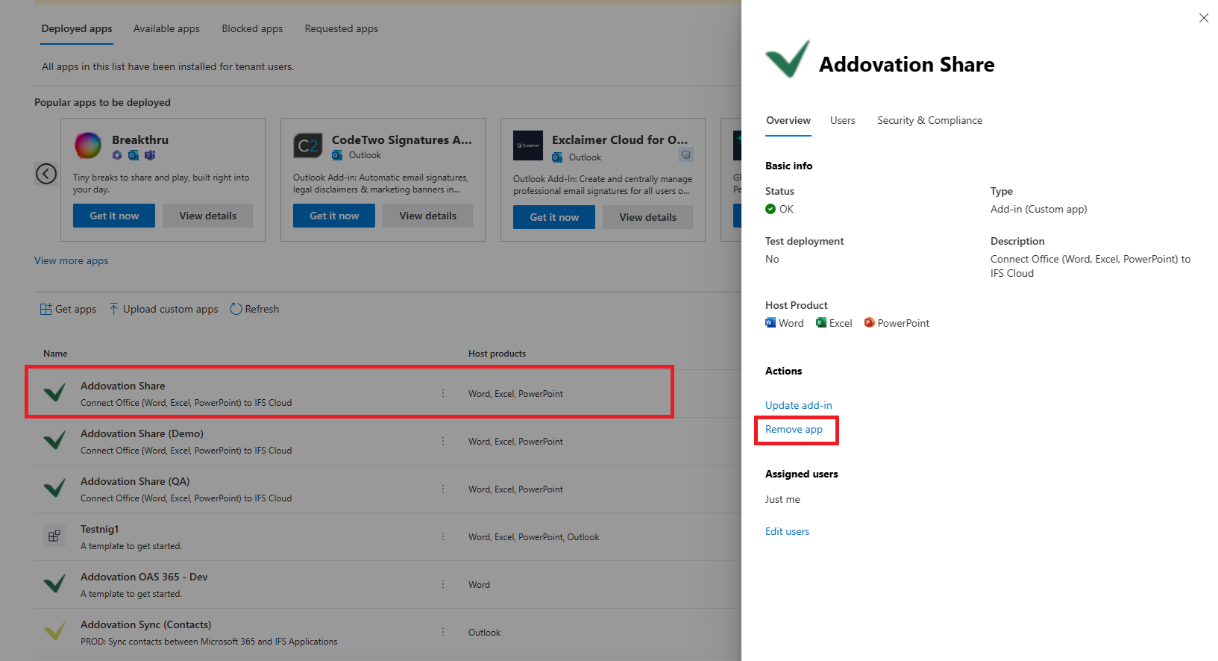
- Click on Yes, I’m sure I want to remove the app and associated data. And click on Remove button.
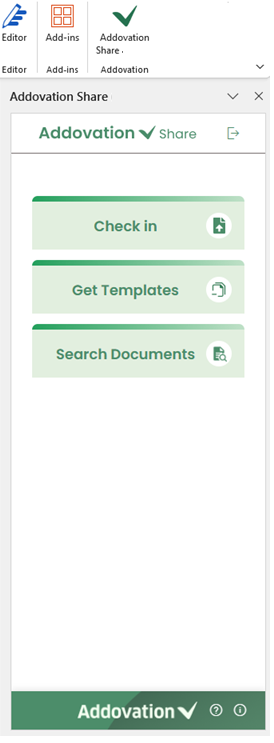
Share Add-in
Open Microsoft Word and select Add- ins. Then click More Add-ins. Then select Addovation Share.
Setup OneDrive path
To work seamlessly with AddoShare and IFS, it is essential to configure your system to follow the standard document storage path.
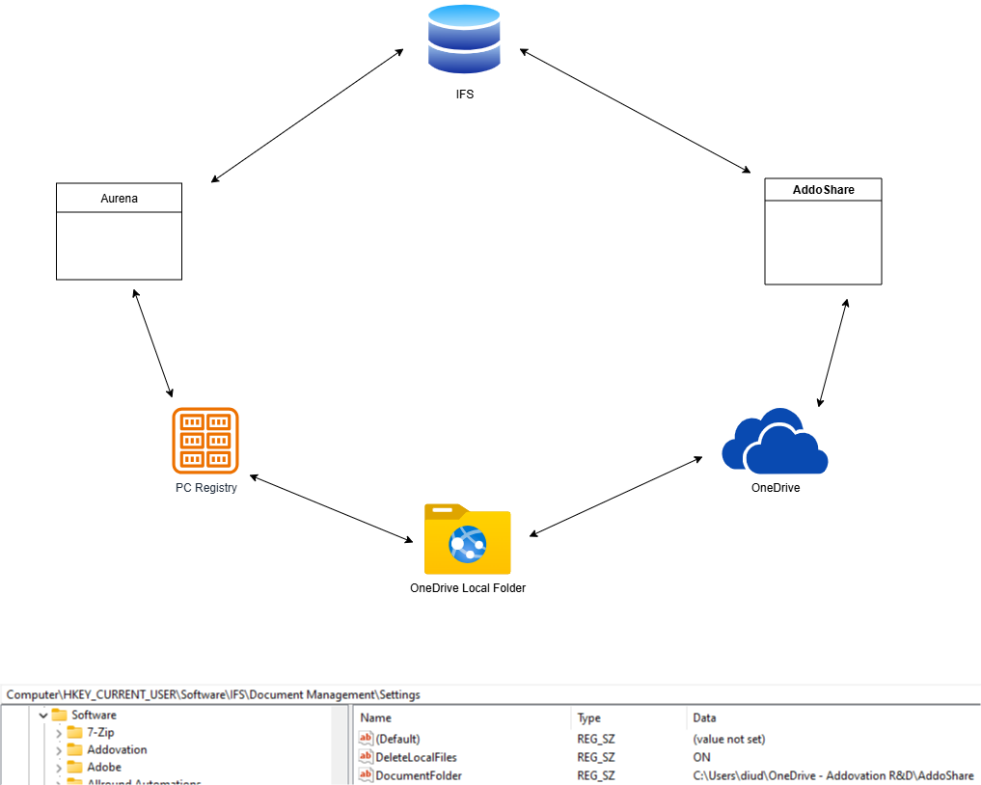
To configure the document folder path;
- Open the Windows
Registry Editor(regedit). - Navigate to: Computer\HKEY_CURRENT_USER\Software\IFS\Document Management\Settings
- Set or verify the following registry keys:
| Key Name | Type | Value |
|---|---|---|
| DocumentFolder | REG_SZ | C:\Users<username>\OneDrive - Addovation R&D\AddoShare (Your OneDrive local folder path) |
Note
Always point Document Folder to your OneDrive local folder to guarantee automatic syncing with OneDrive cloud storage and availability for AddoShare.
Network Configurations
Click here to read details about network configurations.